Fredrick Ramond Onyx FR31037BLK Handleiding
Fredrick Ramond
Lamp
Onyx FR31037BLK
Bekijk gratis de handleiding van Fredrick Ramond Onyx FR31037BLK (2 pagina’s), behorend tot de categorie Lamp. Deze gids werd als nuttig beoordeeld door 2 mensen en kreeg gemiddeld 4.7 sterren uit 1.5 reviews. Heb je een vraag over Fredrick Ramond Onyx FR31037BLK of wil je andere gebruikers van dit product iets vragen? Stel een vraag
Pagina 1/2
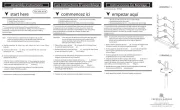
start here
empezar aquí
Mounting Instructions
Les Instructions D’assemblage
Instrucciones De Montaje
English
Spanish
French
W
SAFETY WARNING: READ WIRING AND GROUNDING INSTRUCTIONS IS 0-10V
AND ANY ADDITIONAL DIRECTIONS. TURN POWER SUPPLY OFF DURING
INSTALLATION. IF NEW WIRING IS REQUIRED, CONSULT A QUALIFIED
ELECTRICIAN OR LOCAL AUTHORITIES FOR CODE REQUIREMENTS.
ADVERTENCIA DE SEGURIDAD: CABLEADO DE LEER Y INSTRUC-
CIONES DE CONEXIÓN A TIERRA , E INSTRUCCIONES IS 0-10V
ADICIONALES. VUELTA DE ALIMENTACIÓN DURANTE LA INSTA-
LACIÓN. SI SE REQUIERE UN NUEVO CABLEADO, CONSULTE A UN
ELECTRICISTA O AUTORI-DADES LOCALES PARA REQUISITOS DEL
CÓDIGO.
AVERTISSEMENT DE SÉCURITÉ: CÂBLAGE LIRE ET MISE A LA TERRE
IS 0-10V ET TOUTE AUTRE INSTRUCTION. COUPER L'ALIMENTATION
PENDANT L'INSTALLATION. SI DE NOUVELLES CÂBLAGE NE EST
NÉCESSAIRE, CONSULTER UN ÉLECTRICIEN QUALIFIÉ OU LES
AUTORITÉS LOCALES LES EXIGENCES DES CODES.
33000 Pin Oak Parkway, Avon Lake, OH 44012 800.446.5539 / 440.653.5500
FR31037
: FR31037
FR31037
P
A
C
B
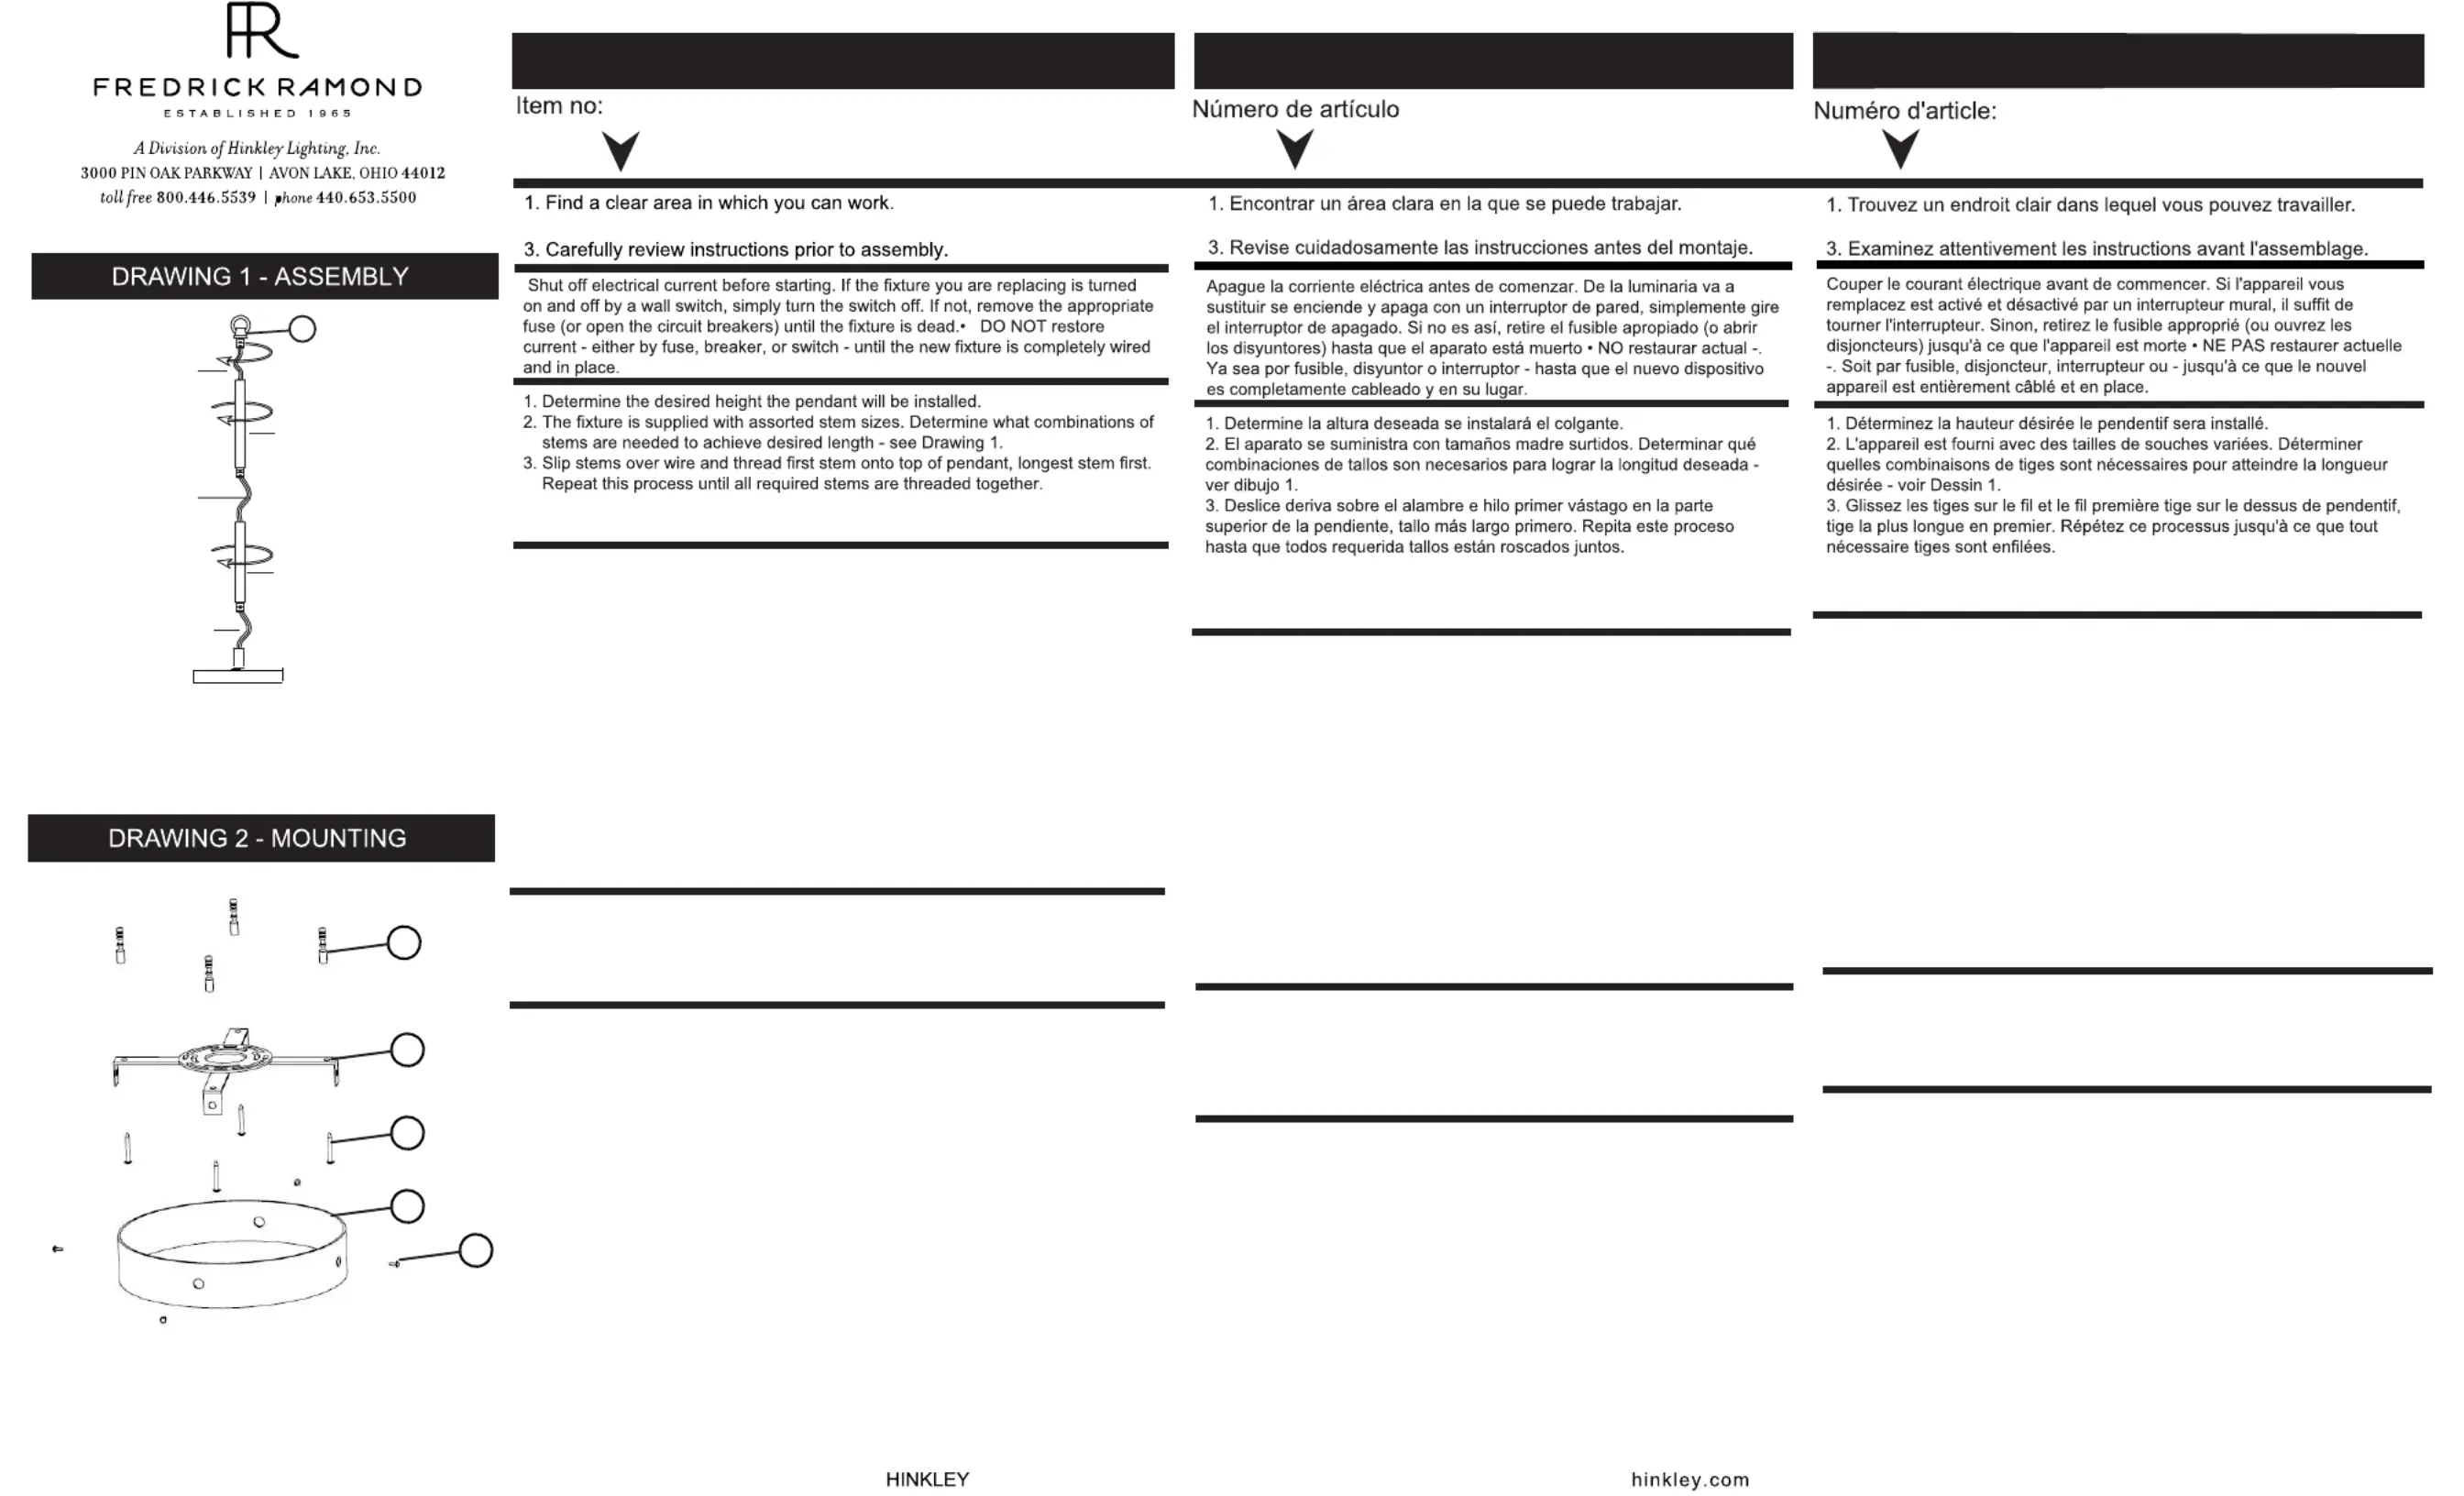
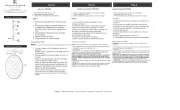
1. Make hole in the ceiling for wall anchorsfour s
2. Secure wall anchors to those holes
3. Release mounting plate (P) by removing the four
screws (B) in the side of the canopy (C)
4. Secure mounting plate (P) to ceiling using screws
(A) and wall anchors (W)
5. Make wiring connections using IS 0-10 volt LED
dimmer
6. Secure canopy (C) to mounting plate using the
previously removed screws (B)
1.Haga cuatro orificios en el techo para los anclajes
de pared.
2. Asegure los anclajes de pared a esos agujeros.
3. Suelte la placa de montaje (P) quitando los cuatro
tornillos (B) en el costado de la cubierta (C)
4. Asegure la placa de montaje (P) al techo con
tornillos (A) y anclajes de pared (W)
5.Realice las conexiones de cableado con un
atenuador LED de 0-10 voltios IS
6. Asegure la cubierta (C) a la placa de montaje con
los tornillos (B) que quitó previamente.
1. Faites quatre trous dans le plafond pour les
ancrages muraux
2. Fixez les ancrages muraux à ces trous
3. Détachez la plaque de montage (P) en retirant les
quatre vis (B) sur le côté de l'auvent (C)
4. Fixez la plaque de montage (P) au plafond à l'aide
des vis (A) et des chevilles (W)
5. Effectuez les connexions de câblage à l'aide du
gradateur LED IS 0-10 volts
6. Fixez l'auvent (C) à la plaque de montage à l'aide
des vis retirées précédemment (B)
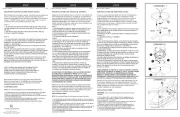
stem
wire
stem
L
wire
wire
2. Unpack fixture from carton
4. Slip wire through center hole of chain link and thread chain link onto top of
last stem installed
4. Deslice el cable a través del orificio central del eslabón de la cadena y
enrosque el eslabón de la cadena en la parte superior del último vástago
instalado.
4. Glissez le fil à travers le trou central du maillon de chaîne et enfilez le
maillon de chaîne sur le dessus de la dernière tige installée
2. Desembale el accesorio de la caja
2. Déballez le luminaire du carton
Wiring
Instructions for 0-10 volt LED dimmer
start here
Instrucciones de cableado para atenuador LED de 0-10 voltios
commencez ici
Instructions de câblage pour gradateur LED 0-10 volts
empezar aquí
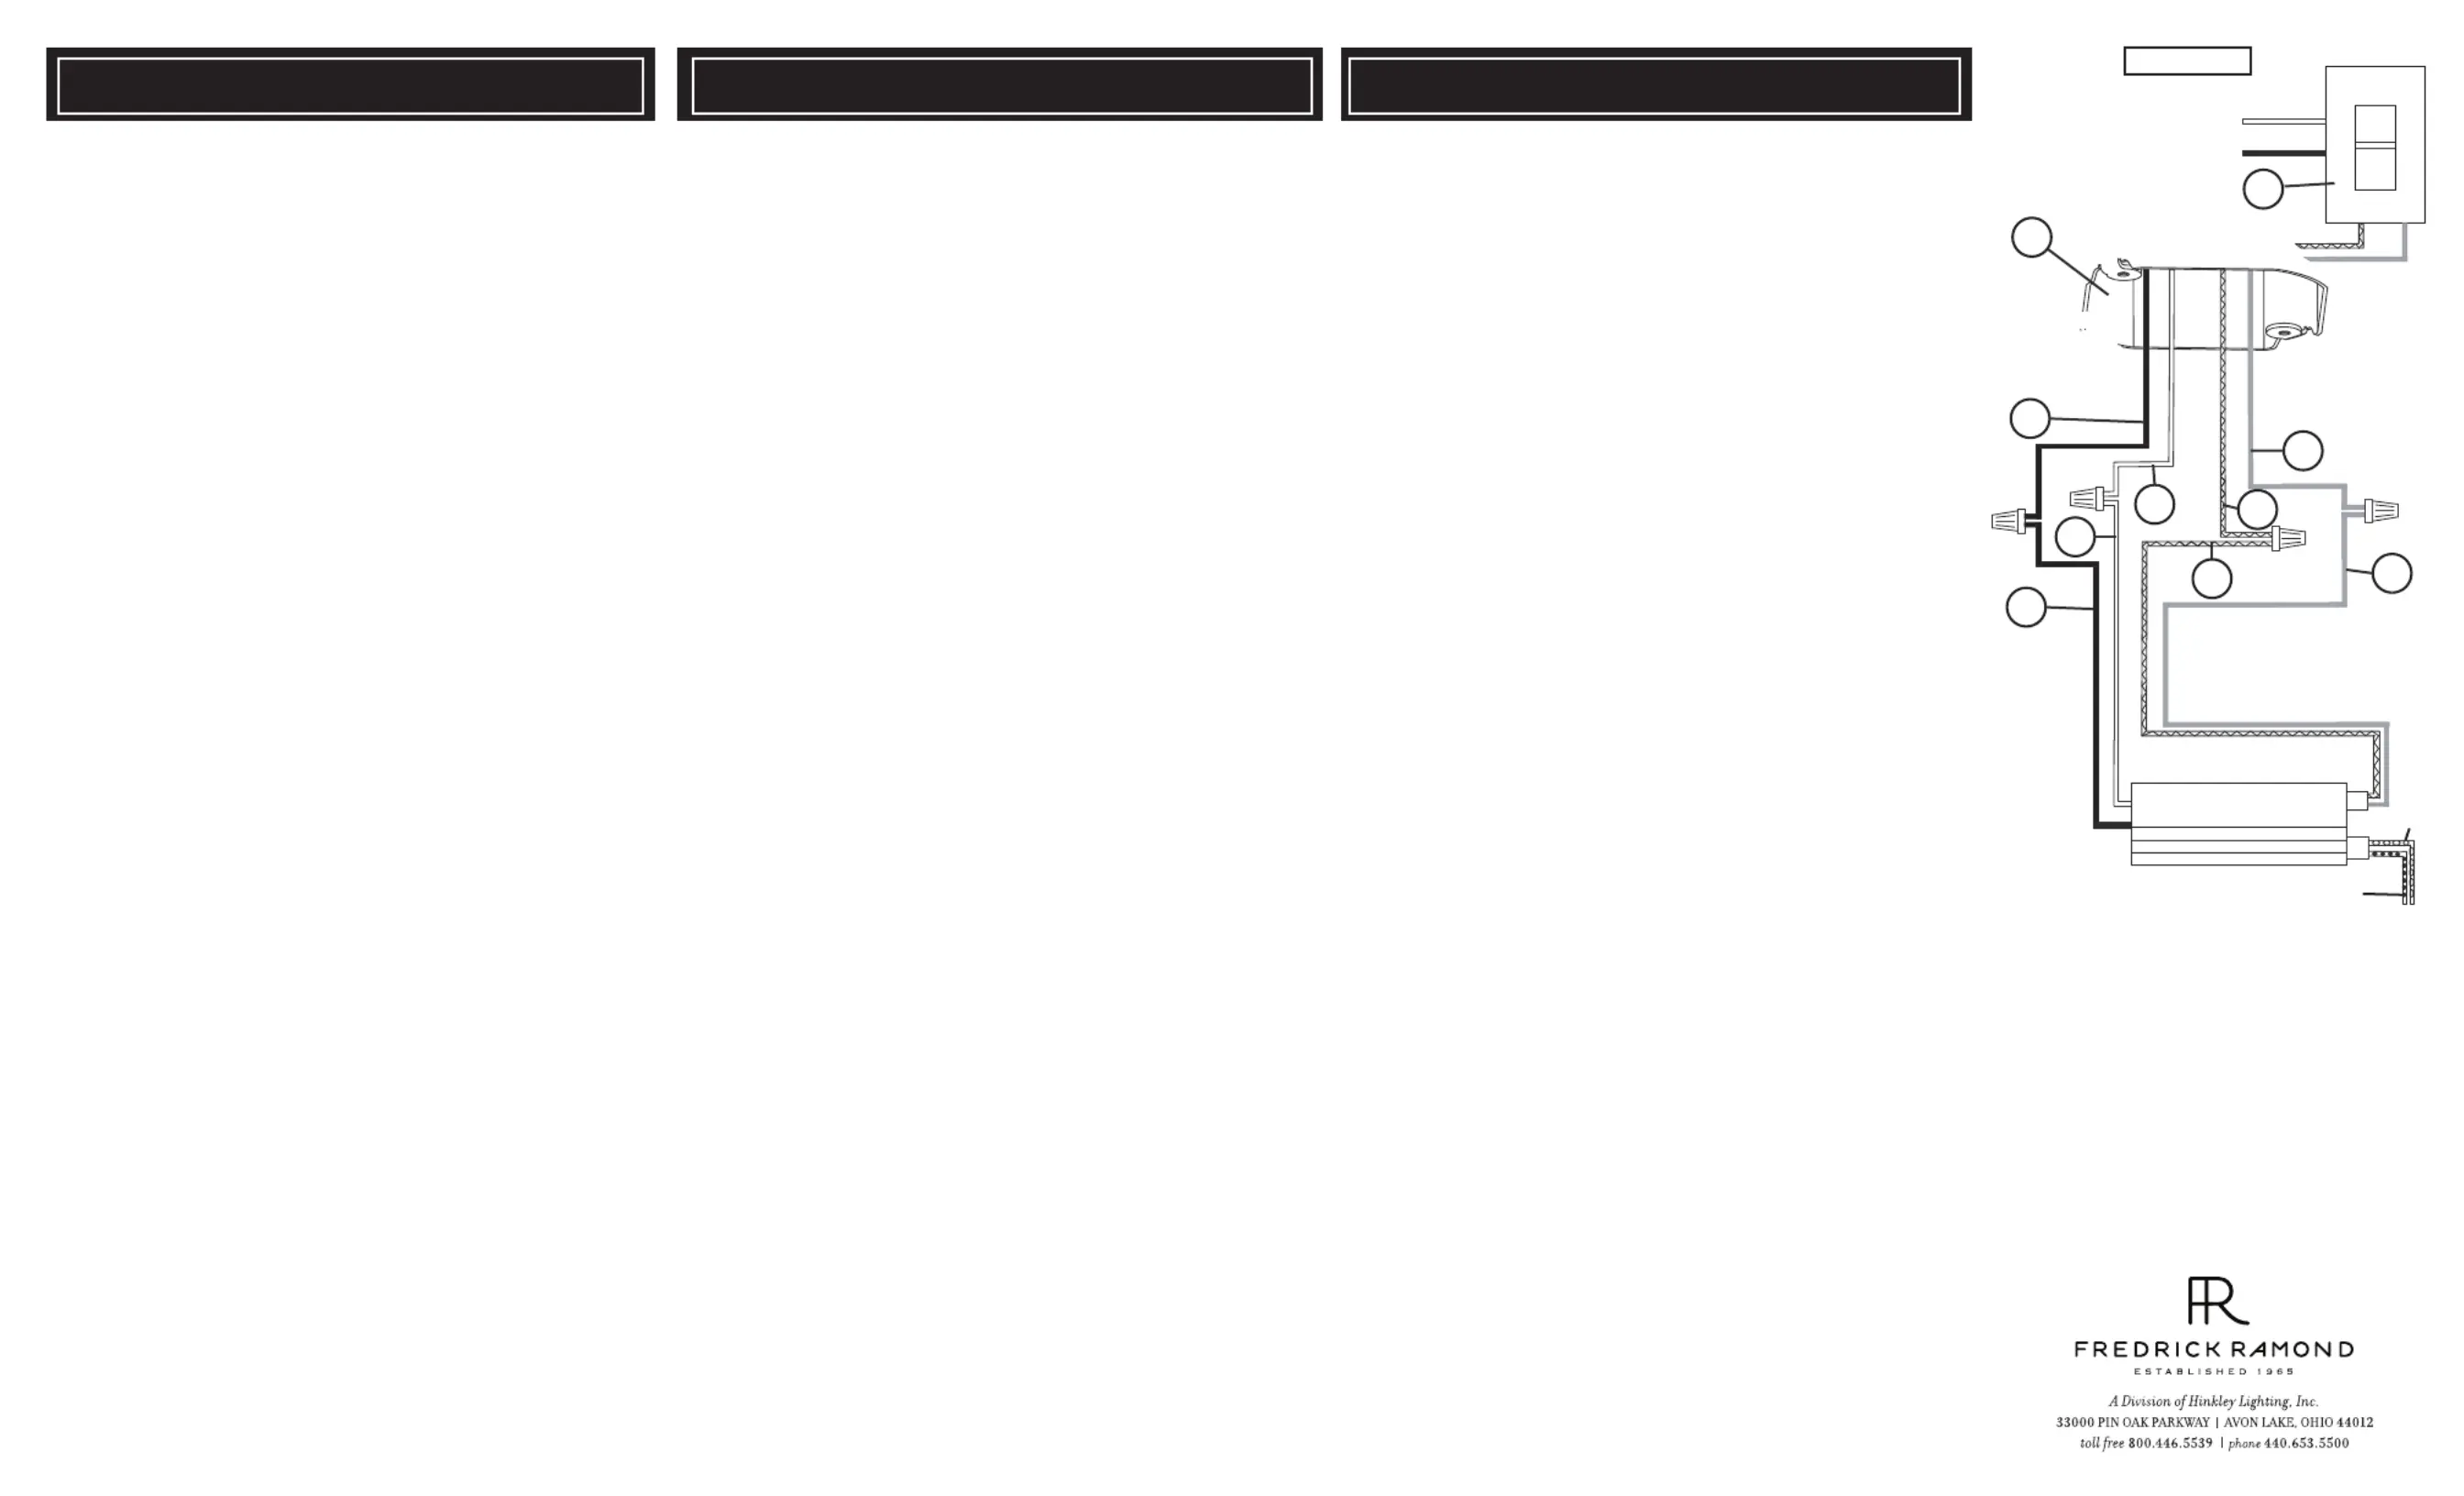
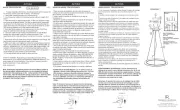
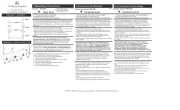
J
WIRES FROM
DIMMER
SUPPLY WIRES
FROM
JUNCTION BOX
Your xture is designed so it can use a standard incandescent
dimmer, Or a 0-10 volt LED dimmer. If a 0-10 volt LED dimmer is
used, it may be necessary to have additonal wiring installed from the
dimmer switch to the xture. Consulting an electrician will be
necessary.
Su luminaria está diseñada para que pueda usar un atenuador
incandescente estándar o un atenuador LED de 0-10 voltios. Si se utiliza
un atenuador LED de 0-10 voltios, puede ser necesario instalar cableado
adicional desde el interruptor atenuador hasta la luminaria. Consultar a un
electricista será
Votre luminaire est conçu pour pouvoir utiliser un variateur à incandes-
cence standard ou un variateur LED 0-10 volts. Si un gradateur LED
0-10 volts est utilisé, il peut être nécessaire d'avoir un câblage supplé-
mentaire installé entre le variateur et le luminaire. Consulter un
électricien sera
DIMMER
DRAWING 1
SWITCH
D
B
W
G
P
1. If using the optional 0-10 volt dimmer there will be four wires exiting
the junction box. (B) Black [+], (W) White [-], wirng are for the 120 /
277 voltage. The (G) Gray {-} and (P) Purple {+} are for the 0-10 volt
wires from the dimmer (D) - see Drawing 1.
2. The xture has four wires of corrisponding colors. When make the
wire connections follow the chart below.
Black (B) from junction box (J) wired to Black (B) from xture (F).
White (W) from junction box (J) wired to White (W) from xture (F).
Gray (G) from junction box (J) wired to Gray (G) from xture (F).
Purple (P) from junction box (J) wired to Purple (P) from xture (F).
Connect ground wire from fixture to ground screw on mounting
hardware
G
B
W
P
INCANDESCENT DIMMER USAGE:
If using an dimmer follow manufactures instructions. incandescent
NOTE: MAKE SURE TO CAP OFF THE GRAY AND PURPLE
WIRE FROM THE FIXTURE INSIDE THE CANOPY. IF ARE THEY
NOT CAPPED THEY CAN SHORT AND CAUSE THE OUT
FIXTURE TO FAIL.
1. Si usa el atenuador opcional de 0-10 voltios, habrá cuatro cables
saliendo de la caja de conexiones. (B) Negro [+], (W) Blanco [-], los
cables son para el voltaje 120/277. El (G) Gris {-} y (P) Morado {+} son
para los cables de 0-10 voltios del atenuador (D); consulte el Dibujo 1.
2. La luminaria tiene cuatro hilos de colores correspondientes. Al realizar
las conexiones de cables, siga la tabla a continuación.
1. Si vous utilisez le gradateur optionnel 0-10 volts, quatre ls sortent de
la boîte de jonction. (B) Noir [+], (W) Blanc [-], le câblage est pour la
tension 120/277. Les (G) Gray {-} et (P) Purple {+} sont pour les ls 0-10
volts du gradateur (D) - voir Schéma 1.
2. Le luminaire a quatre ls de couleurs correspondantes. Lorsque vous
eectuez les connexions des ls, suivez le tableau ci-dessous.
Negro (B) de la caja de conexiones (J) cableado al Negro (B) del
accesorio (F). Blanco (W) de la caja de conexiones (J) cableado al blanco
(W) del accesorio (F). Gris (G) de la caja de conexiones (J) cableada a
Gris (G) del accesorio (F). Púrpura (P) desde la caja de conexiones (J)
cableada a Púrpura (P) desde el dispositivo (F).
Conecte el cable de tierra del dispositivo al tornillo de tierra en el
hardware de montaje
USO INCANDESCENTE DEL DIMMER:
Si usa un atenuador incadescente, siga las instrucciones del fabricante.
NOTA: ASEGÚRESE DE TAPAR EL CABLE GRIS Y PÚRPURA DE LA
LUMINARIA DENTRO DEL DOSEL. SI NO ESTÁN TAPADOS, CAUSAN
UN CORTOCIRCUITO Y LA LUMINARIA NO FUNCIONA.
Noir (B) de la boîte de jonction (J) câblé au noir (B) du luminaire (F).
Blanc (W) de la boîte de jonction (J) câblé au blanc (W) du luminaire (F).
Gris (G) de la boîte de jonction (J) câblé au gris (G) du luminaire (F).
Violet (P) de la boîte de jonction (J) câblé au violet (P) du luminaire (F).
Connectez le fil de terre du luminaire à la vis de terre sur le matériel de
montage
UTILISATION INCANDESCENTE DU DIMMER:
Si vous utilisez un variateur à incandescence, suivez les instructions du
fabricant.
REMARQUE: ASSUREZ-VOUS DE COUVERCLE LE FIL GRIS ET
VIOLET DU LUMINAIRE À L'INTÉRIEUR DE L'AUVENT. S'ILS NE
SONT UN COURT-CIRCUIT PAS PLAFONNÉS, ILS PROVOQUENT ET
LE LUMINAIRE NE FONCTIONNE PAS.
driver
wires to LEDS
red
black
Product specificaties
| Merk: | Fredrick Ramond |
| Categorie: | Lamp |
| Model: | Onyx FR31037BLK |
Heb je hulp nodig?
Als je hulp nodig hebt met Fredrick Ramond Onyx FR31037BLK stel dan hieronder een vraag en andere gebruikers zullen je antwoorden
Handleiding Lamp Fredrick Ramond
16 April 2025

16 April 2025
16 April 2025

16 April 2025
16 April 2025
16 April 2025
16 April 2025
16 April 2025
16 April 2025
16 April 2025
Handleiding Lamp
- Philips
- Niceboy
- Oecolux
- Milwaukee
- Abus
- Ryobi
- Fabas
- Casalux
- American DJ
- Elight
- X4-Tech
- Eufy
- Goobay
- Garden Lights
- SIGOR
Nieuwste handleidingen voor Lamp
29 Juli 2025
29 Juli 2025
29 Juli 2025
29 Juli 2025

29 Juli 2025
29 Juli 2025
29 Juli 2025
29 Juli 2025
29 Juli 2025
29 Juli 2025