EK Water Blocks EK-RES X3 Handleiding
EK Water Blocks Hardwarekoeling EK-RES X3
Bekijk gratis de handleiding van EK Water Blocks EK-RES X3 (2 pagina’s), behorend tot de categorie Hardwarekoeling. Deze gids werd als nuttig beoordeeld door 58 mensen en kreeg gemiddeld 4.3 sterren uit 4 reviews. Heb je een vraag over EK Water Blocks EK-RES X3 of wil je andere gebruikers van dit product iets vragen? Stel een vraag
Pagina 1/2
All disclosures, notices and warranty conditions are being written on the EKWB website. Please read terms of use. Revision 1.0. Released on September 18
th
2012!
Installation and mounting manual for EK-RES X3 series reservoir
This product is intended for installation only by expert users. Please consult with a qualified technician for installation. Improper installation may result in damage to your equipment. EK Water Blocks assumes no liability
whatsoever, expressed or implied, for the use of these products, nor their installation. The following instructions are subject to change without notice. Please visit our web site at www.ekwb.com for updates. Before
installation of this product please read important notice, disclosure and warranty conditions printed on the back of the box.
Before you start using this product please follow these basic guidelines:
1.Please carefully read the manual before through before beginning with the installation process!
2.The EK High Flow and EK-PSC type fittings require only a small amount of force to screw them firmly in place since the liquid seal is ensured by the rubber o-ring gaskets.
3.The use of corrosion inhibiting coolants is always recommended for any liquid cooling system.
4.DO NOT USE any kind of alcohol or alcohol derivate with this reservoir or the acrylic tube may crack and fail! Do not clean it using alcohol either!
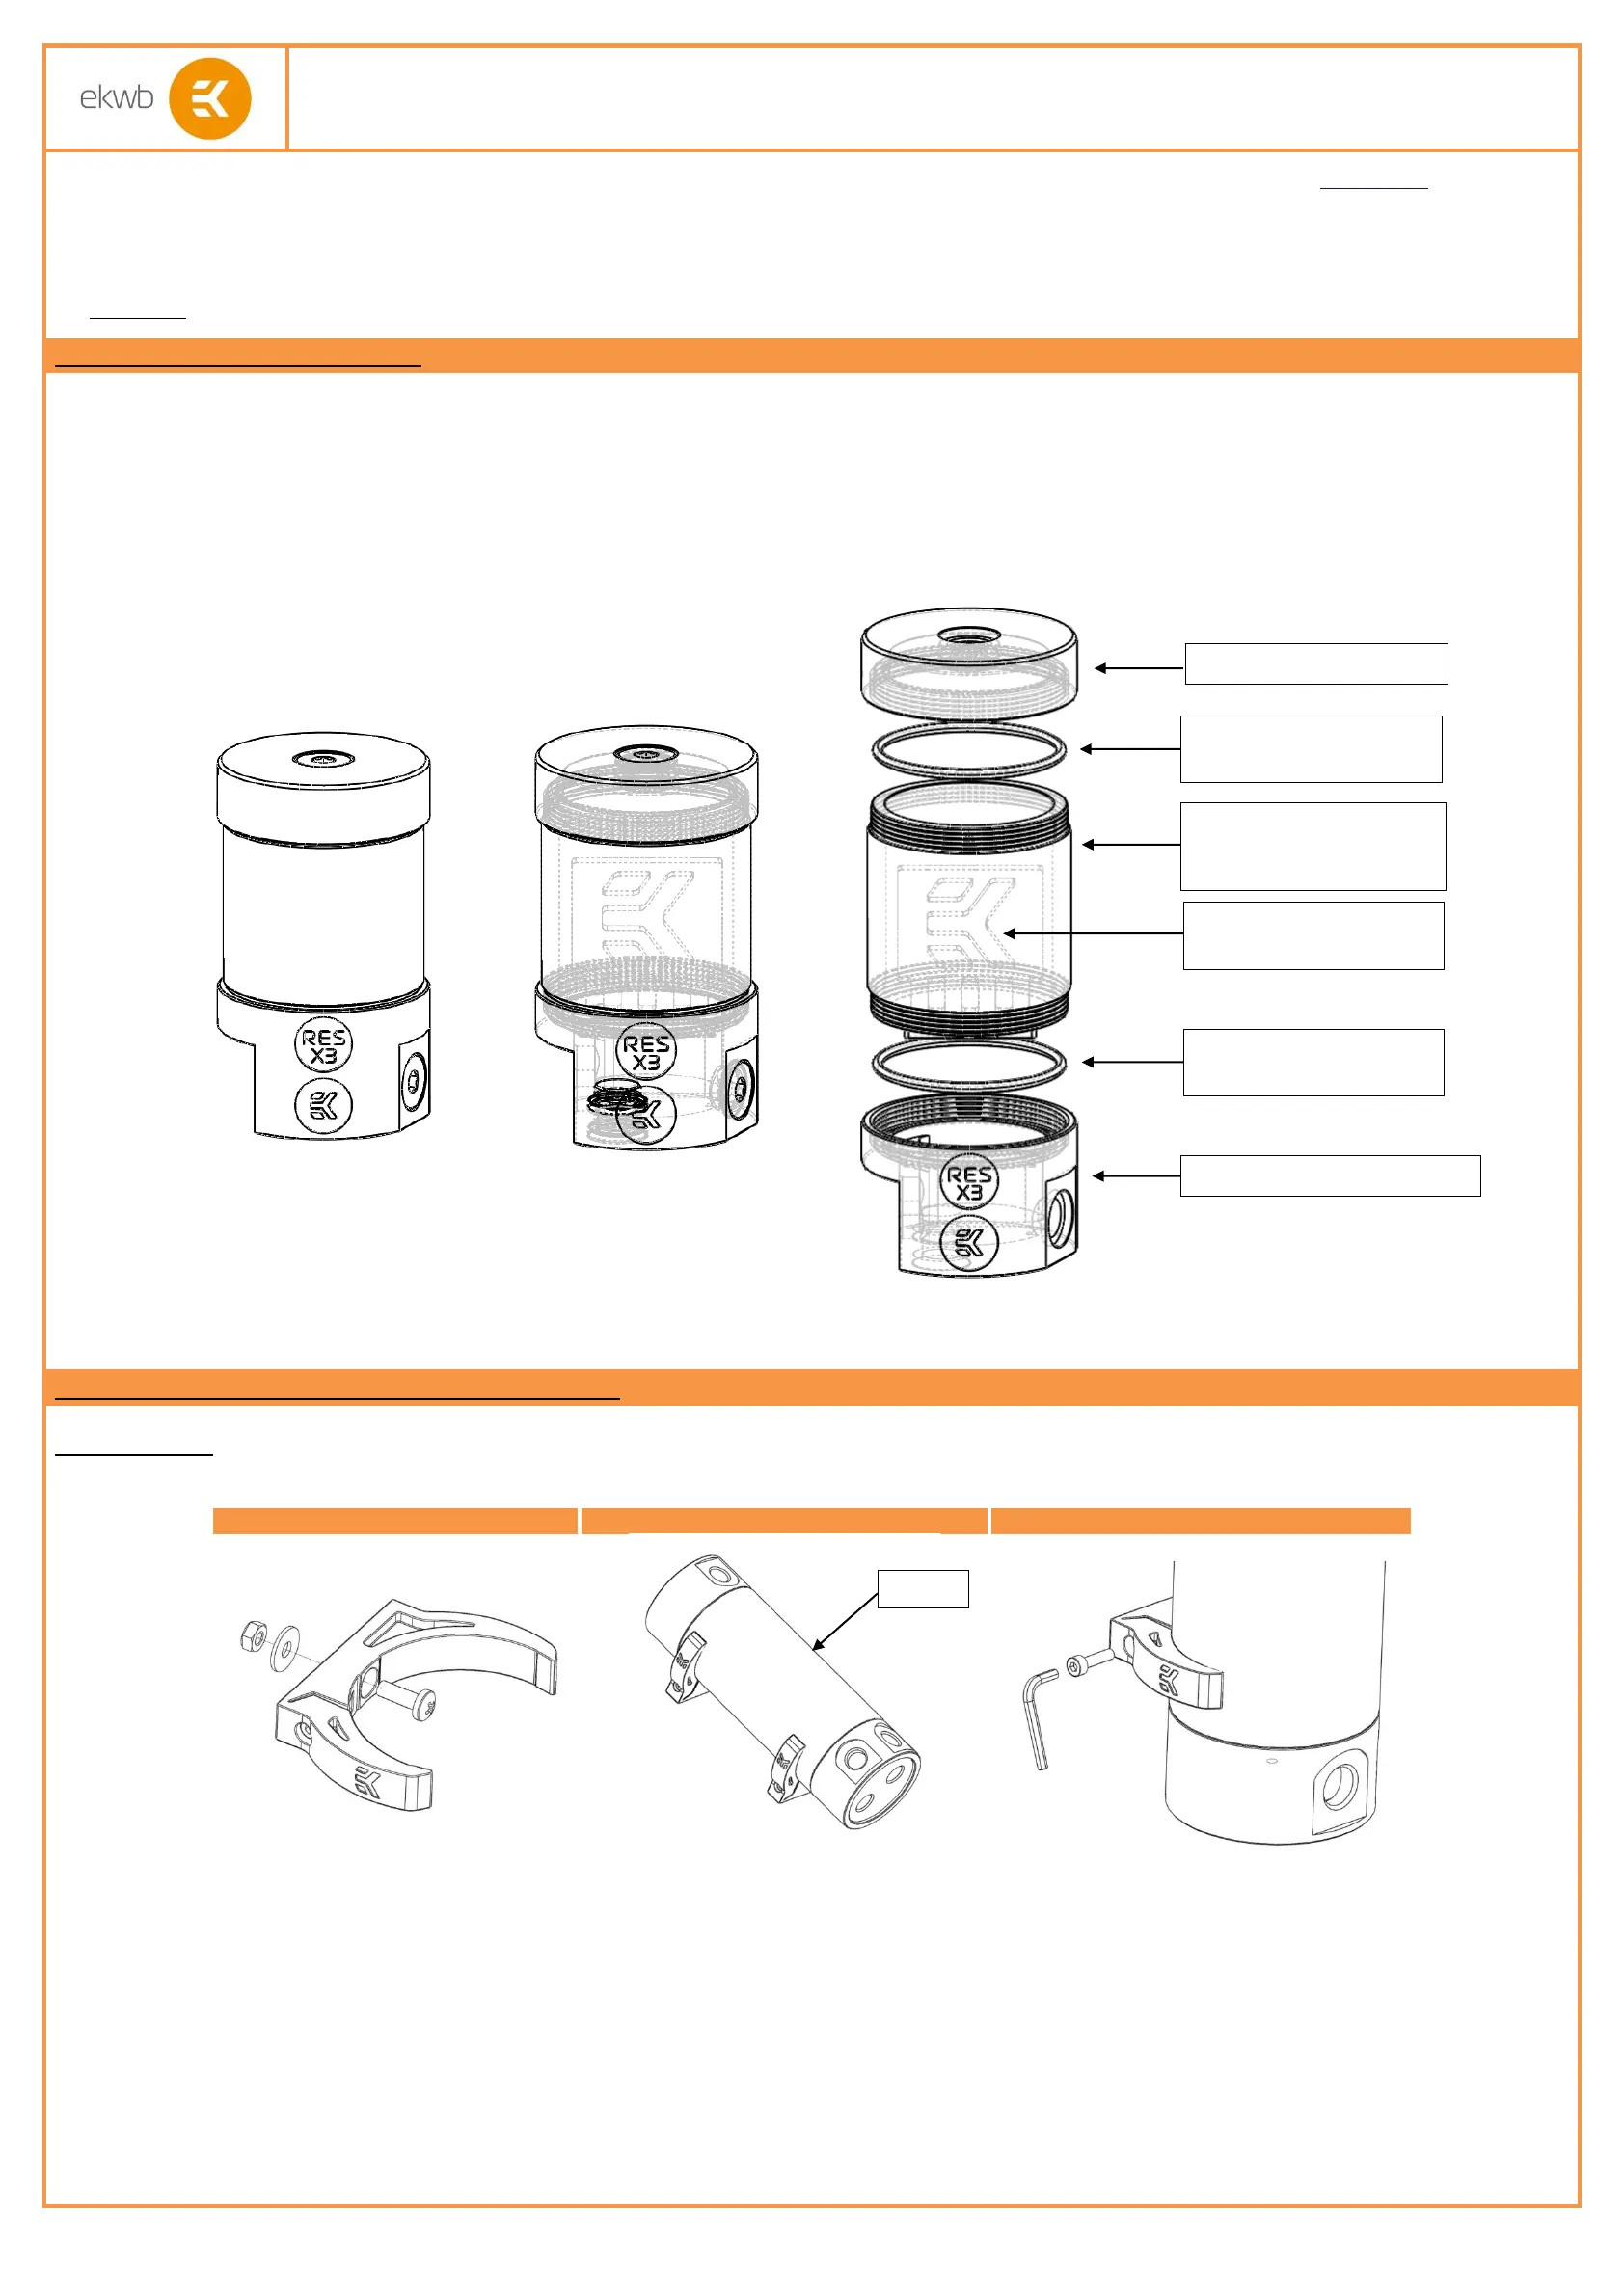
STEP 1: GENERAL INFORMATION. Factory provided EK-RES X3
series
reservoir
Congratulations on your purchase of EK-RES X3 series reservoir! By default the EK-RES X3 series reservoir comes with the following:
-EK-RES X3
series
reservoir with preinstalled EK-RES X3 - Anticyclone
-EK-Multioption RES X2 Holder 60mm (2 pcs)
-Polyether anti-vortex foam (H=15mm)
-Mounting mechanism:
o4x G1/4 Plug
o2x EK-G1/4 Extender
oAllen Key 6mm
STEP 2: INSTALLING THE RESERVOIR HOLDERS
EK-RES X3
series
reservoirs comes with a pair of special EK-Reservoir holders. These holders are meant to be installed directly on the computer chassis. User
may need to drill 2 (two) Φ4mm holes through chassis metal using electric power drill if there are no appropriate mounting holes available.
STEP 2.1
STEP 2.2
STEP 2.3
Use enclosed M4 screw, washer and
nut to mount the reservoir holder
through the pre-drilled hole to the
computer chassis.
Install reservoir onto reservoir holders.
Using a gentle force the reservoir will
easily 'click' into position. The clamps
should always hold onto acrylic tube and
not the acetal top or bottom.
Once the reservoir is positioned please use
enclosed 2.5mm Allen key to tighten the
hex head screw in order to clamp the
reservoir. Do not use high force. Partially
unscrew the aforementioned screw when
removing the reservoir.
Alternatively one can purchase various reservoir holders, such as EK-UNI Holder 50/70 (EAN: 3830046997715): One can use the EK-UNI Holder 50/70 if the
chassis lack the appropriate holes to install the reservoir and the drilling is out of the question. EK-UNI Holder 50/70 can be install on 5.25” Drive Bay cage and
fixated with M4 screws and nuts to carry the Reservoir Holders.
For more reservoir add-ons please EK Webshop!
TUBE
EK-RES X3 – Sealing gasket
(O-Ring 52x2.5mm)
EK-RES X3 – TUBE
(64-, 104-, 204- or 354mm)
depending on the variant
EK-RES X3 – Sealing gasket
(O-Ring 52x2.5mm)
EK-RES X3 – Anticyclone
(Short, Long)
EK-RES X3 – Reservoir Bottom
EK-RES X3 – Reservoir Top
Product specificaties
| Merk: | EK Water Blocks |
| Categorie: | Hardwarekoeling |
| Model: | EK-RES X3 |
Heb je hulp nodig?
Als je hulp nodig hebt met EK Water Blocks EK-RES X3 stel dan hieronder een vraag en andere gebruikers zullen je antwoorden
Handleiding Hardwarekoeling EK Water Blocks

29 Maart 2025
29 Maart 2025
30 Juli 2024
19 Maart 2024
19 Maart 2024
19 Maart 2024
19 Maart 2024
19 Maart 2024
19 Maart 2024
19 Maart 2024
Handleiding Hardwarekoeling
Nieuwste handleidingen voor Hardwarekoeling
22 April 2026
21 April 2026
21 April 2026
12 April 2026
12 April 2026
11 April 2026
11 April 2026
11 April 2026
11 April 2026
6 April 2026