Eltako FUD61NP-230V Handleiding
Eltako
Niet gecategoriseerd
FUD61NP-230V
Bekijk gratis de handleiding van Eltako FUD61NP-230V (4 pagina’s), behorend tot de categorie Niet gecategoriseerd. Deze gids werd als nuttig beoordeeld door 61 mensen en kreeg gemiddeld 4.9 sterren uit 31 reviews. Heb je een vraag over Eltako FUD61NP-230V of wil je andere gebruikers van dit product iets vragen? Stel een vraag
Pagina 1/4

Without N connection, 300 W power
MOSFET. Only 0.7 watt standby loss.
With adjustable minimum brightness
and dimming speed. With switching
operation for children's rooms and
snooze function. Light scenes can be
taught-in.
Encrypted wireless, bidirectional wireless
and repeater function are switchable.
For installation.
45mm long, 45mm wide, 33 mm deep.
Universal dimmer switch for R, L and C
loads up to 300 watt, depending on
ventilation conditions. Automatic detection
of load R+L or R+C.
Without N connection, therefore it is
suitable for mounting directly behind
the pushbutton light switch, even if
there is no N wire.
Energy saving lamps and LED lamps
cannot be controlled by dimmers without
N-connection.
Supply voltage, switching voltage and
control voltage local 230V.
Minimum load only 40 W.
Zero passage switching with soft ON
and soft OFF to protect lamps.
The brightness level is stored on switch-off
(memory).
In case of a power failure the switch
position is stored and may be switched
on when the power supply is restored.
GB
Only skilled electricians may install
this electrical equipment otherwise
there is the risk of fire or electric
shock!
Temperature at mounting location:
-20°C up to +50°C.
Storage temperature: -25°C up to +70°C.
Relative humidity:
annual average value <75%.
Wireless actuator
Universal dimmer switch
without N, FUD61NP-230V
30 100 830 - 9
valid for devices from production week
46/17 (see bottom side of housing)
Automatic electronic overload protection
and overtemperature switch-off.
You can teach in encrypted sensors.
You can switch on bidirectional wireless
and/or a repeater function.
Every change in state and incoming
central command telegrams are then
confirmed by a wireless telegram.
This wireless telegram can be taught-in
into other actuators, FUA55 universal
displays and the GFVS-Software. The
current dimming value is also displayed
in % in the GFVS-Software.
Function rotary switches
The minimum brightness (fully dimmed)
is adjustable with the % rotary switch.
In the setting LRN up to 35 wireless push -
buttons can be assigned therefrom one
or more central pushbuttons.
The dimming speed is adjustable using
the dimming speed rotary switch. At the
same time, the soft ON and soft OFF
periods are changed.
In addition to the wireless control input
via an internal antenna, this universal
dimmer switch can also be controlled
locally by a conventional 230V control
switch if fitted previously.
The wireless pushbuttons can be taught
in either as direction switches or universal
switches:
When installed as a direction switch, one
side is then 'switch on and dim up' and
the other side is 'switch off and dim
down'. A double-click on the switch-on
side activates automatic dim-up to full
brightness at dim speed. A double click
on the switch-off side activates the
snooze function. The children's room
function is implemented on the switch-
on side.
As a universal switch, change the
direction by briefly releasing the push-
button. Short-time control commands
switch on/off.
Switching operation for children's
rooms (universal switch or direction
switch on the switch-on side): If the
light is switched on by holding down
the pushbutton, it starts at the lowest
brightness level after approx. 1 second
and dims up slowly as long as the push -
button is held down without modifying
the last stored brightness level.
Snooze function (universal switch or
direction switch on the switch-off side):
With a double impulse the lighting is
dimmed down from the current dimming
position to the minimum brightness level
and switched off. The current dimming
position as well as the adjustable
minimum brightness level determine the
dimming time (max. = 60 minutes)
which can be reduced as required. It
can be switched off at any time by
short-time control commands during the
lighting is dimmed down.
Light scenes on the PC are set and
retrieved using the Wireless Visualisation
and Control Software GFVS. A description
of the GFVS is at 'eltako-wireless.com'.
One or several FUD61NP devices must be
taught in on the PC as dimming switches
with percentage brightness values.
Lights scenes with wireless switches are
taught in on the FUD61NP device. Up to
four brightness values which can be
taught-in in light scene pushbuttons with
double rocker.
Semi-automatic motion detection with
taught-in FB65B wireless motion sensor
(factory setting): After switching on via
pushbutton, the 5 minutes delay time
starts, within this time the delay will
restart after each detected motion. 5 mi-
nutes after the last detected motion it will
switch off. If a motion is detected 5 mi-
nutes after switching off, it will automati-
cally switch on again. After this time only
a pushbutton can switch on. The push-
button is allowed to switch off at any
time, then the motions are no more
evaluated.
Fully automatic motion detection with
FB65B taught-in wireless motion sensor:
If the actuator should switch on automa-
tically when motion is detected, e.g. in
rooms without daylight, replug the jumper
to 'active' on the FB65B device. When
motion is no longer detected, the device
switches off automatically after the 5 mi-
nutes release delay time expires. Press
the pushbutton at any time to switch the
device on or off. When motion is detected,
the device switches on again automati-
cally.
Either an FBH (Master) or an FAH can be
taught in.
If a wireless motion-brightness sensor
FBH (Master) is taught in, the switching
threshold at which the lighting with me-
mory value switches on (from approx.
30lux in the position 'min' to approx.
300lux in the position '3') depending on
the brightness (in addition to the mo-
tion) is de termined with the lower rotary
switch during teach-in. If the FBH is
taught in in position 'max', it is only
evaluated as a motion sensor (Slave). A
dropout delay of 1 minute is fixed in the
FBH.
If a wireless brightness sensor FAH is
taught in, the threshold at which the
lighting switches on or off (from approx.
0lux in the position 'min' to approx.
50lux in the position 'max') depending
on the brightness is determined with the
lower rotary switch. If the brightness
threshold is undershot, the memory
parameter is used to switch the device
on. Switching off takes place at a bright-
ness of > 200 lux.
The LED performs during the teach-in
process as mentioned in this instruction
manual below. It shows wireless control
commands by short flickering during
operation.
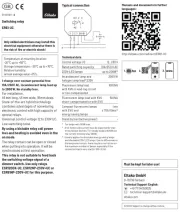
Typical connection
Technical data
Incandescent lamp and up to 300 W2)
halogen lamp load1) 230V
Local control current 1mA
at 230V control input
Max. parallel capacitance 0.06μF
(approx. length) of local (200m)
control lead at 230V AC
Standby loss (active power) 0.7W
1) Applies to lamps of max. 150W.
2) Also max. 2 induction transformers of the same
type (L load) and electronic transformers (C load).
Teaching-in wireless sensors in wire-
less actuators
All sensors must be taught-in in the
actuators so that they can detect and
execute commands.
Teaching-in actuator FUD61NP-230 V
The teach-in memory is empty on
delivery from the factory. To ensure that
a device was not previously taught-in,
clear the memory completely:
Turn the upper rotary switch to CLR.
The LED flashes at a high rate. Within
10 seconds, turn the lower rotary switch
three times to right stop (turn clockwise)
and back again. The LED stops flashing
and goes out after 2 seconds. All taught-
in sensors are cleared; the repeater and
the confirmation telegrams are switched
off.
Clear single taught-in sensors:
Turn the upper rotary switch to CLR. The
LED flashes at a high rate. Operate the
sensor. The LED goes out.


If all the functions of an encrypted sensor
are cleared, teach-in must be repeated
as described under
Teach-in encrypted
sensors.
After teach-in, set the rotary switches to
the required function.
To prevent unintentional teach-in, teach
in pushbuttons by 'double-clicking'
(pressing rapidly twice in succession).
Within 2 seconds, turn the upper rotary
switch three times to right stop LRN (turn
clockwise). The LED flashes 'double'.
'Double-click' the pushbutton you want
to teach in. The LED goes out.
To change back to teach-in with a 'single
click', turn the upper rotary switch 3 times
to right stop LRN (clockwise) within
2 seconds. The LED flashes at a low rate.
After a power supply failure, the device
reverts automatically to teach-in with a
'single click'.
You can teach in unencrypted and
encrypted sensors.
Teach in encrypted sensors:
1. Turn the upper rotary switch to LRN.
2.Turn the lower rotary switch three
times to left stop (anticlockwise).
The LED flashes very rapidly.
3.Within 120 seconds, enable sensor
encryption. The LED goes out.
Caution: Do not switch off the power
supply.
4.Then teach in the encrypted sensor as
described in
Teach in sensors.
To teach in other encrypted sensors,
turn the upper rotary switch briefly away
from position LRN and then turn it to 1.
With encrypted sensors, use the 'rolling
code', i.e. the code changes in each
telegram, both in the transmitter and in
the receiver.
If a sensor sends more than 50 tele-
grams when the actuator is not enabled,
the sensor is no longer recognised by
the enabled actuator and you must repe-
at teach-in as 'encrypted sensor'. It is
not necessary to repeat the function
teach-in.
Saving light scenes
Up to four brightness values retrievable
with a direct light scene pushbutton can
be saved.
1. Adjust the required brightness level with
When an actuator is ready for
teach-in (the LED flashes at a
low rate), the very next
incoming signal is taught-in.
Therefore, make absolutely
sure that you do not activate
any other sensors during the
teach-in phase.
!
EnOcean wireless
Frequency 868.3 MHz
Transmit power max. 10mW
Hereby, Eltako GmbH declares that the
radio equipment type FUD61NP-230 V
is in compliance with Directive
2014/53/EU.
The full text of the EU declaration of
conformity is available at the following
internet address: eltako.com
Eltako GmbH
D-70736 Fellbach
Technical Support English:
Michael Thünte +49 176 13582514
thuente@eltako.de
Marc Peter +49 173 3180368
marc.peter@eltako.de
eltako.com
46/2017 Subject to change without notice.
Must be kept for later use!
a push button or with the GFVS.
2. Within 60 seconds, this brightness
value will be stored by pressing a
button 3-5 seconds on one of the four
ends of the rocker of the previously
taught-in direct light scene pushbutton.
3. Repeat from point 1 to save further
directly retrievable light scenes.
Switching the repeater on and off:
The repeater is switched on or off if the
control voltage is applied to the local
control input when connecting the supply
voltage. The LED lights up for 2 seconds
as a status signal when applying the
supply voltage = repeater off (as-delive-
red state) or 5 seconds = repeater on.
Switch-on confirmation telegrams:
For deliveries ex-works the confirmation
telegrams are switched-off. Set the upper
rotary switch to CLR. The LED flashes
nervously. Now within 10 seconds turn
the bottom rotary switch 3 times to the
left (anticlockwise) and then back away.
The LED stops flashing and goes out
after 2 seconds. The confirmation tele-
grams are switched-on.
Switch-off confirmation telegrams:
Set the upper rotary switch to CLR.
The LED flashes nervously. Now within
10 seconds turn the bottom rotary switch
3 times to the left (anticlockwise) and
then back away. The LED goes out
immediately. The confirmation telegrams
are switched-off.
Teaching-in feedback of this actuator
in other actuators or GFSV software:
For switching ON and OFF and simulta-
neously transmitting of feedback the
local control input has to be applied.
Teaching-in feedback of other actua-
tors in this actuator: 'Switch on' will be
taught-in in position 'central ON'.
'Switch off' will be taught-in in position
'central OFF'. After teach-in the desired
minimum brightness and the dimming
speed will be set.
-
Teaching-in sensors:
1. Setting of the lower rotary switch to
the desired teaching-in function:
The flashing of the LED as soon as a
new setting range has been reached
when turning the rotary switch helps
to find the desired position reliably.
Left stop min = Teach in direct light
scene pushbutton, a complete push-
button with double rocker is assigned
automatically.
Position 1 = teach-in 'central OFF';
Position 2 = teach-in universal
switch 'dim and ON/OFF';
Universal switches must be taught-in
identically at top and bottom if the
switch is to have the same function
at top and bottom.
Position 3 = teach-in 'central ON';
Right stop max = Direction switches;
Direction switches are completely
taught-in automatically when operating
the top or bottom pushbutton. Other -
wise top and bottom must be taught-in
in the same way if the top and bottom
pushbutton are to have the same
function.
The FB65B can be taught-in in any
position.
Rotary switches and GFVS can be
taught-in in any position, confirmation
telegrams are automatically activated
and sent.
The percentage brightness can be set
in the GFVS between 0 and 100 per
cent and saved. Several dimmer swit-
ches can be linked to form a light
scene.
2. Set the upper rotary switch to LRN.
The LED flashes at a low rate.
3. Operate the sensor which should be
taught-in. The LED goes out.
To teach-in further sensors, turn the upper
rotary switch briefly away from position
LRN. Continue the procedure from pos 1.
Product specificaties
| Merk: | Eltako |
| Categorie: | Niet gecategoriseerd |
| Model: | FUD61NP-230V |
Heb je hulp nodig?
Als je hulp nodig hebt met Eltako FUD61NP-230V stel dan hieronder een vraag en andere gebruikers zullen je antwoorden
Handleiding Niet gecategoriseerd Eltako

14 April 2025

14 April 2025

13 Maart 2024

21 Februari 2024

21 Februari 2024

21 Februari 2024

21 Februari 2024

20 Februari 2024

20 Februari 2024

20 Februari 2024
Handleiding Niet gecategoriseerd
- Ferm
- Homedics
- Cleco
- Devolo
- Carrera
- Heitech
- Car Jack
- Orbegozo
- Maclean
- CRU
- Baumr-AG
- A-NeuVideo
- MSpa
- Axing
- Minox
Nieuwste handleidingen voor Niet gecategoriseerd

18 September 2025

18 September 2025

18 September 2025

18 September 2025

18 September 2025

18 September 2025

18 September 2025

18 September 2025

18 September 2025

18 September 2025