Sani-Lav U2424A Handleiding
Bekijk gratis de handleiding van Sani-Lav U2424A (10 pagina’s), behorend tot de categorie Spoelbak. Deze gids werd als nuttig beoordeeld door 20 mensen en kreeg gemiddeld 5.0 sterren uit 8 reviews. Heb je een vraag over Sani-Lav U2424A of wil je andere gebruikers van dit product iets vragen? Stel een vraag
Pagina 1/10
1
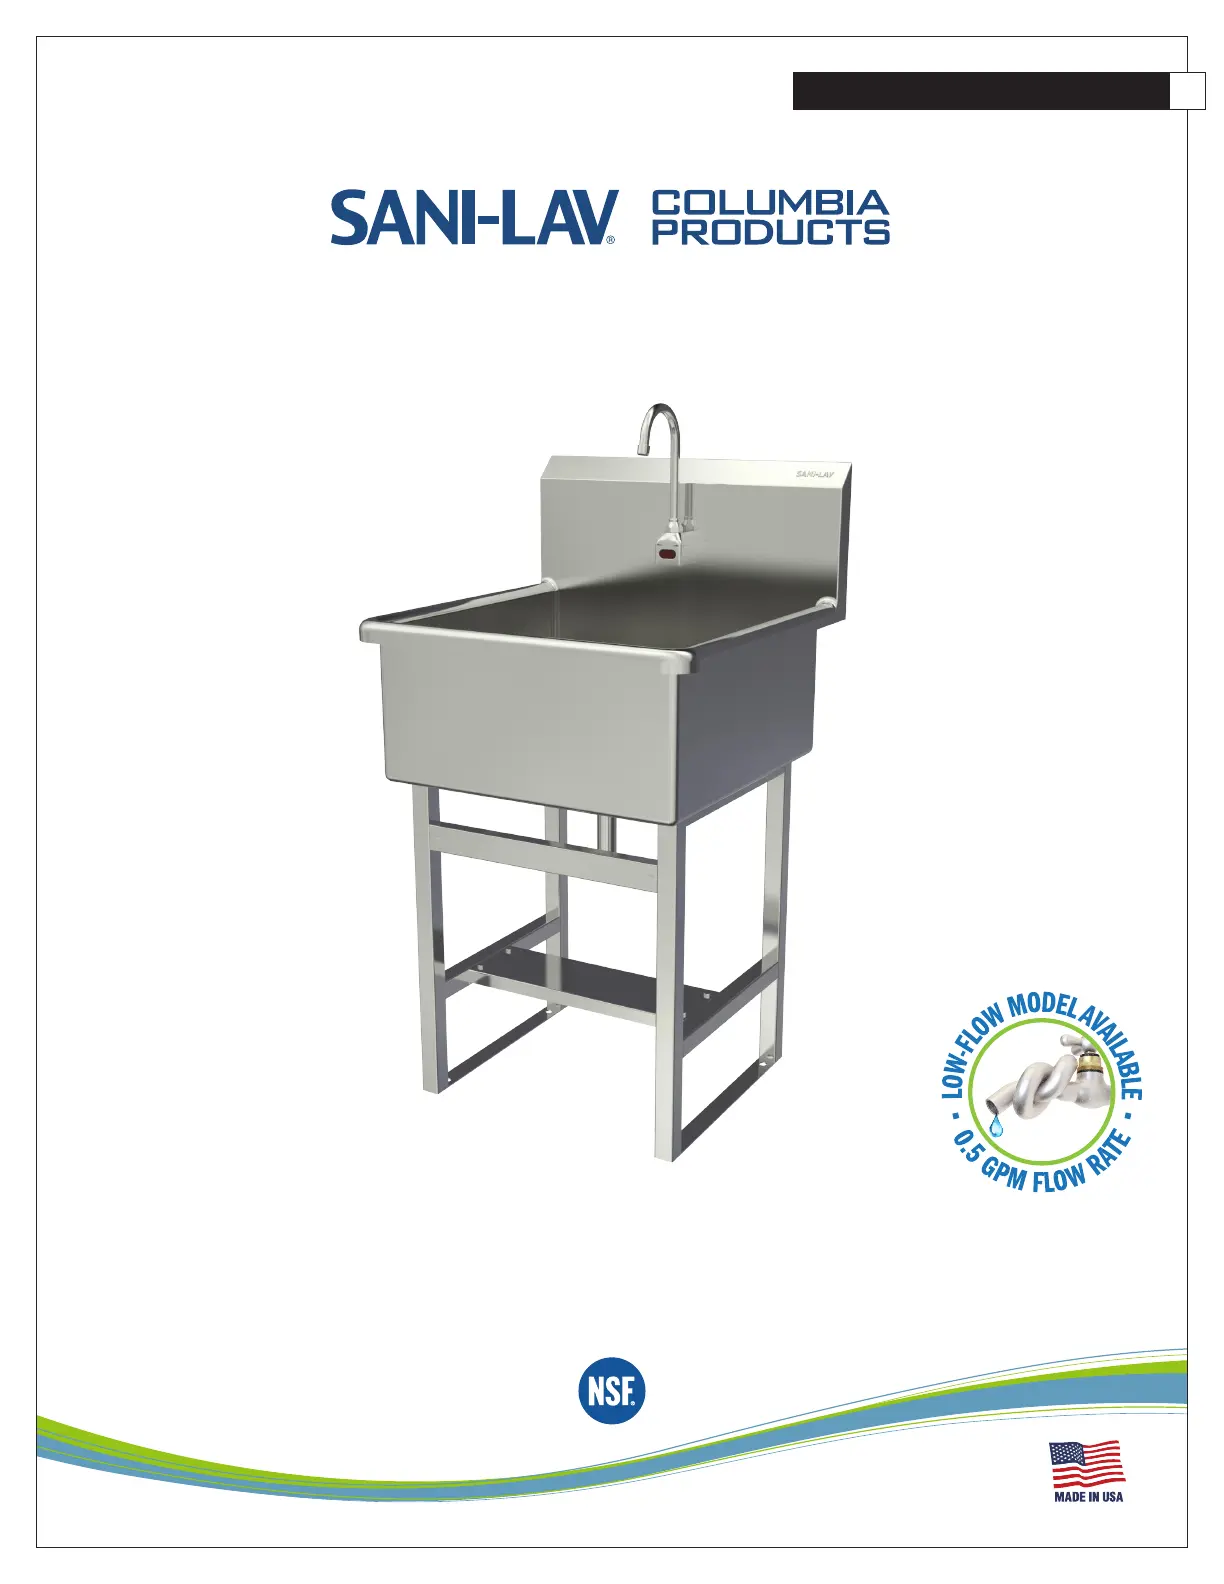
AC OR BATTERY POWERED
UTILITY SINK WITH ELECTRONIC SENSOR
Operating Manual for Hands-Free Floor Mount Stainless Steel Utility Sink
AC Models U2424A and U2424A-0.5
Battery Models U2424B and U2424B-0.5
of Domestic and Foreign Parts
Columbia does not recommend use with harsh chemicals.
Product Compliance
NSF/ANSI 2 Food Equipment, NSF/ANSI 372 Lead-Free Compliant, ASME A112.18.1
Product specificaties
| Merk: | Sani-Lav |
| Categorie: | Spoelbak |
| Model: | U2424A |
Heb je hulp nodig?
Als je hulp nodig hebt met Sani-Lav U2424A stel dan hieronder een vraag en andere gebruikers zullen je antwoorden
Handleiding Spoelbak Sani-Lav

22 September 2025
22 September 2025
22 September 2025
22 September 2025
26 Augustus 2025
26 Augustus 2025
26 Augustus 2025
26 Augustus 2025
26 Augustus 2025
26 Augustus 2025
Handleiding Spoelbak
Nieuwste handleidingen voor Spoelbak
21 April 2026
21 April 2026
20 April 2026
14 April 2026
13 April 2026
12 April 2026
11 April 2026
2 April 2026
25 Maart 2026
25 Maart 2026