Flir ioi HD CB-5222 Handleiding
Flir Bewakingscamera ioi HD CB-5222
Bekijk gratis de handleiding van Flir ioi HD CB-5222 (2 pagina’s), behorend tot de categorie Bewakingscamera. Deze gids werd als nuttig beoordeeld door 44 mensen en kreeg gemiddeld 4.0 sterren uit 9 reviews. Heb je een vraag over Flir ioi HD CB-5222 of wil je andere gebruikers van dit product iets vragen? Stel een vraag
Pagina 1/2
Quick Install Guide
ioi HD
CB-5222
Analytic Bullet IP Camera
A. Connect the Camera
1. Select one of the following power connections:
·Connect the Ethernet cable from the camera to a PoE+ switch/injector (for -40° to 50°C/-40° to 122°F)
·Connect the Ethernet cable from the camera to a PoE switch/injector (for -10° to 50°C/14° to 122°F)
·Connect the camera’s power cable to a 12VDC (1.6 amps), 24 VDC (0.8 amps), or 24VAC (0.85 amps)
power supply (for -40° to 50°C/-40° to 122°F)
2. Connect the analog video, audio in, audio out, alarm cables as required for your system.
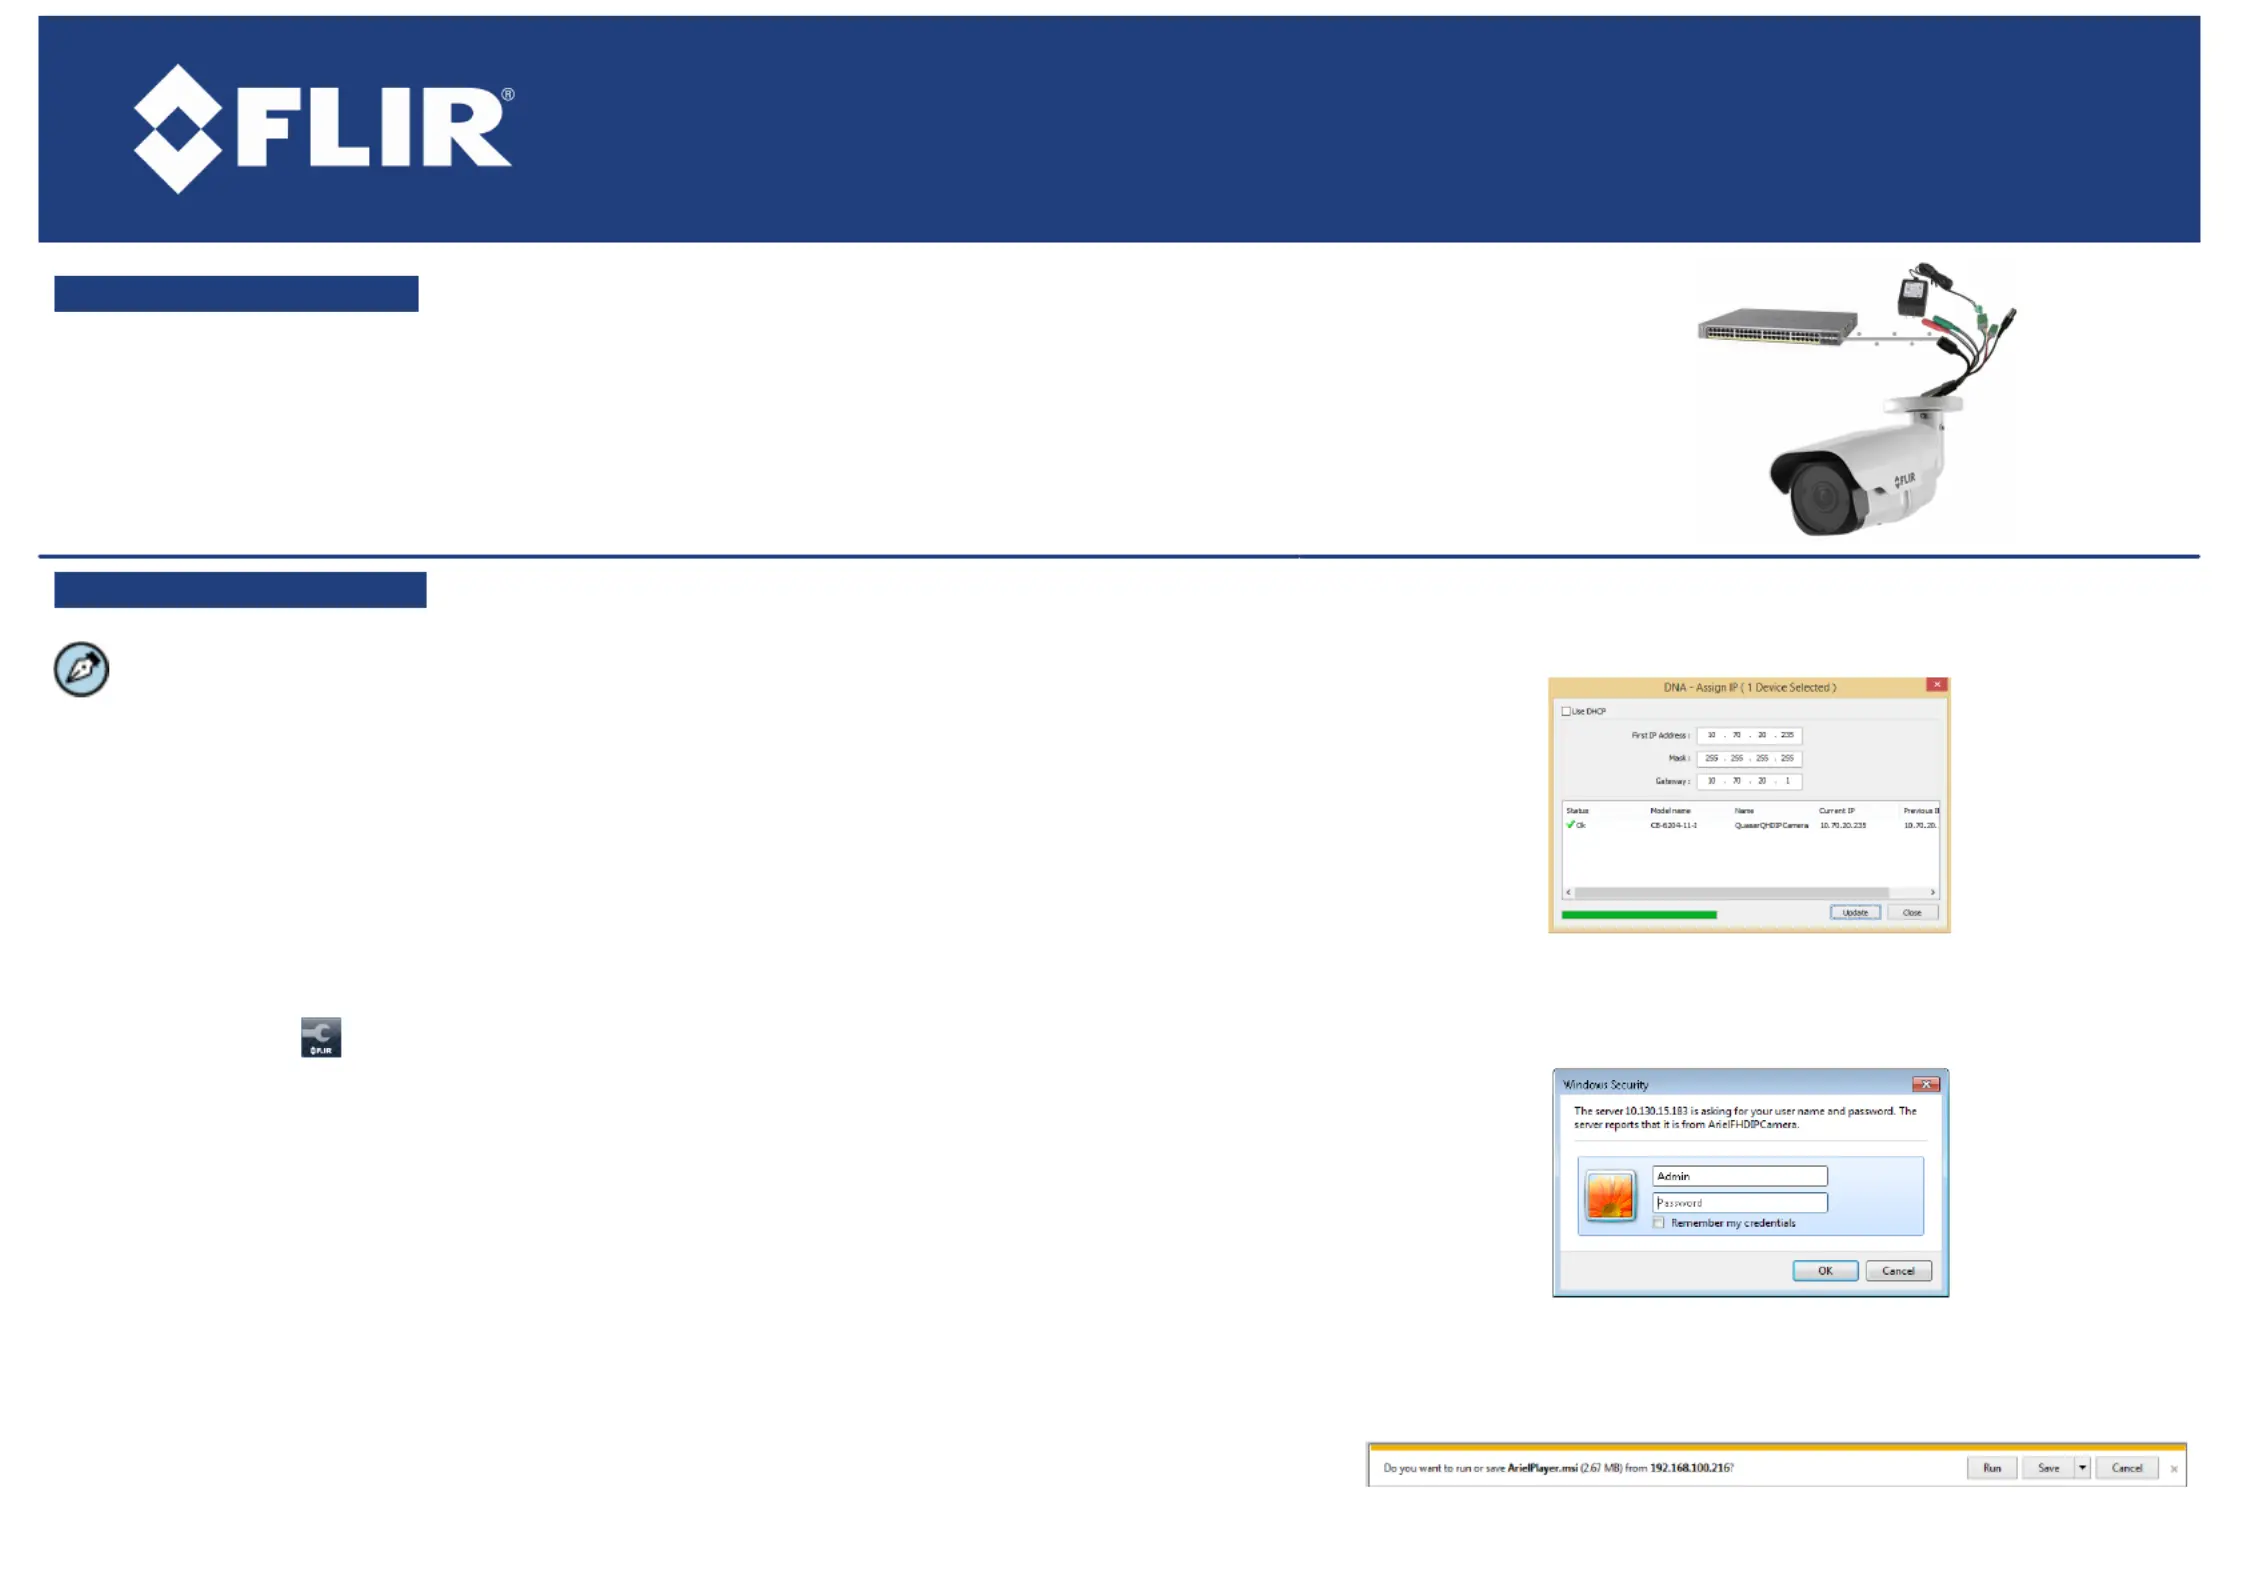
B. Discover the Camera
The camera’s web interface can be accessed by
Internet Explorer 9 and higher (32-bit) with the ActiveX
plug-in on PCs running 64-bit Windows XP, 7, 8, 8.1,
or 10.
B.1. Configuring the camera on your workstation
for the first time
1.Install the CD in the product package or download
FLIR’s Discovery Network Assistant (DNA) utility from
the Support > FLIR Firmware & Software
Downloadspage at http://www.flir.com/security.
2.Click the DNA icon and run DNA version 2.1.x.x or
above to log into the unit.
3.Attach the unit to the same LAN segment as the
computer that is managing the unit. DNA
automatically discovers the unit on the network and
displays the device’s current IP address in the
Discover List.
4.Select the unit from the Discover List.
5. Select PAL or NTSC by selecting the unit and clicking
Change Video Format from the context menu, or
from the Properties > Device Propertiesscreen.
6. Click Update.
B.2.a Managing the camera with Horizon,
Meridian or on a DHCP-enabled network
If the camera is managed by Horizon configured
as a DHCP server, or is on a network with a DHCP
server, the camera automatically receives an IP
address.
1.Open DNA. The unit is automatically discovered
on the network. See section B.1 for instructions
how to install DNA.
2.Verify that the unit is displayed in the Discover
List. The unit status should be displayed as
OnlineAuthenticated.and
B.2.b Managing the camera with Latitude or
on a network with static IP configuration
If the camera is managed by Latitude or is on a
network without a DHCP server, you must
manually enter its IP address in DNA.
1.Open DNA. The unit is automatically discovered
on the network. See section B.1 for instructions
how to install DNA.
2.If you use non-default credentials, the unit might
become unauthenticated. In this case,
authenticate the unit:
a. Use DNA to select the unit(s).
b. Right-click or click the Login button.
c. Enter the camera's User Name ("admin") and
Password ("admin").
d. Click Login.
3.In the DNA Assign IP screen, uncheck Use DHCP, and enter the unit’s IP,
Mask and Gateway IP addresses. If the camera is not authenticated, you
must first authenticate it.
4.Click Update.
B.3. Log into the Unit
1.Click the unit in DNA’s Discover List. The Login window opens.
2.Enter the default User Name ("admin") and Password ("admin"), which are
case-sensitive. Then click OK.
3.Click Loginin DNA. The unit’s web interface opens.
4.Click the message to install the ActiveX plug-in.
5.Follow the on-screen instructions to install the plug-in.
Product specificaties
| Merk: | Flir |
| Categorie: | Bewakingscamera |
| Model: | ioi HD CB-5222 |
Heb je hulp nodig?
Als je hulp nodig hebt met Flir ioi HD CB-5222 stel dan hieronder een vraag en andere gebruikers zullen je antwoorden
Handleiding Bewakingscamera Flir

7 December 2025
7 December 2025
6 December 2025
6 December 2025
4 December 2025
4 December 2025
4 December 2025
4 December 2025
4 December 2025
1 December 2025
Handleiding Bewakingscamera
Nieuwste handleidingen voor Bewakingscamera
22 April 2026
21 April 2026
7 April 2026
7 April 2026
6 April 2026
6 April 2026
6 April 2026
6 April 2026
3 April 2026
1 April 2026