EK Water Blocks 3831109868973 Handleiding
EK Water Blocks Hardwarekoeling 3831109868973
Bekijk gratis de handleiding van EK Water Blocks 3831109868973 (124 pagina’s), behorend tot de categorie Hardwarekoeling. Deze gids werd als nuttig beoordeeld door 46 mensen en kreeg gemiddeld 4.1 sterren uit 4 reviews. Heb je een vraag over EK Water Blocks 3831109868973 of wil je andere gebruikers van dit product iets vragen? Stel een vraag
Pagina 1/124
All disclosures, notices and warranty conditions are being written on the back of the box. Revision 1.0. Released on 9
th
of July 2012.
Installation and mounting manual for EK-FC Titan Z Backplate
This product is intended for installation only by expert users. Please consult with a qualified technician for installation. Improper installation may result in damage to your equipment. EK Water Blocks assumes no liability
whatsoever, expressed or implied, for the use of these products, nor their installation. The following instructions are subject to change without notice. Please visit our web site at www.ekwaterblocks.com for updates.
Before installation of this product please read important notice, disclosure and warranty conditions printed on the back of the box.
STEP 1: GENERAL INFORMATION. Sample picture of nVidia GeForce Titan Z
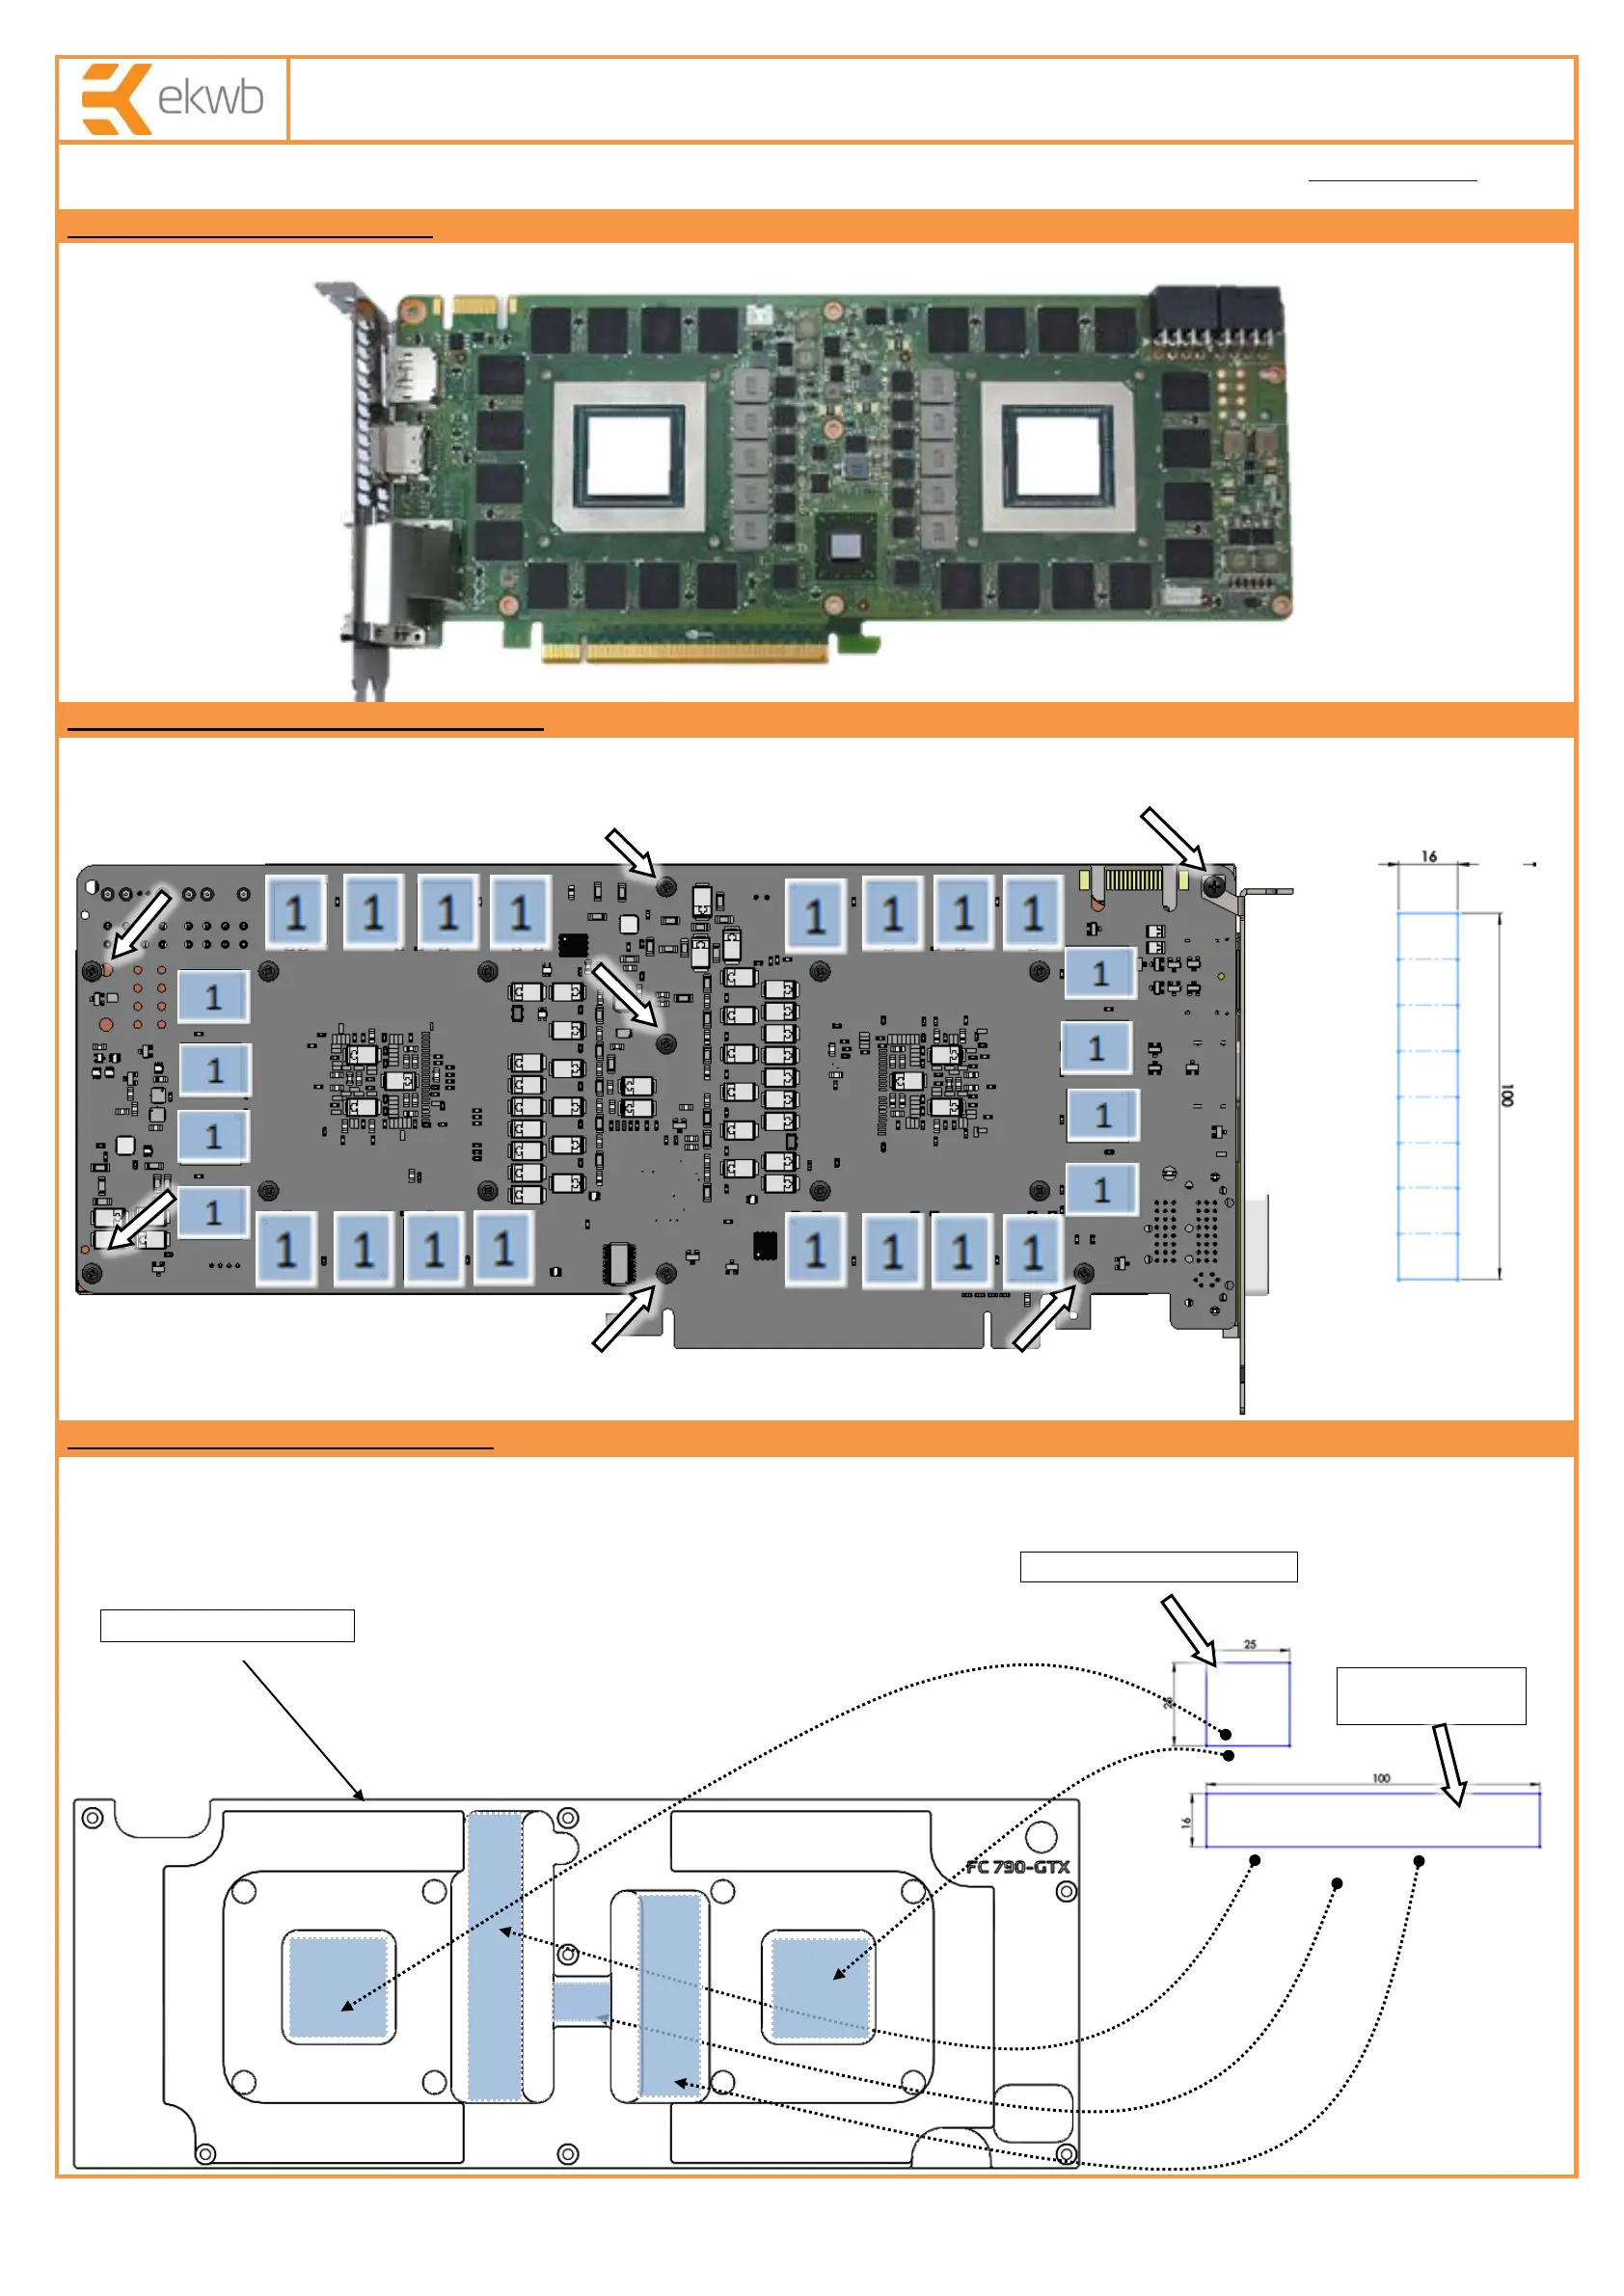
STEP 2: PREPARING YOUR GRAPHICS CARD
EK-FC Titan Z Backplate is very easy to install. First install EK-Titan Z water block according to its manual. If you have it already installed the water
block please check the picture below to see which mounting screws are to be left in their position and which are to be removed. Please remove the
six (6) screws marked with arrow. Apply thermal pads on RAMs 3x Thermal Pad D – 0.5mm (8xRAM).
STEP 3: APPLYING THE THERMAL PADS
EK-FC Titan Z Backplate features passive cooling of the printed circuit board and it’s components therefore it is mandatory to install the enclosed
thermal pad. Please install enclosed 0,5mm thick thermal pad (Thermal Pad A – 0,5mm (100x16)) and 1,5mm thick thermal pad (Thermal Pad C –
1,5mm (50x25)) directly on the large extruded stub on the back plate itself as shown on the picture below. You need to trim the excess thermal
pad.
EK-FC Titan ZBackplate
2x Thermal pad
A-0,5mm (100x16)
Thermal pad C -1,5mm (50x25)
3
3
2
2
2
3
3
1
1
1
1
1
1
1
1
Product specificaties
| Merk: | EK Water Blocks |
| Categorie: | Hardwarekoeling |
| Model: | 3831109868973 |
Heb je hulp nodig?
Als je hulp nodig hebt met EK Water Blocks 3831109868973 stel dan hieronder een vraag en andere gebruikers zullen je antwoorden
Handleiding Hardwarekoeling EK Water Blocks

29 Maart 2025
29 Maart 2025
30 Juli 2024
19 Maart 2024
19 Maart 2024
19 Maart 2024
19 Maart 2024
19 Maart 2024
19 Maart 2024
19 Maart 2024
Handleiding Hardwarekoeling
Nieuwste handleidingen voor Hardwarekoeling
22 April 2026
21 April 2026
21 April 2026
12 April 2026
12 April 2026
11 April 2026
11 April 2026
11 April 2026
11 April 2026
6 April 2026