SoundTube RS4-EZ Handleiding
SoundTube Niet gecategoriseerd RS4-EZ
Bekijk gratis de handleiding van SoundTube RS4-EZ (2 pagina’s), behorend tot de categorie Niet gecategoriseerd. Deze gids werd als nuttig beoordeeld door 21 mensen en kreeg gemiddeld 4.7 sterren uit 5 reviews. Heb je een vraag over SoundTube RS4-EZ of wil je andere gebruikers van dit product iets vragen? Stel een vraag
Pagina 1/2
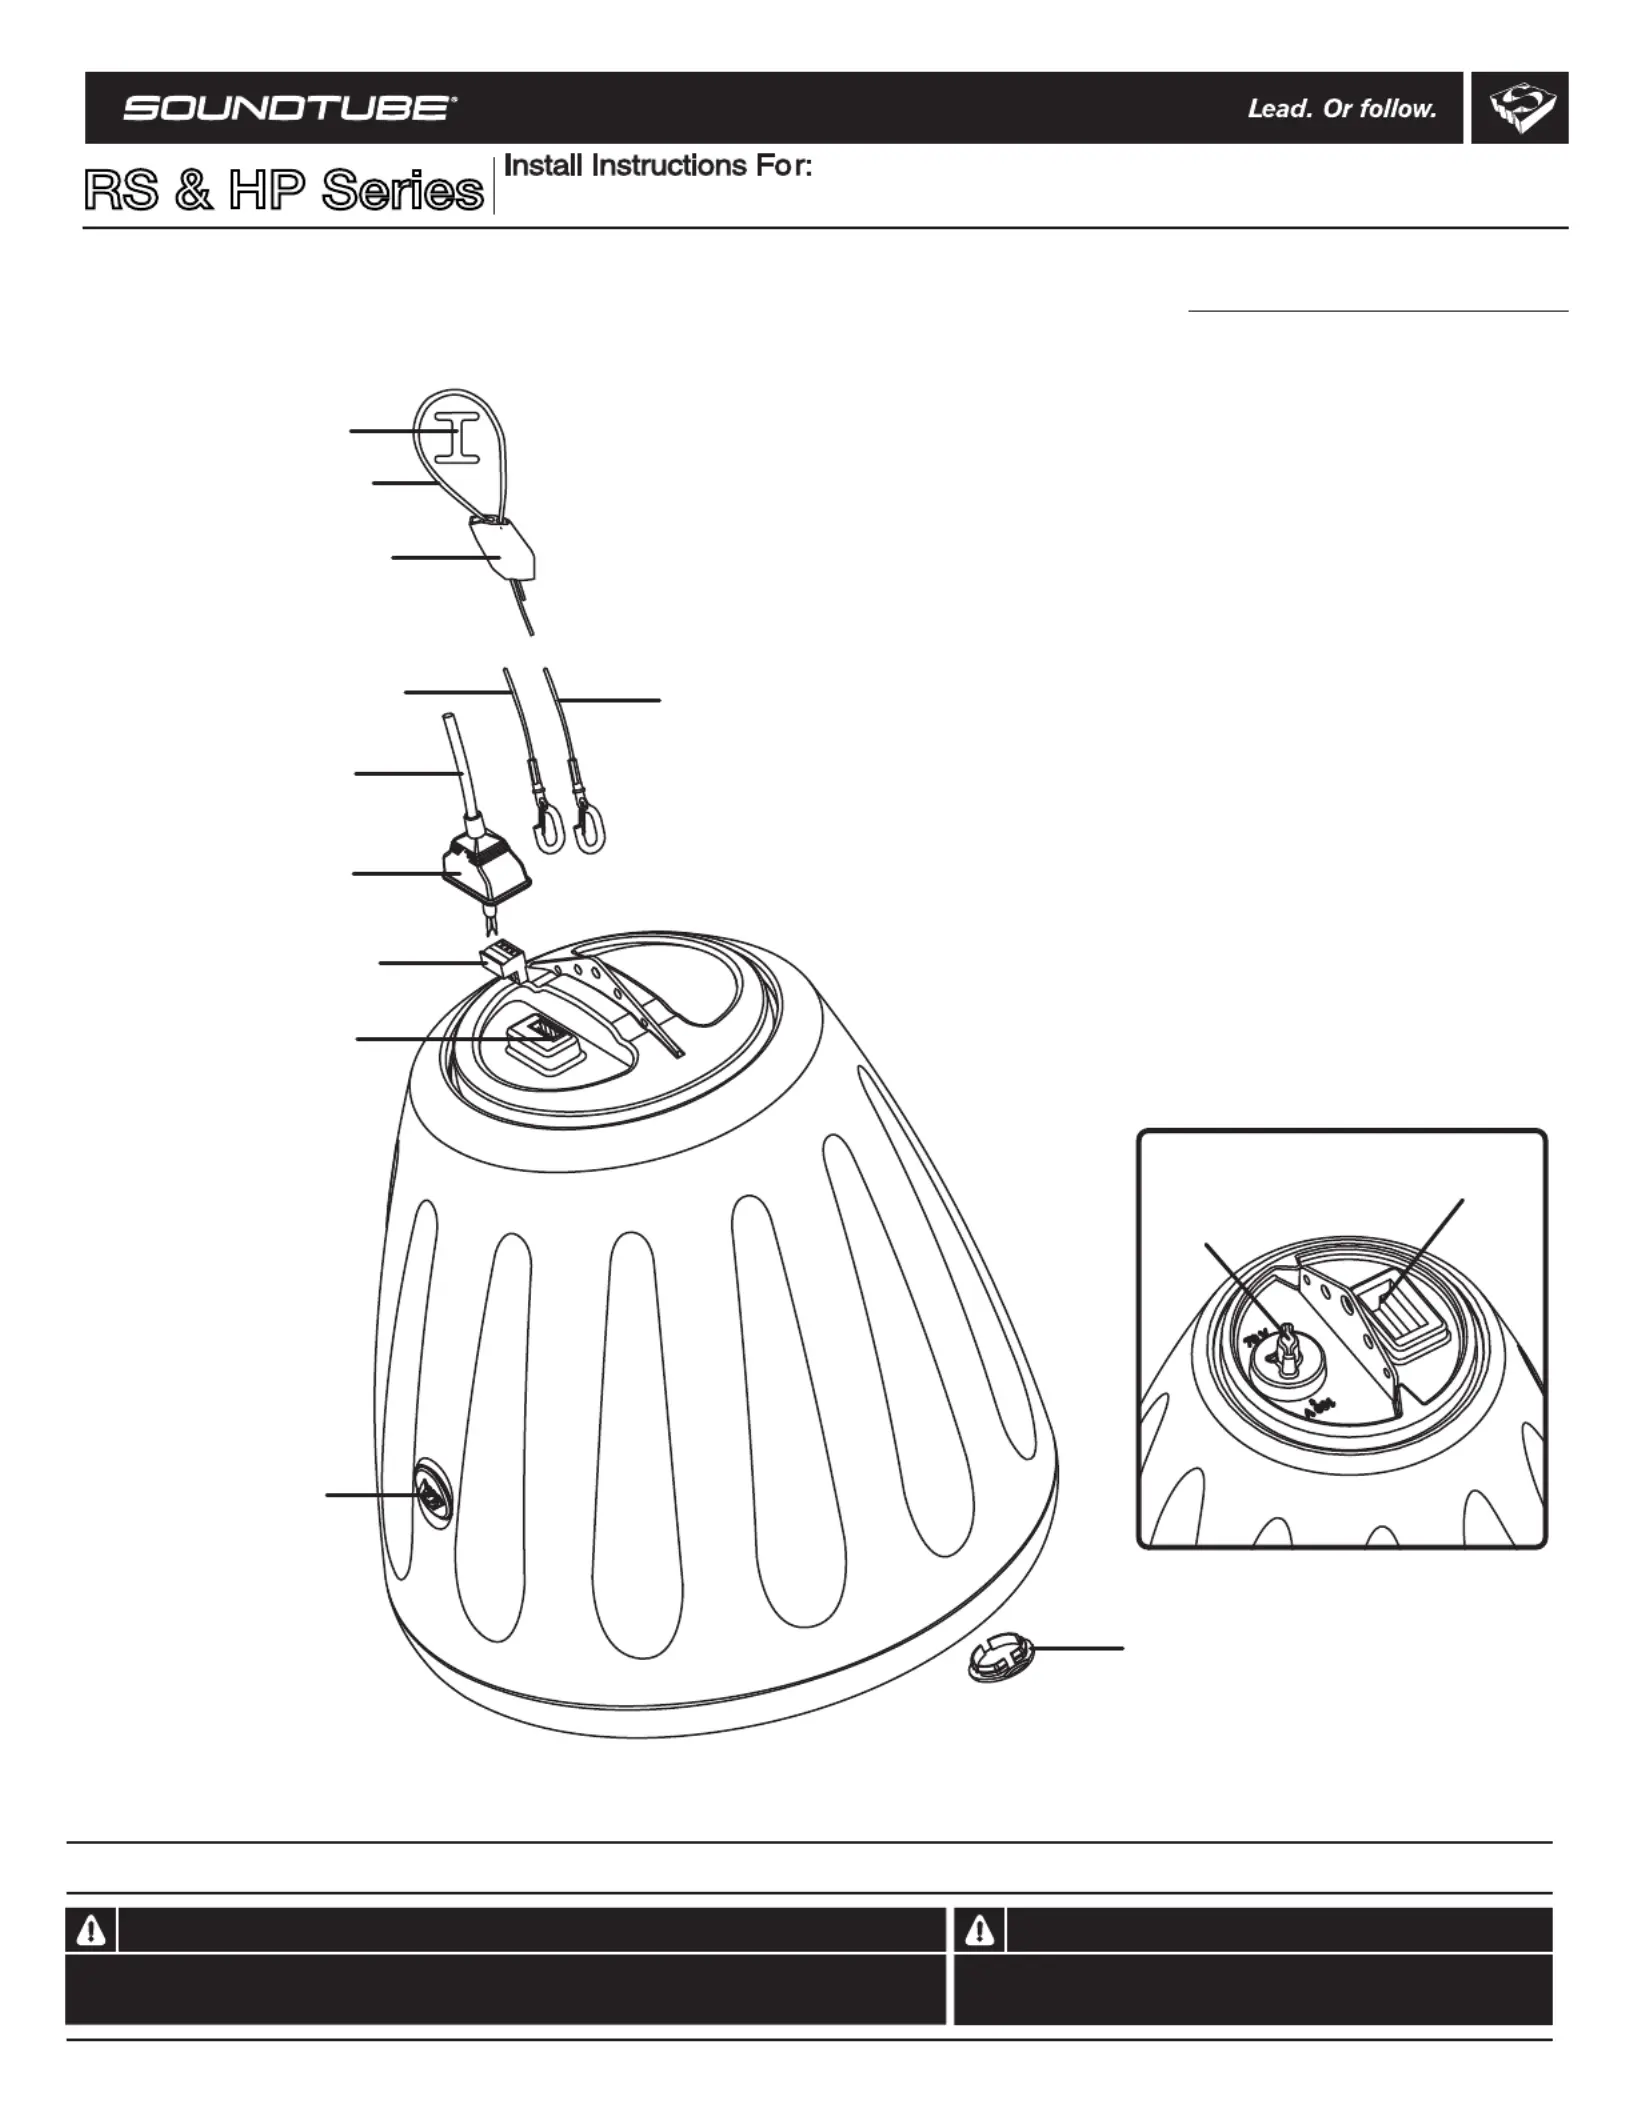
RS4-EZ, RS400i, RS500i, HP590i, RS600i, HP690i, RS800i, RS1201i, HP890i, RS1001i-II, HP129a,
& HP1290i speakers
Box contents
1 Speaker
2 SpeedClamps™
1 Release key (small hex wrench)
1 Hanging cable
1 Safety cable
1 Terminal weather boot
1 Euroblock connector
1 Grille-mounted tap switch cover
4 Zip ties
Sy caafetble with clip
Temirnal w eatherboot
Signal wire
Euroblock cr onntoec
Suurcefa-mont
bet rackinsert
Euroblock jack
Hanging caleb with clip
Hiangng or satyfe cab le
Se ar ecurnchoponti
SepedClmpa™
Gleted ril-moun
tap switch co ver
(except RS4-EZ)
RS4-EZ &RS400itap location
Tap swch it
Eurobockl jack
© 2008Sond uTube tetain Enrment, Inc.Allrights reseved.PNr INRevS-RSI 11.12.18
RS400i, RS500i, RS600i,, RS800i RS1001i-II, HP690i and HP890i - UL liste0d 148
1.435.647.9555
|
800.647.TUBE
|
www.soundtube.com
Do not spec or install speaker near support beam, ventilation duct or
other structure that may interfere with speaker function or dispersion.
WarningWarning
SoundTubespeakersustbestalledbyofesionalaudiointaller/contracto m in a prs sr. sy and r Forafetfo
optimdioperformance,tallefollowalldiectionsuedSouum au insr must rs is by ndTubeEntetaiment rn.
RS & HP Series
Product specificaties
| Merk: | SoundTube |
| Categorie: | Niet gecategoriseerd |
| Model: | RS4-EZ |
Heb je hulp nodig?
Als je hulp nodig hebt met SoundTube RS4-EZ stel dan hieronder een vraag en andere gebruikers zullen je antwoorden
Handleiding Niet gecategoriseerd SoundTube

15 November 2025
5 Augustus 2025
5 Augustus 2025
4 Augustus 2025
4 Augustus 2025
4 Augustus 2025
4 Augustus 2025
15 Juli 2025
14 Juli 2025
4 Juni 2025
Handleiding Niet gecategoriseerd
Nieuwste handleidingen voor Niet gecategoriseerd
23 Juli 2026
23 Juli 2026
23 Juli 2026
22 Juli 2026
22 Juli 2026
22 Juli 2026
22 Juli 2026
22 Juli 2026
22 Juli 2026
21 Juli 2026