Nektar SE25 Handleiding
Bekijk gratis de handleiding van Nektar SE25 (4 pagina’s), behorend tot de categorie Keyboard. Deze gids werd als nuttig beoordeeld door 91 mensen en kreeg gemiddeld 5.0 sterren uit 9 reviews. Heb je een vraag over Nektar SE25 of wil je andere gebruikers van dit product iets vragen? Stel een vraag
Pagina 1/4
Octave -/+
Pressing the Octave buttons shifts the octave played by the keys down -4
octaves and up +5 octaves.
Press both together to reset to 0.
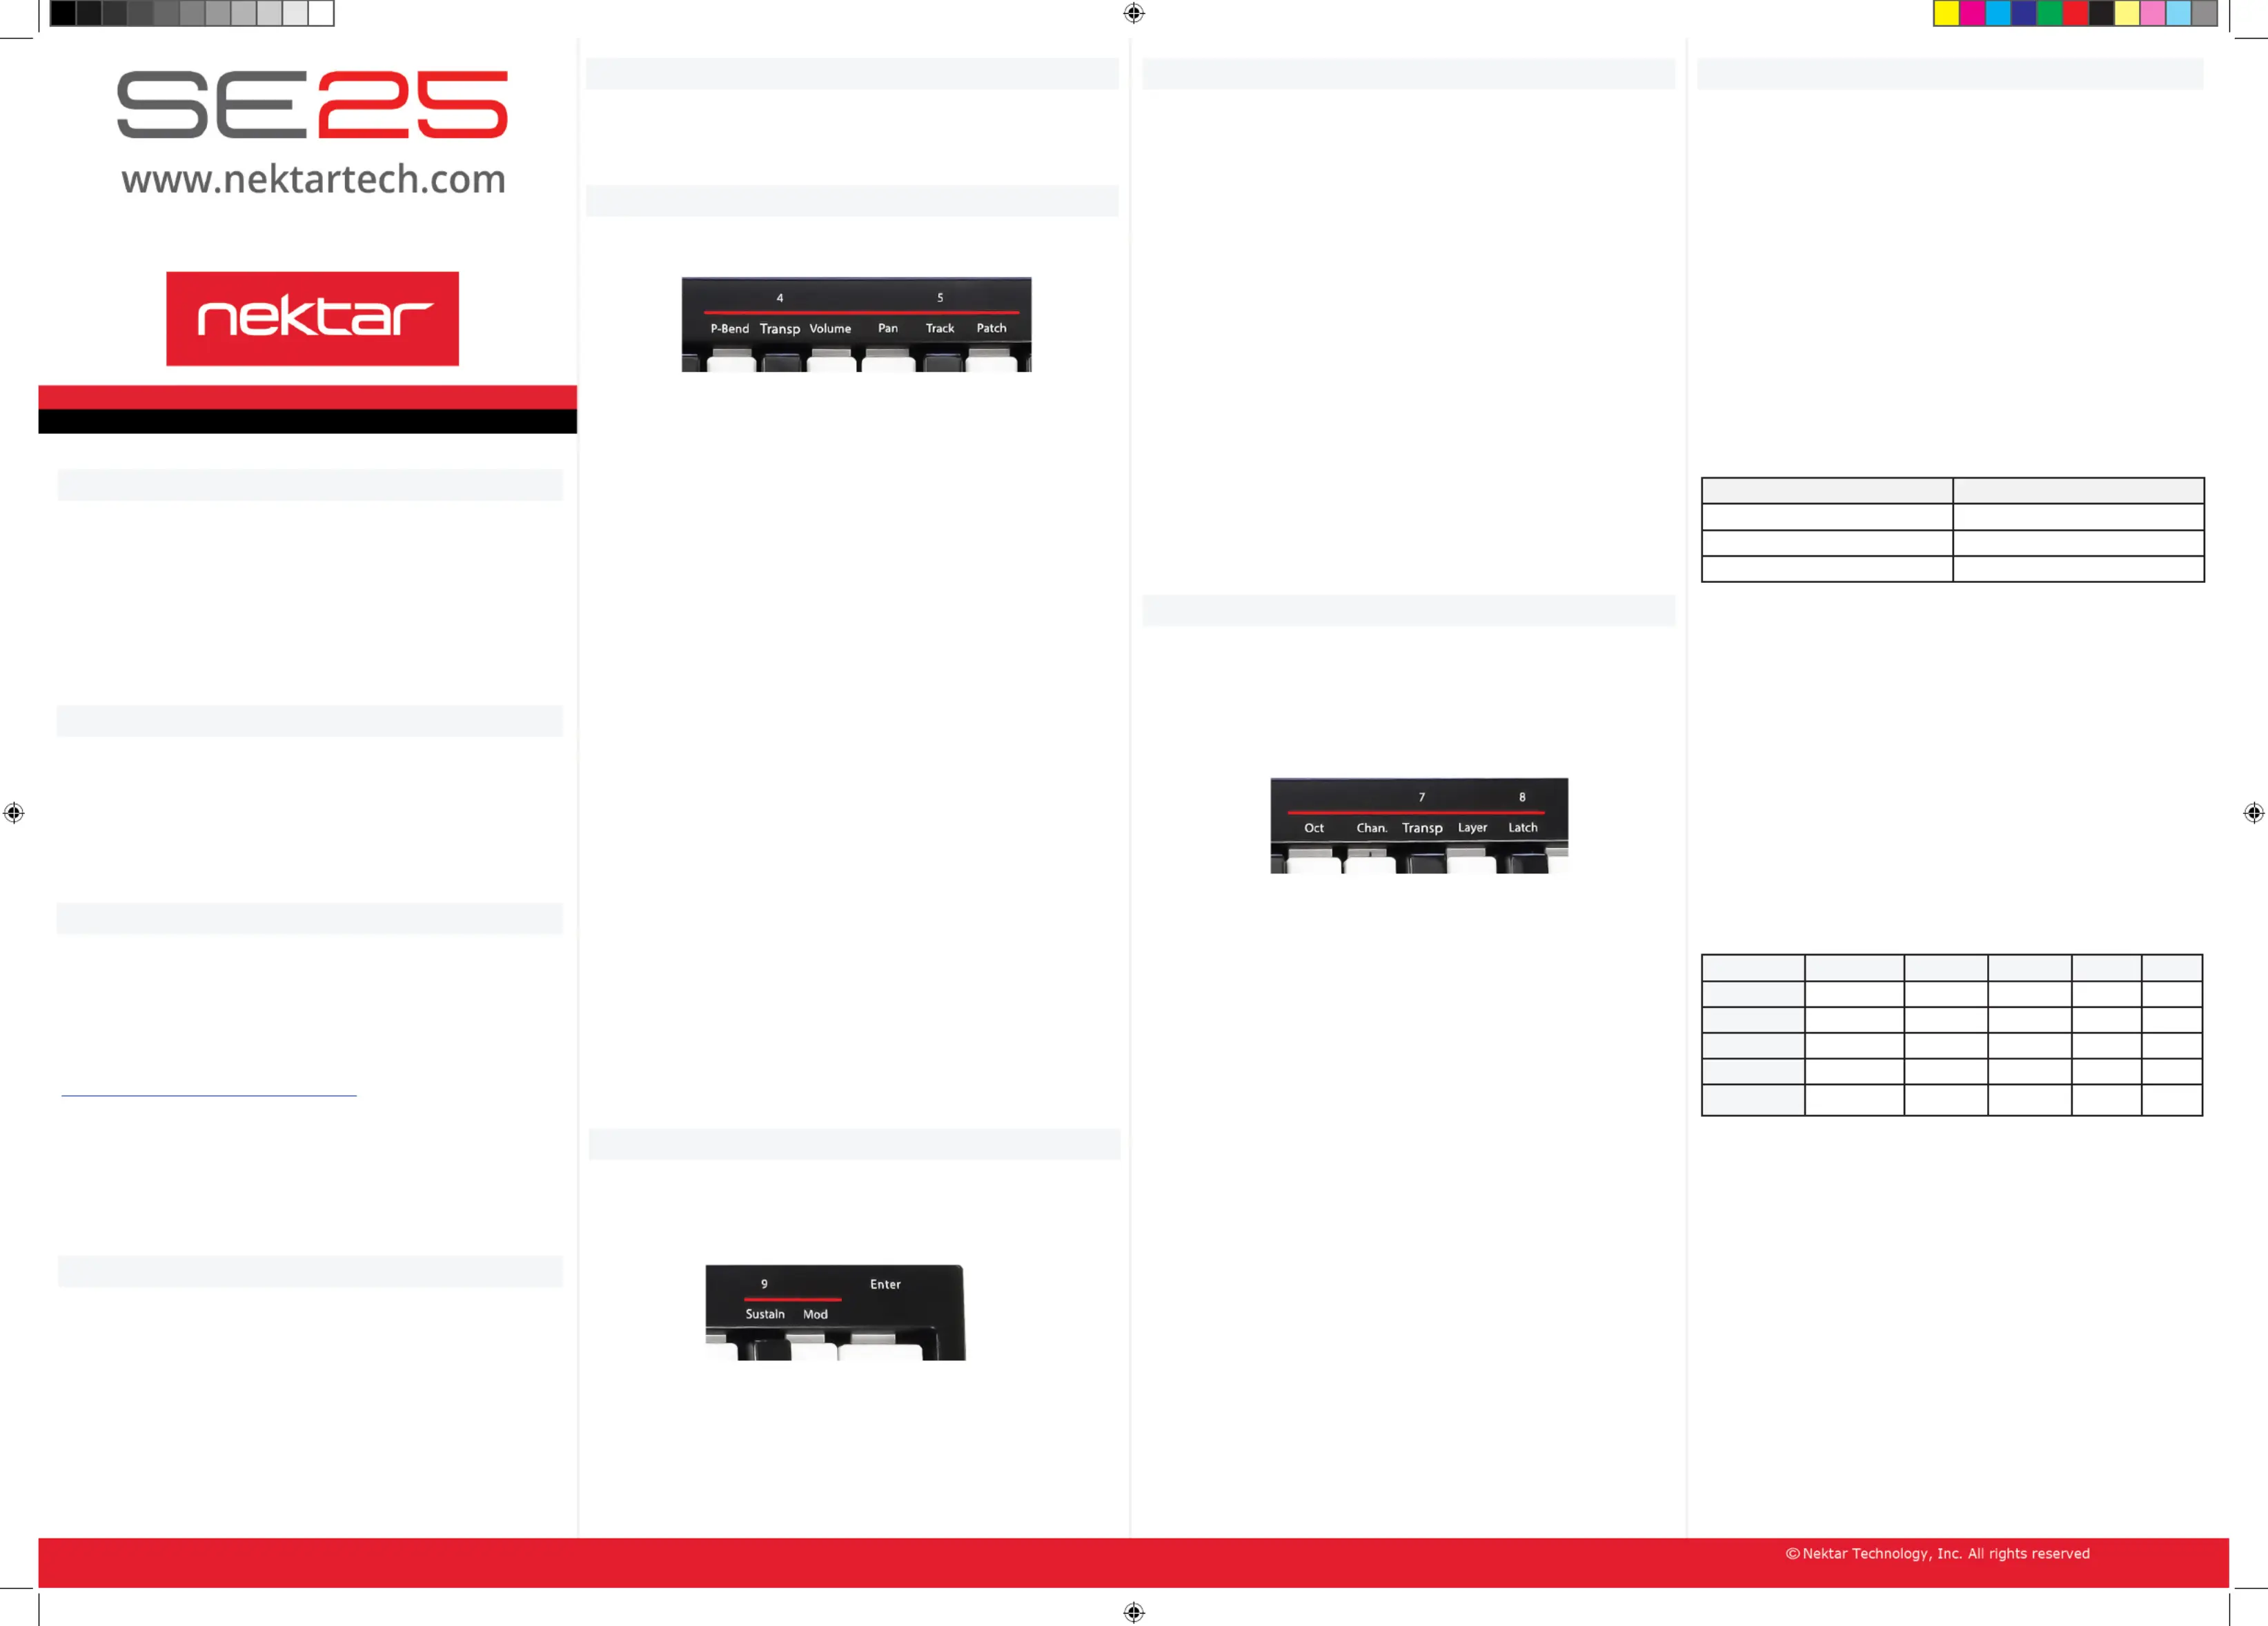
PB1/PB2 buttons
The PB1 and PB2 buttons can be assigned to any of 6 functions listed under
the rst red line above keys A1-D2.
To assign a function to the PB1/PB2 buttons do the following:
1. Enter Setup mode by pressing the [S]+[2] buttons at the same time.
The two LEDs now blink red.
2. Select the function you want to assign to the buttons by pressing the
corresponding key on the keyboard (example: press C1 to assign Pan).
3. Once a function has been selected, SE25 immediately exits Setup mode
and is ready to be played.
Pitch-Bend (default) (A1)
[PB1] bends the pitch of a played note from a low position up to neutral
pitch and [PB2] bends the pitch from a high position down to neutral pitch.
The low and high positions are set on the receiving instrument. Note that the
rate of the bend is xed.
Transpose (A#1)
With each press, the [PB1] button will transpose the keyboard down one
semitone and [PB2] will transpose the keyboard up 1 semitone to a maxi-
mum of -/+ 12 semitones.
Pressing both [PB] buttons at the same time resets Transpose to 0.
Volume (B1)
When “Volume” is assigned, [PB1] sends descending volume (MIDI cc 7)
messages from 127-0 and [PB2] sends the same message but ascending.
Press and hold each of the buttons to change volume faster. Note that your
receiving instrument must be able to respond to this MIDI message, but
most instruments are.
Pan (C2)
Works the same way as Volume but the [PB1] and [PB2] buttons now send
descending/ascending panning messages (MIDI cc 10). Press and hold one of
the buttons to send messages faster.
Track (C#2)
If your DAW is supported by Nektar DAW Integration software, you’ll be able
to use [PB1] and [PB2] to select tracks.
Patch (D2)
If your DAW is supported by Nektar DAW Integration software, you’ll be able
to use [PB1] and [PB2] to select instrument patches.
Sustain/Modulation [S]
Because of its compact size, the SE25 does not have a sustain socket. You
can however activate sustain by holding the [S] button. Release [S] again to
deactivate sustain.
The [S] button can also be used to trigger modulation.
1. Enter Setup mode by pressing [S]+[2] buttons at the same time. The two
LEDs now blink red.
2. Select “Mod” by pressing the B2 key on the keyboard.
3. Once a function has been selected, SE25 immediately exits Setup mode.
The [S] button is now assigned to trigger modulation.
To change the setting back, complete steps 1-3 again but this time press the
A#2 key, labeled “Sustain”.
Part Two [2]
Part Two is a unique feature which allows you to completely change the
conguration of the keyboard with one button press and then return to orig-
inal settings on button release. With this feature you can instantly shift the
octave or transpose up or down, trigger two octaves when playing one note,
add an interval to a part or layer two sounds on dierent MIDI channels.
Activating Part Two
Part Two is active when the [2] button is pressed and held. Releasing [2]
deactivates Part Two again. By default, SE25 shifts the keyboard up by two
octaves when Part Two is activated. Try it, and experience how playing this
way is quite dierent from using the octave buttons.
Recalling Part Two Presets
Part Two settings can be stored in 5 preset locations for recall at any time.
Here are the steps to recall or load presets:
1. Enter Setup mode by pressing the [S]+[2] buttons at the same time. The
two LEDs now blink red.
2. Select “Recall” by pressing the E1 key.
3. Select location 1-5 by pressing the black number keys (example: press
F#1 to recall preset 2).
4. Press “Enter” by pressing the C3 key.
If you load preset 2, activating Part Two will now play a fth interval. See
the default preset chart in the next column under “Recall/Default Part Two
Presets”.
Part Two Programming Options
Programming Part Two presets is not complicated, but it’s easiest to start
from an existing preset that’s close to what you want. For example, if you
want the keyboard to play a layered note 2 octaves above the played note,
just recall preset 1 and switch layer on.
There are 5 programming options listed under the second red line above
keys E2-G#2.
To program a Part Two function, do the following:
1. Enter Setup mode by pressing the [S]+[2] buttons at the same time. The
two LEDs now blink red.
2. Select the function you want to set by pressing the corresponding key
on the keyboard (example: press E2 to set the Part Two octave).
3. If octave, channel or transport have been selected, the next step is to
set a value by pressing the black value keys 0-9. Press “Enter” C3 to
conrm and exit.
4. If Layer or Latch are selected, the change happens immediately be-
cause these two functions are either on or o.
Octave (E2): Sets the octave -/+ oset for Part Two. If you change the octave
for the default Part One, Part Two will play at the oset value set here. For
example: If Part Two octave is set to -1, Part two will always play one octave
below Part One.
To enter negative values, press C#1 rst “(0/-)” followed by the value.
Channel (F2): The MIDI channel for Part Two is an absolute value. So if you
set it to 3, Part Two will send data on MIDI Channel 3 regardless of the Global
Channel setting. If you set channel to 0 (default) Part Two will send on what-
ever the Global Channel is set to.
Transpose (F#2): Sets the Transpose -/+ oset for Part Two. If you change
the Transpose value for Part One, Part Two will play at the oset value set
here. For example: If Part Two transpose is set to 7, Part Two will always play
a fth above Part One.
To transpose down, press C#1 “(0/-)” rst, followed by the value.
Layer (G2): When on, plays Part 1 and Part 2 MIDI notes at the same time.
Latch (G#2): When on, triggers a Part Two note on message at rst press
and the corresponding note o value at the second press. You could trigger
drone notes using Part Two for example, and then play additional sections
over this drone using Part One.
Global Settings
The 7 functions accessible via C1-F#1 are global settings. Each of the
functions are programmed or operated in the following way:
1. Enter Setup mode by pressing the [S]+[2] buttons at the same time.
The two LEDs now blink red.
2. Select the function by pressing the corresponding key on the key-
board (example: press C#1 to change velocity curve).
3. Enter a numerical value using the black keys numbered 0-9.
4. Press “Enter” (C3) to conrm and exit.
Return To Default (C1)
You can revert to the default setting for a selected function by rst select-
ing the function (such as “Global Channel” via steps 1+2 in the process),
then pressing C1 “Return” to restore the default.
Velocity Curve (C#1)
There are 3 dierent keyboard velocity curves to choose from.
Select a velocity curve in step 3 using values 1-3.
Vel. Curve Num.Description
1Standard
2Soft, emphasis on lower values
3Hard, emphasis on higher values
Global Channel (D1)
MIDI notes as well as controls for volume or pan are sent on the Global
MIDI channel. MIDI channels can be used to send data to multiple desti-
nations at the same time.
In step 3, enter a value from 1-16 using the black number keys.
Sending a Program Change Message (D#1)
If your receiving device or software is able to receive a program change
message, it can be used to select sounds or presets on a device (for
example a General MIDI sound module).
Values in step 3 should be programmed from 0-127, which provides a
total of 128 program options.
Recall/Default Part Two Presets (E1)
As already mentioned in the Part Two section, settings can be recalled
from 5 dierent presets at any time. In step 3, enter value 1-5 to make
your selection. Below is an overview of the default presets.
1 (Default)2345
Octave20-113
Channel00220
Transpose00007
LayerOOOnOnOn
LatchOOOOOn
Store a Preset (F1)
If you store your settings to any of the 5 preset locations, it will overwrite
the default settings. The process is the same as recalling a preset so
simply enter a location number 1-5 in step 3.
Panic (F#1)
“Panic” sends out the all notes o and reset all controllers MIDI messages
on all 16 MIDI channels.
Once you have pressed F#1 in step 2, the reset will be sent and the SE25
will exit the Setup menu.
Owner’s Manual
Box Content
Your SE25 box contains the following items:
• The SE25 controller keyboard
• Printed Guide
• A standard USB cable
• Software license card
If any of the items above are missing, please let us know via email:
Connection and Power
The SE25 is USB Class Compliant. This means there is no driver to install
to get the keyboard set up with your computer. SE25 uses the built-in
USB MIDI driver which is already part of your operating system on Win-
dows and OS X, as well as iOS (via the optional camera connection kit).
To get started, connect the SE25 to your computer’s USB socket, via the
included USB cable.
Nektar DAW Integration
If your DAW is supported by Nektar DAW integration software, you’ll
need to rst create a user account on our website and subsequently
register your product to then gain access to the downloadable les
applicable to your product.
Start by creating a Nektar user account here:
www.nektartech.com/registration
Next follow the on-screen instructions given to register your product.
IMPORTANT: Make sure to read the installation instructions in the PDF
guide, included in the downloaded package, to ensure you don’t miss an
important step.
Using the SE25
Once you have connected the SE25 keyboard to your computer, you’ll
need to set it up to work with your MIDI software or DAW. This is made
easier if you have registered your product and downloaded Nektar DAW
integration les, but you can also check the documentation for your DAW
or MIDI software. You’ll typically nd a menu for conguring MIDI inputs
in Preferences or Options menus.
The following assumes you have completed that process and will look at
how the SE25 works as a generic controller.
SE25 user guide_ENGLISH_V4.indd 127.09.18 17:23
Product specificaties
| Merk: | Nektar |
| Categorie: | Keyboard |
| Model: | SE25 |
Heb je hulp nodig?
Als je hulp nodig hebt met Nektar SE25 stel dan hieronder een vraag en andere gebruikers zullen je antwoorden
Handleiding Keyboard Nektar

7 Juli 2023
6 Juli 2023
4 Juli 2023
3 Juli 2023
2 Juli 2023
26 Juni 2023
23 Juni 2023
Handleiding Keyboard
Nieuwste handleidingen voor Keyboard
21 April 2026
20 April 2026
18 April 2026
17 April 2026
10 April 2026
8 April 2026
7 April 2026
7 April 2026
6 April 2026
6 April 2026