Epson EH-QB1000B Handleiding
Bekijk gratis de handleiding van Epson EH-QB1000B (252 pagina’s), behorend tot de categorie Beamer. Deze gids werd als nuttig beoordeeld door 21 mensen en kreeg gemiddeld 4.3 sterren uit 9 reviews. Heb je een vraag over Epson EH-QB1000B of wil je andere gebruikers van dit product iets vragen? Stel een vraag
Pagina 1/252
Quick Setup
IMPORTANT: Before using this product, make sure you read these instructions
and the safety instructions in the online User’s Guide.
Note: Your product may differ from the illustrations on this sheet, but the
instructions are the same.
Choose a location
Keep the projector level and place it at a height so its lens is even with the top
or bottom of the screen and is centered horizontally. If this isn’t possible, use the
lens shift feature to reposition the image (see “Adjust the image”).
See the online User’s Guide for more information on where to place your
projector.
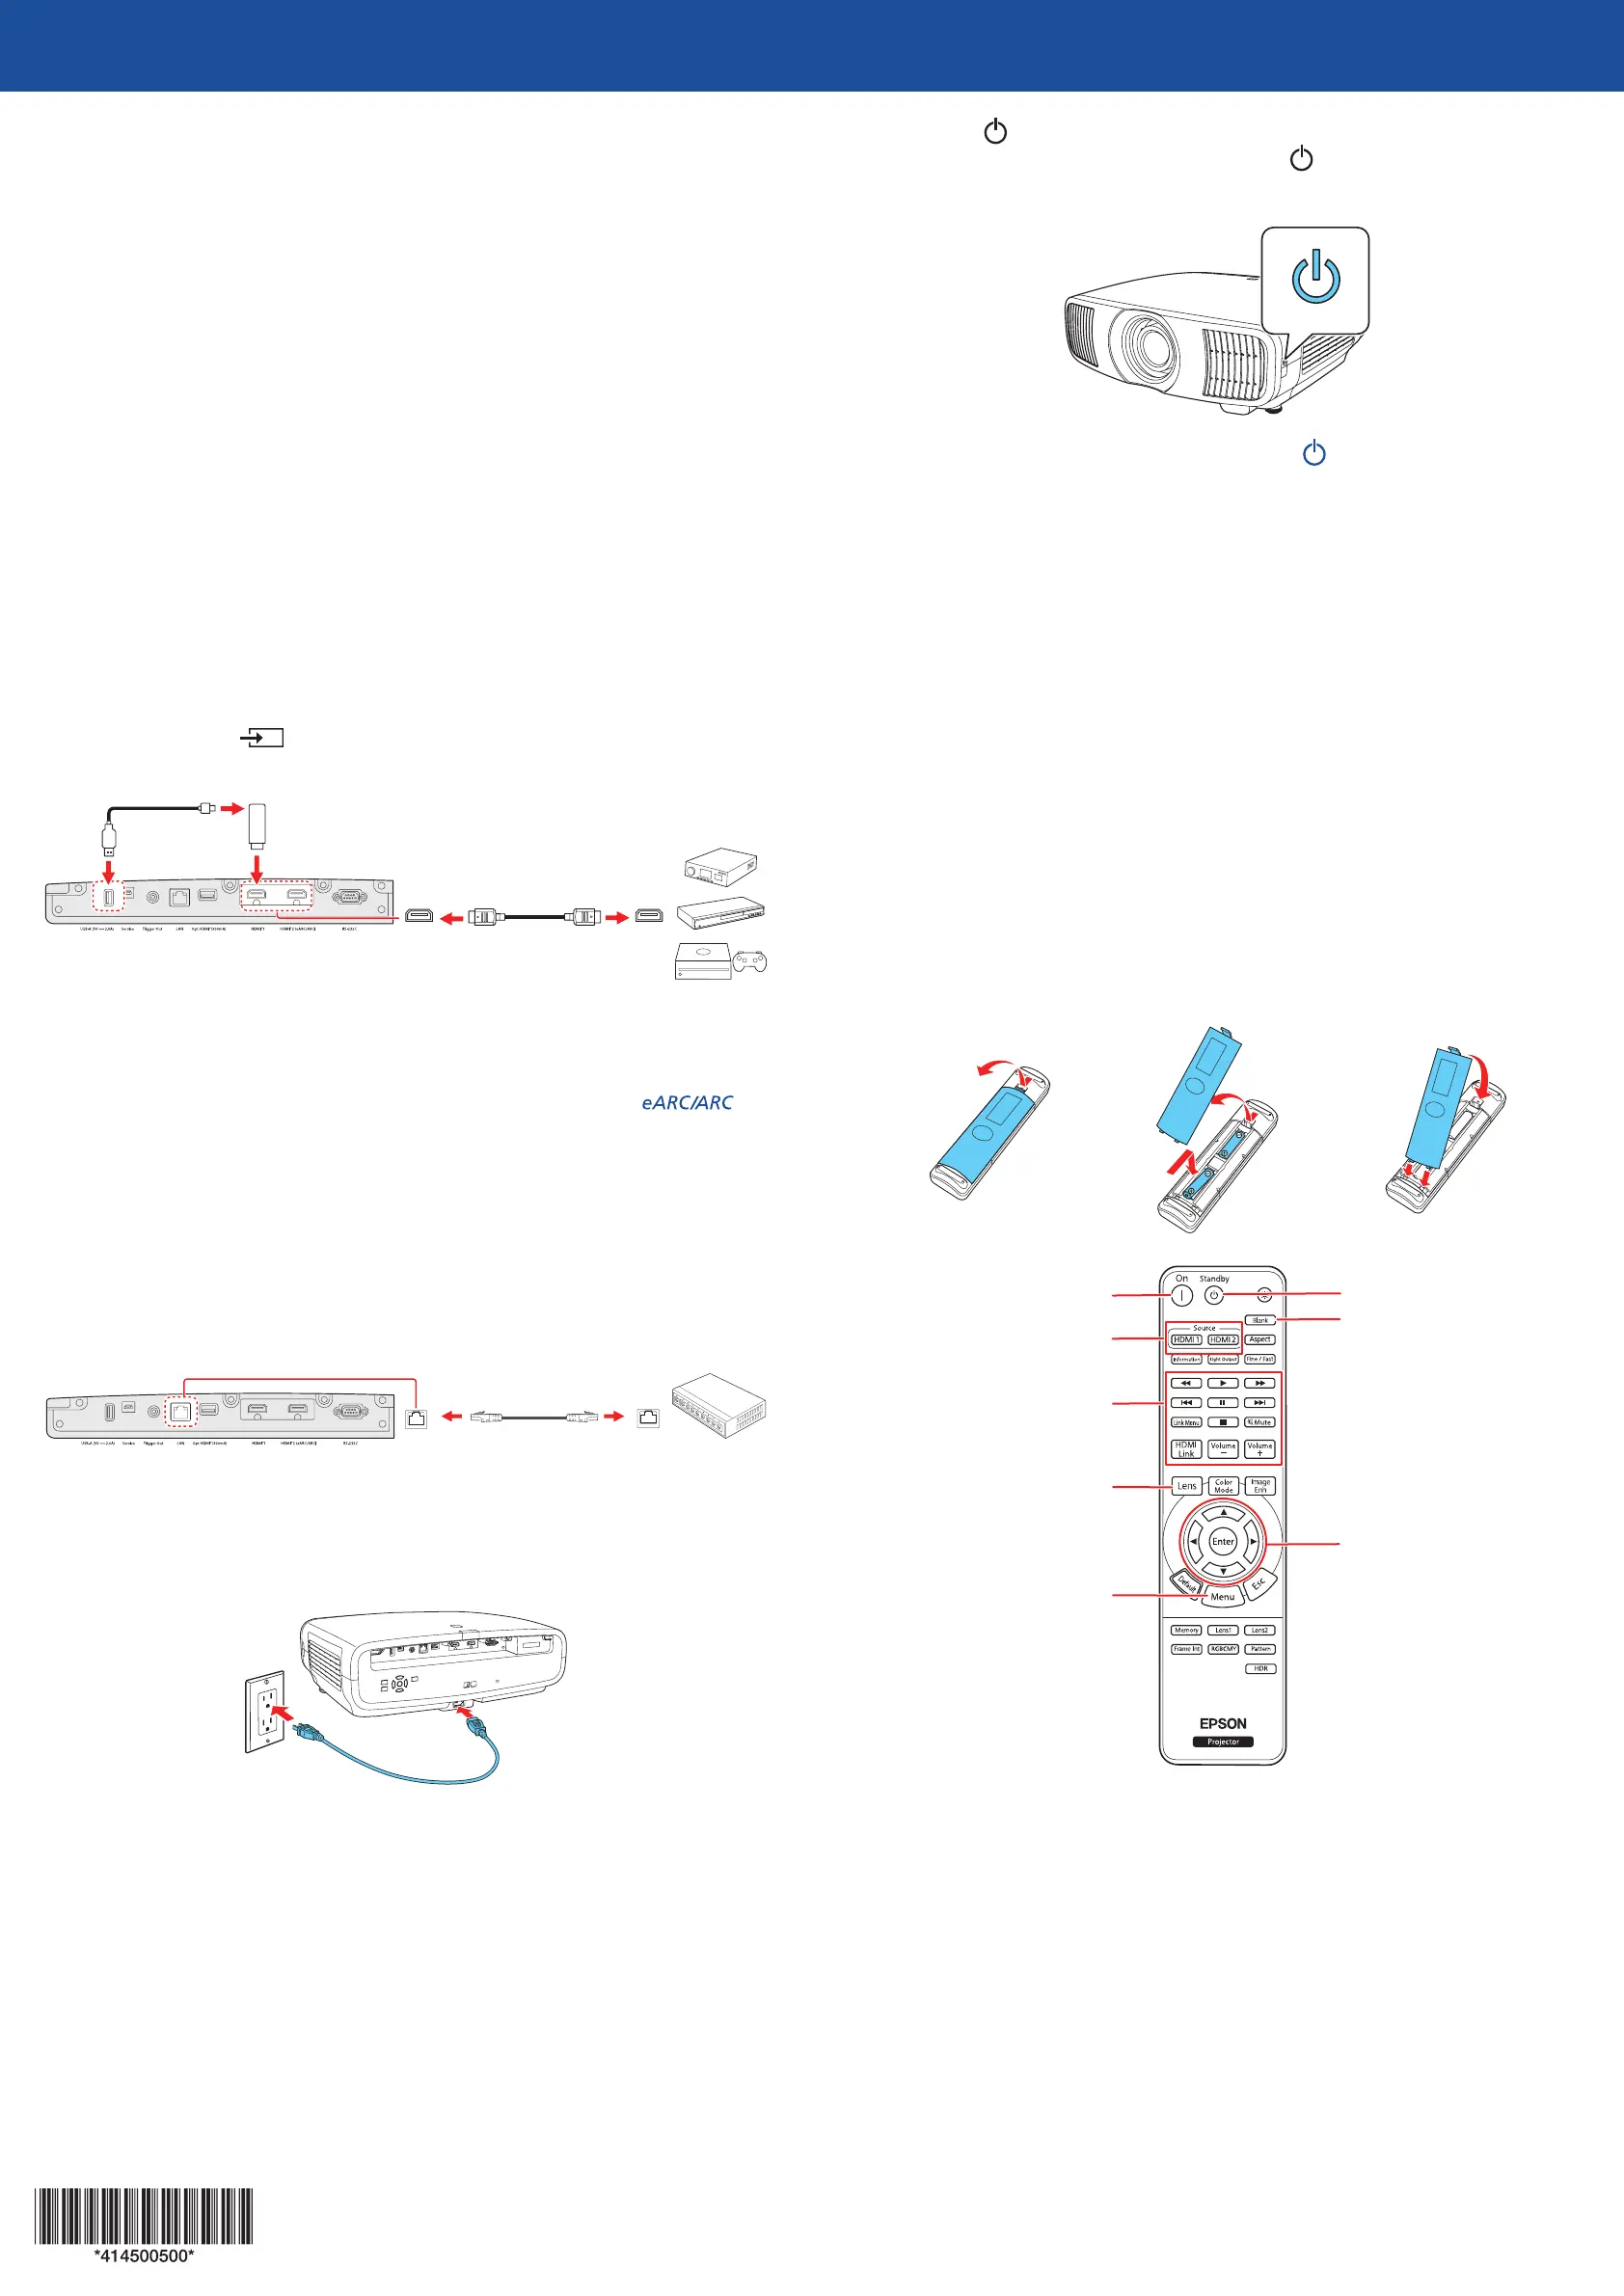
Connect the projector
Connect multiple video devices and use the Source buttons on the remote
control or the Source button on the projector to switch between them. For
additional connection types, see the online User’s Guide.
HDMI
TM
cable
Power supply
USB cable
Streaming
device
Note:
• When projecting images at 4K 120Hz, use an HDMI 2.1 rated cable (ultra-high
speed).
• You can output audio to an external sound system that supports
using the HDMI
™
2 (eARC/ARC) port.
• If you are connecting an optical HDMI cable that has a power supply USB cable,
you must also connect the cable’s USB power connector to the Opt.HDMI
™
(300mA) port.
Wired network
Connect the projector to your network using an Ethernet cable. See “Wired
network configuration” for more information.
Ethernet cable
Turn on your equipment
1
Plug in the projector.
2
Press the power button on the projector or the On button on the
remote control. The shutter opens and the power light flashes blue,
then stays on.
Note: To shut down the projector, press the power button on the
projector or the Standby button on the remote control, then press the
button again to confirm, if necessary. Wait for cooldown to complete
before unplugging the projector.
3
Use the arrow and Enter buttons on the remote control to select the focus,
image orientation, and language settings.
Note: To change these settings, see the online User’s Guide.
4
Turn on your video source.
5
If you don’t see an image, press one of the Source buttons on the remote
control to select the image source.
Note: If you still see a blank screen or have other display problems, see the
troubleshooting tips on this sheet.
Using the remote control
Install the batteries as shown (two AA batteries).
Choose which source to
display
Turn projector on
Access projector menus
Adjust zoom, focus,
and lens shift
Turn off projector
display
Navigate projector
menus
Turn projector off
Control connected
sources with HDMI
Link
For more information on using the remote control, see the online User’s Guide.
Adjust the image
1
Press the Pattern button on the remote control to display a test pattern.
2
Press the Lens button on the remote control and use the and buttons
to focus the image.
3
Press the Lens button on the remote control again and use the and
buttons to reduce or enlarge the image.
4
Press the Lens button on the remote control again and use the , ,
, and buttons to reposition the image.
Wired network
configuration
Follow these steps to set up your projector for a wired network connection.
1
Press the Menu button on the remote control, select the Network menu,
then press Enter.
2
Choose Network Settings and press Enter.
3
Select the Wired LAN menu and press Enter.
4
Choose IP Settings and press Enter.
5
If your network assigns addresses automatically, make sure the DHCP
setting is on. If not, make sure DHCP is off and enter the projector’s
IP Address, Subnet Mask, and Gateway Address, as needed. Then
press Esc.
6
To prevent the IP address from appearing on the network standby screen,
set the IP Address Display setting to Off.
7
When you are finished, return to the Network Settings menu and select Set
to apply your settings. Then select Yes to save the settings.
Note: If you are prompted to enter a password for Epson Web Control, you
can create a password or leave it blank. If you do not set a password, you
cannot use Epson Web Control.
8
Press the Menu button to exit the menu system.
Using web control
You can use a standard web browser to control the projector through the
network. A virtual remote control on your computer or mobile device screen lets
you perform many of the same functions as you can with the physical remote
control.
1
Open your web browser and enter the IP address of the projector you want
to monitor in the browser’s address bar. The Epson Web Control menu
opens.
If you’re not sure what the IP address of the projector is, turn the projector
on and select Wired LAN Info from the Network menu to display the IP
address of the projector. (Do not enter the leading zeroes.)
2
Select Basic Control or Remote. If you see a login screen, enter
EPSONWEB as the user name. If a password was created, enter the
password.
3
Use the on-screen buttons to operate the projector, as you would using the
remote control. See the online User’s Guide for details.
Turn off picture
and sound
Select input source
Troubleshooting
•
If you see a blank screen, check the following:
•
Make sure your computer or video device is properly connected.
•
Make sure the power and Status lights on the projector are blue and
not flashing.
•
Press the power button on the projector or the remote control to
wake the projector from standby or sleep mode, if necessary.
•
If you see a blank screen when a computer is connected, check the
following:
•
On Windows
®
, hold down the Windows key and press P at the same
time, then click Duplicate.
•
If you are using a Mac laptop with macOS 13 or newer, select System
Settings > Displays. Select the projector, then choose the mirror
option for your display from the Use as pop-up menu.
On macOS 12, select System Preferences > Displays > Display
Settings. Select the projector, then choose the mirror option for your
display from the drop-down menu.
On macOS 11 and older, open System Preferences and select
Displays. Click the Arrangement tab and select the Mirror Displays
checkbox.
•
If the projector does not respond to remote control commands, make sure
the batteries in the remote control are installed correctly. Replace the
batteries, if necessary.
EH-QB1000B/EH-QB1000W
Product specificaties
| Merk: | Epson |
| Categorie: | Beamer |
| Model: | EH-QB1000B |
Heb je hulp nodig?
Als je hulp nodig hebt met Epson EH-QB1000B stel dan hieronder een vraag en andere gebruikers zullen je antwoorden
Handleiding Beamer Epson

24 Maart 2026
20 Januari 2026
11 December 2025
11 December 2025
10 December 2025
9 December 2025
9 December 2025
9 December 2025
9 December 2025
9 December 2025
Handleiding Beamer
Nieuwste handleidingen voor Beamer
13 April 2026
11 April 2026
6 April 2026
6 April 2026
6 April 2026
31 Maart 2026
30 Maart 2026
30 Maart 2026
30 Maart 2026
29 Maart 2026