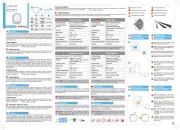
Salus HTRP-RF50 Handleiding
Salus
Smarth home
HTRP-RF50
Bekijk gratis de handleiding van Salus HTRP-RF50 (4 pagina’s), behorend tot de categorie Smarth home. Deze gids werd als nuttig beoordeeld door 5 mensen en kreeg gemiddeld 4.8 sterren uit 3 reviews. Heb je een vraag over Salus HTRP-RF50 of wil je andere gebruikers van dit product iets vragen? Stel een vraag
Pagina 1/4

3 Sec
Note: You cannot add two thermostats to the same zone. If you are trying
to do this, the following error will be displayed.
Hinweis:Es ist nicht möglich, derselben Zone zwei Thermostate hinzuzufügen.
Sollte dies versucht werden, wird der folgende Fehler angezeigt.
Remarque: Vous ne pouvez pas ajouter deux thermostats à la même zone.
Si vous essayez de le faire, l'erreur suivante s'affichera.
NB: Het is niet mogelijk om twee thermostaten aan dezelfde zone toe te voegen.
Als u dit probeert te doen, wordt de volgende foutmelding weergegeven.
Use right and left keys to select the day
of the programs.
Links- und Rechtstaste verwenden, um
den Tag der Programme auszuwählen.
Utilisez les touches directionnelles de
droite et de gauche pour sélectionner le
jour des programmes.
Gebruik de pijltoetsen naar rechts en
links om de dag van de programma's te
selecteren.
5/2 days - 12 schedules
7 days - 6 schedules
24 h - 42 schedules
13
EN Pairing with the TRV- oine
FR Appariement avec la TRV - hors ligne
DE Pairing mit dem TRV − oine
NL Koppelen met de radiatorkraan - oine
2
Make sure your TRV is in pairing mode. Please check TRV manual for full process. Max 6TRVs!
Stellen Sie sicher, dass sich Ihr TRV im Pairing-Modus bendet. Das vollständige Verfahren kann im TRV-Handbuch
nachgelesen werden. Max. 6 TRV!
Assurez-vous que votre TRV est en mode appariement. Consultez le manuel TRV pour un processus complet. Maximum 6 TRV !
Zorg ervoor dat uw radiatorkraan in de koppelingsmodus actief is. Raadpleeg de handleiding van de radiatorkraan voor het
volledige proces. Max. 6 radiatorkranen!
Follow the same steps to set up the date
Follow the same steps to set up the date
Follow the same steps to set up the date
Follow the same steps to set up the date
5
EN Pairing with the boiler receiver RX1/RX2
FR Appariement avec le récepteur de chaudière RX1/RX2
DE Pairing mit dem Boiler-Empfänger RX1/RX2
NL Koppelen met de ontvanger van de verwarmingsketel RX1/RX2
Make sure your receiver is in pairing mode. Please check receiver manual for full process.
Stellen Sie sicher, dass sich Ihr Empfänger im Pairing-Modus bendet. Das vollständige Verfahren kann im Emp-
fänger-Handbuch nachgelesen werden.
Assurez-vous que votre récepteur est en mode appariement. Consultez le manuel du récepteur pour un processus
complet.
Zorg ervoor dat uw ontvanger in de koppelingsmodus actief is. Raadpleeg de handleiding van de ontvanger voor
het volledige proces.
12
X2
OR
EN Device identication
EN Setting date and time
EN Setting the schedule
FR Identication de l'appareil
FR Réglage de l’heure et de la date
FR Réglage de l'horaire
DE Geräteerkennung
DE Einstellung von Datum und Zeit
DE Einstellung des Plans
NL Identicatie van het apparaat
NL Datum en tijd instellen
NL Het schema instellen
3 4
678
1234
678
2
5 sec
OR
When pairing the thermostats with the Wiring Center you can assign a group to a programmable thermostat. This will
allow control of up to 11 group thermostats. There can be maximum 2 groups per Wiring Center. You can also add a
KL04RFto the KL08RF, having a total of 12 zones.
Beim Pairing des Thermostats mit der Klemmleiste können Sie einem programmierbaren Thermostat eine Gruppe
zuweisen. Dadurch können Sie bis zu 11 Gruppen-Thermostate ansteuern. Es sind maximal 2 Gruppen pro Klemmleiste
möglich. Sie können der KL08RF zudem eine KL04RF hinzufügen, wodurch insgesamt 12 Zonen entstehen.
Lors de l'appariement des thermostats avec le Centre de câblage, il est possible d'affecter un groupe à un thermostat
programmable. Ceci permettra de contrôler jusqu'à 11 thermostats de groupe. Il peut y avoir au maximum 2 groupes
par Centre de câblage. Vous pouvez également ajouter un KL04RF au KL08RF, avec un total de 12 zones.
Als u de thermostaten met het Wiring Center koppelt, kunt u een groep toewijzen aan een programmeerbare
thermostaat. Hierdoor kunt u tot 11 groepthermostaten besturen. Er kunnen maximaal 2 groepen zijn per Wiring
Center. U kunt ook een KL04RF toevoegen aan de KL08RF, met in totaal 12 zones.
ufh use
3
4
5 6
12
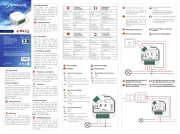
EN Power Up and button function
FR Mise sous tension et fonctions des boutons
DE Einschalten und Tastenfunktion
NL Opstarten en knopfuncties
EN Pairing with the Wiring Center - oine
FR Appariement avec le Centre de câblage - hors ligne
DE Pairing mit der Klemmleiste − oine
NL Koppelen met het Wiring Center - oine
OR
5 sec
OK key. Short press to conrm selection.
Long press to save and return home.
Long press to enter Program/Clock/HeatCool.
OK-Taste. Kurz gedrückt halten, um Auswahl zu bestäti-
gen. Lange gedrückt halten, um zu speichern und zum
Startbildschirm zurückzukehren. Lange gedrückt halten,
um Programm/Uhrzeit/Heizen/Kühlen einzugeben.
Touche OK. Appuyez brièvement pour conrmer la sélection.
Appuyez longuement pour enregistrer et retourner à l'écran d'accueil.
Appuyez longuement pour accéder à Programmation/Horloge/
Chauage-Refroidissement.
Okétoets. Kort drukken om de selectie te bevestigen. Lang
drukken om op te slaan en naar het beginscherm terug te
keren. Lang drukken om naar Programma/Klok/Verwarmen-
Koelen te gaan.
Decrease or increase Setpoint Temperature
.
Increase or decrease Day, Clock.
Augmenter ou diminuer la température de consigne.
Augmenter ou diminuer les paramètres Jour, Horloge.
Temperatursollwert verringern oder erhöhen.
Tag und Uhrzeit vor- oder zurückstellen.
Ingestelde temperatuur verlagen of verhogen.
Dag, klok verhogen of verlagen.
Mode selection.
Long press to return home without saving.
Short press to return to previous screen.
Modusauswahl.
Lange gedrückt halten um ohne Speichern
zum Startbildschirm zurückzukehren. Kurz
gedrückt halten um zum vorherigen
Bildschirm zurückzukehren.
Sélection du mode.
Appuyez longuement sur pour revenir à l’écran d'accueil
sans enregistrer.
Appuyez brièvement sur pour revenir à l'écran précédent.
Modusselectie. Lang drukken om naar het beginscherm terug te keren zonder op te slaan. Kort drukken om naar het vorige
scherm terug te keren.
Quick Guide
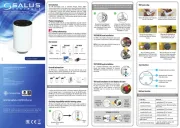
HTRP-RF (50) Thermostat
Introduction
HTRP - RF (50) is a stylish and accurate digital room thermostat. You can now simply adjust your home temperature
as desired in order to create a comfortable home environment.
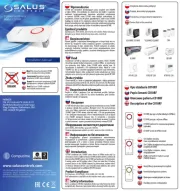
Product Compliance
This product complies with the essential requirements and other relevant provisions of Directives 2014/53/EU
(RED) and 2011/65/EU.
The full text of the EU Declaration of Conformity is available at the following internet address: www.saluslegal.com
Safety Information
Use in accordance with the regulations. Indoor use only. Keep your device completely dry. Disconnect your device
before cleaning it with a dry cloth.
2405-2480MHz; <14dBm
Einleitung
Das HTRP-RF(50) ist ein elegantes und präzises digitales Raumthermostat. Sie können die Temperatur Ihres Zuhauses nun
nach Wunsch einstellen und dadurch ein komfortables Wohnumfeld schaen.
Produktkonformität
Das Produkt erfüllt die wesentlichen Anforderungen und andere relevante Bestimmungen der Richtlinien
2014/53/EU (RED) und 2011/65/EU. Der vollständige Text der EU-Konformitätserklärung kann auf der folgenden
Internetseite eingesehen werden: www.saluslegal.com.
Sicherheitshinweise
Der Gebrauch muss in Übereinstimmung mit den Vorschriften erfolgen. Nur zum Gebrauch in Innenräumen
vorgesehen. Halten Sie Ihr Gerät vollständig trocken. Trennen Sie Ihr Gerät vom Strom, ehe Sie es mit einem
trockenen Tuch reinigen.
2405-2480MHz; <14dBm
Introductie
HTRP - RF (50) is een stijlvolle en nauwkeurige digitale kamerthermostaat. U kunt de temperatuur in uw huis voortaan
naar wens regelen om een aangename thuisomgeving te creëren.
Productconformiteit
Dit product voldoet aan de richtlijn 2011/65/EU en de radioapparatuurrichtlijn (RED) 2014/53/EU. De volledige
EU-conformiteitsverklaring vindt u op www.saluslegal.com.
Veiligheidsinformatie
Gebruik in overeenstemming met de voorschriften. Alleen gebruiken in binnenomgevingen. Zorg dat het apparaat
helemaal droog blijft. Ontkoppel uw apparaat voordat u het schoonmaakt met een droge handdoek.
2405-2480MHz; <14dBm
Introduction
HTRP - RF (50) est un thermostat d’ambiance numérique élégant et précis. Vous pouvez maintenant simplement régler la
température de votre maison comme vous le souhaitez an de créer un environnement familial confortable.
Conformité du produit
Ce produit est conforme à la norme 2011/65/EU et à la Directive sur les équipements radio (RED) 2014/53/EU. Texte
complet de la déclaration de conformité de l'UE disponible sur le site www.saluslegal.com.
Utilisation des informations sur la scurité
Conforme aux réglementations. Conçu pour un usage intérieur. Maintenez votre appareil au sec. Débranchez votre
appareil avant de le nettoyer avec un chion sec.
2405-2480MHz; <14dBm
OR
5 sec
5 sec
3
1 2
3
4 5 6 7
7
1
5
5 Sec
5 Sec
3 Sec 3 Sec
3 Sec
For pairing with RX2, set the internal switch of the receiver to RX2 and choose at step 4. After
that, follow the same procedure as described above.
Stellen Sie den internen Schalter des Empfängers auf RX2 ein, um das Pairing mit dem RX2 durchzuführen.
Wählen Sie bei Schritt 4 und befolgen Sie anschließend das oben beschriebene Verfahren.
Pour apparier avec RX2, réglez le sélecteur interne du récepteur sur RX2 et choisissez à l'étape
4. Ensuite, suivez la même procédure que celle décrite ci-dessus.
Stel de interne schakelaar van de ontvanger in op RX2 en kies bij stap 4 om de koppeling met
de RX2 te realiseren. Volg daarna dezelfde procedure die hierboven is beschreven.
5 sec
5 sec
5 sec
5 sec
FR/ NL / DE:
support@salus-controls.de
tel: +49 6108 8258515


1 2 3
Tap Scan for equipment to add your
thermostat.
Tippen Sie auf „Nach Geräten scannen“, um
Ihr Thermostat hinzuzufügen.
Appuyez sur Recherche d'équipement pour
ajouter votre thermostat
Tik op 'Naar apparaten zoeken' om apparaten
toe te voegen aan uw thermostaat
45
6 7 8
9 10 11
When pairing the thermostats with the Wiring Center you can assign a group to a programmable
thermostat. This will allow control of up to 11 group thermostats. There can be maximum 2
groups per Wiring Center. You can also add a KL04RFto the KL08RF, having a total of 12 zones.
Please follow the on screen instruction in order to complete the pairing process.
Beim Pairing des Thermostats mit der Klemmleiste können Sie einem programmierbaren
Thermostat eine Gruppe zuweisen. Dadurch können Sie bis zu 11 Gruppen-Thermostate
ansteuern. Es sind maximal 2 Gruppen pro Klemmleiste möglich. Sie können der KL08RF zudem
eine KL04RF hinzufügen, wodurch insgesamt 12 Zonen entstehen.
Lors de l'appariement des thermostats avec le Centre de câblage, il est possible d'affecter un
groupe à un thermostat programmable. Ceci permettra de contrôler jusqu'à 11 thermostats de
groupe. Il peut y avoir au maximum 2 groupes par Centre de câblage. Vous pouvez également
ajouter un KL04RF au KL08RF, avec un total de 12 zones.
Als u de thermostaten met het Wiring Center koppelt, kunt u een groep toewijzen aan een
programmeerbare thermostaat. Hierdoor kunt u tot 11 groepthermostaten besturen. Er kunnen
maximaal 2 groepen zijn per Wiring Center. U kunt ook een KL04RF toevoegen aan de KL08RF,
met in totaal 12 zones.
EN Setting the schedule
FR Réglage de l'horaire
DE Einstellung des Plans
Note: Once connected to the App, the time and date will update automatically. Select the desired
programming mode (5/2 days, 7 days or 24h) and create your own schedule.
Hinweis: Nach Verbindung mit der App werden Zeit und Datum automatisch aktualisiert. Stellen
Sie den gewünschten Programmiermodus (5/2 Tage, 7 Tage oder 24h) ein und erstellen Sie Ihren
eigenen Plan.
Remarque: une fois connecté à l'application, l'heure et la date seront mises à jour
automatiquement. Sélectionnez le mode de programmation souhaité (5/2 jours, 7 jours ou 24 h)
et créez votre propre horaire.
NB: Wanneer er verbinding met de app is, worden de datum en tijd automatisch bijgewerkt.
Selecteer de gewenste programmeringsmodus (5/2 dagen, 7 dagen of 24u) en stel uw eigen
schema in.
NL Het schema instellen
4
7 8
910
1 2 3
4 5 6
1
4 5
32
Make sure the TRV is in pairing
mode
Stellen Sie sicher, dass sich das
TRV im Pairing-Modus bendet.
Assurez-vous que la TRV est en
mode appariement.
Zorg ervoor dat de radiatorkraan
in de koppelingsmodus actief is
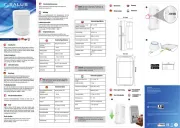
EN Factory Reset
FR Retour aux paramètres d'usine
DE Zurücksetzung auf Werkseinstellung
NL Standaardinstellingen herstellen
Befolgen Sie bitte die Anweisungen auf dem Bildschirm, um den Pairing-Prozess abzuschließen.
Verknüpfen Sie anschließend das/die TRV mit dem/den Thermostat(en) (obligatorisch). Max. 6 TRV!
Suivez les instructions à l'écran pour terminer le processus d'appariement. Après cela, continuez
en associant le(s) TRV au(x) thermostat(s) (obligatoire). Maximum 6 TRV !
Volg de instructies op het scherm om het koppelingsproces te voltooien. Ga daarna door met het
koppelen van de radiatorkra(a)n(en) met de thermosta(a)t(en) (verplicht). Max. 6 radiatorkranen!
Please follow the on screen instruction in order to complete the pairing process. After that
continue by associating the TRV(s) to the thermostat(s) (mandatory). Max 6TRVs!
EN Pairing with the boiler receiver RX1/RX2 - online Pairing mit dem Boiler-Empfänger RX1/RX2 − onlineDE
FR Appariement avec le récepteur de chaudière RX1/RX2 - en ligne Koppelen met de ontvanger van de verwarmingsketel RX1/RX2 - onlineNL
7 8
11 12
1 2 3
EN Device identication
FR Identication de l'appareil
DE Geräteerkennung
NL Identicatie van het apparaat
Note: To identify your devices, tap the icon on the app screen. The LED (or screen) on the
enquired device will flash.
Hinweis: Tippen Sie auf das Symbol auf dem App-Bildschirm, um Ihre Geräte zu erkennen. Die
LED (oder der Bildschirm) am angefragten Gerät leuchtet auf.
Remarque: pour identifier vos appareils, appuyez sur l'icône sur l'écran de l'application. Le
voyant (ou l'écran) de l'appareil identifié clignotera.
NB: Tik op het pictogram op het scherm van de app om uw apparaten te identificeren. Het
lampje (of scherm) op het aangesproken apparaat zal knipperen.
5
6
69
10 11 12 13
EN Pairing with the Wiring Center - online
FR Appariement avec le Centre de câblage - en ligne
DE Pairing mit der Klemmleiste − online
NL Koppelen met het Wiring Center - online
12 13
EN Pairing with the TRV - online
FR Appariement avec la TRV - en ligne
DE Pairing mit dem TRV − online
NL Koppelen met de radiatorkraan - online
1 2 3 4
Note: The TRV LED will flash orange until the association process is complete. Once this action has
finished the LED will go off.
Hinweis: Die LED des TRV blinkt orange, bis der Verknüpfungsprozess abgeschlossen ist. Sobald
diese Aktion abgeschlossen ist, erlischt die LED.
Remarque: le voyant de la TRV clignote en orange jusqu'à ce que le processus d'association
soit terminé. Une fois cette action terminée, le voyant s'éteindra.
NB: Het lampje van de radiatorkraan zal oranje knipperen tot het koppelingsproces is
voltooid. Zodra deze actie is beëindigd, gaat het lampje uit.
1 2 3
45
5 Sec 5 Sec X2
3 Sec 3 Sec
Tap Scan for equipment to add your
thermostat.
Tippen Sie auf „Nach Geräten scannen“, um
Ihr Thermostat hinzuzufügen.
Appuyez sur Recherche d'équipement pour
ajouter votre thermostat
Tik op 'Naar apparaten zoeken' om apparaten
toe te voegen aan uw thermostaat
Make sure your receiver is in pairing mode. Please check receiver manual for full process.
Stellen Sie sicher, dass sich Ihr Empfänger im Pairing-Modus bendet. Das vollständige Verfahren kann im Emp-
fänger-Handbuch nachgelesen werden.
Assurez-vous que votre récepteur est en mode appariement. Consultez le manuel du récepteur pour un processus
complet.
Zorg ervoor dat uw ontvanger in de koppelingsmodus actief is. Raadpleeg de handleiding van de ontvanger voor
het volledige proces.
For pairing with RX2, set the internal switch of the receiver to RX2 and choose at step 4. After
that, follow the same procedure as described above.
Stellen Sie den internen Schalter des Empfängers auf RX2 ein, um das Pairing mit dem RX2 durchzuführen.
Wählen Sie bei Schritt 4 und befolgen Sie anschließend das oben beschriebene Verfahren.
Pour apparier avec RX2, réglez le sélecteur interne du récepteur sur RX2 et choisissez à l'étape
4. Ensuite, suivez la même procédure que celle décrite ci-dessus.
Stel de interne schakelaar van de ontvanger in op RX2 en kies bij stap 4 om de koppeling met
de RX2 te realiseren. Volg daarna dezelfde procedure die hierboven is beschreven.
Product specificaties
| Merk: | Salus |
| Categorie: | Smarth home |
| Model: | HTRP-RF50 |
Heb je hulp nodig?
Als je hulp nodig hebt met Salus HTRP-RF50 stel dan hieronder een vraag en andere gebruikers zullen je antwoorden
Handleiding Smarth home Salus
28 Juli 2025
28 Juli 2025

28 Juli 2025
28 Juli 2025
28 Juli 2025
28 Juli 2025

28 Juli 2025

11 Mei 2023

26 April 2023

19 April 2023
Handleiding Smarth home
- Airlive
- Niko
- Burg-Wachter
- Sanus
- Aiphone
- Ajax
- Renkforce
- Energenie
- Alecto
- Ferguson
- Byron
- Denver
- Lutron
- Danfoss
- EMOS
Nieuwste handleidingen voor Smarth home

29 Juli 2025

28 Juli 2025
15 Juli 2025
14 Juli 2025

14 Juli 2025

6 Juli 2025

5 Juli 2025
5 Juli 2025
5 Juli 2025

5 Juli 2025