Noctua NF-A4x10 24V PWM Handleiding
Noctua Hardwarekoeling NF-A4x10 24V PWM
Bekijk gratis de handleiding van Noctua NF-A4x10 24V PWM (2 pagina’s), behorend tot de categorie Hardwarekoeling. Deze gids werd als nuttig beoordeeld door 88 mensen en kreeg gemiddeld 4.2 sterren uit 8 reviews. Heb je een vraag over Noctua NF-A4x10 24V PWM of wil je andere gebruikers van dit product iets vragen? Stel een vraag
Pagina 1/2
NOCTUA NF-A4x10 24V PWM
INSTALLATION MANUAL
Scan this code to display
multilingual manuals on
your phone.
Installation
This document includes some instructions for
installing, running and cleaning your NF-A4x10 24V
PWM.
Should you encounter any difculties, please
check the FAQs on our website (faqs.noctua.at)
and don’t hesitate to contact our support team at
support@noctua.at.
Multilingual versions of this manual are available on our
website: www.noctua.at/manuals
1
The NF-A4x10 24V PWM comes with a 4-pin PWM
fan connector for PWM based speed control. Please
note that the fan can also be connected to standard
3-pin fan headers, though. When connected to 3-pin
fan headers, the fan will run at full speed.
The included NA-AC9 adaptor cable allows the fan to
be connected to the 2-pin JST XHP-2 2.5mm sockets
used on many popular 3D printer models (e.g. Creality
Ender 3 and CR-10, Anycubic Mega).
If you would like to connect the fan to other fan
headers, please use the supplied OmniJoin
TM
adaptor
set as described below.
The fan features a short 20cm primary cable in order to
help you minimise cable clutter in typical applications.
If you need a longer cable, please add the supplied
30cm extension (NA-EC1).
The NF-A4x10 24V PWM comes with a Low-Noise
Adaptor (NA-RC8) that allows you to reduce the fan
speed from 5000 to 4100rpm. You can either use the
adaptor to set the fan to a xed speed of 4100rpm (if
speed control is deactivated) or to cap the maximum
speed to 4100rpm during PWM speed control.
Dear customer,
Congratulations on choosing the Noctua NF-A4x10
24V PWM.
We at Noctua always strive to achieve superior quiet
cooling performance regardless of whether it’s a big
200mm fan or a small 40mm one. That’s why the
NF-A4x10 24V PWM sports many of the features
and advanced aerodynamic design measures of our
award-winning larger models, making it perhaps the
most thoroughly optimised 40mm fan on the market.
Each Noctua fan is double-checked for awless
operation by our quality control team before it leaves
the factory and I’m condent that you will be able to
sense some of the research, attention and care we’ve
put into making this product.
Enjoy your NF-A4x10 24V PWM!
Yours sincerely,
Roland Mossig, Noctua CEO
Included mounting parts:
OmniJoin™ adaptor setNA-AC9
4-pin molex to 2-pin
adaptor cable
4x fan screws4x NA-AV3
anti-vibration mounts
If you replace an existing 40mm fan with the
NF-A4x10 24V PWM in devices such as 3D printers,
it is usually best to use the screws (or other mounting
mechanism) used for the original fan.
Caution: Being a 24V fan, the NF-A4x10 24V cannot
be run at 12V and requires a starting voltage of at
least 17V. It is therefore not suitable for standard PC
applications.
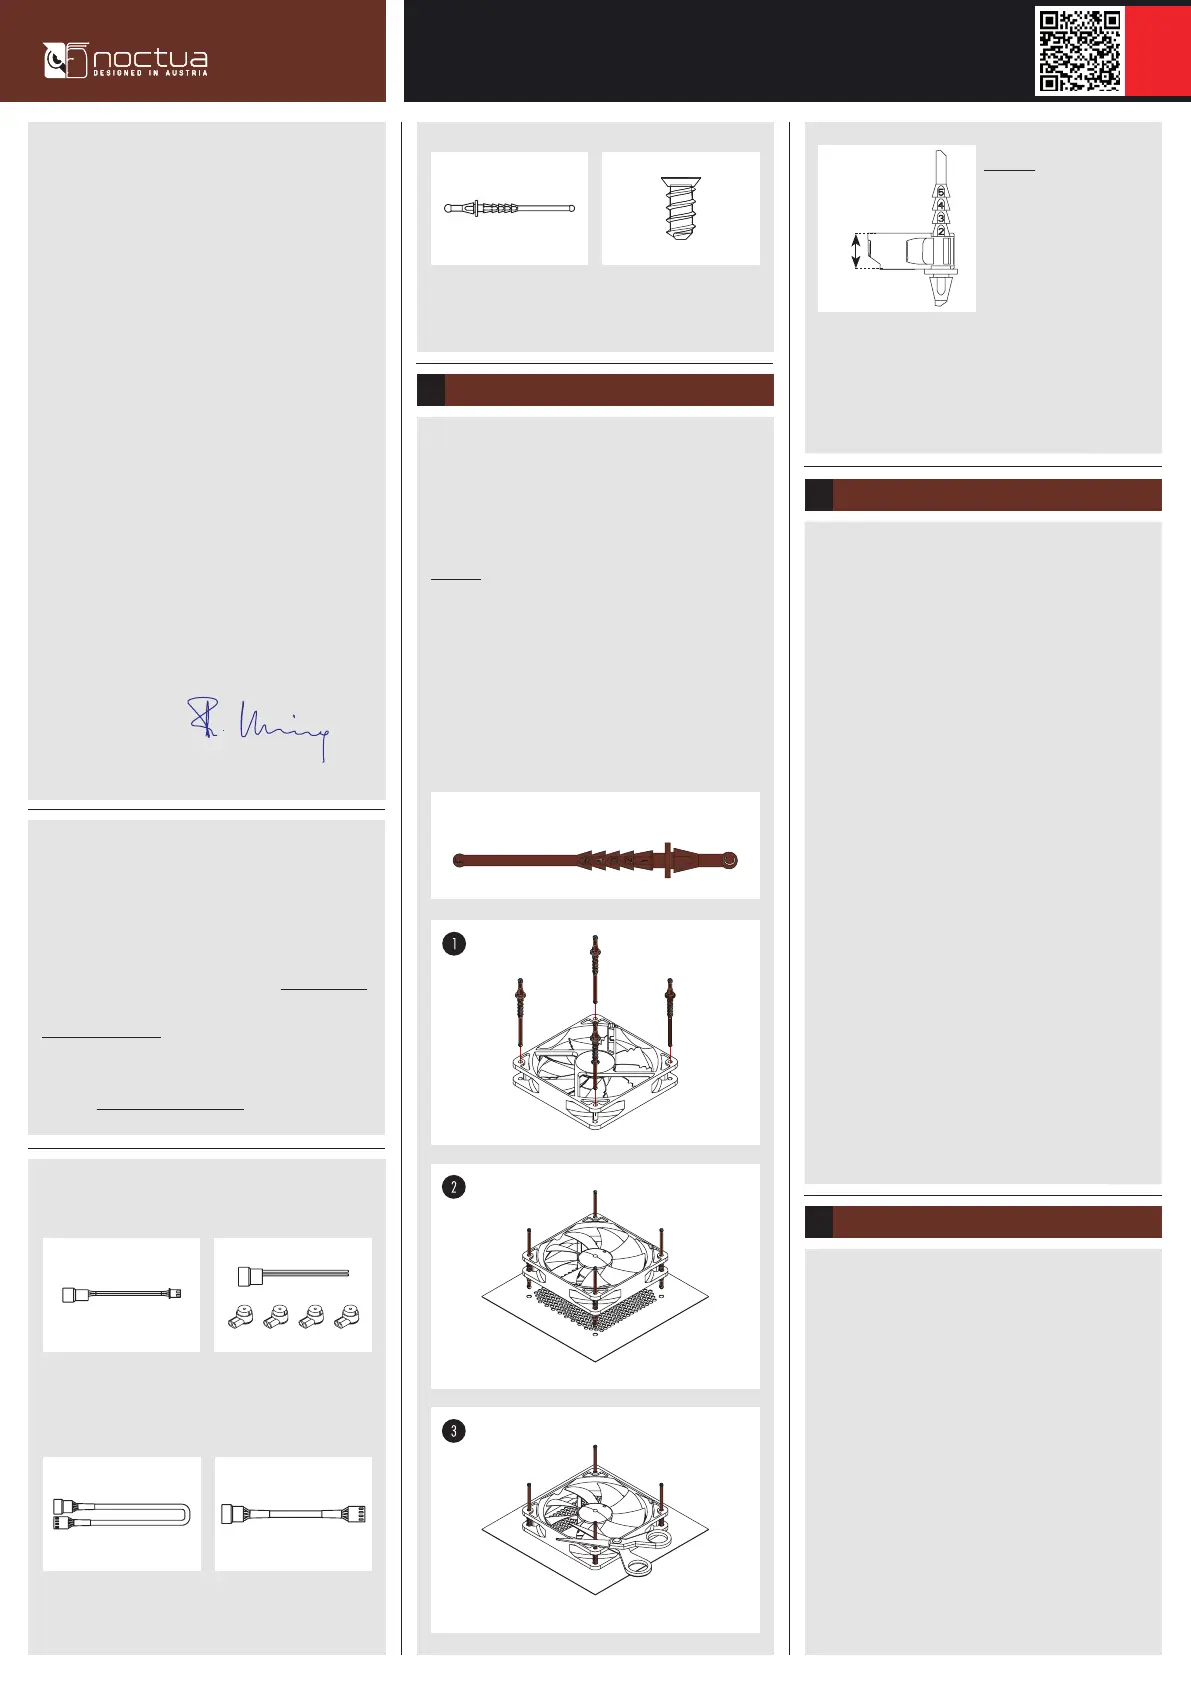
For installing the fan using the NA-AV3 anti-vibration
mounts, please rst pull the F side through the fan’s
mounting holes until pawl 2 is all the way through the
rst hole.
Connection
2
Using the OmniJoin
TM
adaptor set3
The supplied OmniJoin
TM
adaptor set allows you to
easily connect the NF-A4x10 24V PWM to proprietary
fan headers.
Please rst identify the individual leads of the OmniJoin
TM
adaptor and the original fan. The OmniJoin
TM
adaptor
uses black for ground (GND) and red for +24V.
The black lead of the adaptor has to be matched with
the original GND lead and the red adaptor cable with
the original +24V lead. Many fan cables use the same
colours as the OmniJoin
TM
adaptor, but please note that
there is no guarantee for this, so make sure to correctly
identify the GND and +24V leads of the original fan.
Please refer to the manual that came with the device or
contact the device manufacturer if in doubt.
Then pull the C side through the mounting holes of the
case. If the long ends of the mounts are in the way, you
can use scissors to cut them after installation. Note
that this will then make them difcult to reinstall in the
future.
Caution: Only pull pawl 2
through the rst hole. Don’t
overstretch the mounts
by pulling further pawls
through!
10mm
NA-RC8
Low-Noise Adaptor (L.N.A.)
NA-EC1
30cm extension cable
F = fan side C = case side
Product specificaties
| Merk: | Noctua |
| Categorie: | Hardwarekoeling |
| Model: | NF-A4x10 24V PWM |
Heb je hulp nodig?
Als je hulp nodig hebt met Noctua NF-A4x10 24V PWM stel dan hieronder een vraag en andere gebruikers zullen je antwoorden
Handleiding Hardwarekoeling Noctua

14 Juli 2025
14 April 2025
14 April 2025
14 April 2025
14 April 2025
9 April 2025
20 November 2024
22 Oktober 2024
22 Oktober 2024
25 September 2024
Handleiding Hardwarekoeling
Nieuwste handleidingen voor Hardwarekoeling
26 Mei 2026
19 Mei 2026
18 Mei 2026
14 Mei 2026
14 Mei 2026
12 Mei 2026
10 Mei 2026
8 Mei 2026