MRP Ribbon Coil Handleiding
MRP
Niet gecategoriseerd
Ribbon Coil
Bekijk gratis de handleiding van MRP Ribbon Coil (6 pagina’s), behorend tot de categorie Niet gecategoriseerd. Deze gids werd als nuttig beoordeeld door 3 mensen en kreeg gemiddeld 5.0 sterren uit 2 reviews. Heb je een vraag over MRP Ribbon Coil of wil je andere gebruikers van dit product iets vragen? Stel een vraag
Pagina 1/6

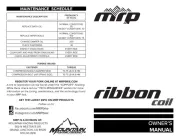
MAINTENANCE DESCRIPTION
FREQUENCY
(in hours)
REPLACE BATH OIL
NORMAL CONDITIONS:
50
MUDDY CONDITIONS: 30
REPLACE WIPER SEALS
NORMAL CONDITIONS:
100
MUDDY CONDITIONS: 75
CHANGE DAMPER OIL 200
CHECK FASTENERS 30
INSPECT STANCHIONS EVERY RIDE
CLEAN DIRT AND MUD FROM STANCHIONS EVERY RIDE
CHECK ADJUSTMENT CONTROLS EVERY RIDE
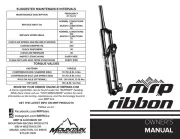
TORQUE VALUES
FASTENER TORQUE
COMPRESSION BOLT (DAMPER SIDE) 70-75 LB-IN 8 NM
COMPRESSION BOLT (AIR SPRING SIDE) 70-75 LB-IN 8 NM
REGISTER YOUR FORK ONLINE AT MRPBIKE.COM
A link to registration can be found under the “SUPPORT” heading.
While there check out our “TECH RESOURCES” section for more
information on the tuning, maintenance, and the technology found
in your MRP fork.
MRP IS A DIVISION OF:
MOUNTAIN RACING PRODUCTS
580 N WESTGATE DR.
GRAND JUNCTION, CO 81505
970.241.3518
GET THE LATEST INFO ON MRP PRODUCTS
Follow us on:
Facebook.com/MRPbike
Instagram.com/MRPbike
MAINTENANCE SCHEDULE
OWNER’S
MANUAL

IMPORTANT CONSUMER SAFETY INFORMATION
WARNING: RIDING A BIKE IS DANGEROUS. NOT PROPERLY
MAINTAINING OR INSPECTING YOUR BIKE AND ITS
COMPONENTS IS EVEN MORE DANGEROUS. IT IS ALSO
DANGEROUS TO NOT READ AND FOLLOW THESE
INSTRUCTIONS.
Thank you for choosing MRP. This owner’s manual is your
FORK INSTALLATION
1. Remove your old fork from the bicycle. Measure the diameter and
length of your old fork’s steerer tube to ensure that your new steerer
tube is the correct diameter and sucient length for the installation.
If your MRP fork has a tapered steerer tube, be sure to leave enough
room above the taper to allow for proper stem installation.
2. Remove the crown race from your old fork.
3. Press the crown race onto your new fork. (See Figure #1)
4. Preassemble the fork on the bike with the headset, stem, and
spacers (optional). Refer to your stem manufacturer’s instructions to
determine how much room is needed to clamp the stem.
5. Mark the steerer tube at the top of the stem. The steerer tube will
now need to be cut to the correct length. Disassemble and cut 3mm
MAINTENANCE LOG
DATE PROCEDURE

(1/8”) below the mark. Consult your dealer or mechanic if you don’t
have the proper tools to cut the steerer tube.
6. The star-fangled nut must now be installed into the steer tube. If you
don’t have the set tool, we recommend dealer installation of this part.
(See Figure #3)
7. Clean and grease all headset bearings and races to prepare them
for assembly. Note: Replace the bearings if there is any sign of wear or
corrosion.
8. Now loosely assemble the headset, stem and handle bars as done in
step four.
9. Install the headset according to the manufacturer’s instructions until
there is no play and the fork turns smoothly.
10. Install your front brake and adjust according to the manufacturer’s
instructions.
11. Install the wheel on the fork. Proper installation of the axle is
communicated in the next section of this manual.
12. Check to see that the brakes are adjusted and properly working.
Make sure that the brake cable does not interfere with any part of the
bike and is secured under the brake hose clamp on the fork brace.
Make sure your brakes are adjusted and functioning properly, and the
brake hose does not interfere with any part of the bike when the fork is
IMPORTANT BRAKE INFORMATION:
THE RIBBON COIL FORK FEATURES A POST MOUNT FOR 180mm
ROTORS. SHOULD YOU WANT TO USE A LARGER ROTOR, MAKE
SURE TO USE THE APPROPRIATE DISC BRAKE ADAPTOR AS
RECOMMENDED BY YOUR BRAKE MANUFACTURER. FAILURE TO DO
SO COULD RESULT IN SERIOUS INJURY OR DEATH.
S tar F angled Nut
S teerer Tube
S teering S t
r
F ram
Hea
em
Optional Headset S pace
Headset Upper R ace
e with
dset C ups
Headset Lower R ace
F ork C rown
FIGURE 1
FIGURE 2
FIGURE 3
SPRING AND TRAVEL CHANGE (CONTINUED)
PRELOAD ADJUSTMENT
Preloading the coil spring compresses it without initiating travel. As a
result, the breakaway force to initiate travel is increased. Thus, greater
force is required to achieve a given sag point on a preloaded spring
than a spring without preload. Adding preload reduces sag, removing
preload increases it.
The Ribbon Coil has adjustable preload underneath the cap
on the top of the spring-side fork leg. Your fork is shipped with zero
preload. The adjustment is made by a 3mm hex fitting. You have a
total range of approximately ten and half rotations. Additionally, your
fork shipped with a preload washer that can be installed to add the
equivalent of two more rotations. Installing that washer and setting
preload to max will add approximately 7% to the force required to
bottom-out the fork. If you cannot hit your desired sag by tuning
preload, consider a lighter or firmer spring rate.
to hold the Ramp Control adjustment stationary as the spring screw is
tightened (if you do not have the rebound removal knob refer to 12b). If
the screw encounters resistance before fully tightening, oil may still be
trapped in the socket of the Ramp Control needle. Remove the screw
and use a cotton swab to wick away oil pooled in the hex socket, then
install the screw and tighten to 8Nm.
12b) If the rebound removal knob is not used, before installing the
screw use the 3 mm hex key to screw the Ramp Control needle inside
the spring rod until it is near the end of the spring rod. Use a cotton
swab to wick away any oil trapped in the socket of the Ramp Control
needle. Insert the key of the Ramp Control screw into the socket of the
Ramp Control needle and thread the screw into the rod. Tighten the
screw to 8Nm.
13) Wipe away any oil on the Ramp Control screw and install the orange
Ramp Control knob. Now turn the Ramp Control knob counterclockwise
until it stops, to set the Ramp Control to its “minimum” setting.
14) If you backed-out the spring-side top cap in step one, tighten it
using an HG-spline cassette tool now. Install the fork back on your bike
and adjust the spring pre-load and Ramp Control to your liking.
Product specificaties
| Merk: | MRP |
| Categorie: | Niet gecategoriseerd |
| Model: | Ribbon Coil |
Heb je hulp nodig?
Als je hulp nodig hebt met MRP Ribbon Coil stel dan hieronder een vraag en andere gebruikers zullen je antwoorden
Handleiding Niet gecategoriseerd MRP
6 Juli 2025
5 Juli 2025
Handleiding Niet gecategoriseerd
- Alfen
- XYZprinting
- Seymour Duncan
- GoldAir
- King Canopy
- Yamiry
- Parallels
- Accucold
- G.Skill
- Transcend
- Alfatron
- Audioline
- Altra
- Rio
- Pit Boss
Nieuwste handleidingen voor Niet gecategoriseerd
6 Juli 2025

6 Juli 2025
6 Juli 2025
6 Juli 2025
6 Juli 2025
6 Juli 2025
6 Juli 2025
6 Juli 2025
6 Juli 2025

6 Juli 2025