Chinook Whirlwind Guide 5 Handleiding
Bekijk gratis de handleiding van Chinook Whirlwind Guide 5 (2 pagina’s), behorend tot de categorie Tent. Deze gids werd als nuttig beoordeeld door 42 mensen en kreeg gemiddeld 4.4 sterren uit 2 reviews. Heb je een vraag over Chinook Whirlwind Guide 5 of wil je andere gebruikers van dit product iets vragen? Stel een vraag
Pagina 1/2
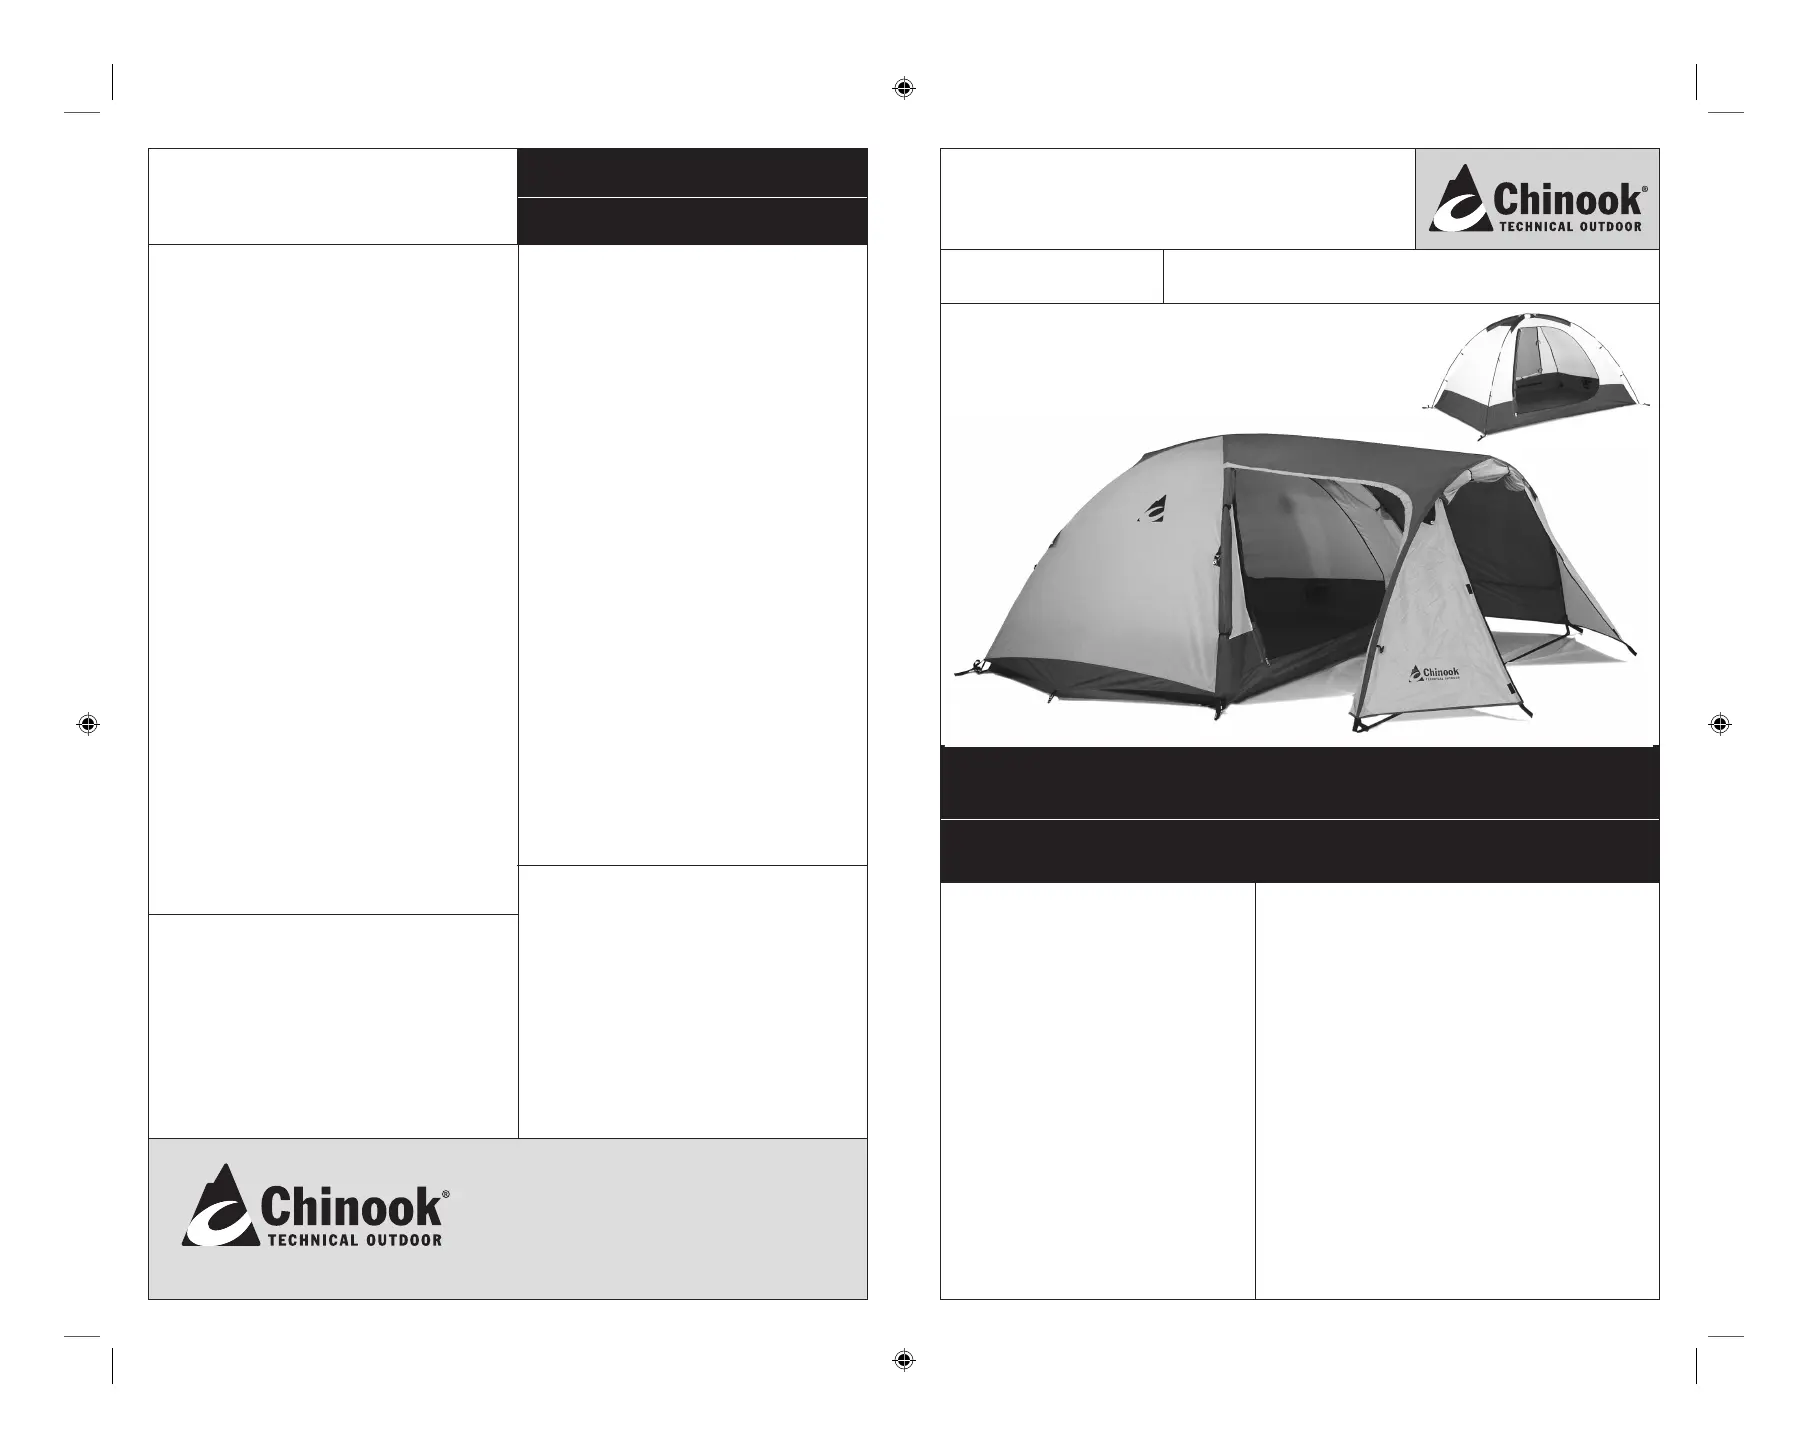
Whirlwind Guide 5
5-person tent
tent assembly instructions
instructions de montage
tent parts:accessoires de tente:
> Whirlwind Guide 5Tent Body (1)
> Whirlwind Guide 5 Fly (1)
> Tent Body poles (2)
220"/559 cm long (10 sections)
> Vestibule pole (1)
197"/500 cm long (9 sections)
> Ridge pole (1)
122.5"/311 cm long (6 sections)
> Tent peg set
> Guylines
> Stuff Sacks (3)
• 1 Peg stuff sack
• 1 Pole stuff sack
• 1 Tent stuff sack
Tente à 5 personnes
Whirlwind Guide 5
use & care
utilisation et entretien
> Tente Whirlwind Guide 5
> Double toit Whirlwind Guide 5
> Armature de tente
220"/559 cm longueur (10 sections)
> Armature de vestibule
197"/500 cm longueur (9 sections)
> Faitière
122.5"/311 cm longueur (6 sections)
> Ensemble de piquets de tente
> Tendeurs
> Sacs de rangement
• Sac de rangement pour piquets
• Sac de rangement pour armature
• Sac de rangement pour tente
CLEANING AND STORAGE
•Set up the tent and wipe it down with a mild soap
(liquid hand soap works well) and lukewarm water
solution. Rinse thoroughly and dry completely. Never
machine wash or dry as this can cause damage to the
tent’s protective coating and seams.
•Never store your tent wet. After cleaning, make sure
the tent is completely dry before storing or mold and
mildew are likely to occur. Store the loosely rolled tent
in a cool, dry area.
•Clean the zippers by immersing them in water and
gently cleaning, allowing any dirt and sand to wash
away. Rinse thoroughly and dry completely.
•Fiberglass and Aluminum poles should be cleaned
with a damp cloth and dried thoroughly before storage.
A light coating of Silicone spray will help protect the
Aluminum and ferrules.
ULTRAVIOLET
•Excessive exposure to sunlight can cause Ultraviolet
damage to tent fabric and will cause nylon and
polyester to become brittle and tear easily. Chinook
tent fabrics have been treated with a UV-resistant
coating during the manufacturing process but
any synthetic fabric is susceptible to ultraviolet
degradation.
• You can minimize damage by erecting your tent on
sites where exposure to direct sunlight can be avoided.
Always use the rain y as this will help protect the
inner tent from UV damage and less is expensive to
replace if damaged. PLEASE NOTE: Ultraviolet damage
is not covered under the Chinook Warranty.
CANADA
GREENLAND SALES LTD.
3145 14th Avenue
Markham, Ontario
Canada L3R 0H1
Tel: 1-905-513-0333
Fax: 1-905-513-9809
USA
GREENLAND SALES CORP.
Box 11, 2221 Niagara Falls Blvd.
Niagara Falls, New York
USA 14304
Tel: 1-800-513-8299
Fax: 1-800-273-8451
www.chinooktec.com
WARNING: KEEP ALL FLAME AND HEAT SOURCES
AWAY FROM THIS TENT FABRIC. MEETS CPAI-84
SPECIFICATIONS. This tent is made of ame-resistant
fabric. It is not reproof. The fabric will burn if left in
continuous contact with a ame source.
PLEASE NOTE:THE APPLICATION OF ANY FOREIGN
SUBSTANCE TO THE TENT FABRIC MAY RENDER THE
FLAME RESISTANT PROPERTIES INEFFECTIVE.
NETTOYAGE ET ENTREPOSAGE
•Monter la tente, essuyer et nottoyer avec un savon
doux (savon à main) et eau tiède. Bien rincer et
sécher complètement. Ne jamais laver ou sécher
à la machine car cette dernière peut causer des
dommages aux coutures et à la couche protectrice.
•Ne jamais remiser votre tente quand votre tente est
humide ou mouillée.
•Nettoyer les fermetures glissières en les trempants
dans l’eau pour enlever saleté et sable. Bien rincer
et sécher.
•Les tiges de bre de verre ou d’aluminium devraient
être nettoyer avec un linge humide et bien sécher
avant l’entreposage. Un silicone en aerosol peut-
être appliqué pour une meilleure protection.
RAYONS ULTRAVIOLET
•Les ultraviolet du soleil causent certains dommages
a votre tente en asséchant le materiel, le rendant
fragile et plus facilement déchirable. Les tentes
Chinook ont été spécialement traitées avec un
enduit contre les rayons “UV” pour une protection
maximale.
•Le montage de votre tente dans un endoit ombragé
accentura la longévité de vie de votre tente.
Toujours utiliser votre double toit pour une meilleure
protection de votre tente intérieure. Les dommages
causés par les “ultraviolet” ne sont pas couverts par
la guarantie Chinook.
MISE EN GARDE: TENIR LE TISSU DE CETTE
TENTE LOIN DE TOUTE FLAMME ET DE TOUTE
SOURCE DE CHALEUR. Cette tente est fabriquée
d’un tissue resistant au feu, mais qui n’est pas
inammable. Ce tissue brûlera s’il est laissé en
contact continu avec une source d’inammation.
A NOTER: UNE APPLICATION DE SUBSTANCE
ETRANGERE SUR LA TENTE PEUT ENDOMMAGER
LA PROTECTION ANTI-FEU DE LA TOILE.
WhirlwindGuide5_TAI_2006.ID11/2/06, 1:24 PM1
Product specificaties
| Merk: | Chinook |
| Categorie: | Tent |
| Model: | Whirlwind Guide 5 |
Heb je hulp nodig?
Als je hulp nodig hebt met Chinook Whirlwind Guide 5 stel dan hieronder een vraag en andere gebruikers zullen je antwoorden
Handleiding Tent Chinook

25 Februari 2024
Handleiding Tent
Nieuwste handleidingen voor Tent
21 April 2026
27 Maart 2026
27 Maart 2026
17 Maart 2026
16 Maart 2026
16 Maart 2026
16 Maart 2026
10 Maart 2026