Broan 509N Handleiding
Broan
Ventilator
509N
Bekijk gratis de handleiding van Broan 509N (4 pagina’s), behorend tot de categorie Ventilator. Deze gids werd als nuttig beoordeeld door 11 mensen en kreeg gemiddeld 4.8 sterren uit 6 reviews. Heb je een vraag over Broan 509N of wil je andere gebruikers van dit product iets vragen? Stel een vraag
Pagina 1/4

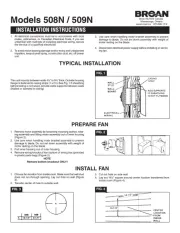
Models 508N / 509N
INSTALLATION INSTRUCTIONS
1. All electrical connections must be in accordance with local
codes, ordinances, or Canadian Electrical Code. If you are
unfamiliar with methods of installing electrical wiring, secure
the service of a qualified electrician.
2. To avoid motor bearing damage and/or noisy and unbalanced
impellers, keep drywall spray, construction dust, etc. off power
unit.
3. Use care when handling motor bracket assembly to prevent
damage to blade. Do not set down assembly with weight of
motor resting on the blade.
4. Disconnect electrical power supply before installing or servic-
ing fan.
fIG. 1
FIG. 2
TYPICAL INSTALLATION
PREPARE FAN
INSTALL FAN
FIG. 1
FIG. 2
FIG. 4
FIG. 3
This unit mounts between walls 4½” to 9½” thick. Outside housing
flange is fastened to casing strips (1 x 2’s). See Fig. 1. If sheathing
behind siding is not wood, provide extra supports between walls
(Nailed or screwed to siding).
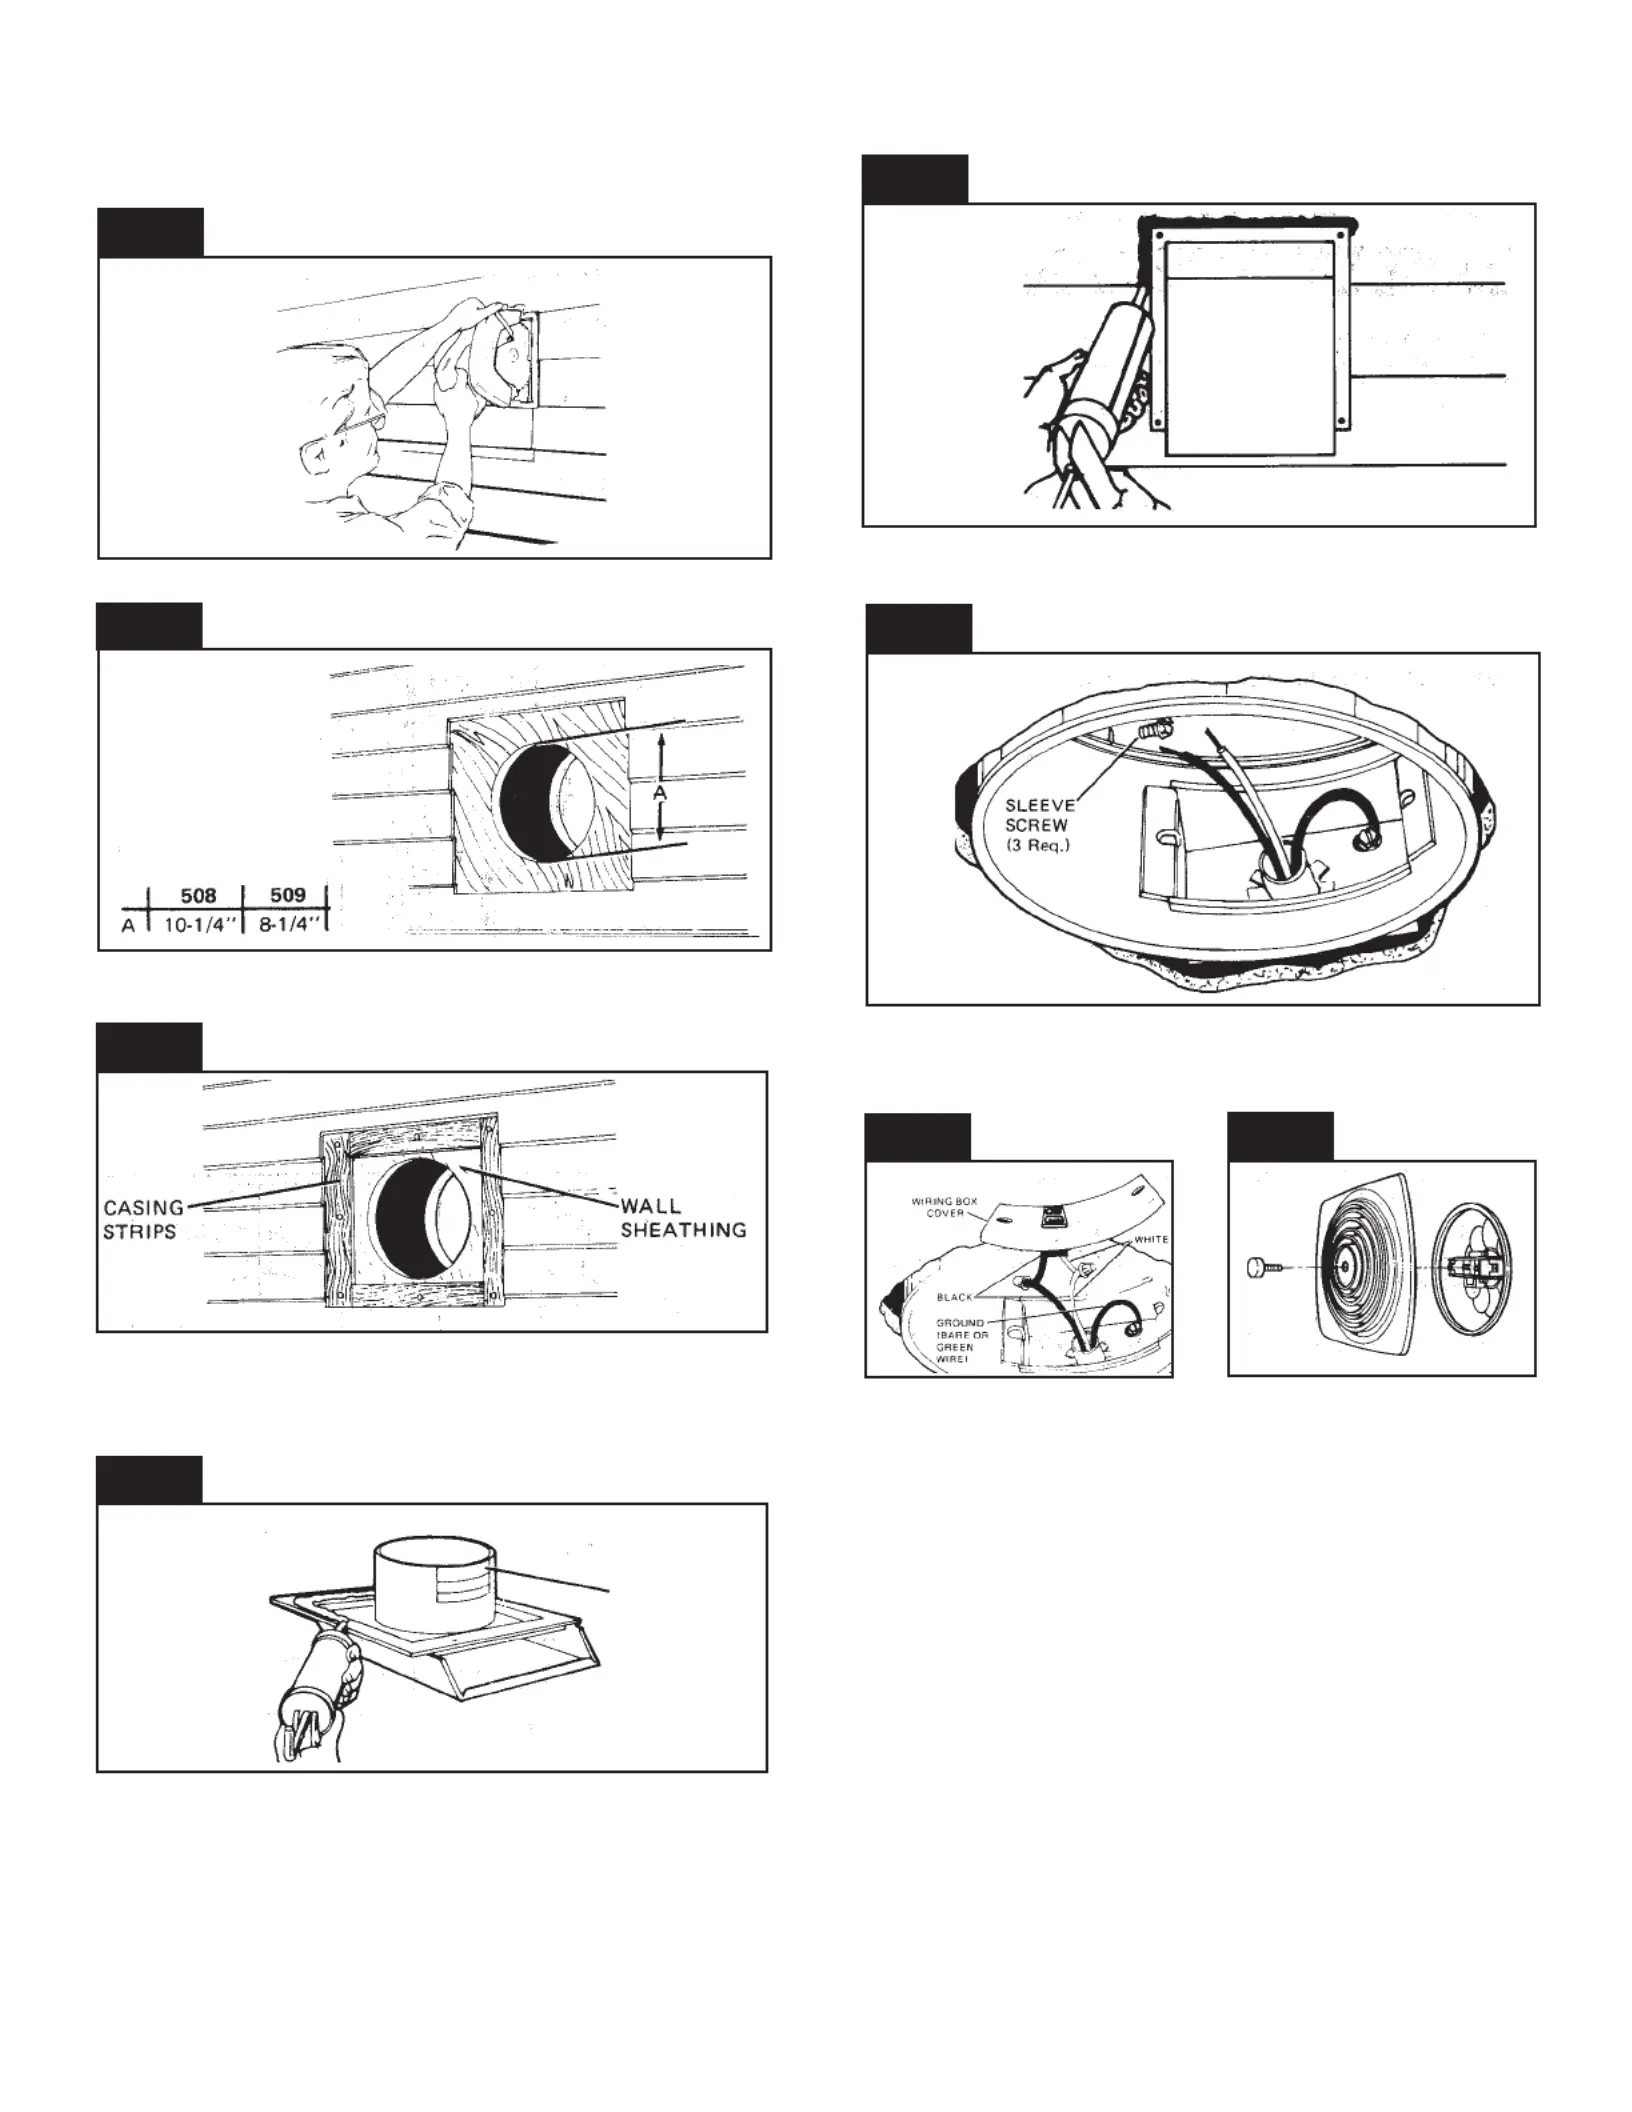
1. Choose fan location from inside room. Make sure that wall stud
does not run through opening. Lay out hole on wall (Figure
3).
2. Transfer center of hole to outside wall.
1. Remove motor assembly by loosening mounting screws, rotat-
ing assembly and lifting motor assembly out of inner housing
(Figure 2).
2. Use care when handling motor bracket assembly to prevent
damage to blade. Do not set down assembly with weight of
motor resting on the blade.
3. Pull inner housing out of outer housing.
4. Remove wiring knockout from bottom of wiring box (provided
in plastic parts bag) (Figure 2).
NOTE
Remove bottom knockout ONLY!
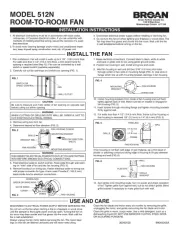
3. Cut out hole on side wall.
4. Lay out 14½” square around center location transferred from
inside room (Figure 4).
Broan-NuTone Canada
Mississauga, Ontario
www.broan.ca 877-896-1119
INSTALL FAN (Cont’d)
USE AND CARE
DISCONNECT ELECTRICAL POWER SUPPLY BEFORE SER-
VICING FAN.
Always unplug the fan motor before servicing the fan. The motor
bearings on this fan are lifetime lubricated and will never need
oiling.
Clean the fan blade and motor every six months by removing
the grille, unplugging the motor, and gently vacuuming the fan
blade and motor.
Clean the grille in warm, soapy water. Use a mild detergent, such
as a dishwashing liquid. DO NOT USE ABRASIVE CLOTHS,
STEEL WOOL OR SCOURING POWDERS.
99045053A
FIG. 5
FIG. 6
5. Cut square hole in SIDING ONLY! DO NOT CUT SHEATHING
(Figure 5)! Nail down all siding ends.
6. Cut round hole for fan housing in sheathing (Figure 6).
7. Nail or screw 1 x 2 casing strips inside square opening (Figure
7).
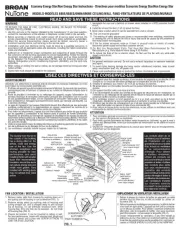
8. Put a large bead of caulk on the inside of flange on outer
housing (Figure 8).
9. If wall is less than 8” thick, remove one or more knockouts on
outer sleeve (Figure 8). Use inner sleeve for test fit.
10. Insert outer housing through hole on outside wall and nail or
screw housing to casing strips. Caulk all around filler strips
and flange (Figure 9).
11. Run wiring to fan location. Pull wire through both sleeves (Fig-
ure 10). Insert inner sleeve into opening and fasten sleeves
together with three black sheet metal screws provided in plastic
bag.
FIG. 7
FIG. 8
30040037
FIG. 9
FIG. 5
FIG. 10
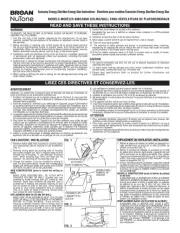
12. Attach wiring to wiring box with proper connector for type of
wire being used. Drop box into opening in housing.
13. Remove receptacle from motor plug. Snap receptacle into
wiring box cover. Make electrical connections as shown in
Figure 12.
FIG. 12
FIG. 13
14. Install wiring box cover. Use two screws provided in plastic
bag.
15.Reinstall motor assembly and plug in motor.
16. Install grille with center knob and threaded stud provided in
plastic bag. (Fig. 13)
KNOCKOUT
PANELS
2

Modèles 508N / 509N
DIRECTIVES POUR L’INSTALLATION
1. L’installation électrique doit être conforme aux ordonances ou
codes locaux ou fédéral. La personne qui n’est pas experte en
électericité doit confier ce travail à un électricien compétent.
2. Afin de ne pas endommager les roulements du moteur et (ou)
de réduire le bruit, protéger le bloc moteur de tout produit de
vaporisation, poussière de construction, etc.
3. Prenez soin en manipulant le support de moteur, pour
empêcher des dommages à la lame. N’établissez pas le
moteur avec le poids du moteur se reposant sur la lame.
4. Couper le courant au point d’entrée avant d’installer le ven-
tilateur ou de procéder à son entretien.
fIG. 1
FIG. 2
INSTALLATION TYPIQUE
PRÉPARATION DU VENTILATEUR
INSTALLATION DUE VENTILATEUR
FIG. 1
FIG. 2
FIG. 4
FIG. 3
Cet appareil s’installe entre des murs de 4½” à 9½” d’épaisseur.
La collerette du boîter extérieur se fixe à des bout de moulture
(1 x 2). Voir la fig. 1. Si le revêtement sous le parement n’est pas
en bois, ajouter des appuis entre les murs (cloués ou vissês au
parement).
1. Décider de l’emplacement du ventilateur á l’intérieur de la
pièce. S’assurer que le poteau mural n’est pas placé dans
l’ouverture. Desiner le trou à découper dans le mur. (Fig. 3)
2. Reproduire le centre du trou sur le mur extérieur.
1. Enlever le bloc moteur en desserrant les vis de montage, en
faisant pivoter le bloc moteur et en le sortant du boîter intérieur
en le soulevant.
2. Prenez soin en manipulant le support de moteur, pour
empêcher des dommages à la lame. N’établissez pas le
moteur avec le poids du moteur se reposant sur la lame.
3. Retirer le boîter intérieur de boîter extérieur.
4. Enlever la plaque de câblage étampée du fond le la boîte de
câblage qui se trouve dans le sac de plastique avec les aures
piéces. (Fig. 2).
A NOTER
Enlever SEULEMENT la piéce
êtampée du fond de la boîte!
3. Découper le trou dans le mur intérieur.
4. Dessiner un carrê de 14½” en vous basant sur le point qui
marque le centre du trou découpé à intérieur et qui a été
reproduit à la extérieur.
BOUT DE
MOULURE
AJOUTER DES
APPUIS SI LE
PAREMENT
N’EST
PAS EN BOIS
CÂBLAGE
ÉLECTRIQUE
POTEAU
MURAL
PLANCHE
MURAILLE
POINT
CENTRAL RE-
PRODUIT DE
L’INTÉRIEUR
3
Broan-NuTone Canada
Mississauga, Ontario
www.broan.ca 877-896-1119
Product specificaties
| Merk: | Broan |
| Categorie: | Ventilator |
| Model: | 509N |
Heb je hulp nodig?
Als je hulp nodig hebt met Broan 509N stel dan hieronder een vraag en andere gebruikers zullen je antwoorden
Handleiding Ventilator Broan
11 Juni 2025

10 Juni 2025
17 April 2025

17 April 2025

17 April 2025
15 April 2025
15 April 2025

15 April 2025
15 April 2025

15 April 2025
Handleiding Ventilator
- Korona
- Elro
- Akasa
- CSL
- Philips
- Crane
- VisionAir
- Premium Levella
- Eldom
- Neo
- Kogan
- Lian Li
- Fantini Cosmi
- Quorum International
- EVOLVEO
Nieuwste handleidingen voor Ventilator
30 Juli 2025

29 Juli 2025
29 Juli 2025
29 Juli 2025
28 Juli 2025
23 Juli 2025

23 Juli 2025

22 Juli 2025

22 Juli 2025

22 Juli 2025