Adder -DVA Handleiding
Bekijk gratis de handleiding van Adder -DVA (2 pagina’s), behorend tot de categorie Audio/video-converter. Deze gids werd als nuttig beoordeeld door 99 mensen en kreeg gemiddeld 4.9 sterren uit 2 reviews. Heb je een vraag over Adder -DVA of wil je andere gebruikers van dit product iets vragen? Stel een vraag
Pagina 1/2
KVM Extender
Solutions
Experts in
Connectivity
Solutions
FEATURES
High quality VGA to DVI-D conversion
Adder DVA is a high quality VGA to
DVI-D converter supporting most
resolutions up to 1920 x 1200 @ 60Hz.
Auto calibration
Adder DVA auto calibrates for horizontal
and vertical position. Manual adjustment is
also available through the Virtual Control
Panel (VCP) app, if required.
EDID management
EDID management is a critical element
in VGA/DVI-D conversion, to ensure
the correct settings are passed to the
computer’s graphics card.
USB powered with pass through
Adder DVA requires no separate power
adapter and instead draws less than
300mA in operation from a spare USB
port on the computer. A USB pass-
through port is made available on the
Adder DVA to allow a low-powered
USB device to be connected; thus, the
same total number of USB ports remain
available for other uses.
Flash upgradeable
Adder DVA is ash upgradeable,
allowing custom EDID adjustment for
non-standard operations. Upgrades are
achieved via the USB port.
Virtual control panel app
over DDC-CI
Adder DVA is supplied with a Virtual
Control Panel (VCP) app which allows
brightness, tone and sharpness to be
adjusted. Vertical and horizontal video
alignment can also be adjusted, where
necessary. The VCP app contains a test
pattern to accurately display the changes.
EDID management options can also be
changed and the EDID’s of the monitors
can be displayed.
PRODUCT IN BRIEF
ADDER DVA is a high performance VGA
to DVI-D video converter that transforms
analog signals to digital. Placed in-line and
USB powered this solution ts well with
the AdderLink Innity range of products.
It converts VGA signals, up to 1920 x 1200
@ 60Hz, into a DVI standard equivalent.
• Analog to digital video conversion up
to 1920 x 1200 (165MHz max. pixel
frequency)
• EDID management to ensure clean
operation
• Adjustment control for alignment, tone,
sharpness and brightness
• USB powered with USB feed through
• Plug and play – no drivers required
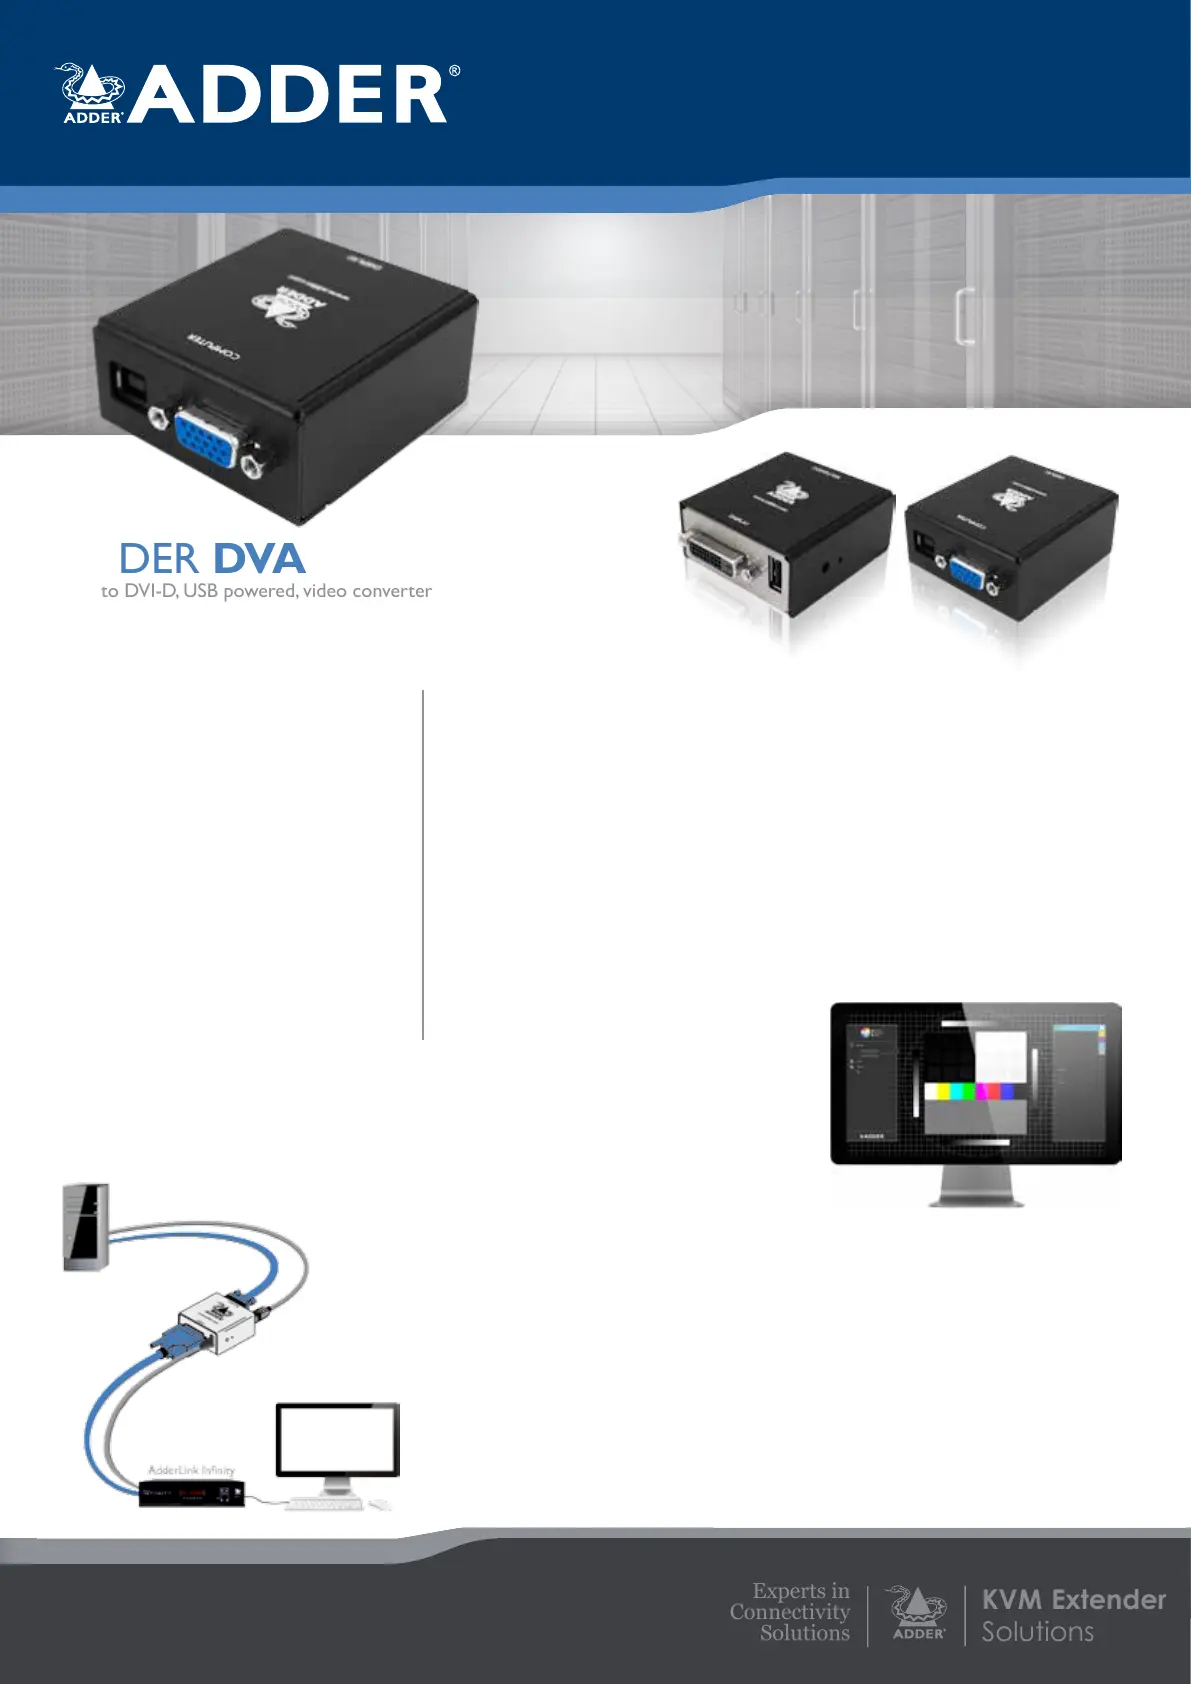
ADDER DVA
VGA to DVI-D, USB powered, video converter
Fanless, small form factor,
VGA to DVI-D
Analog to digital video converter
Adder DVA
VGA
USB
DVI-D
Pictured above:
Adder DVA calibration software as part of
the Virtual Control App
Product specificaties
| Merk: | Adder |
| Categorie: | Audio/video-converter |
| Model: | -DVA |
| Kleur van het product: | Zwart |
| Gewicht: | 100 g |
| Breedte: | 55 mm |
| Diepte: | 70 mm |
| Hoogte: | 25 mm |
| Certificering: | CE, FCC |
| Maximale videoresolutie: | 1920 x 1200 Pixels |
| Aantal: | 1 |
| Compatibele besturingssystemen: | Windows 7 |
| Stroomvoorziening via USB: | Ja |
| Hostinterface: | VGA (D-Sub) |
| Verbinding met pc: | Ja |
| Bedrijfstemperatuur (T-T): | 0 - 40 °C |
| Output interface: | DVI-D |
Heb je hulp nodig?
Als je hulp nodig hebt met Adder -DVA stel dan hieronder een vraag en andere gebruikers zullen je antwoorden
Handleiding Audio/video-converter Adder

8 April 2024
Handleiding Audio/video-converter
Nieuwste handleidingen voor Audio/video-converter
11 Mei 2026
30 April 2026
24 April 2026
23 April 2026
23 April 2026
23 April 2026
21 April 2026
20 April 2026
17 April 2026
16 April 2026