Tamron 150-500mm F/5-6.7 Di III VC VXD Handleiding
Bekijk gratis de handleiding van Tamron 150-500mm F/5-6.7 Di III VC VXD (4 pagina’s), behorend tot de categorie Lens. Deze gids werd als nuttig beoordeeld door 37 mensen en kreeg gemiddeld 4.9 sterren uit 2 reviews. Heb je een vraag over Tamron 150-500mm F/5-6.7 Di III VC VXD of wil je andere gebruikers van dit product iets vragen? Stel een vraag
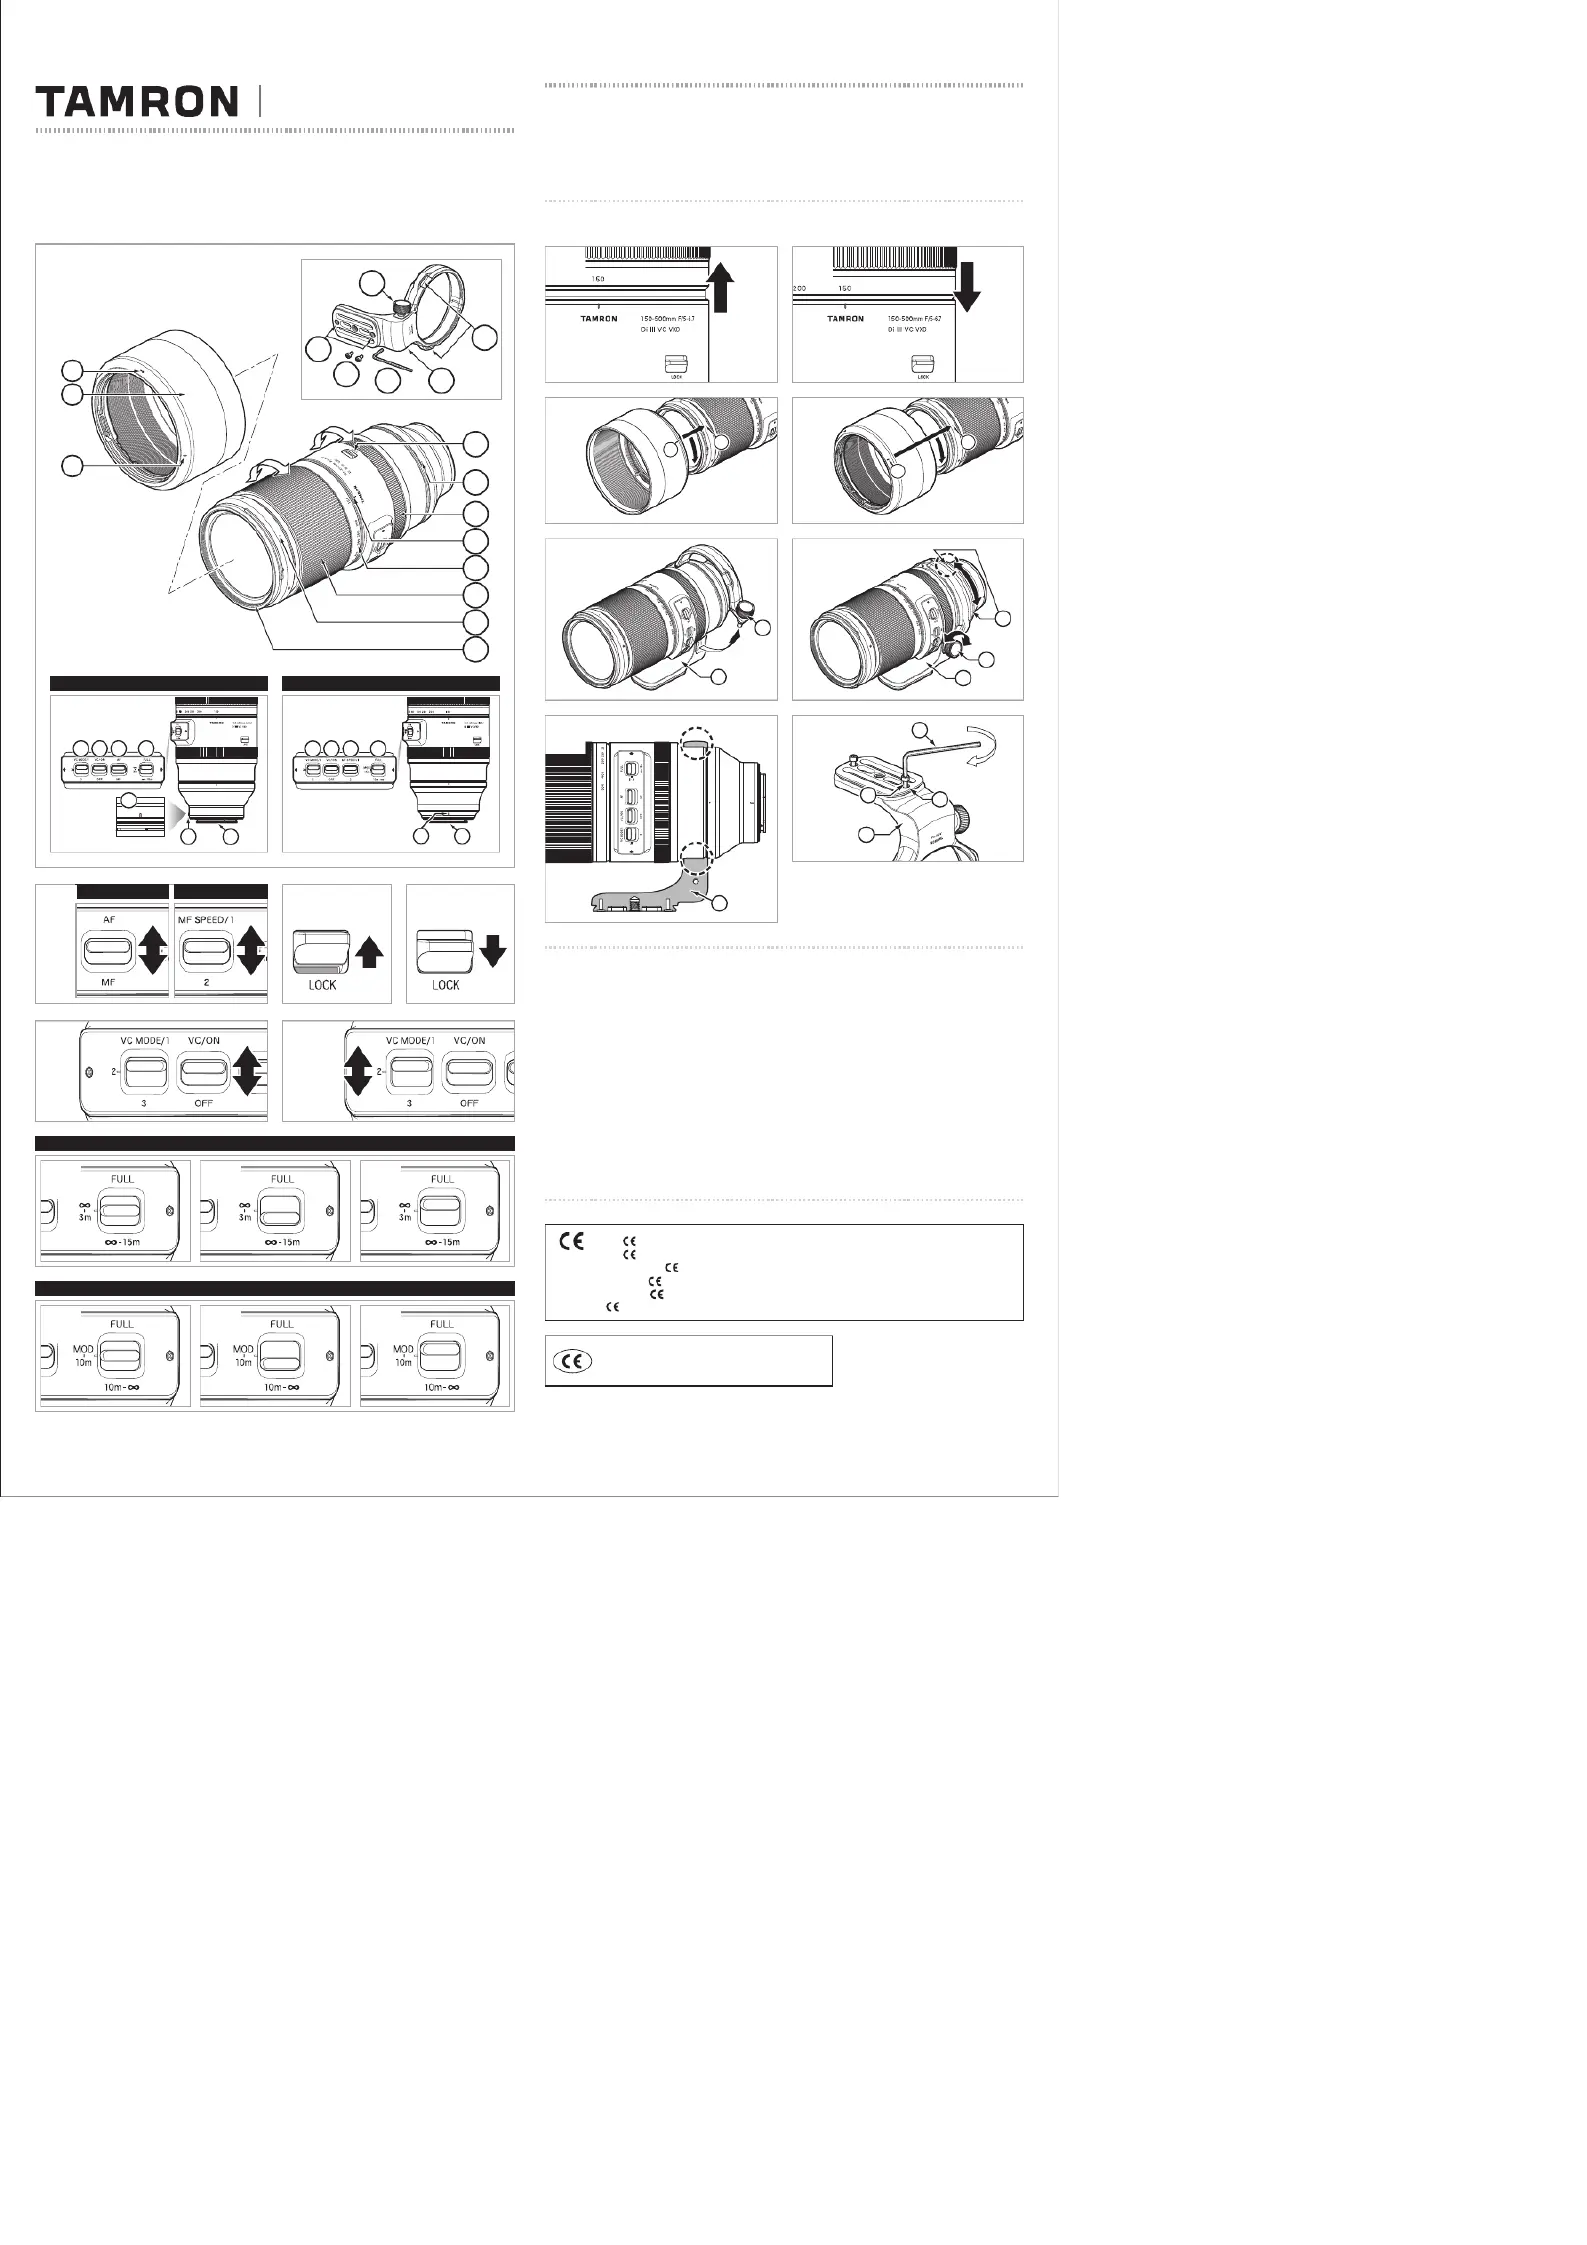
Pagina 1/4
10
12
11
TLM-A057X-T/T-2209-01
Model:
A057
Owner’s manual
* The Marking is a directive conformity mark of the European Community (EC).
* Das -Zeichen entspricht der EC Norm.
* La marquage est un marquage de conformité .à la direcive CEE (CE)
* La marca es marca de conformidad segun directiva de la Comunidad Europea (CE).
* Il marchio attesta la conformita alla directtiva della Comunit.à Europea (CEE)
* 标志表示符合欧州共同体(EC)指标
The EEC Conformity Report applies to the Council
Directive 2014/30/EU, 2011/65/EU and is used by
Tamron Co., Ltd., manufacturer of this product.
150-500mm F/5-6.7
Di
III
VC VXD
For Sony E
For FUJIFILM X (APS-C)
10
12
10
2
5
5
3
FUJIFILM
14
13
10
15
17
22
20
1918
21
Sony
Sony
Sony
FUJIFILM
17
20
17
1918
21
22
2
3
1
4
5
6
7
8
9
11
23
13
12
14
15
16
10
Focusing
Zooming
FUJIFILM
For FUJIFILM X Mount Lens
FreeRTOS Kernel V10.3.1
Copyright (C) 2020 Amazon.com, Inc. or its affiliates. All Rights Reserved.
Permission is hereby granted, free of charge, to any person obtaining a copy of this software and associated documentation
files (the “Software”), to deal in the Software without restriction, including without limitation the rights to use, copy, modify,
merge, publish, distribute, sublicense, and/or sell copies of the Software, and to permit persons to whom the Software is
furnished to do so, subject to the following conditions:
The above copyright notice and this permission notice shall be included in all copies or substantial portions of the Software.
THE SOFTWARE IS PROVIDED “AS IS”, WITHOUT WARRANTY OF ANY KIND, EXPRESS OR IMPLIED, INCLUDING BUT
NOT LIMITED TO THE WARRANTIES OF MERCHANTABILITY, FITNESS FOR A PARTICULAR PURPOSE AND
NONINFRINGEMENT. IN NO EVENT SHALL THE AUTHORS OR COPYRIGHT HOLDERS BE LIABLE FOR ANY CLAIM,
DAMAGES OR OTHER LIABILITY, WHETHER IN AN ACTION OF CONTRACT, TORT OR OTHERWISE, ARISING FROM, OUT
OF OR IN CONNECTION WITH THE SOFTWARE OR THE USE OR OTHER DEALINGS IN THE SOFTWARE.
http://www.FreeRTOS.org
http://aws.amazon.com/freertos
Product specificaties
| Merk: | Tamron |
| Categorie: | Lens |
| Model: | 150-500mm F/5-6.7 Di III VC VXD |
| Kleur van het product: | Zwart |
| Gewicht: | 1710 g |
| Automatisch scherpstellen: | Ja |
| Diameter: | 93 mm |
| Diafragma (F-F): | 5 - 32 |
| Brandpuntbereik: | 150 - 500 mm |
| Lensstructuur (elementen/groepen): | 25/16 |
| Lengte: | 209.6 mm |
| Dichtstbijzijnde focus afstand: | 0.6 m |
| Maximum aperture number: | 5 |
| Minimum aperture number: | 32 |
| Maat filter: | 82 mm |
| Kijkhoek: | 16.25 ° |
| Lens type: | Telelens |
| Component voor: | MILC |
| Manuele focus: | Ja |
| Lens mount interface: | Fujifilm X |
| Aantal diafragma bladen: | 7 |
| Compatibele camera merken: | Fujifilm |
Heb je hulp nodig?
Als je hulp nodig hebt met Tamron 150-500mm F/5-6.7 Di III VC VXD stel dan hieronder een vraag en andere gebruikers zullen je antwoorden
Handleiding Lens Tamron

10 Mei 2026
6 December 2025
1 September 2025
1 September 2025
5 Augustus 2025
10 Juni 2025
2 April 2025
25 November 2024
16 November 2024
16 November 2024
Handleiding Lens
Nieuwste handleidingen voor Lens
25 Juni 2026
23 Juni 2026
23 Juni 2026
20 Mei 2026
6 Mei 2026
4 Mei 2026
3 Mei 2026
3 Mei 2026
2 Mei 2026
2 Mei 2026