SIIG CE-MT0212-S1 Handleiding
Bekijk gratis de handleiding van SIIG CE-MT0212-S1 (8 pagina’s), behorend tot de categorie Wandsteun. Deze gids werd als nuttig beoordeeld door 100 mensen en kreeg gemiddeld 5.0 sterren uit 2 reviews. Heb je een vraag over SIIG CE-MT0212-S1 of wil je andere gebruikers van dit product iets vragen? Stel een vraag
Pagina 1/8
Caution
ABCDEFG
04-0527C
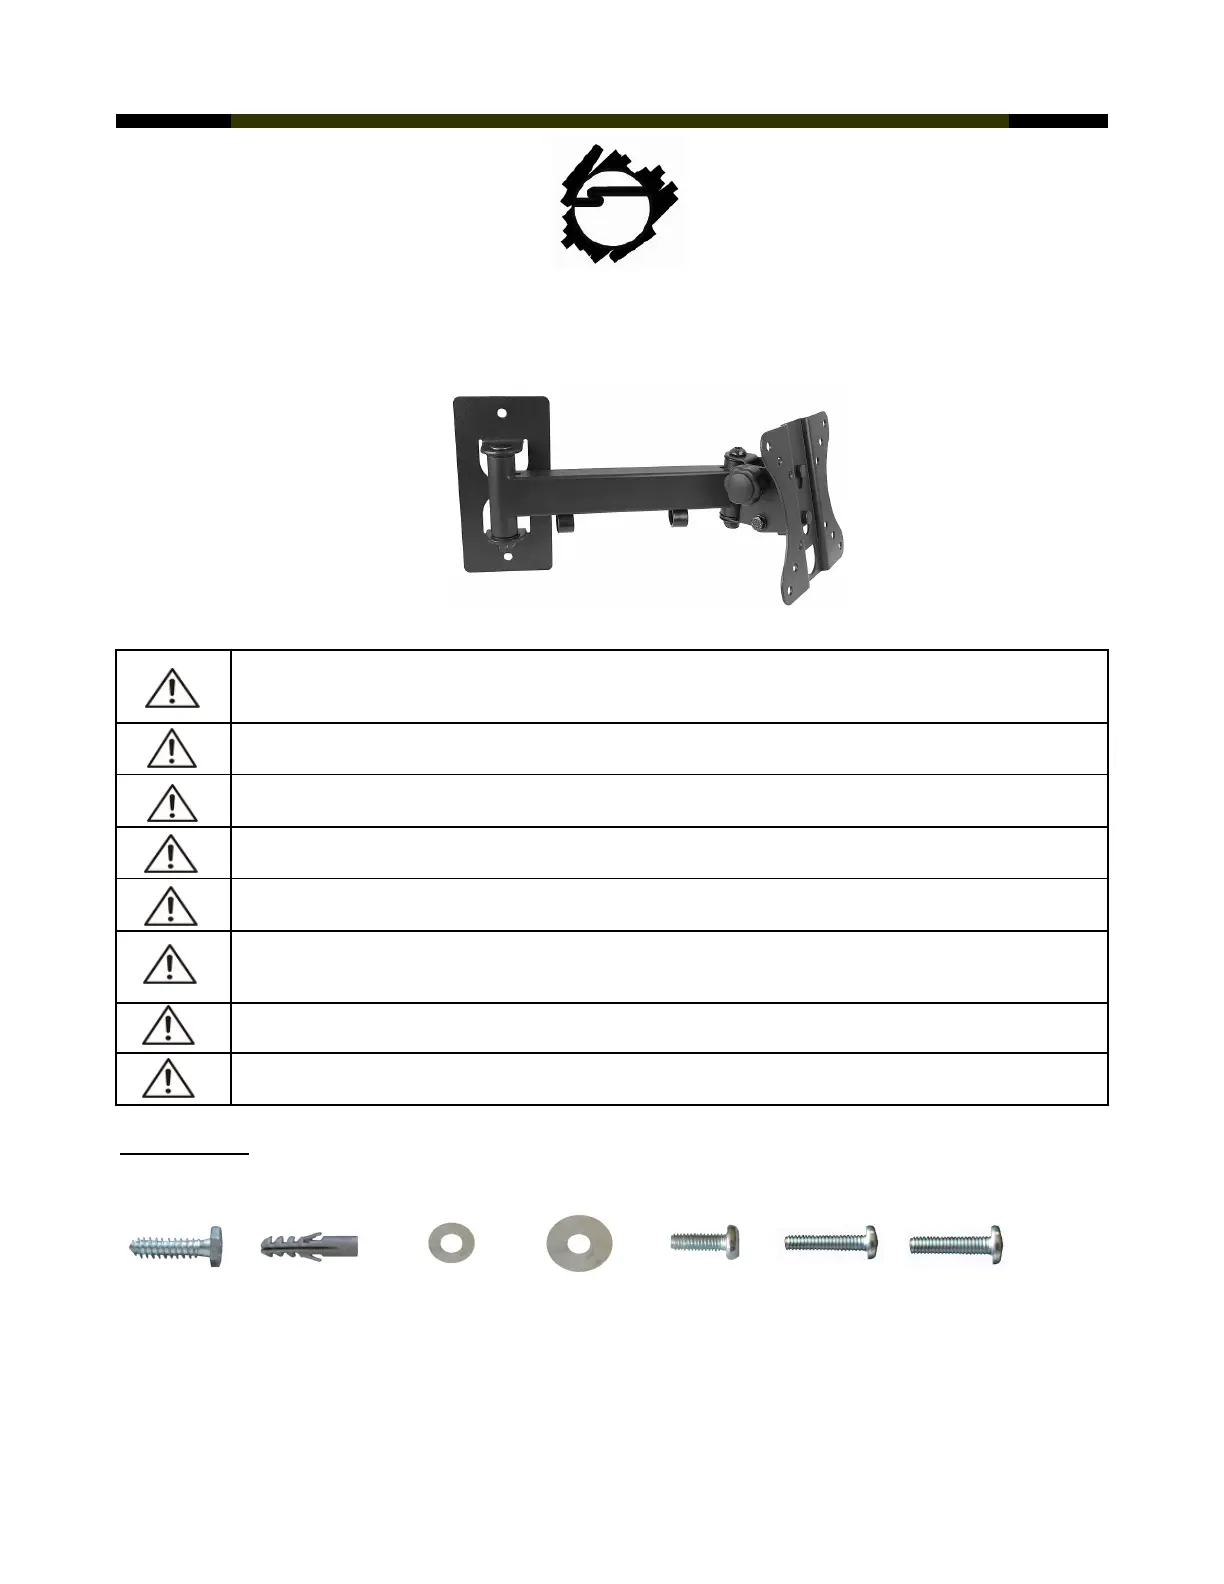
Full-Motion LCD/TV Monitor Mount - 10" to 24"
Installation Instructions
(x2) M6X60
bolt
(x2) M6 concrete
anchor
(x4) M6 small
washer
(x2) M6 large
washer
(x4) M4X12
screw
(x4) M5X12
screw
ToolsRequired:Electronicstudfinder,#2Phillipsheadscrewdriver,drill,1/8"drillbit(woodstudinstallation),5/16"masonry
drill bit (concrete/brick wall installation).
Donotinstallnearheater,fireplace,airconditioning,indirectsunlight,oranyotherheatproducingsource.
Failure to do so may result in damage to the display and could increase the risk of fire.
Thewallstructuremustbecapableofsupportingatleastthemaximumloadcapacityasindicated.Ifnot,the
wallmustbereinforced.Properinstallationprocedurebyyourselforaqualifiedservicetechnician,asoutlinedin
the installation instructions, must be adhered to. Failure to do so could result in serious personal injury.
Whenmountingtoawallthatcontainswoodstuds,confirmdeadcenterofthewoodstudpriortoinstallation,it
is recommended that the wood studs be a minimum of 16" apart.
Itisrecommendedthattwopeopleperformtheinstallation.Injuryand/ordamagecanresultfromdroppingor
mishandling the display.
(x4) M6X12
screw
Priortotheinstallationofthisproduct,theinstallationinstructionsshouldbereadandcompletelyunderstood.
Theinstallationinstructionsmustbereadtopreventpersonalinjuryandpropertydamage.Keepthese
installation instructions in an easily accessible location for future reference.
CAUTION:Themaximumloadcapacityis33lbs(15kg).Usewithproductsexceedingthemaximumload
capacity may cause serious injury. See apparatus instructions.
Recommendedmountingsurfaces:woodstudandsolid-flatconcrete.Ifthemountistobeinstalledonany
surface other than wood studs, use suitable hardware (not included but commercially available).
Hardware Kit
Donotinstallonastructurethatispronetovibration,movementorchanceofimpact.Failuretodosocould
result in damage to the display and/or damage to the mounting surface.
1
Product specificaties
| Merk: | SIIG |
| Categorie: | Wandsteun |
| Model: | CE-MT0212-S1 |
| Kleur van het product: | Zwart |
| Gewicht: | 1150 g |
| Breedte: | 14 mm |
| Diepte: | 12 mm |
| Hoogte: | 26.5 mm |
| Montagewijze: | Muur |
| Certificering: | VESA |
| Horizontaal draaibaar: | 15 ° |
Heb je hulp nodig?
Als je hulp nodig hebt met SIIG CE-MT0212-S1 stel dan hieronder een vraag en andere gebruikers zullen je antwoorden
Handleiding Wandsteun SIIG

28 Juni 2025
13 Maart 2024
13 Maart 2024
13 Maart 2024
13 Maart 2024
13 Maart 2024
13 Maart 2024
12 Maart 2024
12 Maart 2024
12 Maart 2024
Handleiding Wandsteun
Nieuwste handleidingen voor Wandsteun
16 Juli 2026
16 Juli 2026
15 Juli 2026
14 Juli 2026
14 Juli 2026
13 Juli 2026
13 Juli 2026
12 Juli 2026
9 Juli 2026
8 Juli 2026