Primera LX810e Handleiding
Primera Labelprinter LX810e
Bekijk gratis de handleiding van Primera LX810e (2 pagina’s), behorend tot de categorie Labelprinter. Deze gids werd als nuttig beoordeeld door 11 mensen en kreeg gemiddeld 4.7 sterren uit 3 reviews. Heb je een vraag over Primera LX810e of wil je andere gebruikers van dit product iets vragen? Stel een vraag
Pagina 1/2
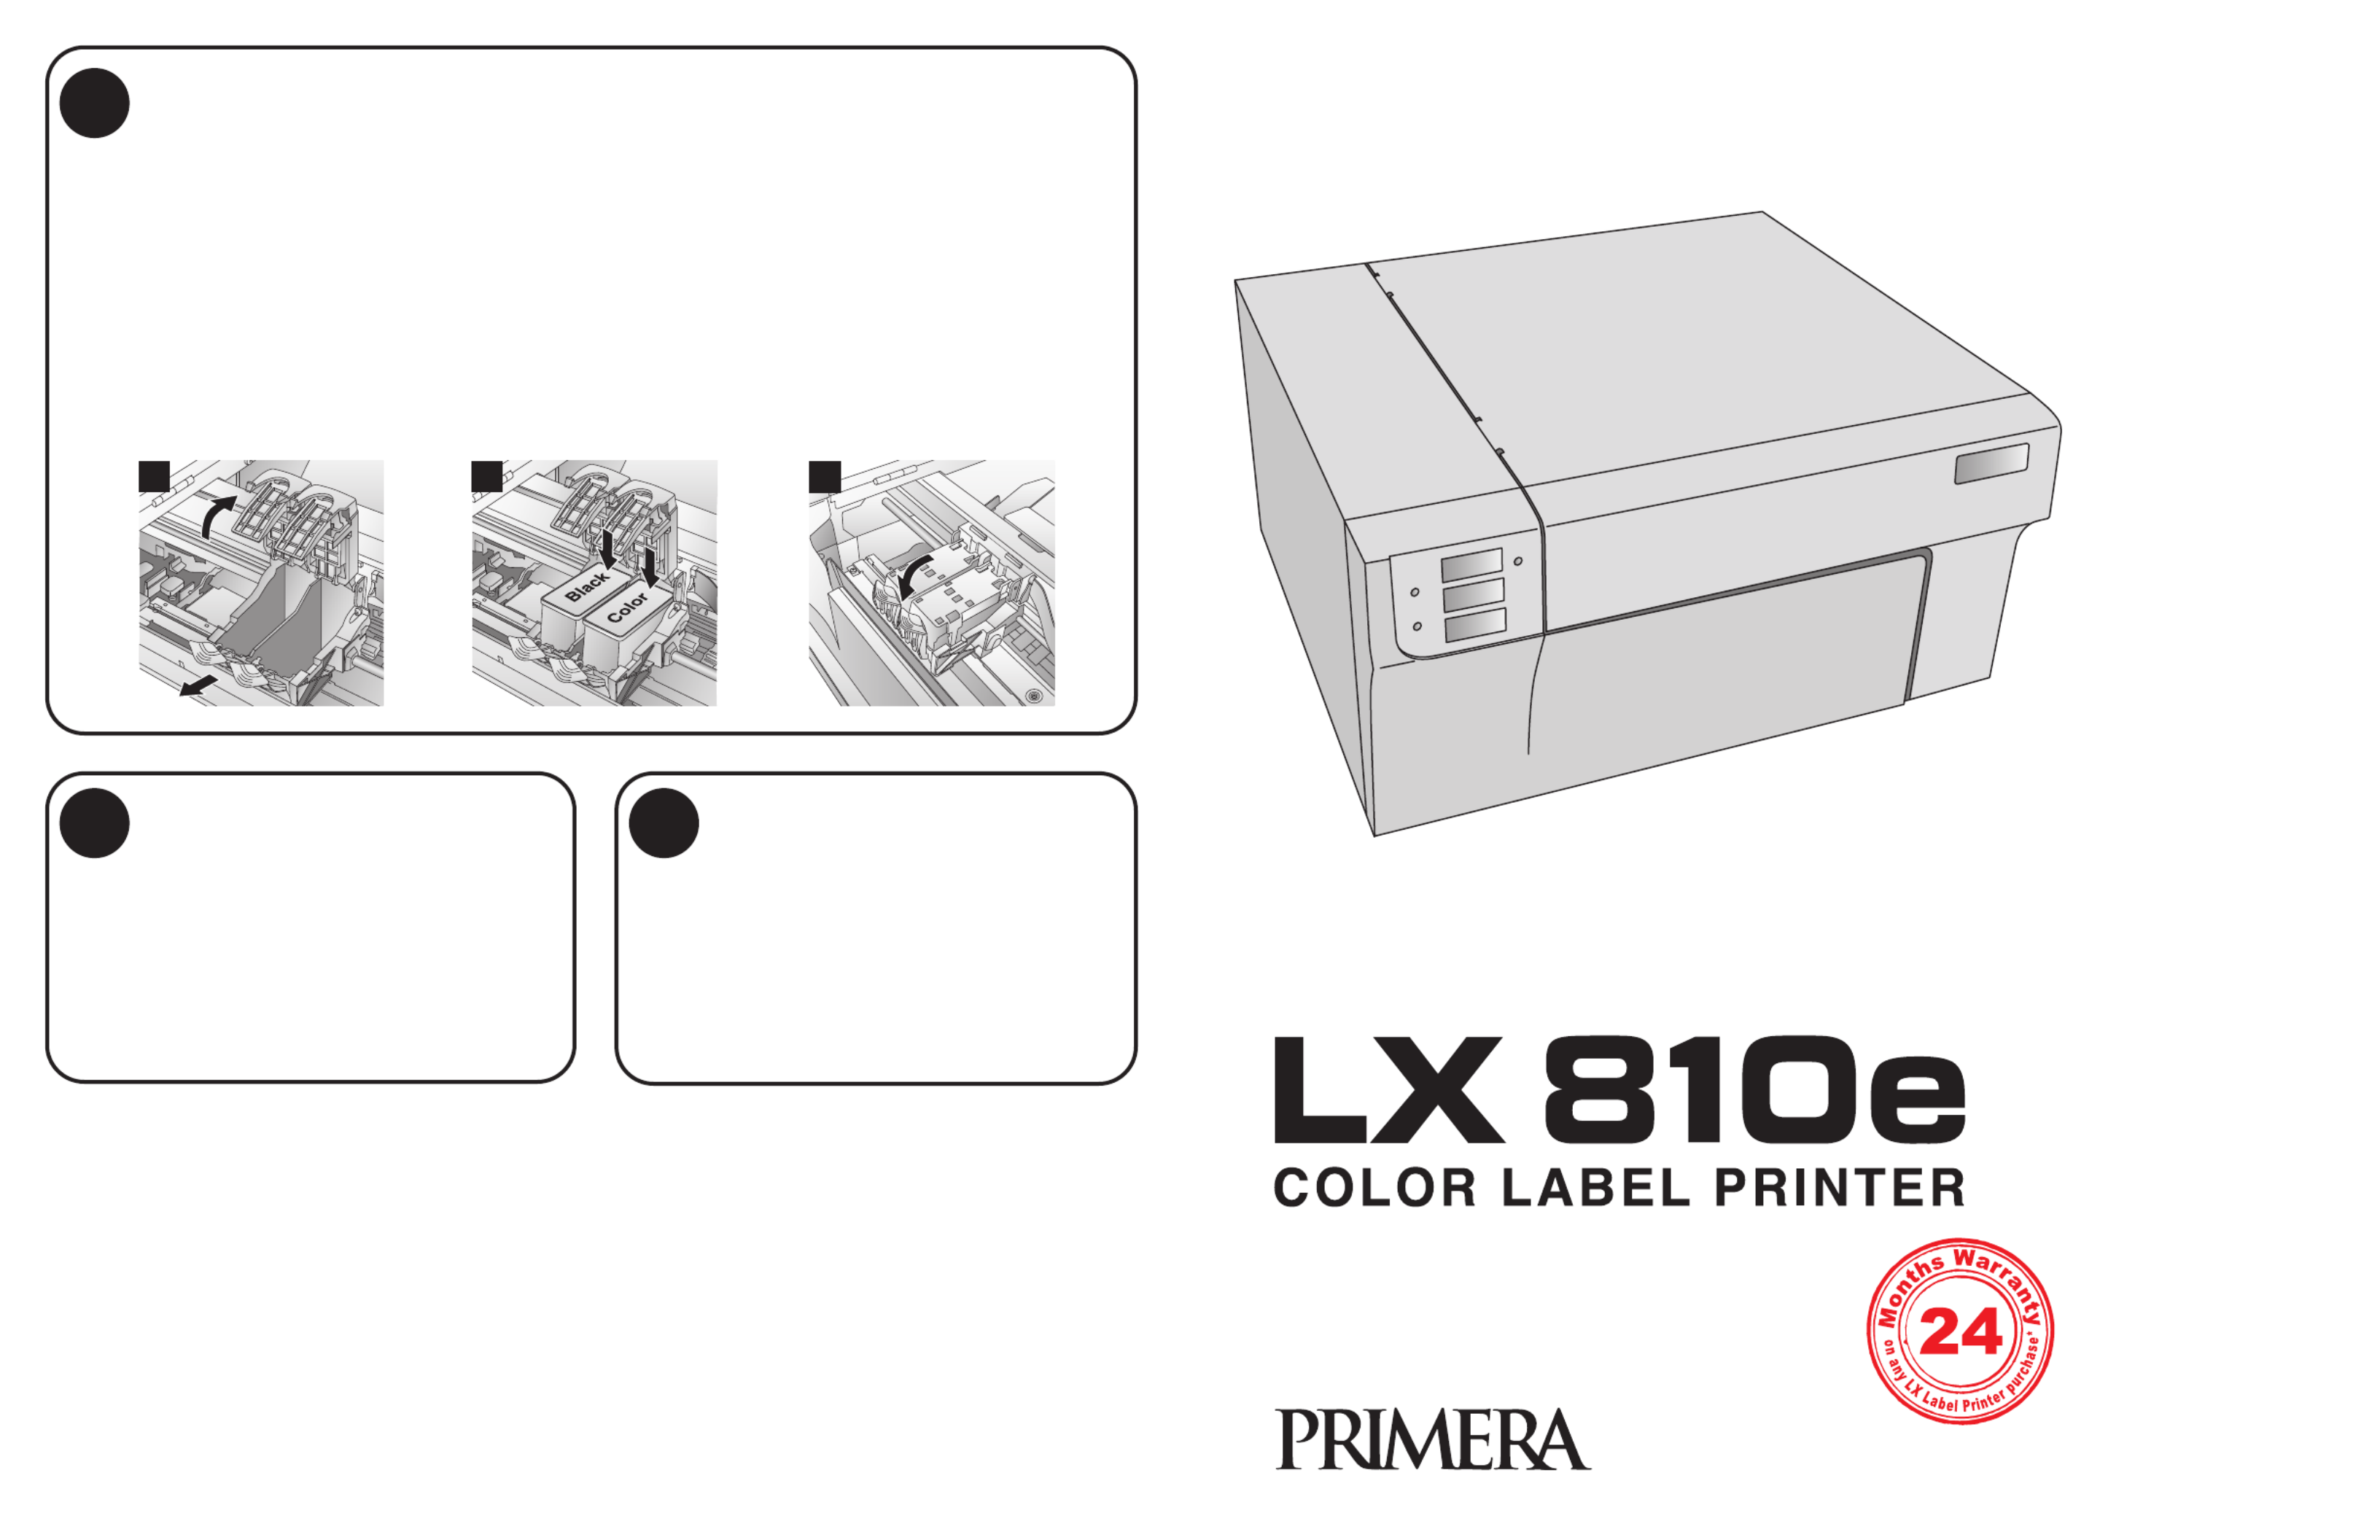
6Install Cartridges
Quick Start
P/N 510929-060409
7Finishing the Install8Congratulations
Once you have installed the media, the installer
will prompt you to install the cartridges.
Open the Top Cover. Click the Install Cartridges
button to start the cartridge installation process.
The Cartridge Carrier will move itself to the center
of the print area.
1.Press the Cartridge Cover Release to open the
Cartridge Holder.
2. Remove each cartridge from its packaging
and slowly remove the tape covering the
cartridge's print head.
3.Replace/install the cartridge.
4.Push cartridge cover downward until it snaps
in place.
5.Close the Top Cover.
Click Finished Installing Cartridges to confirm
the cartridges have been installed. You will now
be prompted to align your cartridges.
Click Align Cartridges to start the cartridge
alignment. The Printer will now print and
automatically scan a pattern of lines that will
align the black cartridge to the color cartridge.
12 3
After the cartridges and the label media have
been installed and configured, the installer will
complete its process by installing the NiceLabel
SE software on your computer. Simply click
Next to continue installing, and follow the
onscreen instructions to the finish.
Note: For optimal printing speed you MUST
reboot the PC after installing the software!
Congratulations! Your LX810e Color Label
Printer is now installed and ready for use.
Please refer to Section 3 of the User Manual
for a tutorial on using NiceLabel®SE.
© 2009 All rights reserved
*after registering your
product. See
www.primerawarranty.com
for terms and conditions.
Product specificaties
| Merk: | Primera |
| Categorie: | Labelprinter |
| Model: | LX810e |
| Kleur van het product: | Wit |
| Gewicht: | 13200 g |
| Breedte: | 432 mm |
| Diepte: | 394 mm |
| Hoogte: | 231 mm |
| Stroomvoorziening: | 100 - 240V, 50/60Hz |
| Kleur: | Ja |
| LED-indicatoren: | Ja |
| USB-poort: | Ja |
| Connectiviteitstechnologie: | Bedraad |
| Ethernet LAN: | Nee |
| Aantal USB 2.0-poorten: | 1 |
| Certificering: | UL, UL-C, CE, FCC |
| Meegeleverde software: | NiceLabel SE |
| Compatibele besturingssystemen: | Windows XP\nWindows Vista\nWindows 7\nMac OS X v10.2+ |
| Mac-compatibiliteit: | Ja |
| AC-adapter, uitgangsspanning: | 12 V |
| AC-adapter, uitgangsstroom: | 0.5 A |
| Maximale resolutie: | 4800 x 1200 DPI |
| Printkleuren: | Cyan, Magenta, Yellow |
| Maximum roll diameter: | 152 mm |
| Standaard interfaces: | USB |
| Minimale opslag schijfruimte: | 5000 MB |
| Minimale processor: | Intel Pentium IV, G4 |
| Afmetingen (B x D x H): | 432 x 394 x 231 mm |
| Minimale RAM: | 512 MB |
| Maximale print breedte: | 210 mm |
| Printsnelheid (metrisch): | 51 mm/sec |
| Wifi: | Nee |
| Maximale label lengte: | 0.609 m |
| Core diameter: | 76 mm |
Heb je hulp nodig?
Als je hulp nodig hebt met Primera LX810e stel dan hieronder een vraag en andere gebruikers zullen je antwoorden
Handleiding Labelprinter Primera

17 November 2024
1 Juni 2024
13 September 2023
12 September 2023
12 September 2023
12 September 2023
16 Juni 2023
14 Juni 2023
12 Juni 2023
8 Juni 2023
Handleiding Labelprinter
Nieuwste handleidingen voor Labelprinter
5 Mei 2026
22 April 2026
21 April 2026
21 April 2026
31 Maart 2026
27 Maart 2026
25 Maart 2026
9 Maart 2026
27 Februari 2026
17 Februari 2026