Kenwood kdc 7090r Handleiding
Bekijk gratis de handleiding van Kenwood kdc 7090r (48 pagina’s), behorend tot de categorie Autoradio. Deze gids werd als nuttig beoordeeld door 64 mensen en kreeg gemiddeld 5.0 sterren uit 32.5 reviews. Heb je een vraag over Kenwood kdc 7090r of wil je andere gebruikers van dit product iets vragen? Stel een vraag
Pagina 1/48

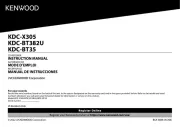
KDC-V7090R
KDC-7090R
B64-1902-00 (EN)
COMPACT
DIGITAL AUDIO
CD-RECEIVER
INSTRUCTION MANUAL

— 2 —
English
Contents
Safety precautions..........................3
Handling Compact discs .................6
General features
Power...............................................................8
Switching Modes .............................................8
Volume .............................................................9
Attenuator ........................................................9
Loudness........................................................10
System Q .......................................................10
Speaker Setting..............................................10
TEL Mute .......................................................10
Faceplate Angle Adjustment..........................11
Forced Closing ...............................................11
Removing the Faceplate ................................12
Clock display ..................................................12
Audio control features
Audio Control Setting.....................................13
Bass Centre Frequency..................................14
Bass Level......................................................14
Bass Quality Factor ........................................14
Bass Extend ...................................................14
Middle Centre Frequency ..............................14
Middle Level...................................................14
Middle Quality Factor.....................................14
Treble Centre Frequency ...............................14
Treble Level....................................................14
Balance Level.................................................15
Fader Level.....................................................15
Volume Offset................................................15
Tuner features
Tuning ............................................................16
Direct Access Tuning .....................................16
Station Preset Memory..................................16
Switching Display for Tuner...........................17
RDS features
RDS (Radio Data System) ..............................18
Enhanced Other Network ..............................18
Alarm..............................................................18
Traffic Information Function...........................18
Presetting Volume for
Traffic Information/News...........................19
Radio Text Scroll ............................................19
Programme Type (PTY) Function ...................20
Changing Language for
Programme Type(PTY) Function................21
CD/External disc control features
Playing CDs....................................................22
Playing Other Disc mode ...............................22
Switching Display for Discs ...........................22
Fast Forwarding and Reversing Disc Play......23
Track Search...................................................23
Disc Search ....................................................24
Direct Track Search........................................24
Direct Disc Search..........................................24
Track / Disc Repeat........................................24
Track Scan......................................................25
Presetting Disc Names (DNPS)......................26
Random Play ..................................................27
Magazine Random Play..................................27
Disc Name Preset Play (DNPP) .....................28
Text / Title Scroll ............................................28
Menu settings
Menu System.................................................29
Mask Key .......................................................30
Touch Sensor Tone ........................................30
Manual Time Adjustment...............................30
Automatic Time Adjustment ..........................31
Selectable Illumination ...................................31
Switching Graphic Display..............................31
Variable Illumination Colour Setting ...............32
Contrast Adjustment......................................32
Dimmer ..........................................................32
Time setting for removing the faceplate........33
System Q .......................................................33
External Amp Control.....................................33
News Bulletin Function
with PTY News Timeout Setting ...............33
Local Seek Function ......................................33
Selecting Tuning Mode .................................34
Auto Memory Entry .......................................34
AF (Alternative Frequency) Function..............34
Restricting RDS Region
(Region Restrict Function) .........................34
Auto TP Seek Function ..................................35
Monaural Reception ......................................35
Text Scroll ......................................................35
Power OFF Timer...........................................35
Basic Operations of remote control...36
Installtion
Accessories....................................................39
Installation Procedure.....................................39
Connecting Cables to Terminals ....................40
Installtion........................................................41
Removing the Unit .........................................42
Locking the faceplate to the unit ...................43
Troubleshooting Guide .................44
Specifications ...............................48

— 3 —
To prevent injury and/or fire, take the
following precautions:
• Insert the unit all the way until it is fully
locked in place. Otherwise it may fly out of
place during collisions and other jolts.
• When extending the ignition, battery or
ground cables, make sure to use automotive-
grade cables or other cables with an area of
0.75mm2(AWG18) or more to prevent cable
deterioration and damage to the cable
coating.
• To prevent short circuits, never put or leave
any metallic objects (e.g., coins or metal
tools) inside the unit.
• If the unit starts to emit smoke or strange
smells, turn off the power immediately and
consult your Kenwood dealer.
• Make sure not to get your fingers caught
between the faceplate and the unit.
• Be careful not to drop the unit or subject it to
strong shock.
The unit may break or crack because it
contains glass parts.
• Do not touch the liquid crystal fluid if the
LCD is damaged or broken due to shock. The
liquid crystal fluid may be dangerous to your
health or even fatal.
If the liquid crystal fluid from the LCD
contacts your body or clothing, wash it off
with soap immediately.
2WARNING
To prevent damage to the machine,
take the following precautions:
• Make sure to ground the unit to a negative
12V DC power supply.
• Do not open the top or bottom covers of the
unit.
• Do not install the unit in a spot exposed to
direct sunlight or excessive heat or humidity.
Also avoid places with too much dust or the
possibility of water splashing.
• Do not subject the faceplate to excessive
shock, as it is a piece of precision
equipment.
• When replacing a fuse, only use a new one
with the prescribed rating. Using a fuse with
the wrong rating may cause your unit to
malfunction.
• To prevent short circuits when replacing a
fuse, first disconnect the wiring harness.
• Do not place any object between the
faceplate and the unit.
• During installation, do not use any screws
except for the ones provided. The use of
improper screws might result in damage to
the main unit.
• Do not apply excessive force to the moving
faceplate. Doing so will cause damage or
malfunction.
• Do not apply excessive force to the open
faceplate or place objects on it. Doing so will
cause damage or breakdown.
2CAUTION
IMPORTANT INFORMATION
About the disc changer to be
connected:
To connect a disc changer having the "O-N"
switch to this unit, set the "O-N" switch to
"N".
When you connect a model with no "O-N"
switch, the converter cord CA-DS100
available as an option may be required. For
details, consult your Kenwood dealer.
If a model with no "O-N" switch is
connected, some unavailable functions and
information that cannot be displayed are
generated, such as the DNPS, DNPP,
Magazine random play, and CD Text display.
Note that none of the KDC-C100, KDC-C302,
C205, C705, and non-Kenwood CD changers
can be connected.
You can damage both your unit and
the CD changer if you connect them
incorrectly.
Do Not Load 8-cm (3-in.) CDs in the
CD slot
If you try to load an 8-cm CD with its adapter
into the unit, the adapter might separate
from the CD and damage the unit.
2CAUTION
Safety precautions
Product specificaties
| Merk: | Kenwood |
| Categorie: | Autoradio |
| Model: | kdc 7090r |
Heb je hulp nodig?
Als je hulp nodig hebt met Kenwood kdc 7090r stel dan hieronder een vraag en andere gebruikers zullen je antwoorden
Handleiding Autoradio Kenwood
24 Maart 2025

24 Maart 2025
24 Maart 2025

24 Maart 2025
24 Maart 2025
19 Februari 2025
19 Februari 2025
27 Januari 2025
16 December 2024

3 December 2024
Handleiding Autoradio
- Conceptronic
- Impulse
- Sanyo
- Roadstar
- PNI
- Panasonic
- Scott
- Cobra
- Biltema
- Nextbase
- Fiat
- Audison
- Hifonics
- Clarion
- Soundstream
Nieuwste handleidingen voor Autoradio
12 September 2025

11 Augustus 2025

22 Juli 2025

21 Juli 2025

15 Juli 2025

14 Juli 2025

14 Juli 2025

14 Juli 2025

5 Juli 2025

4 Juli 2025