EXSYS EX-6061-2 Handleiding
EXSYS Netwerkkaart/adapter EX-6061-2
Bekijk gratis de handleiding van EXSYS EX-6061-2 (2 pagina’s), behorend tot de categorie Netwerkkaart/adapter. Deze gids werd als nuttig beoordeeld door 72 mensen en kreeg gemiddeld 4.7 sterren uit 9 reviews. Heb je een vraag over EXSYS EX-6061-2 of wil je andere gebruikers van dit product iets vragen? Stel een vraag
Pagina 1/2
65
Die EX-6061-2 ist eine high speed 10Gigabit Ethernet PCI-Express Karte. Sie ist mit einem
externen Port ausgestattet. Sie unterstützt alle PCI-Express Slots von x4 bis x16. Der serielle
PCI-Express Bus unterstützt optimal die Leistung des schnellen Tehuti Chipsatz. Die EX-6061-2
gewährleistet so eine sichere Datenübertragung und exzellente Performance von bis zu
10000Mbit/s! Es ist nicht möglich die I/O Adressen und Interrupts manuell einzustellen. Die
Einstellungen werden vom System (BIOS) und beim installieren des Betriebssystems automa-
tisch vorgenommen.
Kompatibilität:PCI-Express p1-x4 bis x16
Betriebssysteme:Windows 7/ 8.x/ 10/ Server 20xx/ Linux 2.6.24 oder höher
Anschlüsse:1x RJ45 10Gigabit Ethernet Anschluss
Lieferumfang:EX-6061-2, Treiber CD, Anleitung, LowProfile Bügel
Zertifikate:
CE
/ FCC / RoHS / WEEE DE97424562 / WHQL
1
ANSCHLÜSSE & LED`S
BESCHREIBUNG & TECHNISCHE DATEN
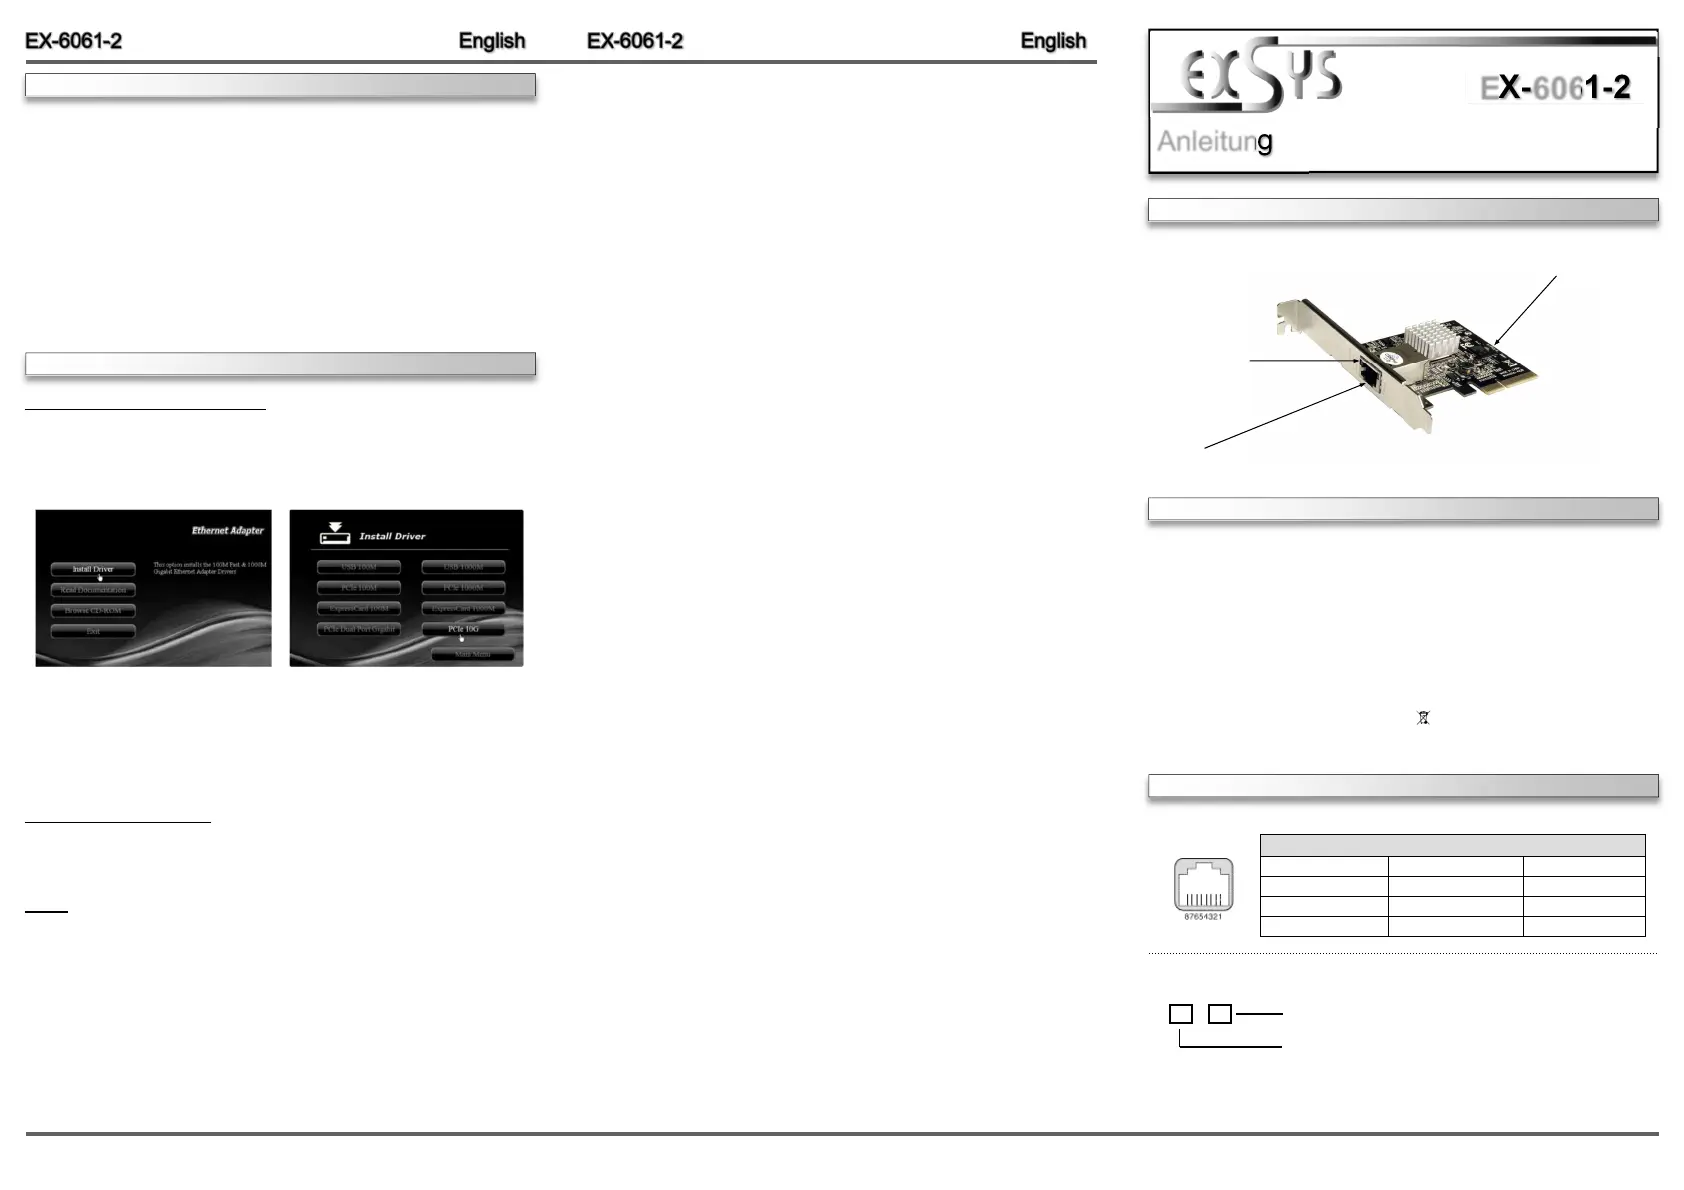
AUFBAU
Anleitung
Vers. 1.0 / 07.02.17
EX-6061-2
RJ45 Anschluss
Status LED´s
Tehuti Chipset
RJ45 Anschluss:
LINK / Connected
ACT LAN DATA
Status LED´s:
PinSignalPinSignalPinSignal
1BI_DA+4BI_DC+7BI_DD+
2BI_DA- 5BI_DC- 8BI_DD-
3BI_DB+6BI_DB-
RJ45 Anschluss
HARDWAREINSTALLATION
Please note the following installation instructions. Because there are large differences between the
PC’s, we can give you only a general installation instructions for the EX-6061-2. Please refer your
computer’s reference manual whenever in doubt.
1.Turn off the power to your computer and any other connected peripherals.
2.Remove the mounting screws located at the rear and/or sides panels of your Computer and
gently slide the cover off.
3.Locate an available PCI-Express expansion slot and insert the card. Make sure that the card
is plugged in correctly.
4.Then attach the card with a screw to the rear panel of the computer.
5.Gently replace your computer’s cover and the mounting screws.
DRIVERINSTALLATION
Windows 7/ 8.x/ 10/ Server 20xx
After starting Windows is recognizes a new “Ethernet-Controller“. Please insert the Driver CD
in the CD-Rom drive. Now start the installation with a click on “Install Driver“ (see Picture 1)
and after them please choose the selection box “PCIe 10G“ (see Picture 2), to proceed the
installation:
Picture 1 Picture 2
Follow the installation instructions and complete the installation.
Windows will now install automatically you right driver for your particular operating system. After
the installation the operating system detects the card and automatically install them.
CHECK INSTALLED DRIVER
Open the >Device manager<. Now you should see at “Network adapters“ the following new
entry: <Tehuti Networks 10GbE Adapter>.
If you see this or a similar information the card is installed correctly.
Linux
You can check whether the driver is loading by using following commands:
# lsmod | grep tn40xx
# ifconfig –a
If there is a device name, ethX, shown on the monitor, the Linux driver is load. Then you can use
the following command to activate the ethX:
# ifconfig ethX up, where X=0,1,2...
Product specificaties
| Merk: | EXSYS |
| Categorie: | Netwerkkaart/adapter |
| Model: | EX-6061-2 |
| Breedte: | 56 mm |
| Hoogte: | 82 mm |
| Gebruikershandleiding: | Ja |
| Connectiviteitstechnologie: | Bedraad |
| Ethernet LAN: | Ja |
| Aantal Ethernet LAN (RJ-45)-poorten: | 1 |
| Interface: | Ethernet |
| Duurzaamheidscertificaten: | RoHS |
| Netwerkstandaard: | IEEE 802.3ad, IEEE 802.3u |
| Ondersteunt Windows: | Ja |
| Temperatuur bij opslag: | -40 - 85 °C |
| Intern: | Ja |
| Ondersteunt Linux: | Ja |
| Hostinterface: | PCI Express |
| Maximale overdrachtssnelheid van gegevens: | - Mbit/s |
| Meegeleverde drivers: | Ja |
| Ondersteunde server operating systems: | Windows Server 2008 R2, Windows Server 2012, Windows Server 2012 R2 |
| Full duplex: | Ja |
| Bedrijfstemperatuur (T-T): | 0 - 60 °C |
| Relatieve vochtigheid in bedrijf (V-V): | 5 - 95 procent |
Heb je hulp nodig?
Als je hulp nodig hebt met EXSYS EX-6061-2 stel dan hieronder een vraag en andere gebruikers zullen je antwoorden
Handleiding Netwerkkaart/adapter EXSYS

3 Maart 2026
3 Maart 2026
3 Maart 2026
3 Maart 2026
2 Maart 2026
2 Maart 2026
2 Maart 2026
1 December 2025
27 November 2025
10 November 2025
Handleiding Netwerkkaart/adapter
Nieuwste handleidingen voor Netwerkkaart/adapter
20 Januari 2026
8 Januari 2026
27 December 2025
24 December 2025
24 December 2025
22 December 2025
20 December 2025
15 December 2025
9 December 2025
27 November 2025