CTA Digital PAD-AUTICC Handleiding
CTA Digital Niet gecategoriseerd PAD-AUTICC
Bekijk gratis de handleiding van CTA Digital PAD-AUTICC (1 pagina’s), behorend tot de categorie Niet gecategoriseerd. Deze gids werd als nuttig beoordeeld door 41 mensen en kreeg gemiddeld 4.2 sterren uit 8 reviews. Heb je een vraag over CTA Digital PAD-AUTICC of wil je andere gebruikers van dit product iets vragen? Stel een vraag
Pagina 1/1
for iPad 8th Gen 10.2, iPad Pro 10.5 and iPad Air3
PAD-AUTICC
Vehicle Mount with Inductive Charging Case Kit
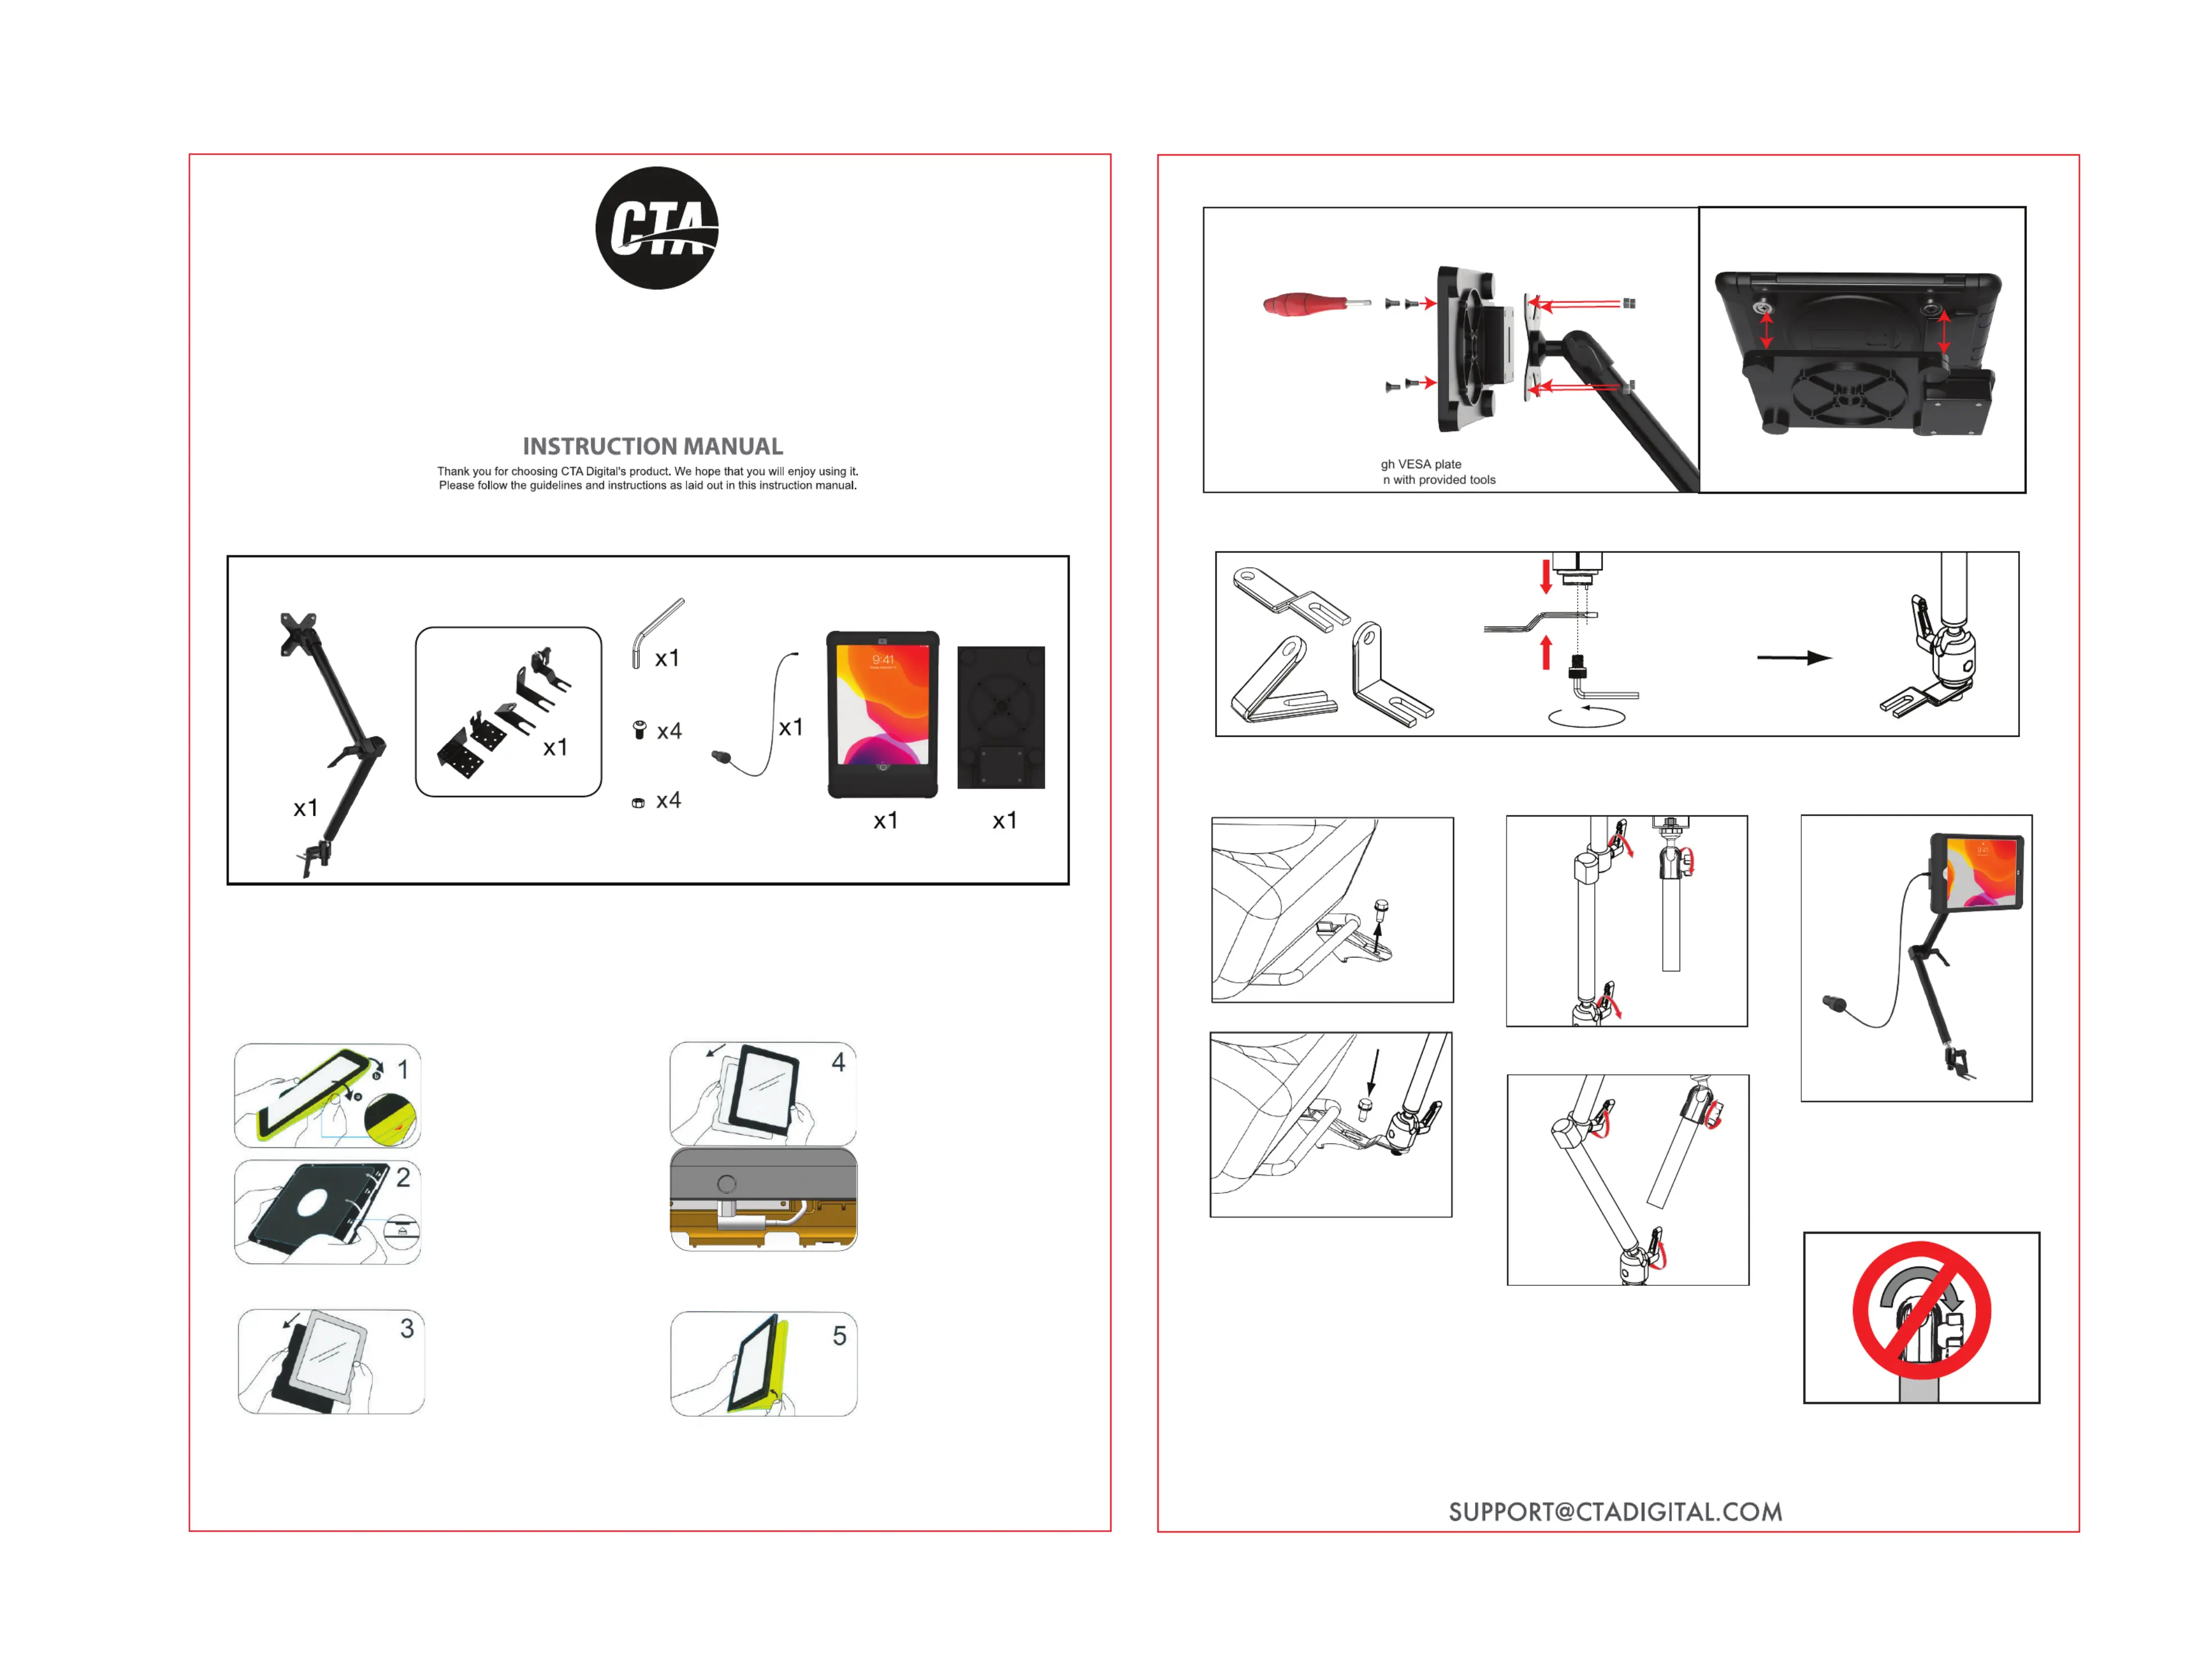
Package Contents:
Instructions:
2. Align Vehicle Seat Rail Clamp and the
Allen Key
Screw
Vechicle Mount and Screw as shown in
diagram above. Use Allen Key to screw together.
4. Installing Vehicle Seat Rail Clamp to the Vechile Rail
Because each vehicle is different, you will need to determine which included seat rail clamp is best for you.
1. Choose the base with the
angle that matches your needs.
Combine nuts and bolts throu
from the front & back as show
3. Place Tablet into Dock
Align the magnets. Please align the battery pack to the
battery pad on the right side so tablet will charge properly.
*Disclaimer - Ball Joint Warning
DO NOT attempt to adjust, tilt, or rotate
any ball socket joints while it is fully
tightened. Any such action will result in
possible damage and loss of integrity of
product functioning at full capacity.
Manufacturer will not be responsible for
any such actions by any person.
8.Adjusting Ball Joints
CAUTION! PLEASE READ
BEFORE USE!
5.Installing Vechicle Mount
to your Vechicle Seat Rail
Loose the bolt of the seat rail.
Install the assembled Vechicle Seat Rail
Clamp and Base set on the seat rail and
screw back the bolt.
6.Adjusting the Flex Arm
Joint for Preferred Positions
Twist the SCREW KNOB (Both or Either)
counter-clockwise to release the connection.
Adjust the arm to your preferred position and then
tighten the SCREW KNOB clockwise .
1. Peel the external
silicone sleeve from
the internal hard
case.
2. To open internal hard
case, apply gentle
pressure to the small
clips (as shown to the
left). The case will open
with all (4) sides are
unclipped.
3. Insert tablet into the back
portion of the hard cover.
4. Once tablet is in the back
portion of the case, look to the
bottom and plug the charging
cable into the power socket of
the tablet. After, place the
internal hard case front cover
on the top of the case and clip
all (4) sides shut around the
case.
5. Place on the external
silicone rubber sleeve over the
hard case again.
2. Attach VESA Plate to Dock
1. Located Tablet Case and Insert Device
7.Plug in Power Cord from
Dock Port into Vehicle
Product specificaties
| Merk: | CTA Digital |
| Categorie: | Niet gecategoriseerd |
| Model: | PAD-AUTICC |
| Kleur van het product: | Zwart |
| Gewicht: | 1528.6 g |
| Breedte: | 50 mm |
| Diepte: | 101 mm |
| Hoogte: | 533 mm |
| Correct gebruik: | Auto |
| Materiaal: | Aluminium |
| Type bevestiging apparaat: | Magnetische montage |
Heb je hulp nodig?
Als je hulp nodig hebt met CTA Digital PAD-AUTICC stel dan hieronder een vraag en andere gebruikers zullen je antwoorden
Handleiding Niet gecategoriseerd CTA Digital

22 Juni 2026
22 Juni 2026
22 April 2026
22 April 2026
19 April 2026
26 Maart 2026
26 Maart 2026
26 Maart 2026
25 Maart 2026
25 Maart 2026
Handleiding Niet gecategoriseerd
Nieuwste handleidingen voor Niet gecategoriseerd
22 Juni 2026
22 Juni 2026
22 Juni 2026
22 Juni 2026
22 Juni 2026
22 Juni 2026
22 Juni 2026
22 Juni 2026
22 Juni 2026
22 Juni 2026