Chief PAC116 Handleiding
Chief Flat panel steun PAC116
Bekijk gratis de handleiding van Chief PAC116 (1 pagina’s), behorend tot de categorie Flat panel steun. Deze gids werd als nuttig beoordeeld door 14 mensen en kreeg gemiddeld 4.1 sterren uit 8 reviews. Heb je een vraag over Chief PAC116 of wil je andere gebruikers van dit product iets vragen? Stel een vraag
Pagina 1/1
INSTALLATION INSTRUCTIONS
PAC115-116-117
Legrand AV and its affiliated corporations and subsidiaries (collectively “Legrand AV”), intend to make this manual accurate and complete. However, Legrand AV makes no claim|||
that the information contained herein covers all details, conditions or variations, nor does it provide for every possible contingency in connection with the installation or use of this
product. The information contained in this document is subject to change without notice or obligation of any kind. Legrand AV makes no representation of warranty, expressed or|
implied, regarding the information contained herein. Legrand AV assumes no responsibility for accuracy, completeness or sufficiency of the information contained in this document.|
Chief, a brand of Legrand
6436 City West Parkway, Eden Prairie, MN 55344
• P: 800.582.6480 / 952.225.6000 • F:877.894.6918 / 952.894.6918
The PAC115/116/117 hardware kits are designed for use with
Chief® Series Mounts. See the specific installation instructions
provided with the mount for additional installation information.
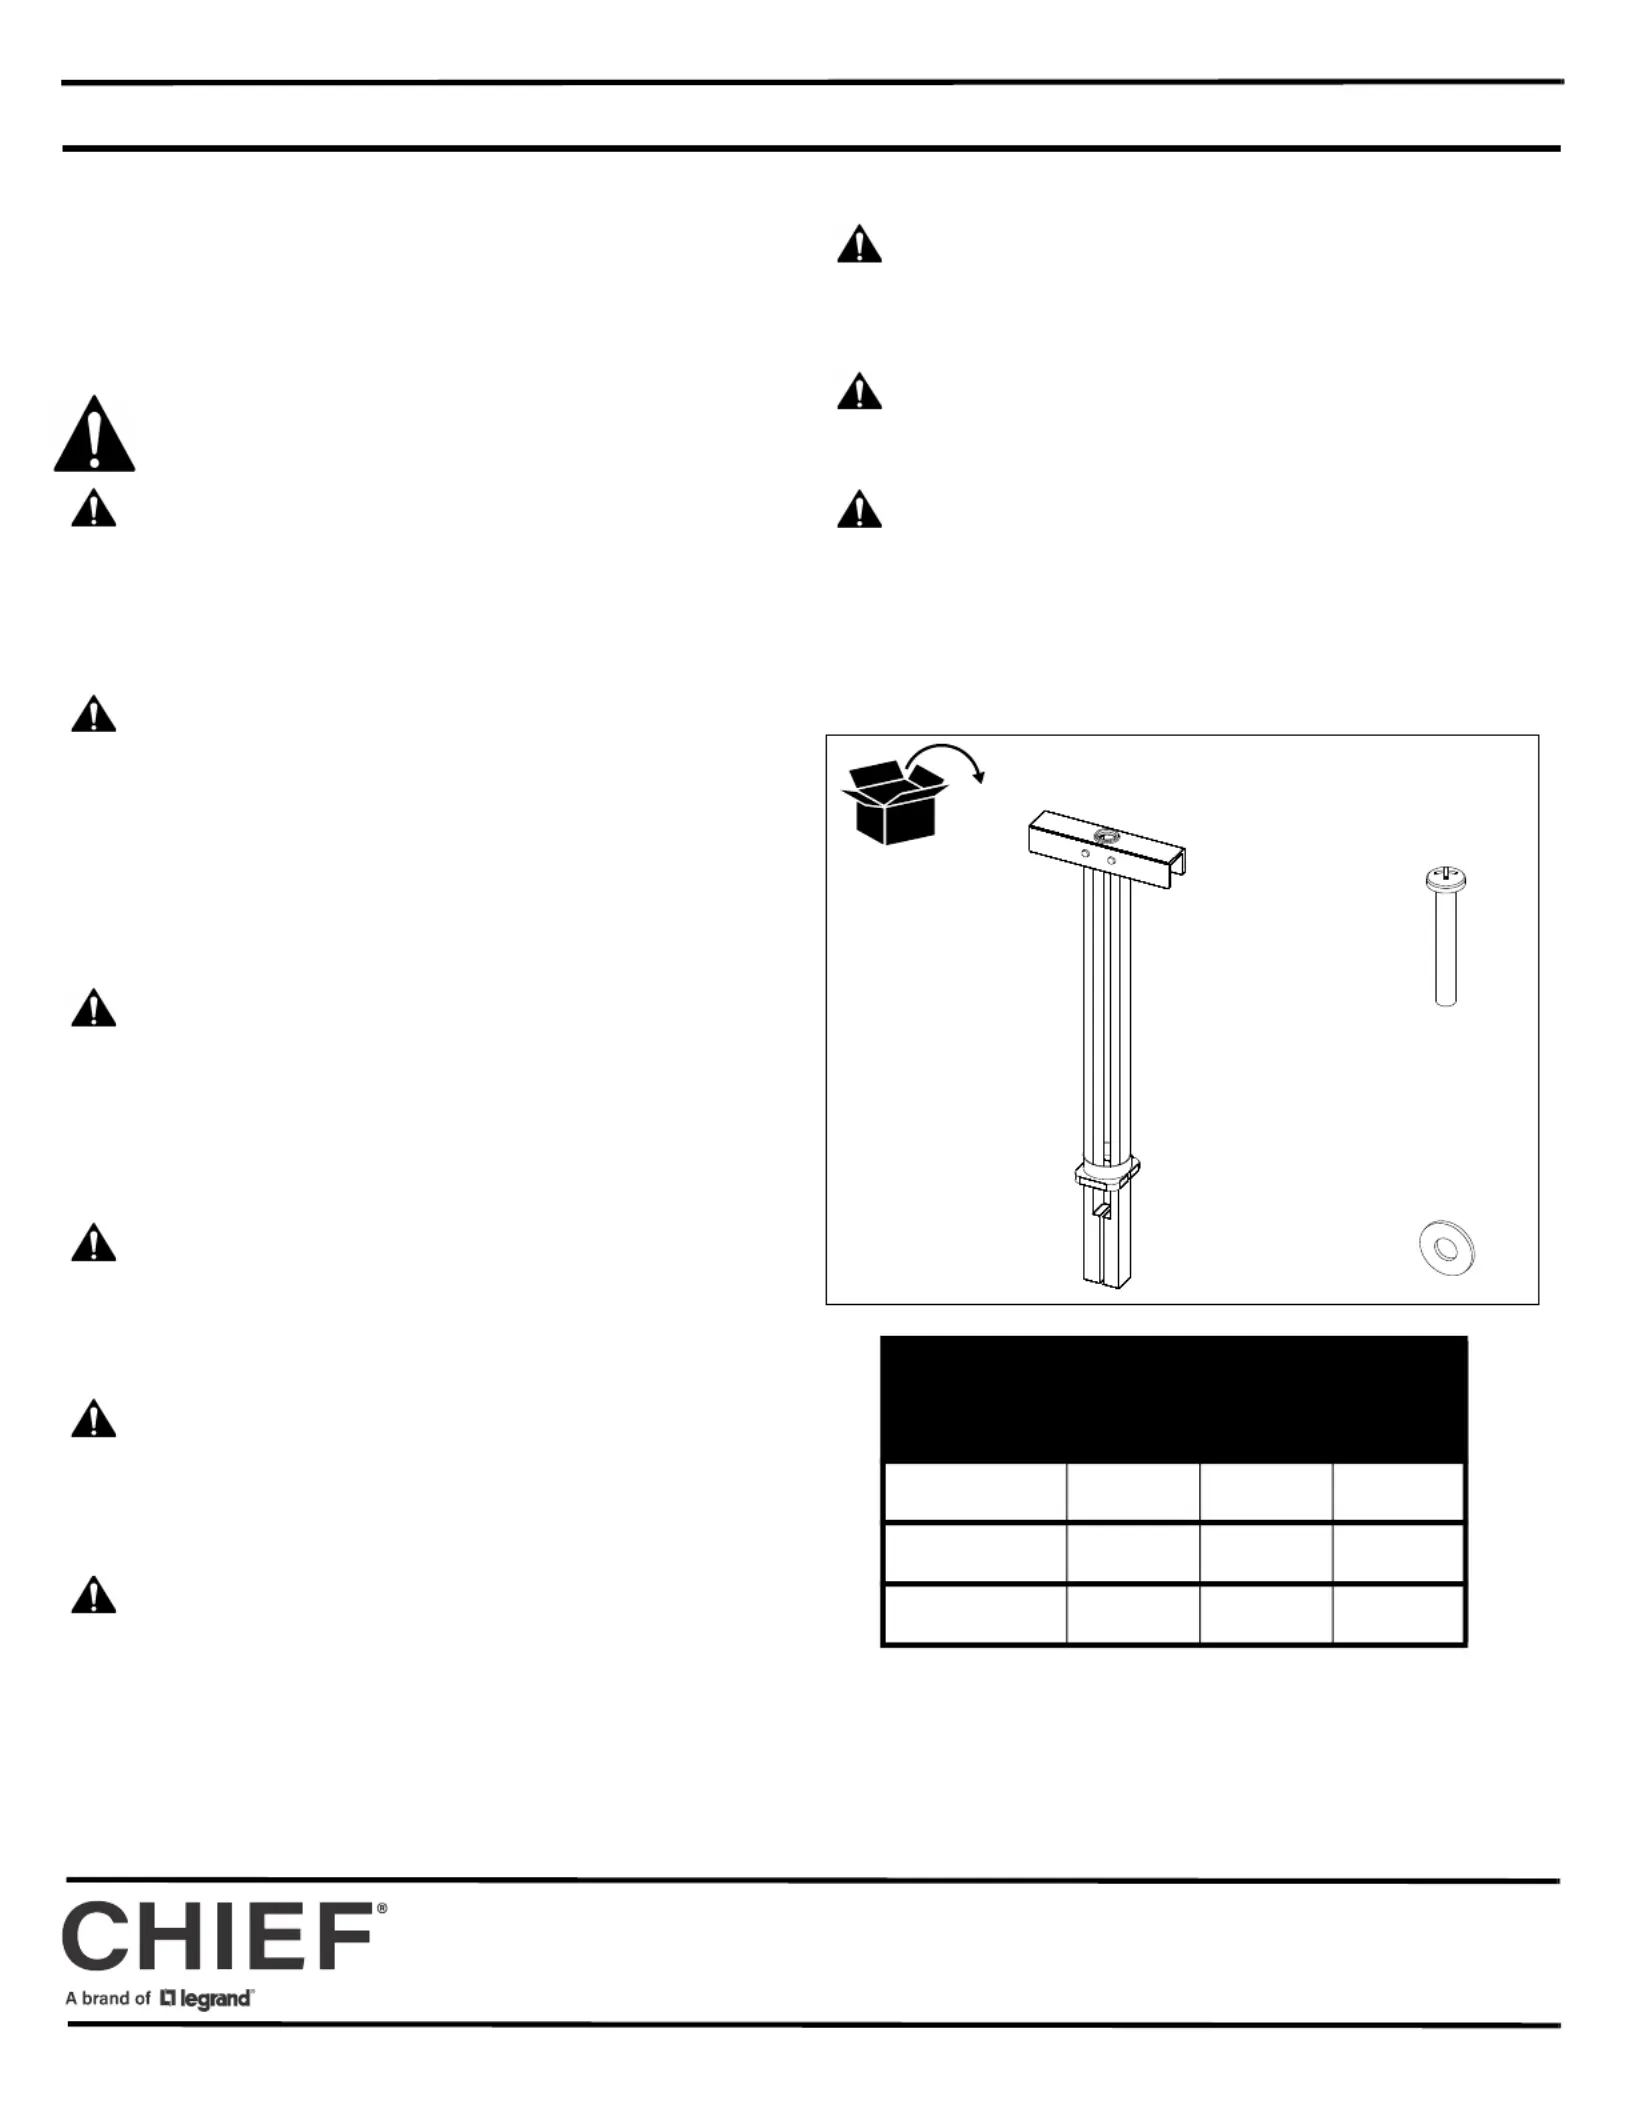
Unpack and verify kit contents. If any listed parts are missing,
immediately contact a Chief Customer Service representative.
IMPORTANT SAFETY INSTRUCTIONS
WARNING: Failure to read, thoroughly understand, and follow
all instructions can result in serious personal injury, damage to
equipment, or voiding of factory warranty! It is the installer’s
responsibility to make sure all components are properly
assembled and installed using the instructions provided.
WARNING: Failure to provide adequate structural strength for
this product can result in serious personal injury or damage to
equipment! It is the installer’s responsibility to make sure the
structure to which this product is attached can support five times
the combined weight of all equipment. Reinforce the structure as
required before installing the product. The wall to which the mount
is being attached may have a maximum drywall thickness 5/8"
(1.6cm) over steel studs.
WARNING: Exceeding the weight capacity can result in serious
personal injury or damage to equipment! It is the installer’s
responsibility to make sure the combined weight of all
components does not exceed the maximum weight capacity of
the mount being installed. (See mount installation instructions for
weight capacity information.)
WARNING: IMPROPER INSTALLATION CAN LEAD TO
EQUIPMENT FALLING CAUSING SERIOUS PERSONAL
INJURY AND DAMAGE TO EQUIPMENT! DO NOT substitute
hardware. Use only hardware supplied by manufacturer!
WARNING: OVER TIGHTENING OF SCREWS CAN
DAMAGE PARTS AND CAN LEAD TO SERIOUS PERSONAL
INJURY AND DAMAGE TO EQUIPMENT! DO NOT over
tighten screws when installing this product.
WARNING: USING THIS PRODUCT INCORRECTLY MAY
RESULT IN SERIOUS PERSONAL INJURY OR DAMAGE TO
EQUIPMENT! Do NOT use the PAC115-116-117 to fasten a
mount into only drywall.
WARNING: Use this product only for its intended use as
described in these instructions. Do not use hardware or
attachments not recommended by the manufacturer.
WARNING: Never operate this product if it is damaged. Return
the product to a service center for examination and repair.
WARNING: Do not use this product outdoors.
IMPORTANT ! : The PAC115-116-117 kits may be used to
fasten mounts to a 2" x 4"-25ga minimum steel stud wall.
®Chief is a registered trademark of Legrand AV Inc.
PARTS
1.Reference the instruction manual included with the mount being
installed for complete steel stud installation steps.
(A)
[1/4-20 BB toggler anchor]
(B)
1/4-20 x 1-3/4"
(C)
1/4"
ABC
MODEL(qty)(qty)(qty)
PAC115
444
PAC116
888
PAC117
282828
8800-003402 Rev00
©2024 Legrand AV|
www.legrandav.com
03/2024
Product specificaties
| Merk: | Chief |
| Categorie: | Flat panel steun |
| Model: | PAC116 |
Heb je hulp nodig?
Als je hulp nodig hebt met Chief PAC116 stel dan hieronder een vraag en andere gebruikers zullen je antwoorden
Handleiding Flat panel steun Chief

13 April 2026
8 April 2026
7 April 2026
6 April 2026
6 April 2026
6 April 2026
6 April 2026
6 April 2026
6 April 2026
6 April 2026
Handleiding Flat panel steun
Nieuwste handleidingen voor Flat panel steun
22 April 2026
20 April 2026
17 April 2026
15 April 2026
14 April 2026
13 April 2026
11 April 2026
31 Maart 2026
31 Maart 2026
26 Maart 2026