Vollrath VP12 Handleiding
Vollrath
Vacuumverpakker
VP12
Lees hieronder de 📖 handleiding in het Nederlandse voor Vollrath VP12 (6 pagina's) in de categorie Vacuumverpakker. Deze handleiding was nuttig voor 3 personen en werd door 2 gebruikers gemiddeld met 4.1 sterren beoordeeld
Pagina 1/6

ENGLISH
Operator’s Manual
Item No. 26131-1 Rev 2/23/15
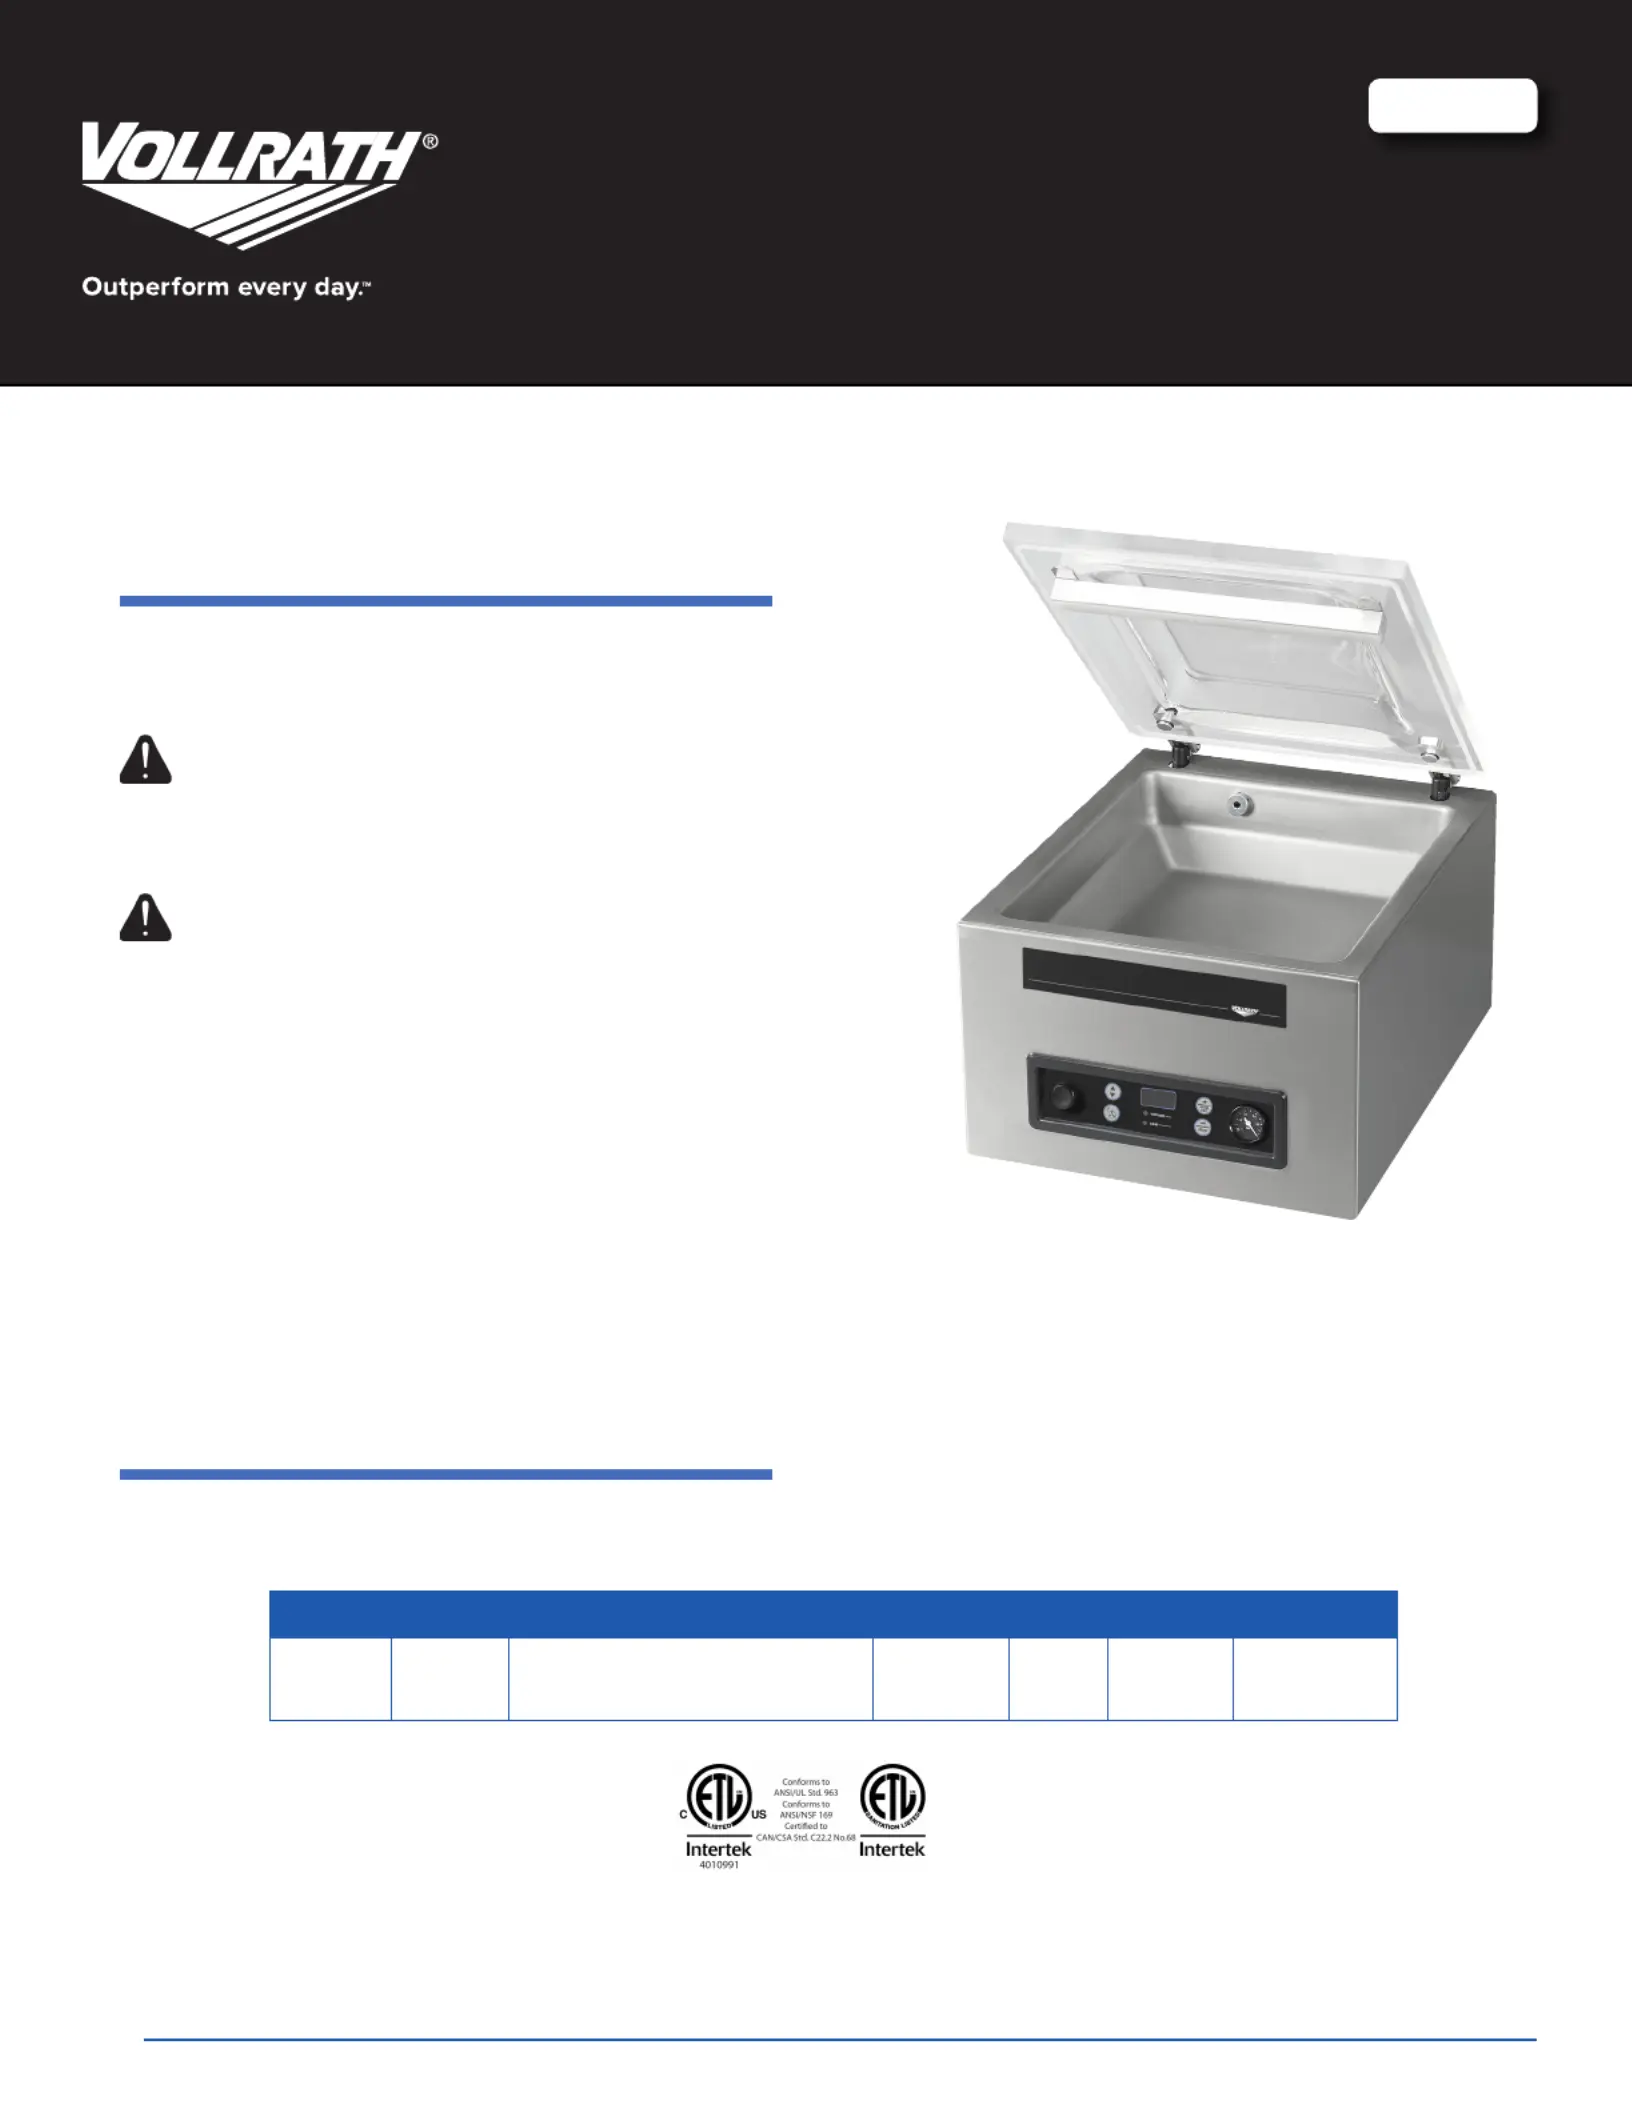
Vacuum Packing machine with 12" Sealing Bar
Thank you for purchasing this Vollrath Vacuum Packing Machine. Before operating the equipment, read and familiarize yourself with
the following operating and safety instructions. SAVE THESE INSTRUCTIONS FOR FUTURE REFERENCE. Save the original box and
packaging. Use this packaging to ship the equipment if repairs are needed.
Item Model Description Voltage Hz Amps Plug
40831 VP12
Vacuum Packing Machine
with 12" Sealing Bar
120 60 8.5
NEMA
5-15P
S Pafety recautionS
To ensure safe operation, read the following statements and understand
their meaning. This manual contains safety precautions which are
explained below. Please read carefully.
warning
Warning is used to indicate the presence of a hazard that will or can cause
severe personal injury or death.
cautiOn
Caution is used to indicate the presence of a hazard that will or can cause
minor or major personal injury if the caution is ignored.
NOTICE is used to note information that is important but not hazard-
related.
These precautions should be followed at all times. Failure to follow these
precautions could result in injury to yourself and others.
Unplug when not in use.
Keep unit and power cord away from open ames, electric burners or
excessive heat.
Do not operate unattended.
Do not operate if unit has been damaged or is malfunctioning in any
way.
f Punction and urPoSe
This unit is intended to vacuum seal food products in a commercial kitchen
environment. It is not intended for household, industrial or laboratory use.

OperatOr s anual’ M
2
ENGLISH
inStallation
c rlearance equirementS
The minimum clearance is 6 inches (15 cm) on all sides of the machine and
30 inches (76.2 cm) inches above the machine.
Ambient temperature must be between 41-86 °F (5-30 °C). Never locate the
machine near a heat source. This can damage the lid.
1. Remove all packing material and tape, as well as any protective plastic
from the equipment.
2. Clean any glue residue left by the plastic or tape.
3. Place the vacuum pack machine on a at, level surface.
4. Check the oil gauge window at the back of the machine. Verify the oil
level is between the minimum and maximum ll lines.
NOTICE: Running the machine without oil or insufcient oil will
damage the machine and void the warranty.
5. Plug the power cord into a grounded electrical outlet that matches the
nameplate rated voltage.
NOTICE: Using a voltage other than the nameplate rated voltage will
cause damage to the unit. Incorrect voltage, modication
to the power cord or electrical components can damage
the unit and will void the warranty.
6. Run the Pump Conditioning program. See “Pump Conditioning program”
on page 4 in this manual.
overview
a
B
D
c
e
c
F
a
Lid - Seals the chamber during the vacuum cycle
B
Chamber - Products are placed in the chamber with the
opening of the vacuum seal bag laid over the seal bar
c
Seal Bar - Seals the vacuum bag
D
Control Panel - Selects and programs functions
e
Seal Pad - Provides counter-pressure on the sealing bar
F
Lid Retainer - Holds lid closed when machine is not in use.
c Pontrol anel
B
a c e g h
D F
a
On/Off Button - Turns the machine On and Off.
B
Function Select Button - Selects vacuum or seal functions.
c
Oil Cleaning Program Button - Activates the pump cleaning
program.
D
Display - Shows the current value of the active function during
the program cycle or the set value of the selected function
when the machine is idle
e
Function LEDs - The LED for the function illuminates when
the function is active during the program cycle or when the
function is selected in the programming mode.
F
Increase Time / Vacuum Stop Button - During a packing
cycle, stops the current function and continues to the next step
in the program. In programming mode, increases the time of
the selected function.
g
Decrease Time / Stop Button - During a packing cycle,
interrupts all functions and cancels the cycle. In programming
mode, decreases the time of the selected function.
h
Vacuum Gauge - Shows the pressure value in the vacuum
chamber. A value of -1 bar is the equivalent of 99% vacuum.
oPeration
cautiOn
Do not touch the sealing bar when placing vacuum bags in the
chamber
Burn Hazard.
Sealing bar may become hot after repeated use.
NOTICE: Never pack products that can be damaged by vacuum
packaging.
Avoid packing warm products to reduce condensation and
corrosion risks for the pump.
Special instructions apply for packing liquid products. See
“Packing Liquid Products” on page 3.
The machine is designed for a maximum use of 5 hours per
day.
This machine is not designed for continuous use. Allow 15
seconds between packing cycles. Do not exceed a vacuum
time of 60 seconds.
If the machine has been in use for one hour, stop the
machine and allow it to cool to ambient temperature.
The machine must be moved or transported in an upright
position. The machine may NOT be tilted because this can
cause damage to the pump.
1. Press the power button to turn on the machine. The display shows codes
for the software revision. For example:
2. If the machine has not been used for a while, run the Pump Conditioning
Program. See “Pump Conditioning program” on page 4.
3. Place food product in a vacuum sealing bag.

3
ENGLISH
OperatOr s anual’ M
4. Place the bag in the chamber.
• If the product is small, use the included insert plates to reduce
empty space in the chamber. This will reduce the cycle time.
• Position the bag so the open end is placed over the sealing bar.
• The bag should NOT extend outside the chamber.
• The vacuum bag must be placed over the sealing bar without any
folds.
5. Multiple vacuum bags can be placed over the sealing bar if the sealing
bar is longer than the opening of the vacuum bags. Do NOT overlap
vacuum bags.
6. Set the vacuum and seal times.
7. Close the lid. Do not use the lid retainer. The cycle automatically starts.
8. The lid opens automatically when the cycle is complete.
9. Remove the packed product.
10. Wait 15 seconds before packing another product.
S mtoPPing the achine
To stop the vacuum step and move to seal step, press
vac
stop
.
To stop and cancel the entire cycle, press
stop
.
S v S tett the acuum or eal ime
1. Press the Function Select button to select Vacuum or Seal.
The LED of the selected function illuminates.
vacuum
seal
2. Press the + or - button to set the time.
vac
stop
stop
Press and release changes the time by 1 second.
Press and hold changes the time in 1 second
increments for the rst 5 seconds, then by 10 second
increments.
Recommended maximum vacuum time is 60
seconds.
Recommended maximum seal time is 2 seconds.
P l Packing iquid roductS
Special care must be taken when packing liquids.
1. Cool foods before packing. Hot food quickly reaches the boiling point,
which can lead to an insufcient seal.
NOTICE: Hot products create condensation which can damage the
pump.
2. Watch the vacuum process through the clear lid.
3. Press the
vac
stop
button as soon as bubbles appear in the product.
This will stop the vacuum and start the seal step.
NOTICE: Do not let products boil. Boiling will increase the amount
of moisture that enters the pump, which can lead to
corrosion.
4. Run the Pump Conditioning Program at the end of the work day. See
“Pump Conditioning program” on page 4.
cleaning
warning
Electrical Shock Hazard.
Keep water and other liquids from entering the
inside of the unit. Liquid inside the unit could cause
an electrical shock.
Do not spray water or cleaning products. Liquid could contact the
electrical components and cause a short circuit or an electrical
shock.
NOTICE: The machine must be moved in an upright position. Do NOT
tilt the machine. Tilting could enable oil to ow out of the
pump and cause damage to the machine.
NOTICE: If the machine will be idle for more than one month, the oil
should be drained from the pump. Moisture in the oil could
corrode the pump.
daily
Run the Pump Conditioning Program
Run the Pump Conditioning Program. See “Pump Conditioning program” on
page 4.
Clean the exterior and interior
1. Unplug the machine. Allow it to cool.
2. Wipe the vacuum chamber, lid, sealing bar, silicone holder and exterior
with a clean damp cloth.
3. Do not use abrasive materials, scratching cleansers or souring pad to
clean the unit. These can damage the nish.
4. Thoroughly wipe off any mild soap or chemical cleaners. Residue could
corrode the surface of the unit.
Product specificaties
Merk: | Vollrath |
Categorie: | Vacuumverpakker |
Model: | VP12 |
Heb je hulp nodig?
Als je hulp nodig hebt met Vollrath VP12 stel dan hieronder een vraag en andere gebruikers zullen je antwoorden
Handleiding Vacuumverpakker Vollrath

9 Juni 2025
Handleiding Vacuumverpakker
- Vacuumverpakker ETA
- Vacuumverpakker Jata
- Vacuumverpakker Neff
- Vacuumverpakker Espressions
- Vacuumverpakker Trebs
- Vacuumverpakker KitchenAid
- Vacuumverpakker ProfiCook
- Vacuumverpakker Gourmia
- Vacuumverpakker Trisa
- Vacuumverpakker Wmf
- Vacuumverpakker Black And Decker
- Vacuumverpakker Concept
- Vacuumverpakker Nesco
- Vacuumverpakker Cosori
- Vacuumverpakker Adler
Nieuwste handleidingen voor Vacuumverpakker

9 Juni 2025

9 Juni 2025

9 Juni 2025

9 Juni 2025

9 Juni 2025

12 Mei 2025

11 Mei 2025

11 Mei 2025

11 Mei 2025

11 Mei 2025