StarTech.com 6SD4FCRTB3C Handleiding
StarTech.com Geheugenkaartlezer 6SD4FCRTB3C
Bekijk gratis de handleiding van StarTech.com 6SD4FCRTB3C (2 pagina’s), behorend tot de categorie Geheugenkaartlezer. Deze gids werd als nuttig beoordeeld door 19 mensen en kreeg gemiddeld 4.8 sterren uit 6 reviews. Heb je een vraag over StarTech.com 6SD4FCRTB3C of wil je andere gebruikers van dit product iets vragen? Stel een vraag
Pagina 1/2
Quick-Start Guide
FR: Guide de l’utilisateur - fr.startech.com
DE: Bedienungsanleitung - de.startech.com
ES: Guía del usuario - es.startech.com
NL: Gebruiksaanwijzing - nl.startech.com
PT: Guia do usuário - pt.startech.com
IT: Guida per l’uso - it.startech.com
JP: - jp.startech.com取扱説明書
Manual Revision: 09/13/2018
For the latest information, technical specications, and support for
this product, please visit www.startech.com/6SD4FCRTB3C.
Package Contents
• SD Card Reader/Writer x 1
• Quick-Start Guide x 1
Requirements
Host Computer
• Thunderbolt 3 Port x 1
SD Card
• (Optional) SD Card x 6
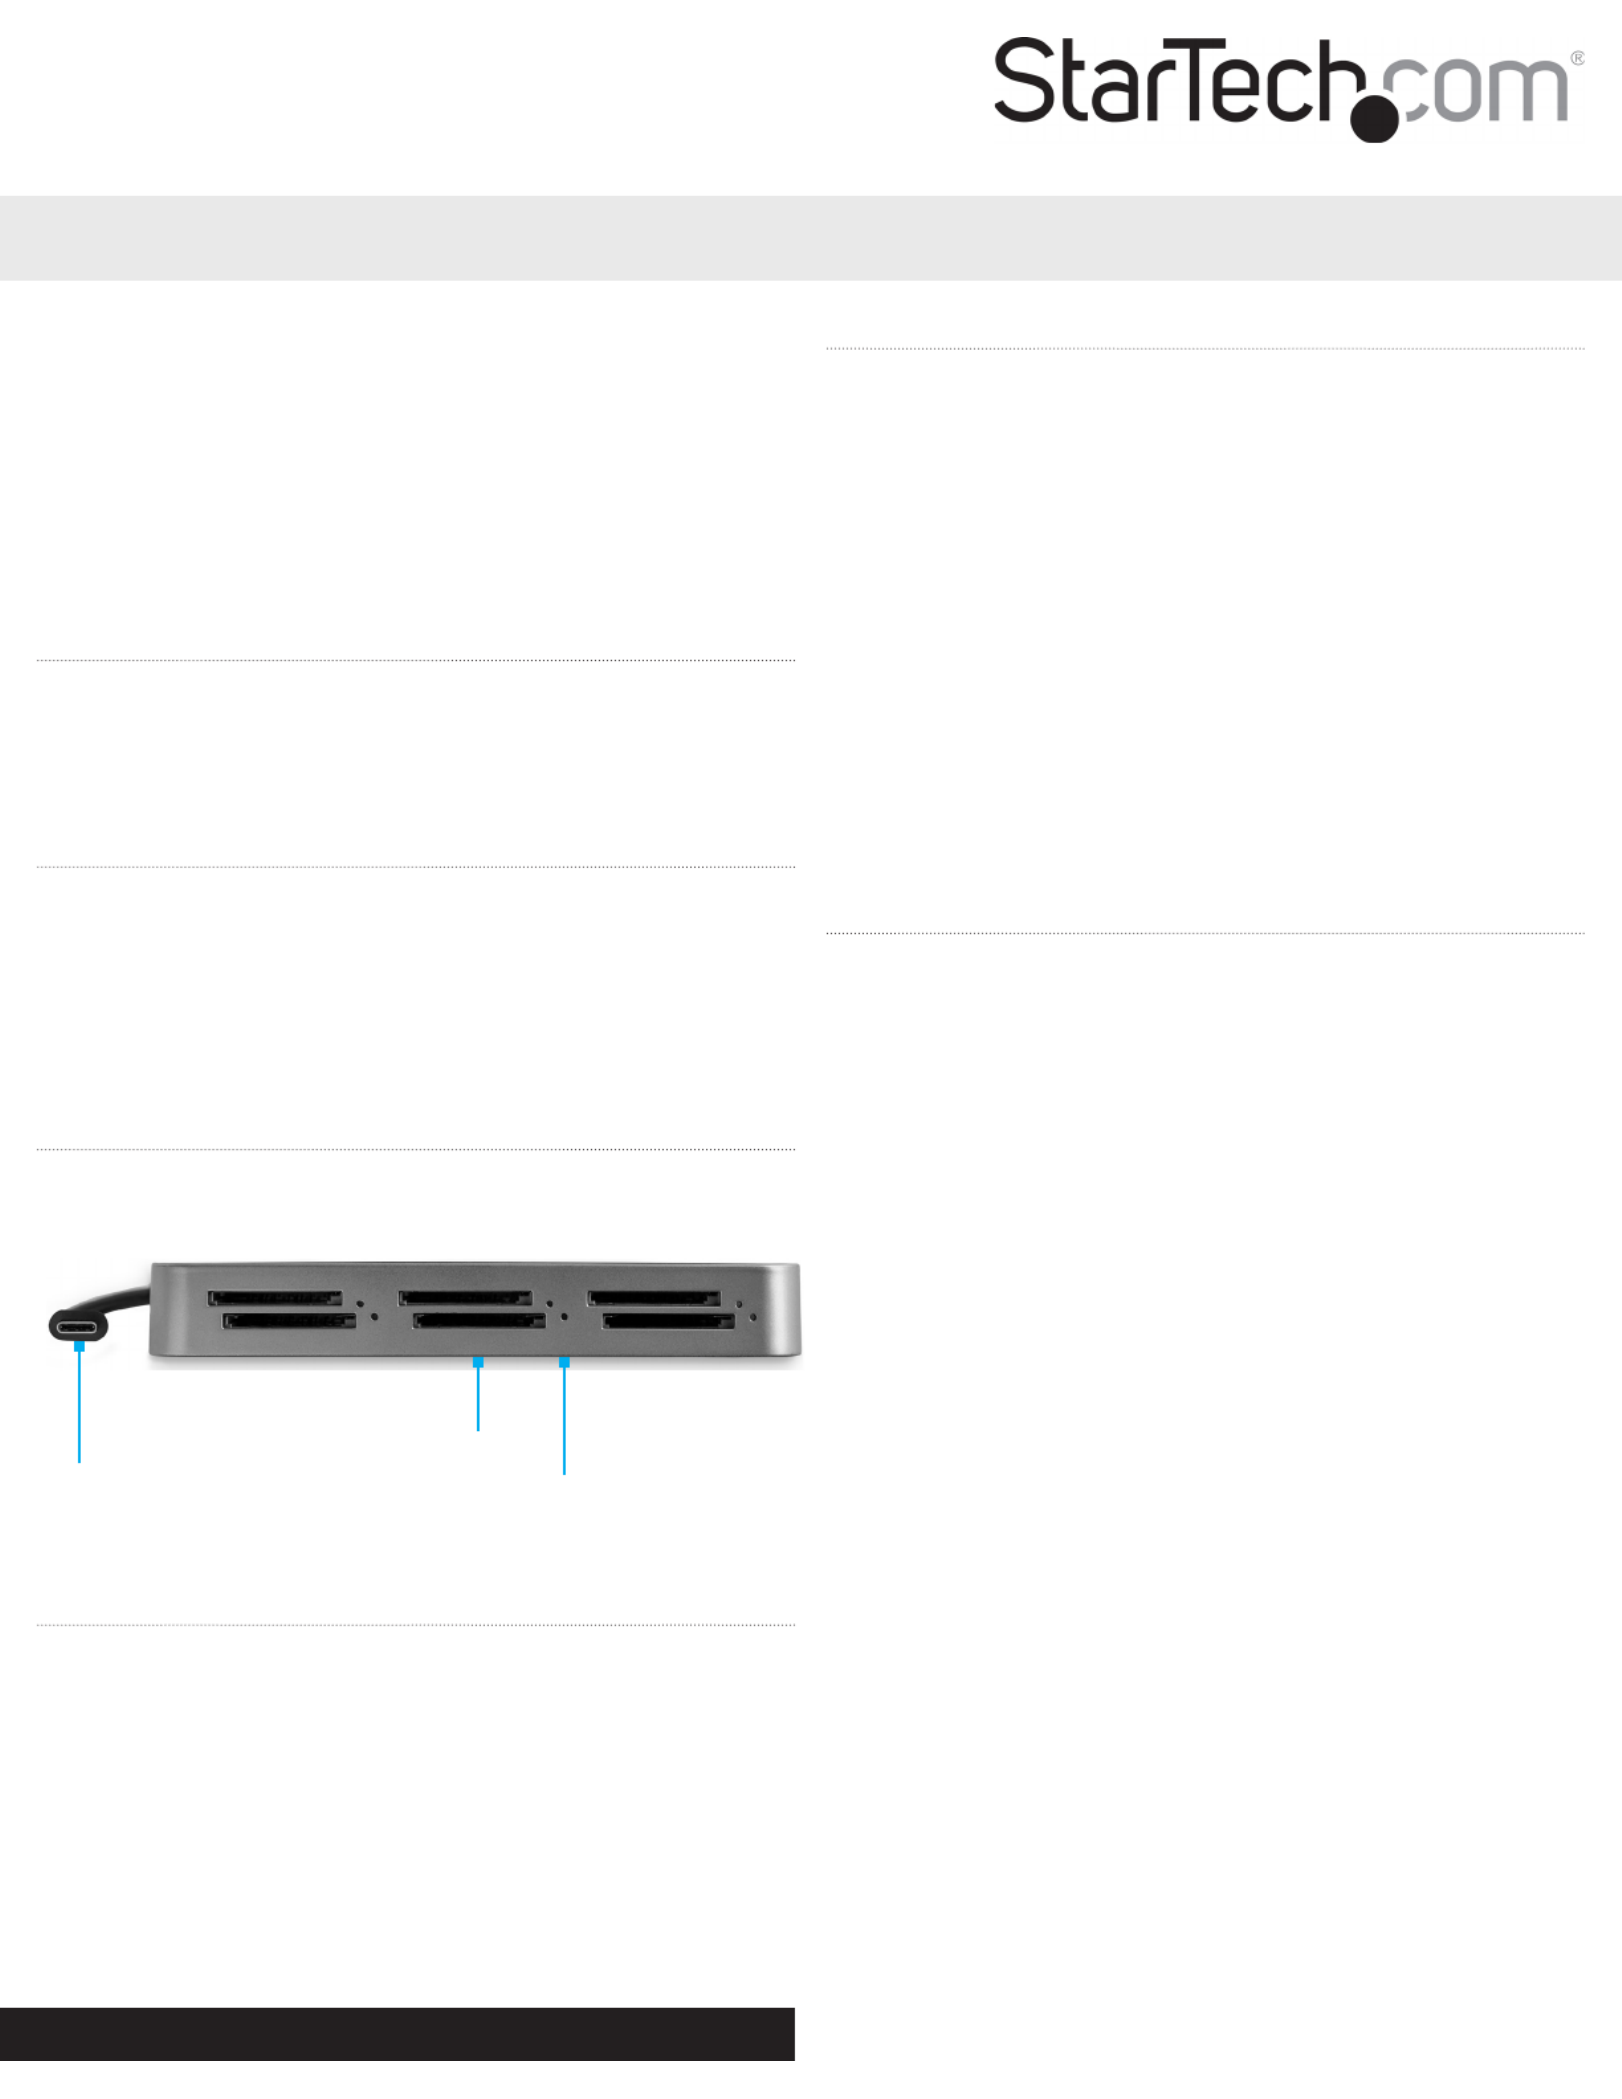
Product Diagram
Actual product may vary from photos.
Connecting the SD Card Reader/Writer
1. Connect the Thunderbolt 3 Connector to a Thunderbolt 3 Port on
the Host Computer.
Note: Driver installation is not required.
Note: Use the Thunderbolt 3 Port on your Host Computer with
the highest power output for the best performance. Consult the
manufacturer of your Host Computer for details regarding the
power specications of your Thunderbolt 3 Ports.
6SD4FCRTB3C
6-Slot SD™ Card Reader/Writer - Thunderbolt™ 3 - SD 4.0, UHS-II
Inserting an SD Card
1. Insert an SD Card, label side up, into one of the SD Card Slots on
the front of the SD Card Reader/Writer.
2. Once inserted, push the SD Card into the SD Card Slot until it
clicks into place.
Note:The Host Computer’s Operating System (OS) will
automatically detect the SD Card and install the required driver
software.
3. Repeat Steps 1 and 2 for the installation of up to ve additional
SD Cards.
4. Access the data stored on the SD Card inserted in step 1.
Note: The SD Cards may require formatting before they appear up
on your Host Computer.
Removing an SD Card
Warning: Removal of an SD Card before it is safe could result in the
loss or corruption of data on the SD Card.
Windows
1. Click on the Up arrowTaskbar on the right side of the .
2. The System Tray will pop up, revealing a set of icons.
3. Click on the Safely Remove Hardware icon.
4. The Safely Remove Hardware screen will appear.
5. Select the SD Card you wish to remove.
6. A message will appear telling you when it is safe to remove the
Card from the SD Card Reader/Writer.
macOS
1. Close any open screens associated with the SD Card Reader/
Writer.
2. On the , click and drag the DesktopUSB storage iconto the
Trash Can icon. The Trash Can Eject icon will turn into an icon
indicating that it is safe to remove the SD Card from the SD Card
Reader/Writer.
Keyboard Shortcut (Optional)
1. Select the icon.USB Storage
2. Press Command E + to safely eject the SD Card. The SD Card can
now be safely removed from the SD Card Reader/Writer.
Physically Removing the SD Card
1. Push the SD Card into the SD Card Reader/Writer until the SD
Card clicks. The SD Card will be ejected from the SD Card Slot.
2. Pull the SD Card out of the SD Card Slot.
SD Card Slot
Thunderbolt 3
Connector LED Indicators
Product specificaties
| Merk: | StarTech.com |
| Categorie: | Geheugenkaartlezer |
| Model: | 6SD4FCRTB3C |
| Kleur van het product: | Zwart, zilver |
| Gewicht: | 90 g |
| Breedte: | 82 mm |
| Diepte: | 135 mm |
| Hoogte: | 19 mm |
| Snoerlengte: | 0.217 m |
| Gewicht verpakking: | 110 g |
| Breedte verpakking: | 145 mm |
| Diepte verpakking: | 210 mm |
| Hoogte verpakking: | 40 mm |
| Materiaal behuizing: | Kunststof |
| LED-indicatoren: | Activiteit |
| Compatibele geheugenkaarten: | MMC, SD, SDHC, SDXC |
| Snelstartgids: | Ja |
| Certificering: | CE, FCC, TAA, RoHS |
| Plug and play: | Ja |
| Aantal per verpakking: | 1 stuk(s) |
| Temperatuur bij opslag: | -20 - 60 °C |
| Intern: | Nee |
| Soort aansluiting: | Thunderbolt 3 |
| Overdrachtssnelheid: | 40000 Mbit/s |
| Bedrijfstemperatuur (T-T): | 0 - 60 °C |
| Relatieve vochtigheid in bedrijf (V-V): | 0 - 90 procent |
| Code geharmoniseerd systeem (HS): | 84719000 |
| Chips organisatie: | Intel - JHL6240, Texas Instruments - TPS65983, Genesys Logic - GL3226, ASMedia - ASM1061 |
Heb je hulp nodig?
Als je hulp nodig hebt met StarTech.com 6SD4FCRTB3C stel dan hieronder een vraag en andere gebruikers zullen je antwoorden
Handleiding Geheugenkaartlezer StarTech.com

17 Augustus 2024
8 Juli 2023
7 Juli 2023
6 Juli 2023
5 Juli 2023
4 Juli 2023
3 Juli 2023
30 Juni 2023
30 Juni 2023
29 Juni 2023
Handleiding Geheugenkaartlezer
Nieuwste handleidingen voor Geheugenkaartlezer
12 Mei 2026
5 Januari 2026
23 December 2025
21 December 2025
21 December 2025
20 December 2025
19 December 2025
19 December 2025
19 December 2025
18 December 2025