Saris MHS UNO Handleiding
Saris
Niet gecategoriseerd
MHS UNO
Bekijk gratis de handleiding van Saris MHS UNO (6 pagina’s), behorend tot de categorie Niet gecategoriseerd. Deze gids werd als nuttig beoordeeld door 5 mensen en kreeg gemiddeld 4.5 sterren uit 3 reviews. Heb je een vraag over Saris MHS UNO of wil je andere gebruikers van dit product iets vragen? Stel een vraag
Pagina 1/6

MHS UNO Add-On #4651
Assembly Instructions | Instrucciones de montaje | Instructions d’assemblage
LOT CODE
REGISTER YOUR PRODUCT
https://saris.com/pages/product-registration
ASSEMBLY/INSTALLATION VIDEO
https://saris.com/pages/videos
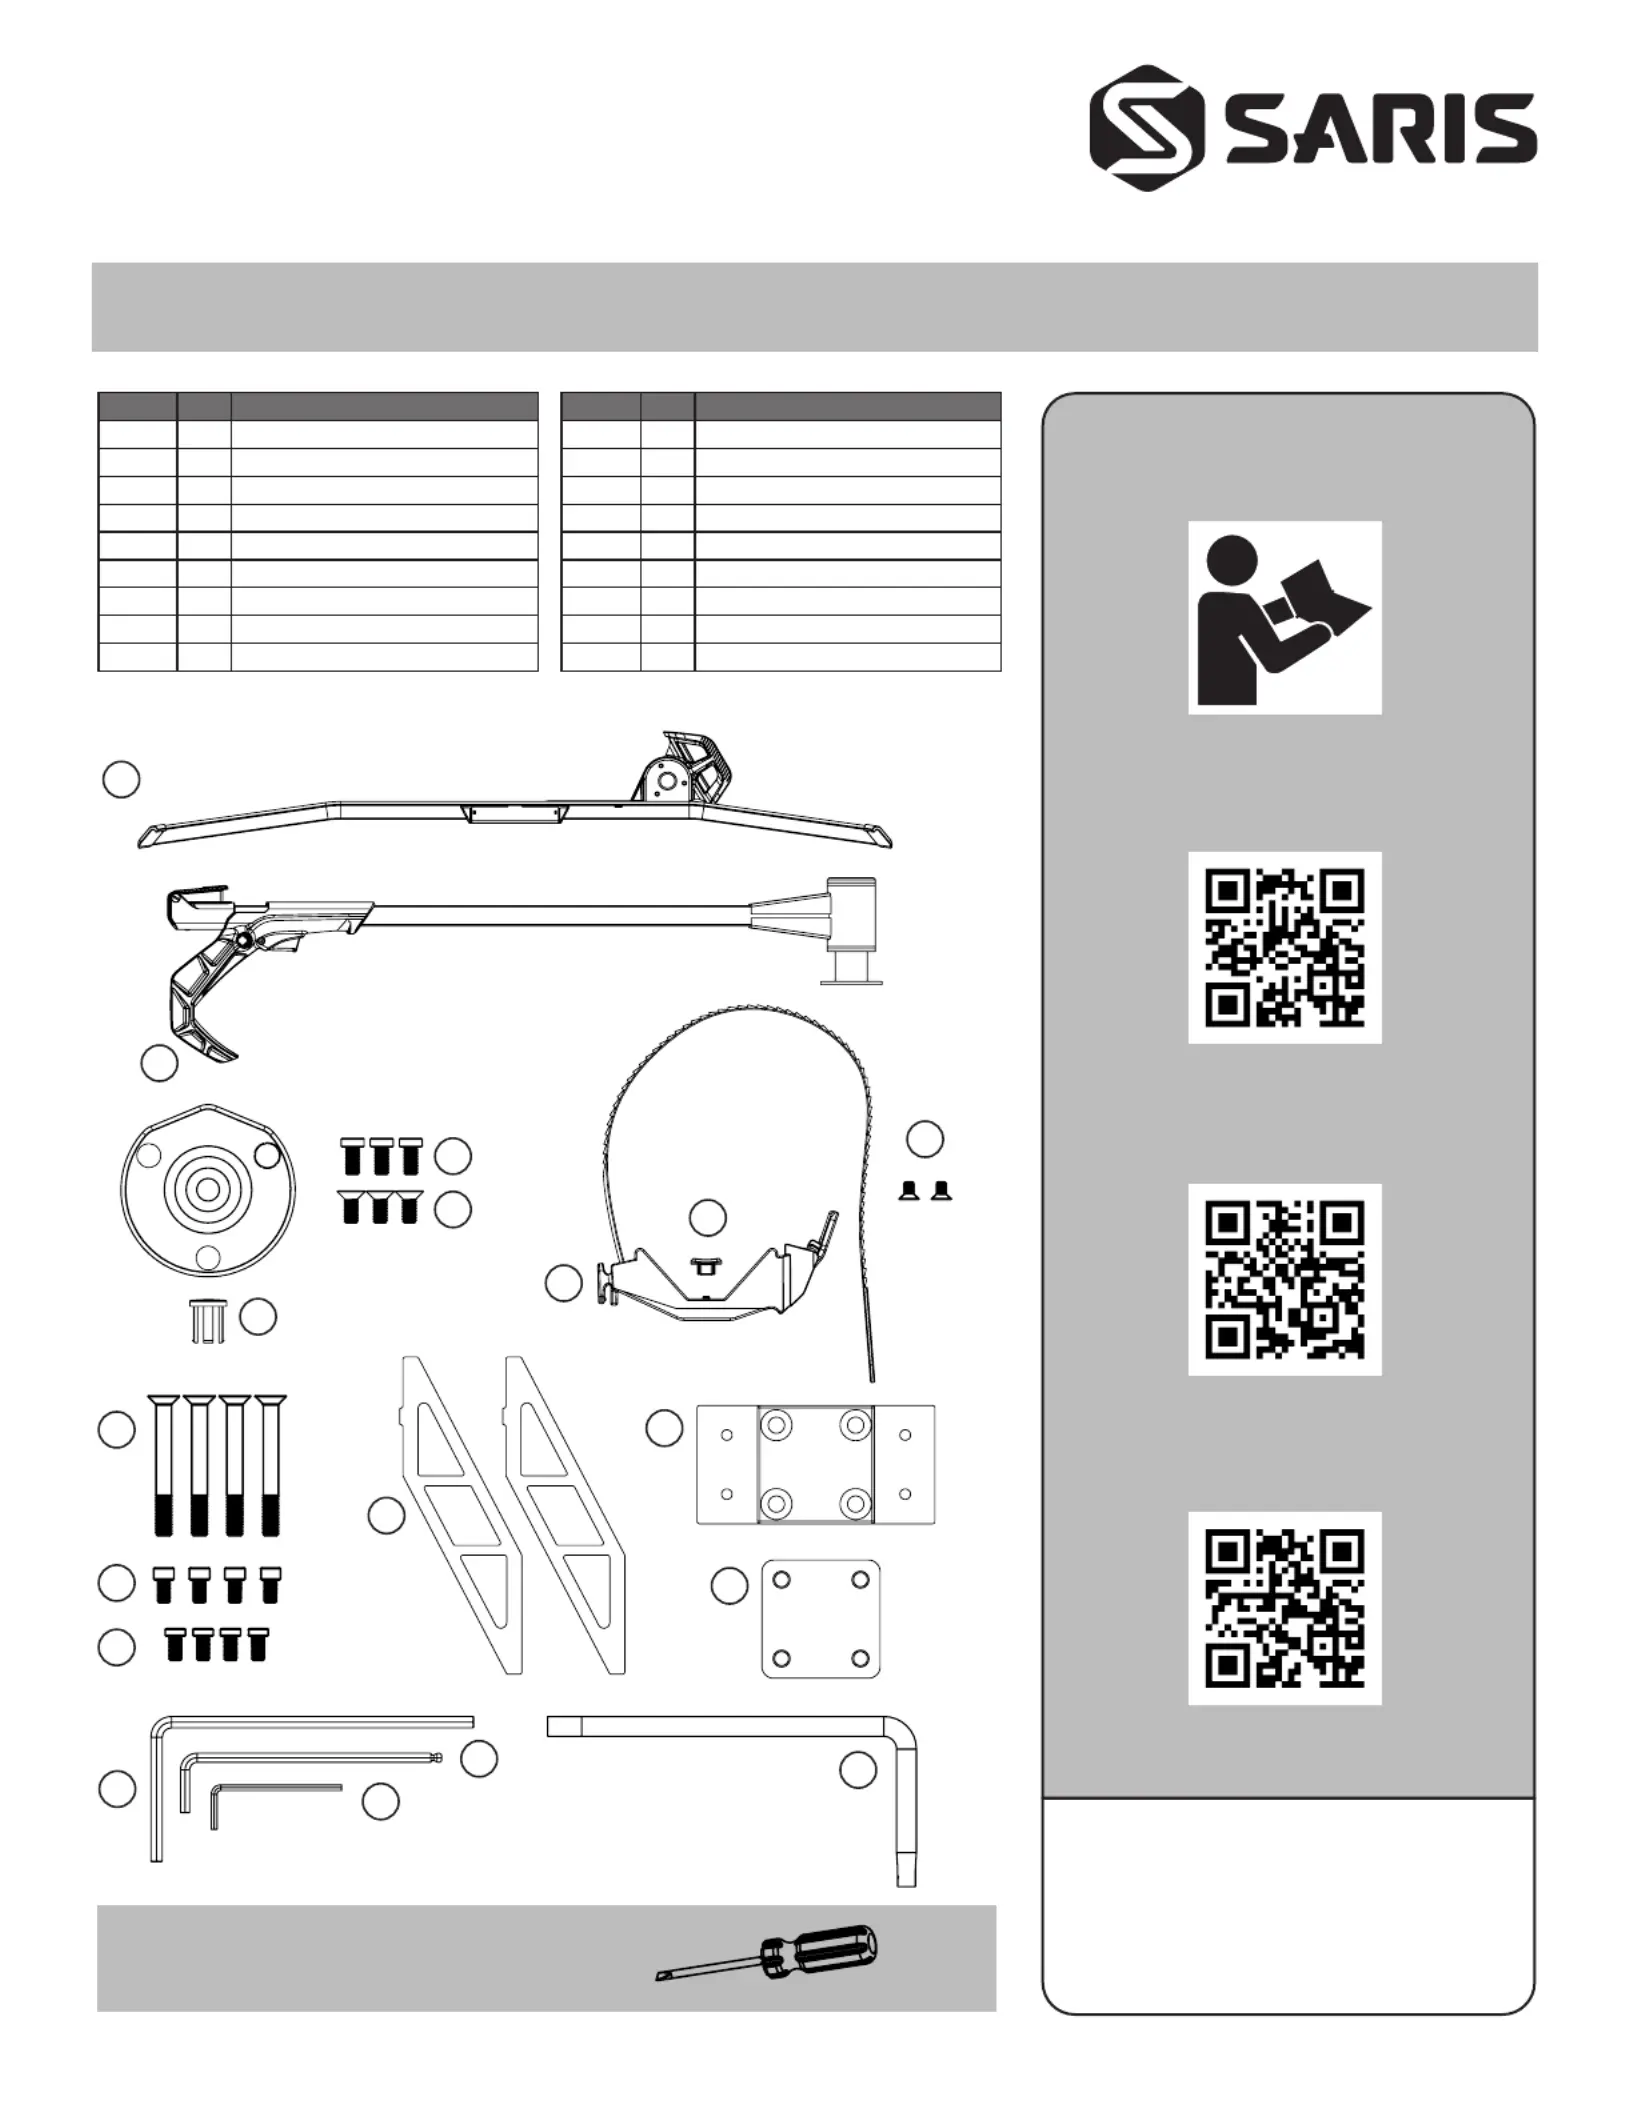
WHAT’S IN THE BOX
Tools Needed (Not included):
Flathead Screwdriver
LETTER QTY PART DESCRIPTION
A 1 MHS UNO tray
B 1 MHS UNO wheel hook arm
C 3 M6 (12mm) socket head screw
D 3 M6 (14mm) flathead screw
E 1 Lock core cap
F 1 Rear wheel strap carriage
G 1 Carriage T-joint
H 2 M4 (6mm) flathead screw
I 4 M10 (90mm) flathead screw
LETTER QTY PART DESCRIPTION
J 4 M8 (16mm) socket head screw
K 4 M8 security bolt
L 2 Add-on truss
M 1 Add-on top plate
N 1 Add-on bottom plate
O 1 5mm hex key (H, I, & J)
P 1 4mm hex key (C & D)
Q 1 2.5mm hex key (G)
R 1 Security torx (T40) key** (K)
B
C
D
E
F
G
H
I
J
K
L
M
N
O
P
Q
FOLLOW INSTRUCTIONS
SARIS FIT GUIDE
https://saris.com/pages/hitch-fit-guide
R
A

From your MHS Base (4610, 4620, or 4630), remove the top and bottom
add-on plugs using a flathead screwdriver to pry off each corner.
a) Align add-on top plate with bolt holes on the top surface of the MHS Base.
b) Thread long bolts (x4) through the 4 central holes in the top plate and
through the base spine.
c) Align bottom plate with respective fed through bolts.
d) Thread each bolt into the bottom plate. Use 6mm hex key to tighten bolts
until flush with top bracket.
Hand thread the security bolts (x4) (K) slightly into the top plate so the
bolts are held in place. Do not fully tighten.
1 2
3
INSTALL UNO ADD-ON HARDWARE FOR MHS BASE
TOP PLATE ASSEMBLYADD-ON PLATE INSTALL

MHS UNO TRAY ASSEMBLY
Remove plastic bolts from the pivot housing on the desired side of the UNO
tray. Keep the remaining plastic bolts in the opposite side.
Determine which side to install the UNO wheel hook arm based on your
desired configuration or existing MHS system. Place UNO tray on a flat
surface and flip to the desired side.
Align the UNO wheel hook arm with bolt holes in pivot housing by matching
flat side of the arm bracket with flat side of pivot housing.
1a
1b
1c
Recommended Installation:
MHS UNO trays can be configured with wheel hook arm on either side of the tray and can be oriented on MHS Bases facing either way. Goal is to alternate bike directions to maximize
space for your combination of bikes. Below is an example configuration using a MHS 2+1 base.
*MHS 2+1, 2 MHS UNO trays
• Bike spot 1: Front wheel on driver side, arm side should be positioned on the driver side
• Bike spot 2: Front wheel on passenger side, arm side should be positioned on passenger side
• Add-On Spot: Front wheel on driver side, arm side should be positioned on the driver side
Thread bolts (x3) (C) into main pivot housing and use 4mm hex key to
tighten. Ensure bolts are completely tightened.
1d
a) Remove remaining plastic screws and replace with flathead
screws (x3) (D). Use 4mm hex key to tighten.
b) Press the plastic cover in tightly. Align with flat edge and ensure edges
are flush.
1e
a
b
Product specificaties
Merk: | Saris |
Categorie: | Niet gecategoriseerd |
Model: | MHS UNO |
Heb je hulp nodig?
Als je hulp nodig hebt met Saris MHS UNO stel dan hieronder een vraag en andere gebruikers zullen je antwoorden
Handleiding Niet gecategoriseerd Saris
4 Augustus 2025
4 Augustus 2025
4 Augustus 2025
4 Augustus 2025
4 Augustus 2025
4 Augustus 2025
4 Augustus 2025
4 Augustus 2025
4 Augustus 2025
16 Juni 2025
Handleiding Niet gecategoriseerd
- Tiger
- SMC
- Fibaro
- GAM
- Bowers And Wilkins
- Novy
- Ninja
- Abus
- Maico
- Cilio
- EK Water Blocks
- Peavey
- UNITEK
- First Austria
- Sungrow
Nieuwste handleidingen voor Niet gecategoriseerd
4 Augustus 2025
4 Augustus 2025
4 Augustus 2025
4 Augustus 2025
4 Augustus 2025
4 Augustus 2025
4 Augustus 2025
4 Augustus 2025
4 Augustus 2025