Saris Guardian 3 Handleiding
Saris Niet gecategoriseerd Guardian 3
Bekijk gratis de handleiding van Saris Guardian 3 (12 pagina’s), behorend tot de categorie Niet gecategoriseerd. Deze gids werd als nuttig beoordeeld door 28 mensen en kreeg gemiddeld 4.2 sterren uit 9 reviews. Heb je een vraag over Saris Guardian 3 of wil je andere gebruikers van dit product iets vragen? Stel een vraag
Pagina 1/12
THEGUARDIANSERIES
INSTALLATION MANUAL
1045P-Guardian 2 bike
1047P-Guardian 3 bike
Note: Before installing
carrier, clean all surfaces
of vehicle which may
come in contact with the
carrier or its straps. Make
sure foam pads are free of
debris as it could scratch
vehicle's finish.
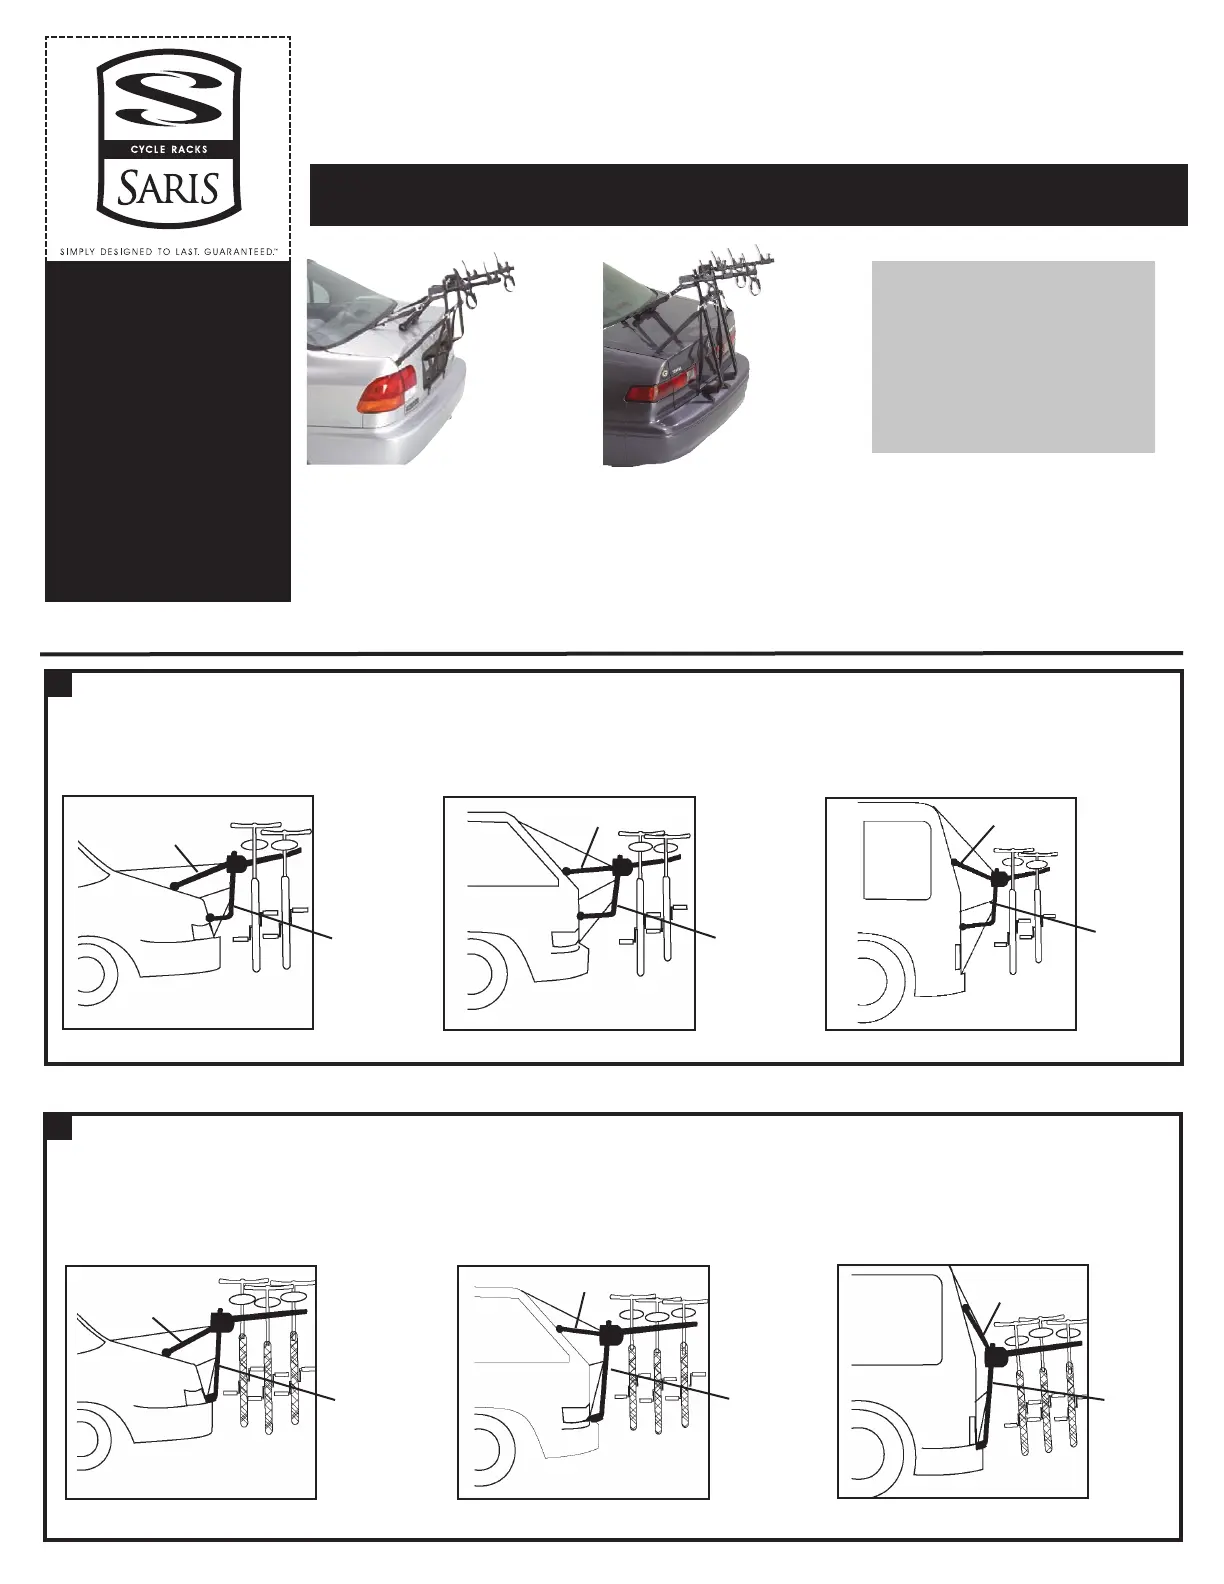
ADJUST CARRIER TO VEHICLE:
GUARDIAN 2-
Following the illustration below that most resembles your vehicle, adjust the top leg such that the lower leg
rests on or above liscense plate and the rack assumes the position that most resembles the illustration.
Lower leg must rest on or above license plate (not on bumper).
Position 1 or 2
Position 3 or 4
Position 4 or 5
Position 1 or 2
Position 3 or 4
Position 4 or 5
GUARDIAN 3-
Following the illustration below that most resembles your vehicle, adjust the top leg such that the lower leg
rests on the bumper and is positioned vertically. Lower leg must rest on bumper.
1
1
Lower Leg
Lower Leg
Lower
Leg
Lower Leg
Lower Leg
Lower
Leg
Please READ and FOLLOW all instructions carefully.
Check Fit Guide for compatibility.
Top Leg
Top Leg
Top Leg
Top Leg
Top Leg
Top Leg
Chances are, your bikes are just
like ours - your most valued
possessions. And if it has the
Saris name on it, nothing we
build goes out the door unless
it’s worth putting those posses-
sions on. Call it obsessive. Call it
eccentric. We just chalk it up to
caring a hell of a lot about creat-
ing the last rack you’ll ever need.
FINALLY – A
COMPANY THAT
LOVES BIKES AS
MUCH AS YOU DO.
Product specificaties
| Merk: | Saris |
| Categorie: | Niet gecategoriseerd |
| Model: | Guardian 3 |
Heb je hulp nodig?
Als je hulp nodig hebt met Saris Guardian 3 stel dan hieronder een vraag en andere gebruikers zullen je antwoorden
Handleiding Niet gecategoriseerd Saris

17 Maart 2026
12 November 2025
11 November 2025
10 November 2025
10 November 2025
10 November 2025
10 November 2025
9 November 2025
2 September 2025
2 September 2025
Handleiding Niet gecategoriseerd
Nieuwste handleidingen voor Niet gecategoriseerd
24 Juli 2026
24 Juli 2026
23 Juli 2026
23 Juli 2026
23 Juli 2026
23 Juli 2026
23 Juli 2026
23 Juli 2026
23 Juli 2026
23 Juli 2026