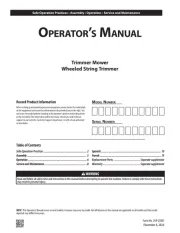
Remington RM115ST Handleiding
Remington
Grastrimmer
RM115ST
Bekijk gratis de handleiding van Remington RM115ST (16 pagina’s), behorend tot de categorie Grastrimmer. Deze gids werd als nuttig beoordeeld door 82 mensen en kreeg gemiddeld 4.4 sterren uit 41.5 reviews. Heb je een vraag over Remington RM115ST of wil je andere gebruikers van dit product iets vragen? Stel een vraag
Pagina 1/16

READ ALL INSTRUCTIONS BEFORE OPERATING
GENERAL SAFETY
• rely exclusively upon the safety devices built into the unit. DO NOT
• allow the unit to be used as a toy. DO NOT
• use the unit in the presence of fl ammable liquids or gases. DO NOT
• attempt operations beyond the operator’s capacity or experience.DO NOT
• over reach.DO NOT
• operate the unit on unstable surfaces, such as trees, ladders, slopes or rooftops. Be very DO NOT
careful when using the unit on stairs.
• force the unit. It will do a better, safer job when used at the intended rate.DO NOT
• Please read the entire operator’s manual carefully before attempting to assemble, operate or
maintain the unit.
• Follow all safety instructions. Failure to do so can result in property damage or serious injury to
yourself and/or others.
• Be thoroughly familiar with the controls and the proper use of the unit. Know how to stop the unit
and disengage the controls quickly.
• Stay alert! Do not operate the unit when tired, ill or under the infl uence of alcohol, drugs or medication.
• Never allow children or teens under the age of 15 to operate the unit, except teens guided by an
adult. Never allow adults to operate the unit without proper instruction.
• Keep these instructions. Refer to them often and use them to instruct other users. If loaning
someone this unit, also loan them these instructions.
• Keep bystanders, especially children and pets, at least 50 feet (15 m) away. If anyone enters the
work area, stop the unit!
• Never allow bystanders to contact the unit or extension cord.
• Keep the work area clean. Cluttered areas invite injuries. Do not start the operation until the work
area is clear and free from obstructions and there is secure footing.
• Always wear appropriate eye and ear protection when operating this unit. Wear safety goggles, or
safety glasses with side shields, that are marked as meeting ANSI Z87.1-1989 standards. Failure
to do so could result in serious eye injury caused by thrown objects. If the operation is dusty, wear
a face mask or dust mask.
• Dress appropriately. Wear non-slip protective gloves and boots. Do not wear loose clothing,
jewelry, short pants, sandals or go barefoot. Secure hair above shoulder level to prevent
entanglement in moving parts.
• Only use the unit in daylight or good artifi cial light.
• Use the right tool. Only use the unit for its intended purpose. Only use the unit as described in this
manual.
• Always hold the unit with both hands when the motor is running. Use a fi rm grip with thumbs and
fi ngers encircling the handle(s) and/or grip(s).
• Keep hands, face and feet away from openings and moving parts. Do not touch or try to stop any
moving parts while they are in motion.
• Keep proper footing and balance at all times.
• Always stop the motor when operation is delayed, before setting down the unit or when walking
from one location to another. Make sure the unit comes to a complete stop.
• To avoid accidental starting, never carry the unit with fi ngers on the switch trigger.
• Always carry the unit by the handle(s) with the unit disconnected from the power source.
• Always make sure the switch trigger is disengaged before connecting or disconnecting the unit
from the power source.
• Make sure that all guards and safety attachments are properly installed before operating the unit.
• This unit is intended for infrequent use by homeowners. It is not intended for prolonged use.
MAINTENANCE AND STORAGE SAFETY
• operate a unit that is damaged, improperly adjusted or not completely and securely DO NOT
assembled. Be sure that the unit stops when the switch trigger is released. Do not use the unit if
the switch trigger does not turn the unit on and off properly.
• perform maintenance procedures other than those described in this manual. Do not DO NOT
attempt to repair; there are no user serviceable parts inside.
• If the unit is not working as it should, has been dropped, damaged, left outdoors or dropped into
water, do not use the unit.
• If the unit strikes or becomes entangled with a foreign object, stop the unit immediately and check
for damage.
• Follow all maintenance instructions in this manual.
• Before inspecting, servicing, cleaning, storing, transporting or replacing any parts on the unit:
1. Make sure the motor is off.
2. Make sure all moving parts have stopped.
3. Disconnect the unit from the power source.
4. Allow the unit to cool.
• Never remove, modify or make inoperative any safety device furnished with the unit.
• Frequently inspect the unit for damage. Before further use, any damaged part should be carefully
checked to determine that it will operate properly and perform its intended function. Check for
alignment of moving parts, binding of moving parts, breakage of parts and any other conditions
that may affect its operation. Damaged parts should be properly repaired or replaced.
RM115ST
Electric Trimmer
TABLE OF CONTENTS
Service ................................................................................................................................................... 1
Safety ..................................................................................................................................................... 1
Know Your Unit ...................................................................................................................................... 2
Assembly ............................................................................................................................................... 3
Starting and Stopping ............................................................................................................................ 3
Operation ............................................................................................................................................... 3
Line Installation ...................................................................................................................................... 4
Cleaning and Storage ............................................................................................................................ 4
Troubleshooting ..................................................................................................................................... 4
Specifi cations ........................................................................................................................................ 4
Warranty ............................................................................................................................................... 16
All information, illustrations and specifi cations in this manual are based on the latest product information
available at the time of printing. We reserve the right to make changes at any time without notice.
Copyright© 2014 MTD SOUTHWEST INC, All Rights Reserved.
SAFETY
SERVICE
DO NOT RETURN THIS UNIT TO THE RETAILER. PROOF OF PURCHASE WILL BE REQUIRED
FOR WARRANTY SERVICE.
For assistance regarding the assembly, controls, operation or maintenance of the unit, please call the
Customer Support Department: (U.S.) or (Canada) 1-866-206-2707 1-877-696-5533
Additional information about the unit can be found on our website:
www.remingtonpowertools.com
Please call the Customer Support Department for replacement parts. When servicing, use only
identical replacement parts.
• SAFETY ALERT SYMBOLS •
Safety alert symbols are used to draw your attention to possible dangers. These symbols, and
their explanations, deserve your careful attention and understanding. The safety warnings do not
by themselves eliminate any danger. The instructions or warnings they give are not substitutes
for proper accident prevention measures. These safety instructions are not meant to cover every
possible condition that may occur. If questions arise, please call the Customer Support Department
at (U.S.) or (Canada).1-866-206-2707 1-877-696-5533
IMPORTANT! Signals special mechanical information.
NOTE: Signals additional important general information.
• IMPORTANT SAFETY INSTRUCTIONS •
S MYMBOL EANING
DANGER: Signals an hazard.EXTREME
Failure to obey a safety signal result in serious injury or death to DANGER WILL
yourself or to others.
WARNING: Signals a hazard.SERIOUS
Failure to obey a safety WARNING CAN signal result in serious injury to yourself or
to others.
CAUTION: Signals a MODERATE hazard.
Failure to obey a safety signal CAUTION MAY result in property damage or injury to
yourself or to others.
WARNING: When using an electric unit, basic safety precautions should
always be followed to reduce the risk of fi re, electric shock and injury to persons,
including the following:
769-10329 / 00 10/14
Operator’s Manual
CALIFORNIA PROPOSITION 65
WARNING: Battery posts, terminals and certain fi nished components
contain lead, lead compounds and chemicals known to the State of California to cause
cancer and birth defects or other reproductive harm. Wash hands after handling.

2
SAFETY
KNOW YOUR UNIT
• If the unit starts to vibrate abnormally, stop the motor, disconnect the unit from the power source
and allow the unit to cool. Then inspect the unit for the cause of the vibration. Vibration is generally
an indicator of trouble.
• Use only original manufacturer replacement parts and accessories, which are designed
specifi cally to enhance the performance and maximize the safe operation of the product. Failure
to do so may cause poor performance and possible injury.
• Be sure to secure the unit while transporting.
• When not in use, store the unit indoors in a locked-up and dry, or high and dry, place to prevent
unauthorized use or damage. Keep out of the reach of children.
• To avoid serious personal injury and/or damage to the unit, keep the unit clean of vegetation and
other materials that may clog, gum or bind moving parts. Keep the handles dry, clean and free from
debris, oil and grease. Clean the unit after each use.
• Never douse or spray the unit with water or any other liquid. Do not wash the unit with a hose; avoid
getting water in the motor and electrical connections. Do not use solvents or strong detergents.
ELECTRICAL SAFETY
• handle the unit, plug(s) or cord(s) with wet hands.DO NOT
• expose the unit to rain. Do not use the unit in damp or wet locations or conditions.DO NOT
• operate the unit on wet surfaces.DO NOT
• abuse the extension cord or the power cord on the unit. Never pull or carry the unit by DO NOT
the cord(s), use the cord(s) as a handle, close a door on a cord, pull the cord(s) around sharp
edges or corners or yank the cord(s) to disconnect the unit. Grasp the plug(s), not the cord(s), to
disconnect the unit.
• modify the power cord, extension cord, power cord plug, extension cord plug or wall DO NOT
outlet in any way.
• use multiple extension cords. DO NOT
• Keep the cords away from oil, water, sharp objects and heated surfaces.
• Keep the cords away from the cutting area and position the cords so that they will not be caught
on branches or other obstacles that may bind or entangle the cords during operation.
• Keep the cords away from the operator’s feet to prevent tripping.
• Make sure the cords are in good condition. Inspect the power cord and extension cord
periodically. Look closely for deterioration, cuts or cracks in the insulation. If the power cord is
damaged, have it repaired by an authorized service center. If the extension cord is damaged,
replace it. Do not use a damaged cord or plug.
• If the extension cord is damaged in any manner while plugged in, disconnect the extension cord
from the receptacle.
• Since the unit is double-insulated, a 2-wire extension cord (one without a ground) may be used.
However, a 3-wire extension cord (one with a ground) that uses a NEMA-type connector (parallel
blade, U ground) is recommended. Extension cords are available from local retailers. Use only
round-jacketed extension cords approved for outdoor use.
• Make sure the extension cord is heavy enough to carry the current drawn by the unit. An
undersized cord will cause a drop in line voltage resulting in loss of power and overheating. If in
doubt, use the next heavier gauge cord. The smaller the gauge number, the heavier the cord.
• To reduce the risk of electrical shock, this unit has a polarized plug (one blade is wider than the
other) and will require the use of a polarized extension cord. The power cord plug will fi t into
a polarized extension cord only one way. If the plug does not fi t fully into the extension cord,
reverse the plug. If the plug still does not fi t, obtain another polarized extension cord. A polarized
extension cord will require the use of a polarized wall outlet. This plug will fi t into the polarized wall
outlet only one way. If the plug does not fi t fully into the wall outlet, reverse the plug. If the plug
still does not fi t, contact a qualifi ed electrician to install the proper wall outlet.
• A nameplate on your unit indicates the voltage used. Never connect the unit to an AC voltage that
differs from this voltage.
• Ground Fault Circuit Interrupter (GFCI) protection should be provided on the circuit(s) or outlet(s)
that will be used with the unit. For an extra measure of safety, use receptacles with built-in GFCI
protection.
• To reduce the likelihood of disconnecting the extension cord from the unit, be sure to use the cord
restraint provided.
• To reduce the risk of electric shock, avoid body contact with grounded conductors, such as metal
pipes or wire fences.
• Unplug the unit from the power source when not in use.
Servicing a Double-Insulated Unit
• This is a double-insulated unit. Two systems of insulation are provided instead of grounding.
There is no grounding provided and no means of grounding should be added to the unit. Servicing
a double-insulated unit requires extreme care and knowledge of the system and should only
be done by qualifi ed service personnel. Replacement parts for a double-insulated unit must
be identical to the parts they replace. Failure to have a double-insulated unit repaired by an
authorized service technician with identical replacement parts could result in serious injury.
TRIMMER SAFETY
• The cutting head shield must always be in place while operating the unit. Do not operate the unit
without both trimming lines extended and the proper line installed. Do not extend the trimming line
beyond the length of the shield.
• Adjust the position of the D-handle to provide the best grip.
• Be sure the cutting head is not in contact with anything before starting the unit
• Use only 0.065 inch (1.65 mm) diameter replacement line. Never use metal-reinforced line, wire,
chain or rope. These can break off and become dangerous projectiles.
S MYMBOL EANING
• SAFETY ALERT SYMBOL
Indicates danger, warning or caution. May be used in conjunction with other symbols
or pictographs.
• READ OPERATOR’S MANUAL
WARNING: Read the operator’s manual(s) and follow all warnings and safety
instructions. Failure to do so can result in serious injury to the operator and/or bystanders.
• WEAR EYE AND HEARING PROTECTION
WARNING: Thrown objects and loud noise can cause severe eye
injury and hearing loss. Wear eye protection meeting ANSI Z87.1-1989 standards and
ear protection when operating this unit. Use a full face shield when needed.
• KEEP BYSTANDERS AWAY
WARNING: Keep all bystanders, especially children and pets, at least
50 feet (15 m) from the operating area. If anyone enters the work area, stop the unit!
• THROWN OBJECTS AND ROTATING CUTTER CAN CAUSE SEVERE INJURY
WARNING: Small objects can be propelled at high speed, causing
injury. Keep away from the rotating rotor.
• WEAR SAFETY GLOVES
Wear non-slip, heavy-duty protective gloves when handling the unit.
• WEAR SAFETY FOOTWEAR
Wear non-slip safety footwear when using this equipment.
• DO NOT USE IN THE RAIN
WARNING: Avoid dangerous environments. Never operate your unit
in the rain, or in damp or wet conditions. Moisture is a shock hazard.
• DOUBLE INSULATED
Two systems of insulation are provided instead of grounding. There is no grounding
provided and no means of grounding should be added to the unit.
• SAFETY AND INTERNATIONAL SYMBOLS •
This operator’s manual describes safety and international symbols and pictographs that may appear
on this product. Read the operator’s manual for complete safety, assembly, operating, maintenance
and repair information.
SAVE THESE INSTRUCTIONS
APPLICATIONS
This unit may be used for the purposes listed below:
• Cutting grass and light weeds
• Edging
• Decorative trimming around trees, fences, etc.
No Tools Required!
MINIMUM WIRE SIZE FOR EXTENSION CORDS
FOR 120 VOLT APPLIANCES USING 0-6 AMPS
Cord Length (feet) 25 50 100 150
Wire Size (AWG) 18 16 16 14
WARNING: To reduce the risk of electric shock, only use extension cords
suitable for outdoor use, such as SW-A, SOW-A, STW-A, STOW-A, SJW-A, SJOW-A,
SJTW-A or SJTOW-A cord types.
SAFETY
Rear Handle
Edging Conversion Button
D-Handle
Shaft Length
Adjustment Button
Shaft Housing
Cord Hook
Switch Trigger
Shaft Angle
Adjustment Button
Cutting Head Shield Cutting Head
Wire Guard
Edge Guide Wheel
Line Cutting Blade
Shaft Angle
Adjustment Button

3
This unit requires assembly.
UNPACKING
• Carefully remove the product and any accessories from the box.
• Inspect the product carefully to make sure no breakage or damage occurred during shipping.
• Do not discard the packing material until you have carefully inspected and satisfactorily operated
the product.
• If any parts are damaged or missing, please call (U.S.) or 1-866-206-2707 1-877-696-5533
(Canada) for assistance.
ASSEMBLING THE SHAFT
1. Remove and discard the rubber grommet (Fig. 1).
2. Align the arrows on the upper and lower shafts (Fig. 2).
3. While pushing the shaft length adjustment button up
toward the rear handle, slide the upper shaft over
the lower shaft until they lock together (Fig. 2).
NOTE: Once assembled, the upper and lower shafts
will not separate again.
Adjusting the Shaft Length
1. Grip the shaft housing fi rmly.
2. While pushing the shaft length adjustment button up
toward the rear handle, move the upper shaft up or
down to the desired length.
3. Release the shaft length adjustment button.
INSTALLING THE CUTTING HEAD SHIELD
1. Align the arrow on the cutting head shield with the
arrow on the motor housing (Fig. 3).
2. Twist the cutting head shield counterclockwise, in
the LOCK direction (Fig. 3), until it snaps into place.
Make sure the cutting head shield is assembled as
shown in the Know Your Unit section.
INSTALLING THE D-HANDLE
1. Remove the knob and bolt from the D-handle.
2. Push the D-handle down onto the upper shaft (Fig. 4).
Some force is required. The hex bolt hole in the handle
should be on the left side.
3. Insert the bolt into the hex hole in the handle and
push it through (Fig. 4). Screw the knob onto the
bolt. Do not tighten the knob completely.
4. While holding the unit in the operating position (Fig.
11), move the D-handle to the location that provides
the best grip. Place it a minimum of 6 inches (15.24
cm) from the end of the rear handle.
5. Tighten the knob until the D-handle is secure.
ADJUSTING THE SHAFT ANGLE
1. Squeeze the shaft angle adjustment buttons on both
sides of the motor housing (Fig. 5).
2. Rotate the shaft to one of the four settings, as
needed to reach under decks, bushes, etc.
CONVERTING TO EDGER MODE
1. Grip the shaft housing fi rmly.
2. Press the edger conversion button and rotate the
rear handle until it locks in place (Fig. 6 and 7).
3. Make sure the wire guard is fl ipped up against the
motor housing (Fig. 8).
ADJUSTING THE WIRE GUARD
1. Rotate the wire guard up or down to the desired
position (Fig. 8). The wire guard helps keep the
trimmer line away from fences, curbs, fl owers, etc.
CONNECTING AND DISCONNECTING THE POWER
SOURCE
Follow these instructions in order to avoid injury and to
reduce the risk of electric shock or fi re:
• Verify that the switch trigger is disengaged before
connecting or disconnecting the power source.
Refer to the section.Starting and Stopping
• Verify that the unit is disconnected from the power
source and the switch trigger is disengaged before
inspecting, adjusting or performing maintenance on
any part of the unit.
Connecting the Power Source
1. Connect the power cord plug to the extension cord
(Fig. 9).
2. Make a narrow loop with the extension cord and
push the loop through the opening for the cord hook
(Fig. 9).
3. Move the loop onto the cord hook and pull the cord
gently to secure the loop over the hook. This helps
prevent accidental disconnection.
4. Connect the extension cord plug to the outlet.
Disconnecting the Power Source
1. Disconnect the extension cord plug from the outlet.
2. Remove the loop in the extension cord from the cord
hook.
3. Disconnect the power cord plug from the extension
cord (Fig. 9).
OPERATION
ASSEMBLY STARTING AND STOPPING
WARNING: Make sure the unit is disconnected from the power source before
assembling, disassembling or adjusting any components.
Fig. 1
Lower
Shaft
Rubber Grommet
Upper
Shaft
STARTING THE MOTOR
1. Connect the unit to the power source. Refer to
Connecting and Disconnecting the Power Source in
the section.Assembly
2. Squeeze and hold the switch trigger (Fig. 10).
STOPPING THE MOTOR
1. Release the switch trigger (Fig. 10).
Fig. 10
Switch
Trigger
PROPER GRIP
• Always maintain a proper grip on the handles
whenever the motor is running. Grip the unit
fi rmly with both hands. Keep the left hand on the
D-handle and the right hand on the rear handle. The
fi ngers should encircle the handles and the thumbs
should wrap under the handles. The left arm should
be straight and the right arm slightly bent.
PROPER STANCE
• Balance body weight securely, with both feet on
solid ground.
• Hold the unit at waist level. The cutting head should easily contact the grass without the need to
bend over (Fig. 11).
WORK AREA PRECAUTIONS
• Keep everyone – helpers, bystanders, children and animals – at least 50 feet (15 m) away from the
work area. If anyone enters the work area, stop the unit!
• Only operate the unit when visibility and light are adequate to see clearly.
• Remove stones, nails, glass and wire from the area before operating the unit.
• Only operate the unit during reasonable hours. Comply with times listed in local ordinances.
OPERATING THE UNIT AS A TRIMMER
1. Start the motor. Refer to the section.Starting and Stopping
2. Slowly move the cutting head into and out of the cutting area at the desired height.
• Move either in a forward-backward or side-to-side motion. When cutting from side-to-side,
cut from right to left whenever possible. This improves the unit’s cutting effi ciency and directs
clippings away from the operator.
• Keep the cutting head parallel to the ground.
• Cutting shorter lengths produces the best results.
• Cut grass over 8 inches (200 mm) by working from top to bottom in small increments to avoid
premature line wear or motor drag.
• Do not force the cutting head. Allow the tip of
the line to do the cutting, especially along walls.
Cutting with more than the tip will reduce cutting
effi ciency and may overload the motor.
• Only trim when grass or weeds are dry.
3. Dispose of debris appropriately.
Decorative Trimming
Decorative trimming is accomplished by removing all
vegetation around trees, posts, fences and more.
• Rotate the whole unit so that the cutting head is at a
30° angle to the ground (Fig. 12).
OPERATING THE UNIT AS AN EDGER
Tips for Best Edging Results
• Convert the unit to edger mode.
• Hold the unit with the motor to the operator’s left
side so that debris is thrown to the rear (Fig. 13).
• Place the edge guide wheel on the sidewalk,
driveway, etc. and the trimmer line in the grass.
ADJUSTING THE TRIMMING LINE LENGTH
The trimming line wears down and becomes shorter
with use. This unit is equipped with an EZ Line Advance cutting head. The cutting head will
automatically dispense more line whenever the unit is stopped and restarted.
NOTE: DO NOT bump the cutting head; this will damage the unit and void the warranty.
NOTE: Always keep the trimming line fully extended. Line release becomes more diffi cult when the
cutting line gets shorter.
If the line becomes too short:
1. Stop the motor. See the section.Starting and Stopping
2. Wait two seconds and then restart the motor.
3. Repeat this process until the line length reaches the line cutting blade on the cutting head shield.
The line cutting blade will cut the line to the proper length if any excess line is released. Remove the
protective material from the line cutting blade before using the unit.
The trimming line can also be extended manually:
1. Stop the motor
2. Disconnect the unit from the power source.
3. Press and release the manual line release button
while gently pulling both lines until they reach the
line cutting blade (Fig. 14).
The life of the cutting line is dependent upon:
• Following the trimming techniques previously
explained
• What vegetation is cut
• Where the vegetation is cut.
For example, the line will wear faster when trimming
against a foundation wall as opposed to trimming
around a tree.
WARNING: Do not allow familiarity with this unit to promote carelessness.
Remember that a careless fraction of a second is enough to infl ict serious injury.
WARNING: If any parts are damaged or missing, do not operate the unit until the
parts are replaced. Failure to heed this warning could result in serious personal injury.
WARNING: Always wear appropriate eye and ear protection when operating this
unit. Wear safety goggles, or safety glasses with side shields, that are marked as
meeting ANSI Z87.1-1989 standards. Failure to do so could result in serious eye injury
caused by thrown objects. If the operation is dusty, wear a face mask or dust mask.
WARNING: Wear non-slip gloves for maximum grip and protection. Refer to the
Safety section for appropriate safety equipment.
WARNING: Do not expose the unit to rain. Do not use the unit in damp or wet
locations or conditions.
Fig. 11
Fig. 2
Upper
Shaft
Lower
Shaft
Shaft Length Adjustment Button
Fig. 4
Bolt
Knob
D-Handle
Fig. 3
Arrows
Cutting
Head
Shield
Motor
Housing
Fig. 5
Shaft Angle
Adjustment Button
Fig. 6
Edger
Conversion
Button
Fig. 8
Wire Guard
Fig. 7
Trimmer
Mode
Edger
Mode
Fig. 9
Cord Hook
Power Cord
Extension
Cord
Fig. 12
Fig. 14
Manual Line
Release Button
Fig. 13
Product specificaties
| Merk: | Remington |
| Categorie: | Grastrimmer |
| Model: | RM115ST |
Heb je hulp nodig?
Als je hulp nodig hebt met Remington RM115ST stel dan hieronder een vraag en andere gebruikers zullen je antwoorden
Handleiding Grastrimmer Remington

4 Maart 2025

4 Maart 2025

11 Juni 2023

10 April 2023

31 Maart 2023

22 Maart 2023

28 November 2022
Handleiding Grastrimmer
- Bosch
- Hanseatic
- Graphite
- Milwaukee
- Budget
- Challenge Xtreme
- OK
- Powerworks
- Plantiflor
- Efco
- Gardol
- Shindaiwa
- Toolcraft
- Gardena
- Ferm
Nieuwste handleidingen voor Grastrimmer
5 Augustus 2025
29 Juli 2025
28 Juli 2025

14 Juli 2025

14 Juli 2025
14 Juli 2025

5 Juli 2025

5 Juli 2025

5 Juli 2025

4 Juli 2025