Panduit CT-310 Handleiding
Panduit Niet gecategoriseerd CT-310
Bekijk gratis de handleiding van Panduit CT-310 (2 pagina’s), behorend tot de categorie Niet gecategoriseerd. Deze gids werd als nuttig beoordeeld door 11 mensen en kreeg gemiddeld 4.8 sterren uit 6 reviews. Heb je een vraag over Panduit CT-310 of wil je andere gebruikers van dit product iets vragen? Stel een vraag
Pagina 1/2
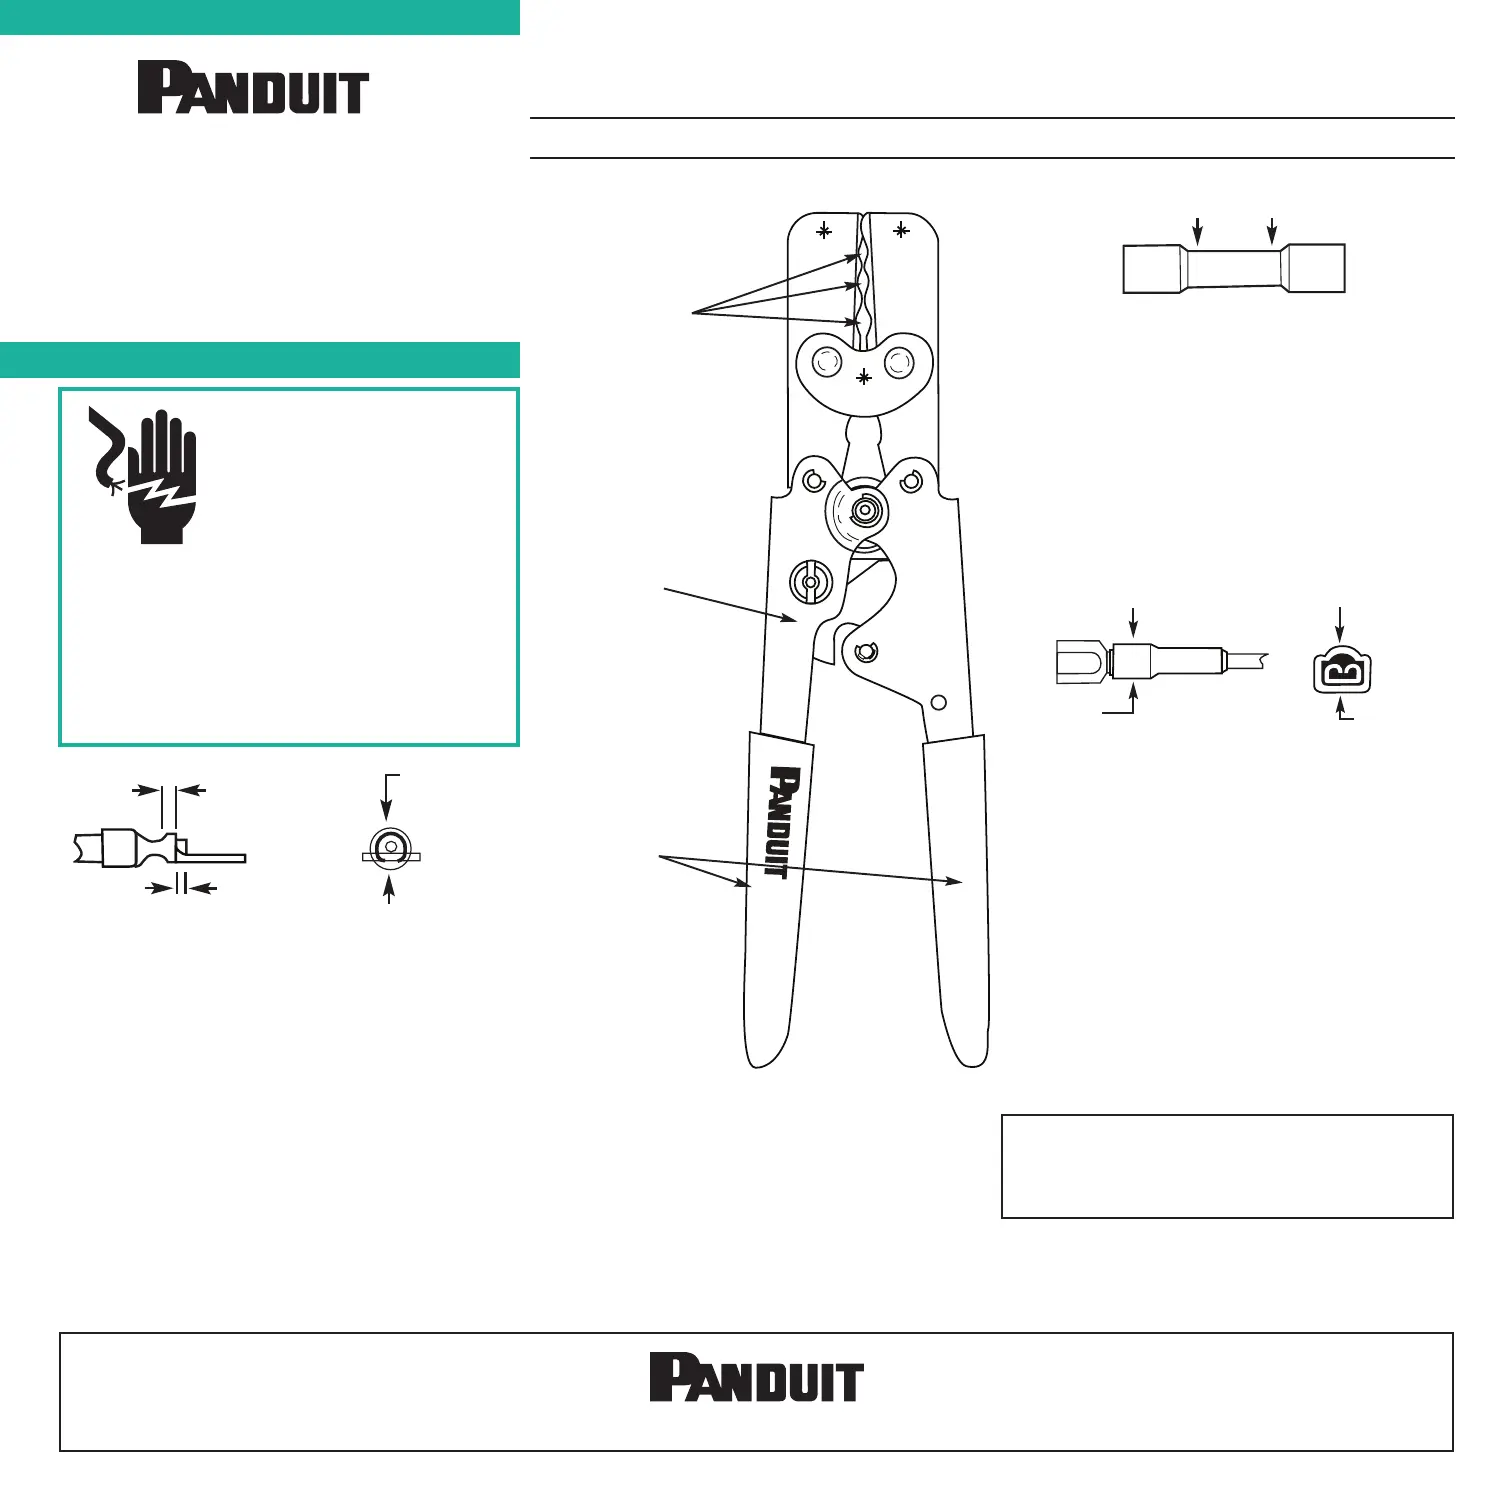
WARNING:
Electric Shock Hazard:
Do NOT use this tool
on live wire.
Verify power is “OFF” before
working on wiring with this tool.
The plastic grips are for the user’s comfort,
and are not intended to insulate against
electrical shock while working on
live electrical circuits.
CRIMPING TOOL OPERATION INSTRUCTIONS
© Panduit Corp. 2016
CT-310
PMPI101
REV: 03 12-2016
Page: 1 of 2
E-mail:
Technical Support:
1-800-777-3300
OPERATION
INSTRUCTIONS
CT-310
CRIMPING TOOL
www.panduit.com
C
T
-
3
1
0
2
2-18
0,5-1,0
16-14
1
,5-2,5
1
2-10
4
,0-6,0
P/N94130
Crimping Dies
for Panduit Heat
Shrink insulated
terminals, disconnects
& splices with #22 to
#10 AWG CU wire.
Ratchet
Device
to assure full cycle
terminations.
Covered
Handles
for better gripping
and comfort.
Crimp
Direction
1/16
1/32
Insulated Terminal Instructions
1. Locate terminal in proper size die with edge of
die 1/16” from front end of insulation. Insure
crimp is perpendicular to the plane formed by
the ring end terminal.
2. Insert stripped wire into terminal until a
minimum of 1/32” of c onductor extends
beyond barrel.
3. Squeeze the handles firmly until
ratchet releases.
4. Heat insulation with a heat gun or open flame
until fully shrunk.
Butt Splice Instructions
1. Locate splice in proper crimp pocket.
Center the crimp pocket over one-half of
the barrel.
2. Insert stripped wire into crimp barrel.
3. Squeeze the handles firmly until
ratchet releases.
4. Repeat for the other side of splice.
5. Heat insulation with a heat gun or open
flame until fully shrunk.
Disconnect Instructions
1. Locate the disconnect in the proper crimp
pocket. Center the crimp die over the crimp
barrel. Ensure crimp is in direction shown.
2. Insert stripped wire into crimp barrel.
3. Squeeze the handles firmly until ratchet
releases.
4. Heat insulation with a heat gun or open
flame until fully shrunk.
Crimp Area
Crimp
Direction
Crimp
Area
See Page 2 for
Crimp Die Go/No Go
Crimp Chart
Product specificaties
| Merk: | Panduit |
| Categorie: | Niet gecategoriseerd |
| Model: | CT-310 |
Heb je hulp nodig?
Als je hulp nodig hebt met Panduit CT-310 stel dan hieronder een vraag en andere gebruikers zullen je antwoorden
Handleiding Niet gecategoriseerd Panduit

7 Juni 2026
4 Juni 2026
3 Juni 2026
3 Juni 2026
2 Juni 2026
2 Juni 2026
2 Juni 2026
1 Juni 2026
1 Juni 2026
1 Juni 2026
Handleiding Niet gecategoriseerd
Nieuwste handleidingen voor Niet gecategoriseerd
8 Juni 2026
8 Juni 2026
8 Juni 2026
8 Juni 2026
8 Juni 2026
8 Juni 2026
8 Juni 2026
8 Juni 2026
8 Juni 2026
8 Juni 2026