Panasonic RP-BDT10 Handleiding

Panasonic Headset RP-BDT10

Lees hieronder de 📖 handleiding in het Nederlandse voor Panasonic RP-BDT10 (12 pagina's) in de categorie Headset. Deze handleiding was nuttig voor 42 personen en werd door 2 gebruikers gemiddeld met 4.5 sterren beoordeeld

Pagina 1/12
ENGLISH
FRANÇAIS
ESPAÑOL
PORTUGUÊS
VQT5J78
Owner’s Manual
Manuel d’utilisation
Instrucciones de funcionamiento
Manual de instruções
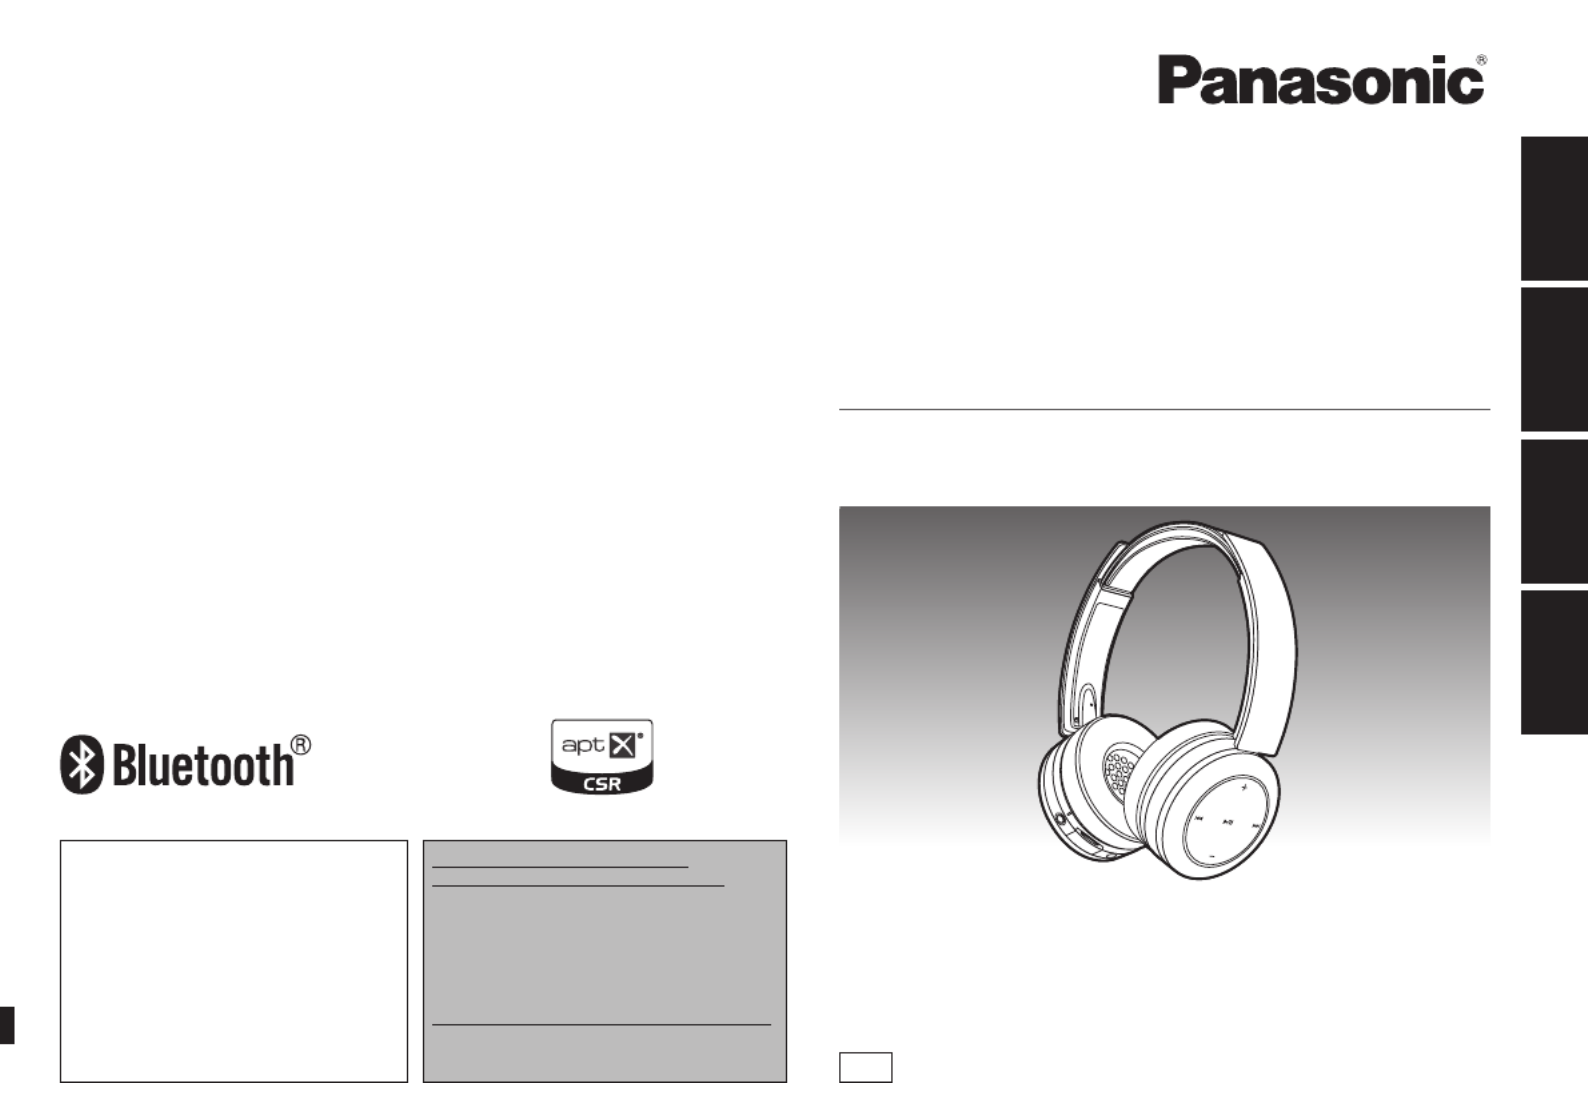
Digital Wireless Stereo Headphones
Casque d’écoute stéréo sans fil numérique
Cascos auriculares estéreo inalámbricos digitales
Auscultadores estéreo sem fios digitais
Model No.
N° de modèle RP-BTD10
PP
If you have any questions, visit:
In the U.S.A. and Puerto Rico:
www.panasonic.com/support
In Canada:
www.panasonic.ca/english/support
Si vous avez une question, visitez :
www.panasonic.ca/french/support
Si usted tiene alguna pregunta, visite:
www.panasonic.com/support
For U.S.A. and Puerto Rico only /
Pour les É.-U. et Porto Rico seulement
The warranty can be found on page 10.
Register online at
www.panasonic.com/register
(U.S. customers only)
La garantía se puede encontrar en la página 10.
For Canada only / Pour le Canada seulement
The warranty can be found on page 11.
La garantie se trouve à la page 10.
VQT5J78
2
2
7
8
9
10 11
12 13
2
3
4
14 15
1
5
6
Please check and identify the supplied
accessories.
Use numbers indicated in parentheses
when asking for replacement parts.
(As of February 2014)
Only for U.S.A. and Puerto Rico:
To order accessories, refer to
“Accessory Purchases (United
States and Puerto Rico)” on
page 10.
Only for Canada:
To order accessories, contact the
dealer from whom you have made
your purchase.
1 Detachable cord [RFX0H75]
1 USB charging cord [RFX0H76]
Table of
contents
The product illustrations may differ from
the actual product.
Part names
1Power / Pairing button
2LED indicator light*
The number of blinks or color
notifies the status of the unit.
(* hereafter referred to as “LED”)
3Audio input terminal
Connect the detachable cord
(supplied) to this terminal
when using the unit as wired
headphones.
4Microphone
5RESET hole
6Charging terminal (DC IN)
Connect the USB charging
cord (supplied) to this terminal
when charging. ( P. 3)
7Call
8NFC touch area
9Previous
10
Volume +
11
Next
12
Volume –
13
Play/Pause
14
Left speaker
15
Right speaker
Note
Excessive sound pressure from
earphones and headphones can
cause hearing loss.
Listening at full volume for long
periods may damage the user’s
ears.
Do not use any other USB
charging cords except the
supplied one.
Do not use any other detachable
cords except the supplied one.
When using the unit, do not cover
the left speaker with the palm
of your hand. The Bluetooth
®
connection may be blocked.
Before use
Accessories ........................................ 2
Part names ......................................... 2
Preparation
Charging ............................................. 3
Turning the power on/off ..................... 3
Connecting a Bluetooth® device ......... 3
One-Touch Connection
(Connecting by NFC) ..................... 4
Operation
Listening to music ............................... 4
Making a phone call............................5
Useful functions .................................. 5
Other
Restoring to the factory settings ......... 6
Maintenance ....................................... 6
About Bluetooth® ................................ 6
Safety precautions .............................. 7
Troubleshooting guide ........................ 8
Specifications ..................................... 9
Copyright, etc. .................................... 9
Limited Warranty
(ONLY FOR U.S.A. AND
PUERTO RICO) ........................... 10
Limited Warranty
(ONLY FOR CANADA) ................ 11
To remove the battery when
disposing of this unit ..................... 38
Dear customer
Thank you for purchasing this product.
Please read these instructions carefully
before using this product, and save this
manual for future use.
Accessories
Left Right
Open the cover
VQT5J78
3
ENGLISH
3
The rechargeable battery (installed in the unit) is not charged initially. Charge
the battery before using the unit.
1Connect this unit to a computer
using the USB charging cord
During charging, the LED on the left
speaker will light in red. When charging
is completed, the LED will go out.
Charging will take approximately
4.5 hours from empty state to fully
charged.
Left
Computer
LED
USB charging cord (supplied)
Note
The Bluetooth® feature cannot be used when this unit is connected to a computer
using the USB charging cord.
Recharge in a room temperature between 10 °C and 35 °C (50 ºF and 95 ºF).
The power cannot be turned on while charging.
Do not use any other USB charging cords except the supplied one.
Caution: Use only the supplied USB charging cord when connecting to a
computer.
Charging
To establish a wireless connection, register the unit with Bluetooth
® compatible
devices.
Preparation on the Bluetooth® device
Turn on the power, and enable the Bluetooth
® feature.
Place the device within 1 m (3.3 feet) from the unit.
Check the device operation in its operation instructions, as required.
Power on for the first time
1Turn on the unit
The unit will start searching for
the Bluetooth® device to connect
to, and the LED on the left
speaker will blink in blue and red
alternately. (Only one operation
after purchase)
2When the unit (“RP-BTD10”)
is detected by the Bluetooth®
device, select it
If prompted for a passkey, input
“0000 (four zeros)”.
If the Bluetooth® profile selection
screen appears, select the
“A2DP” profile. If “A2DP” is not
supported or if you want to just
use phone calls, select the “HSP”
or “HFP” profile. (For details on
profiles, see “Listening to music”
( P. 4) and “Making a phone
call” ( P. 5))
3Check the connection with
the Bluetooth®
device on the
unit
First the LED on the left speaker
lights in blue and repeats on
and off. When the connection is
established, blinking pattern will
change.
Connection after the second
time
<Connect the same Bluetooth
®
device>
When the unit is turned on, it will
search for the previously setup
Bluetooth® device and automatically
start connecting to it. First the LED
on the left speaker lights in blue
and repeats on and off. When the
connection is established, blinking
pattern will change.
<Connect a different Bluetooth
®
device>
Disable the Bluetooth® feature on
the previously connected device.
Check that the unit is turned off. Press
and hold the pairing button for
approximately 5 seconds. The unit will
start searching for other Bluetooth®
device. The LED on the left speaker
will blink in blue and red alternately. A
beep will sound.
Continue steps and .2 3
Connecting a Bluetooth® device
Note
If connection to a device is not
established within approximately
5 minutes, the unit will be turned off.
Start from step again.1
2 or more Bluetooth
® devices cannot
be connected to the unit at the same
time.
You can pair up to 8 devices with
this unit. If a 9th device is paired, the
device with the oldest connection will
be replaced. To use it, pair it again.
1Press and hold the power button for
approximately 2 seconds
A beep will sound and the LED on the left speaker
will blink.
Power button
To turn the power off
Press and hold the power button for 2 seconds or more. A beep will sound
and the power will be turned off.
Note
When the unit is not operated for approximately 5 minutes, the power will
automatically turn off. (See “Auto power off” ( P. 5))
Turning the power on/off


Product specificaties

Merk: Panasonic
Categorie: Headset
Model: RP-BDT10

Heb je hulp nodig?

Als je hulp nodig hebt met Panasonic RP-BDT10 stel dan hieronder een vraag en andere gebruikers zullen je antwoorden


Handleiding Headset Panasonic

Handleiding Headset

Nieuwste handleidingen voor Headset