PAC GM3A-RSTX Handleiding
PAC Niet gecategoriseerd GM3A-RSTX
Bekijk gratis de handleiding van PAC GM3A-RSTX (6 pagina’s), behorend tot de categorie Niet gecategoriseerd. Deze gids werd als nuttig beoordeeld door 12 mensen en kreeg gemiddeld 4.2 sterren uit 8 reviews. Heb je een vraag over PAC GM3A-RSTX of wil je andere gebruikers van dit product iets vragen? Stel een vraag
Pagina 1/6
Radio Replacement and Steering Wheel Control Interface
with OnStar Retention for General Motors Vehicles
GM3A-RSTX
© 2018 AAMP Global. All rights reserved. PAC is a Power Brand of AAMP Global.
PAC-audio.com
C
Page 1
Rev: 1
Date: 100318
Introduction and Features
Important Notes
Wiring Connection Chart
Illustration / Schematic
The GM3A-RSTX interface allows the replacement of a factory radio in select General Motors vehicles with 29-bit LAN
radios. Using this interface will retain factory features such as OnStar, steering wheel controls (SWC), warning chimes,
Rear Seat Controls (RSC), factory XM Radio and the BOSE amplier when the original radio is removed. Use of this
interface also allows you to program two radio functions to each SWC button by using short press long press dual
command functionality. The GM3A-RSTX also provides data bus driven outputs such as retained accessory power
(RAP), vehicle speed signal (VSS), illumination, reverse trigger and parking brake.
1. These instructions only apply to R.2.6.6.19 or later revisions. The revision info can be found on a small white sticker on the
interface and packaging.
2. The radio select rotary switch on the side of the interface must be adjusted to the proper radio setting before plugging the
interface into the vehicle (see next page for setting chart).
3. The interface comes pre-programmed for all of the vehicles factory SWC functions and does not require programming unless
you wish to re-assign the SWC functions or utilize short press long press dual command functionality. The SWC can always be
restored to default settings by following the procedure outlined on page 2.
4. RSC buttons that are identical to the SWC will mimic the SWC one for one.
5. The LED will ash whenever a SWC button is pressed.
Light GreenParking Brake Output (-)
PinkVehicle Speed Output
BlueNot Used
Blue / WhiteAmp Turn On Input
Orange / WhiteIllumination Output (+)
Purple / WhiteReverse Output (+)
Brown LoopMute Loop - See
installation note 8.
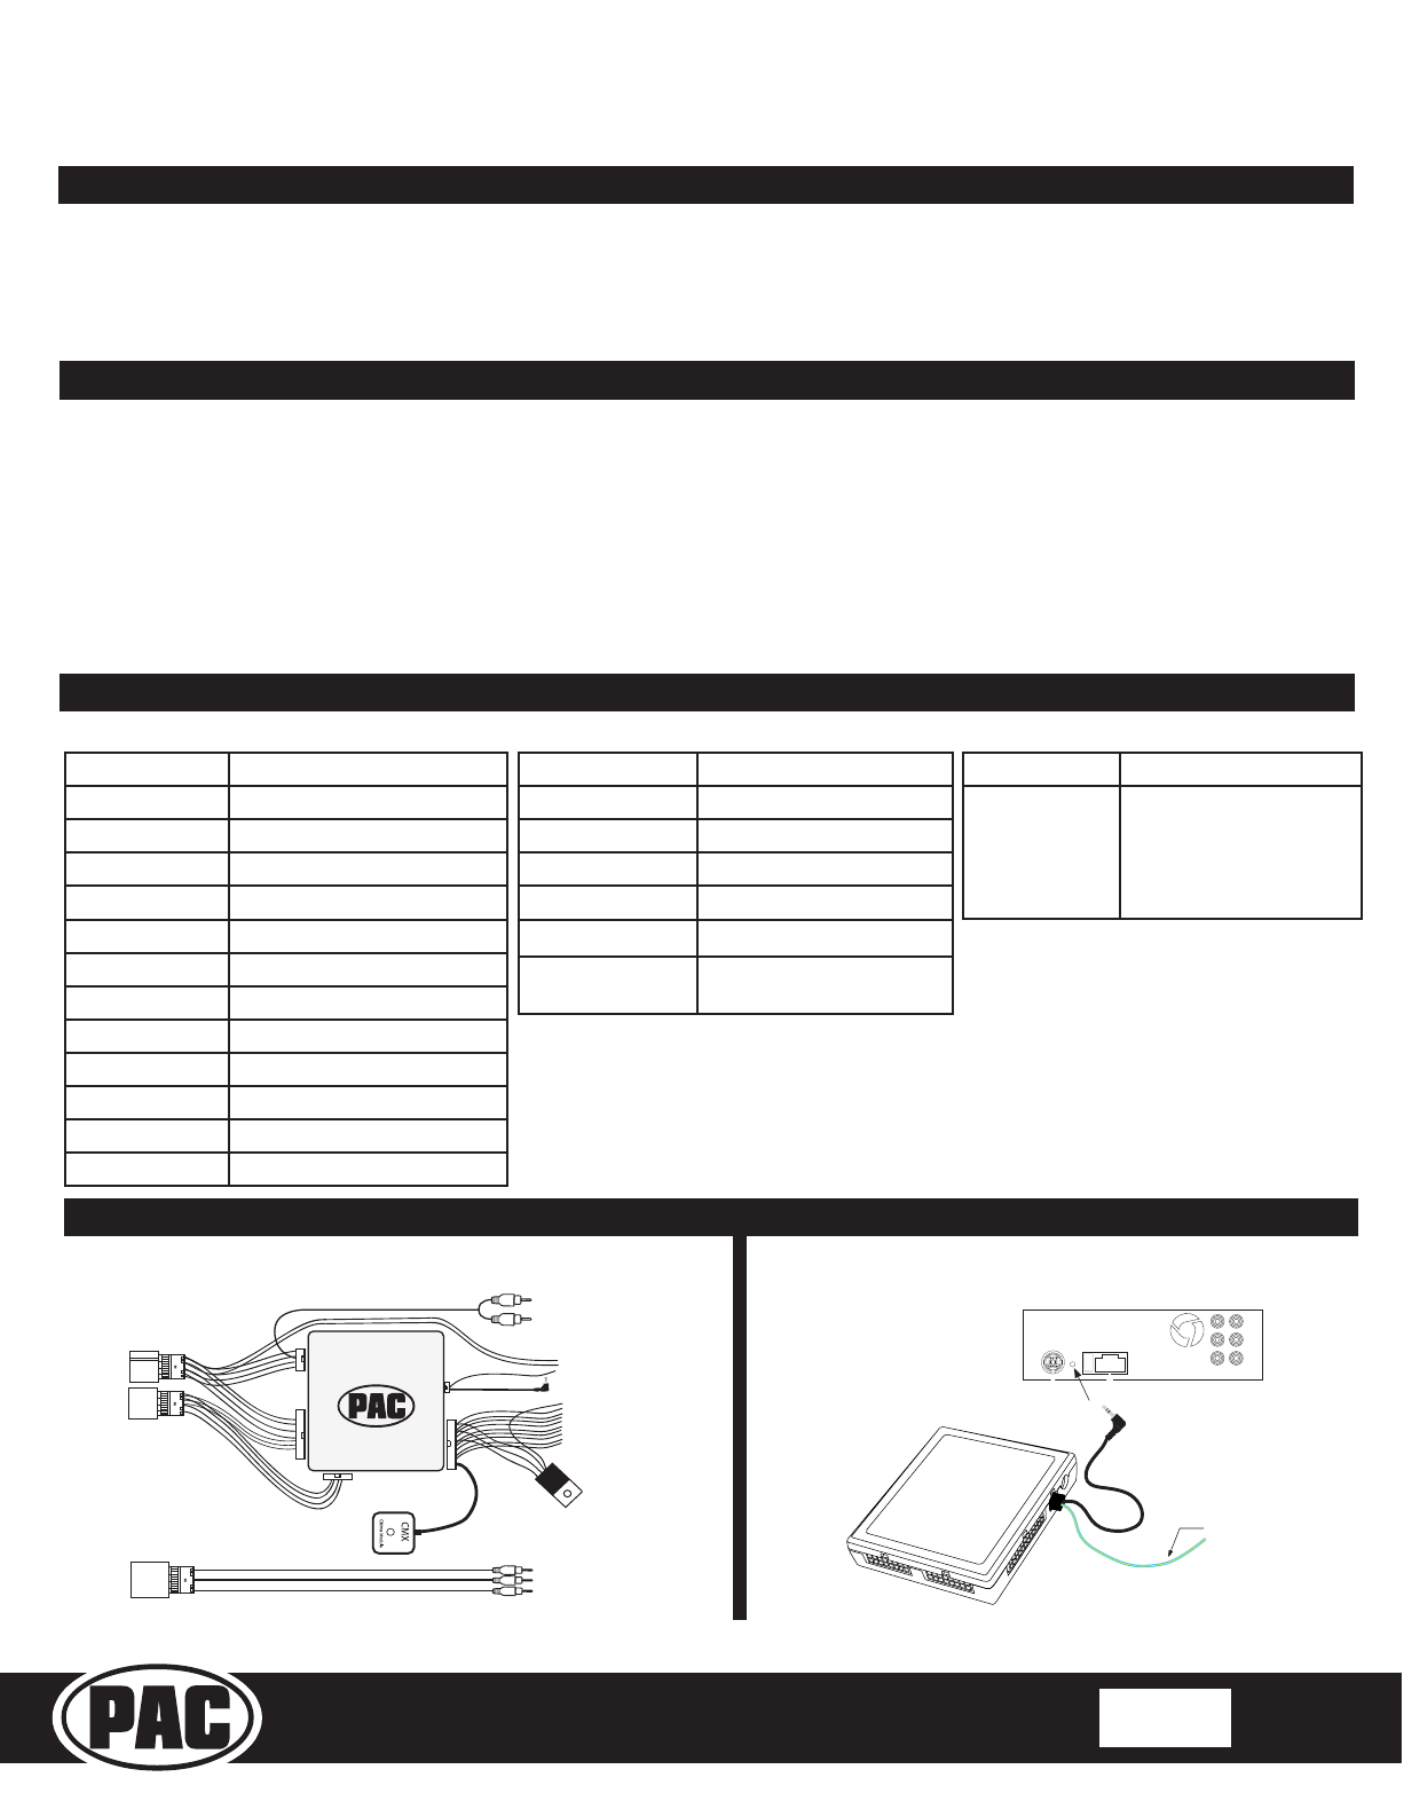
Aftermarket Radio Connections
Yellow *+12v from RP Advanced
Yellow *+12v from vehicle
Black **Ground from RP Advanced
Black **Ground from vehicle
RedAcc. Output
WhiteFront Left + input
White / BlackFront Left - input
GreyFront Right + input
Grey / BlackFront Right - input
GreenRear Left + input
Green / BlackRear Left - input
PurpleRear Right + input
Purple / BlackRear Right - input
SWC Connector
Blue / YellowKenwood, Newer JVC
3.5mm Jack
Alpine, JVC, Clarion,
Pioneer, Sony, Fusion,
Boyo, Dual, Lightning
Audio, Visteon or
Advent
SWC Connection
See above chart for
different radio type
connections
WiringSWC Connection
XM R
XM L
Aftermarket
Radio
Connections
Vehicle
Connections
Pifi ACti
IMPORTANT NOTES REGARDING YELLOW AND BLACK WIRE CONNECTIONS
* Connect both Yellow wires from the RP Advanced harnesses to the radio’s 12v
constant input
** Connect both Black wires from the RP Advanced harnesses to the radio’s ground
input.
Factory reverse camera and
auxiliary input retention harness
Power and speaker
connections
Product specificaties
| Merk: | PAC |
| Categorie: | Niet gecategoriseerd |
| Model: | GM3A-RSTX |
Heb je hulp nodig?
Als je hulp nodig hebt met PAC GM3A-RSTX stel dan hieronder een vraag en andere gebruikers zullen je antwoorden
Handleiding Niet gecategoriseerd PAC

5 Mei 2026
4 Mei 2026
2 Mei 2025
10 Maart 2025
10 Maart 2025
19 Februari 2025
19 Februari 2025
19 Februari 2025
19 Februari 2025
19 Februari 2025
Handleiding Niet gecategoriseerd
Nieuwste handleidingen voor Niet gecategoriseerd
30 Mei 2026
30 Mei 2026
30 Mei 2026
30 Mei 2026
30 Mei 2026
29 Mei 2026
29 Mei 2026
29 Mei 2026
29 Mei 2026
29 Mei 2026