PAC GM6A-RST Handleiding
PAC Niet gecategoriseerd GM6A-RST
Bekijk gratis de handleiding van PAC GM6A-RST (6 pagina’s), behorend tot de categorie Niet gecategoriseerd. Deze gids werd als nuttig beoordeeld door 46 mensen en kreeg gemiddeld 5.0 sterren uit 8 reviews. Heb je een vraag over PAC GM6A-RST of wil je andere gebruikers van dit product iets vragen? Stel een vraag
Pagina 1/6
Radio Replacement Interface for General Motors Vehicles
with 29-bit V2 and with or W/O BOSE and OnStar
C
Rev. 12/2/24
© 2024 PAC. All rights reserved. PAC-audio.com
GM6A-RST
Page 1
Introduction and Features
Important Notes
The GM6A-RST interface allows the replacement of a factory radio in select General Motors vehicles with 29-bit LAN v2, 20-pin and
16-pin connector radios. Using this interface will retain factory features such as BOSE, OnStar, vehicle settings, steering wheel
controls (SWC), front and rear park assist and warning chimes when the original radio is removed. The GM6A-RST also provides data
bus driven outputs such as retained accessory power (RAP), vehicle speed (VSS), illumination, reverse trigger and parking brake.
1. Please make your vehicle settings selections before removing the factory radio for optimal installation time. Once the radio has been removed,
the vehicle settings which are normally selected through the factory radio can be accessed and changed by downloading and installing the
PAC RadioPRO PC Application from http://www.pac-audio.com/rmware.
2. Before removing your factory radio, please review the following settings as these will not be retained once the factory radio is removed:
USB PortRadio Select
DIP switches
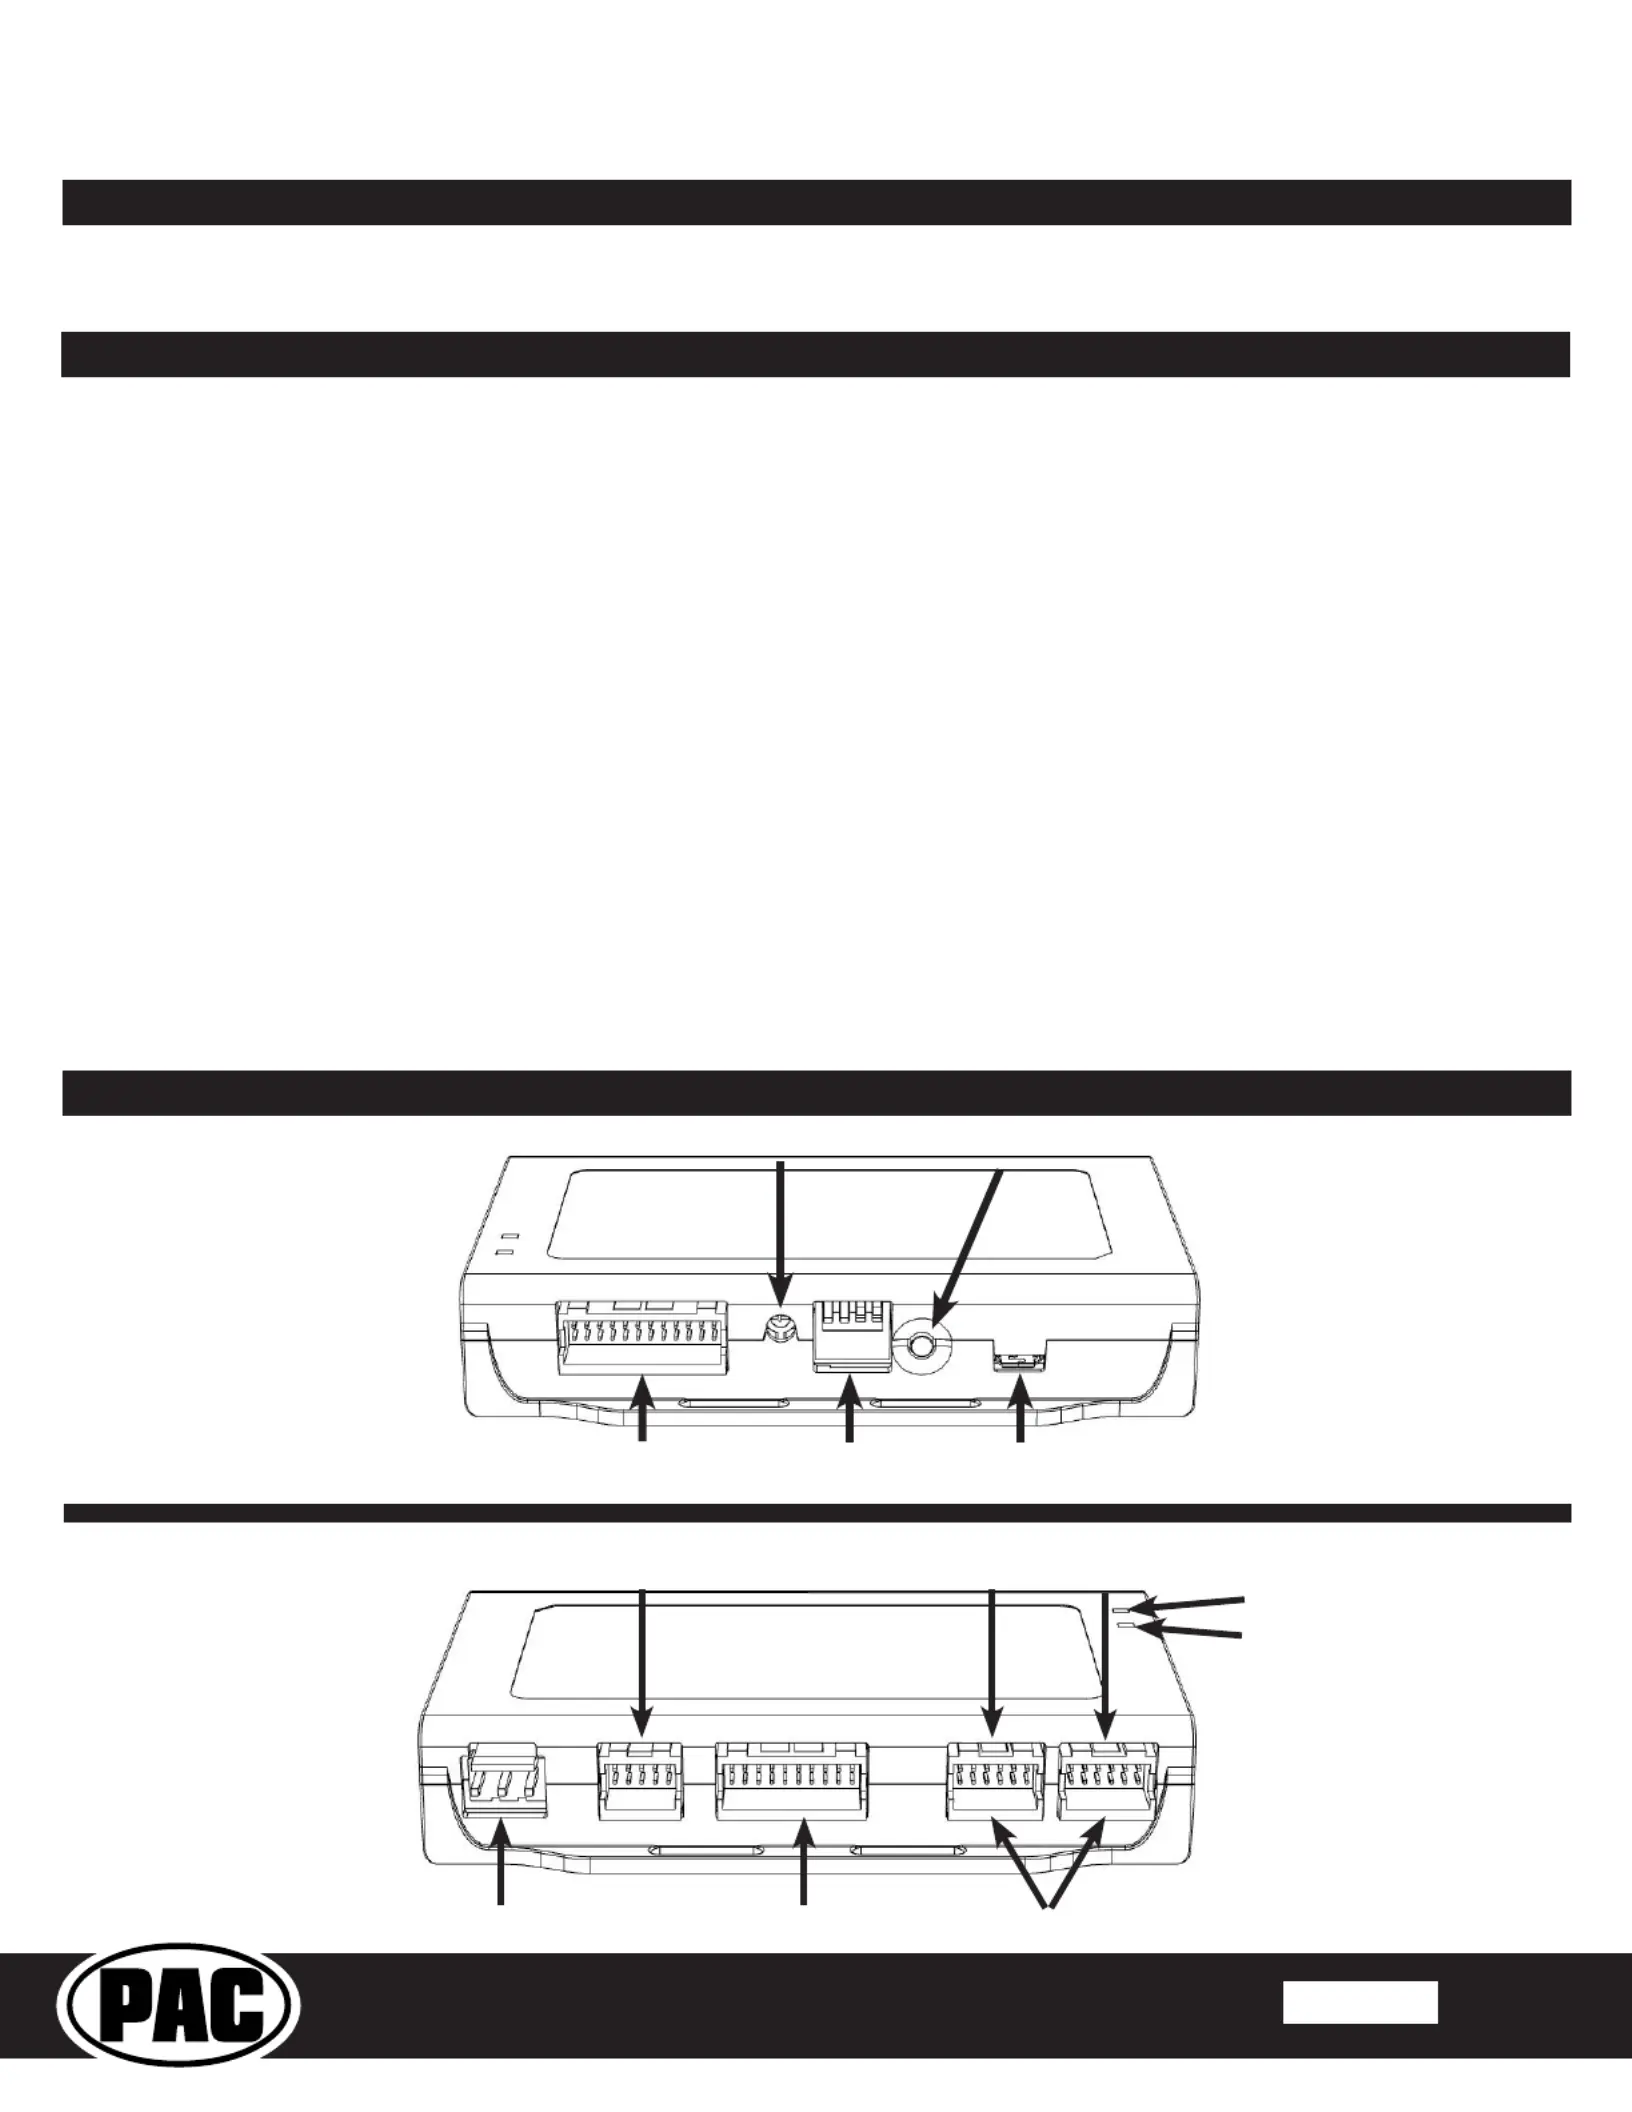
Interface Connector 4
Adjustment DialProgramming Button
Module Layout
Interface Connector 1Interface Connector 2Interface Connector 3
LED 2
Expansion Port
Non-Amplied
Audio Output
LED 1
Amplied
Audio Output
•Ambient Lighting Control
•Teen Driver Feature
•Valet Mode
•Rear Park Assist Symbols displayed on Reverse Camera Image
•OnStar Text
•Performance Data Recorder
•Custom Launch Control (Line Lock, Launch Control)
3. When you plug in the module for the rst time, it must go through an initialization process that takes up to 12 seconds. Make sure you have
the vehicle running diring this process.
4. The radio select dip-switchs on the side of the interface must be adjusted to the proper radio setting before plugging the interface into the
vehicle (see page 2 for setting chart).
5. The Voice button can be set to activate the factory OnStar function by using the RadioPRO PC Application. By default, this button is
re-programed to control the aftermarket radios voice function.
6. The interface comes pre-programmed for all of the vehicles factory SWC functions and does not require programming unless you wish to
re-assign the SWC functions, utilize the buttons that have no initial programming or utilize short press long press dual command functionality.
The SWC can always be restored to default settings by pressing and releasing the program button on the side of the interface once and
waiting 7 seconds for the LED to ash 4 times.
•Chevrolet Malibu and Camarowill require SWC re-mapping. Failure to do this will result in irregular steering wheel control functionality.
•Chevrolet Camaro: You will not be able to control the volume of OnStar or launch OnStar with the SWC.
7. The VS41 can be added to control Rear, Frotn ,Left, Right cameras through the interface. See Page 5 for details.
8. Language: In some vehicles the Lauguage setting is controled over MOST. Please make sure that you adjust this accordlingly before removing
the radio as this will not show up in most cases after your install.
9. For Referencing (IO) Codes. Please refer the vehicles RPO CODE sticker normally located in the vehicles glove box or the underside of the
spare tire cover.
Product specificaties
| Merk: | PAC |
| Categorie: | Niet gecategoriseerd |
| Model: | GM6A-RST |
Heb je hulp nodig?
Als je hulp nodig hebt met PAC GM6A-RST stel dan hieronder een vraag en andere gebruikers zullen je antwoorden
Handleiding Niet gecategoriseerd PAC

5 Mei 2026
4 Mei 2026
2 Mei 2025
10 Maart 2025
10 Maart 2025
19 Februari 2025
19 Februari 2025
19 Februari 2025
19 Februari 2025
19 Februari 2025
Handleiding Niet gecategoriseerd
Nieuwste handleidingen voor Niet gecategoriseerd
30 Mei 2026
30 Mei 2026
30 Mei 2026
30 Mei 2026
30 Mei 2026
29 Mei 2026
29 Mei 2026
29 Mei 2026
29 Mei 2026
29 Mei 2026