Ozito LWE-1405 Handleiding
Ozito
Niet gecategoriseerd
LWE-1405
Bekijk gratis de handleiding van Ozito LWE-1405 (6 pagina’s), behorend tot de categorie Niet gecategoriseerd. Deze gids werd als nuttig beoordeeld door 33 mensen en kreeg gemiddeld 4.1 sterren uit 17 reviews. Heb je een vraag over Ozito LWE-1405 of wil je andere gebruikers van dit product iets vragen? Stel een vraag
Pagina 1/6

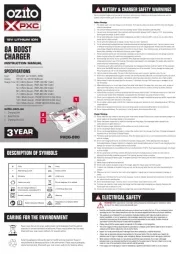
ELECTRIC
LAWN EDGER
1400W 190mm
INSTRUCTION MANUAL
SPECIFICATIONS
Power: 1400W
No Load Speed: 4000/min
Cutting Depths: 15, 25, 38mm
Blade: 190mm x Ø18mm bore
Noise Level: 103dB
Weight: 6.5kg
LWE-1405
IN ORDER TO MAKE A CLAIM UNDER THIS
WARRANTY YOU MUST RETURN THE PRODUCT
TO YOUR NEAREST BUNNINGS WAREHOUSE WITH
YOUR BUNNINGS REGISTER RECEIPT. PRIOR TO
RETURNING YOUR PRODUCT FOR WARRANTY
PLEASE TELEPHONE OUR CUSTOMER SERVICE
HELPLINE:
Australia 1800 069 486
New Zealand 0508 069 486
WARRANTY
TO ENSURE A SPEEDY RESPONSE PLEASE
HAVE THE MODEL NUMBER AND DATE OF
PURCHASE AVAILABLE. A CUSTOMER SERVICE
REPRESENTATIVE WILL TAKE YOUR CALL
AND ANSWER ANY QUESTIONS YOU MAY
HAVE RELATING TO THE WARRANTY POLICY
OR PROCEDURE.
OZITO Australia/New Zealand (Head Office) 1-23 Letcon Drive, Bangholme, Victoria, Australia 3175.
The benefits provided under this warranty are in addition
to other rights and remedies which are available to you at law.
Our goods come with guarantees that cannot be excluded
at law. You are entitled to a replacement or refund for a major
failure and for compensation for any other reasonably foreseeable
loss or damage. You are also entitled to have the goods repaired
or replaced if the goods fail to be of acceptable quality and the
failure does not amount to a major failure.
Generally you will be responsible for all costs associated with
a claim under this warranty, however, where you have suffered
any additional direct loss as a result of a defective product you
may be able to claim such expenses by contacting our customer
service helpline above.
ozito.com.au
1018
Lawn Edger Housing
Blade Spanners
3 YEAR REPLACEMENT WARRANTY
Your product is guaranteed for a period of 36 months from
the original date of purchase. If a product is defective it will
be replaced in accordance with the terms of this warranty.
Warranty excludes consumable parts, for example: Blade, blade
nut, flanges and included accessories.
WARNING
The following actions will result in the warranty being void.
• If the tool has been operated on a supply voltage other
than that specified on the tool.
• If the tool shows signs of damage or defects caused
by or resulting from abuse, accidents or alterations.
• Failure to perform maintenance as set out within the
instruction manual.
• If the tool is disassembled or tampered with in any way.
• Professional, industrial or high frequency use.
STANDARD EQUIPMENT
Adjustable Handle,
Lower Tube
Switch
Handle
Upper Tube
Handle Fasteners

ONLINE MANUAL
Scan this QR Code with your
mobile device to take you to
the online manual.
KNOW YOUR PRODUCT SETUP & PREPARATION
1. ASSEMBLY
ELECTRIC LAWN EDGER
1
2
3
4
5
6 7 8 9
10
11
1. Switch Handle
2. Front Handle
3. Locking Knob
4. Lower Tube
5. Motor Housing
6. Lock-Off Switch
7. Cord Retainer
8. On/Off Trigger
9. Handle Locking Knob
10. Upper Tube
11. Blade Guard
12. Depth Adjustment Knob
13. Dual Cutting Blade
14. Guide Wheel
3. Place the upper tube onto
the lower tube, t the bolt
through both tubes from
the underside and secure
with washer and locking
knob.
1. Align the groove on the
lower tube with the lug in
the motor housing and
push in until it clicks into
place.
Note: Take care not to
damage the cable while
inserting.
4. Place the switch handle
tube onto the upper tube,
t the bolt through both
tubes from the underside
and secure with washer
and locking knob.
2. Secure in place by
tightening the 2 screws
on each side.
Fitting the Front Handle
WARNING! ENSURE THE TOOL IS SWITCHED OFF AND
DISCONNECTED FROM THE POWER SUPPLY BEFORE
PERFORMING ANY OF THE FOLLOWING TASKS.
1. Place the front handle onto
the switch handle. Pass
the bolt through the handle
and secure with the locking
knob.
ACCESSORIES
15. Blade spanners x 2 16. Handle Fasteners x 2
12
13
14
15 16
Tube Assembly

2. ADJUSTMENTS 3. EXTENSION CORD RETAINER
3. Once the desired
cutting depth is
selected, tighten the
depth adjustment
locking knob to secure
in place.
Note: Ensure the lug
on the guide wheel arm
is correctly located into
a preset depth position
before tightening.
3. Once tted, connect the extension lead socket to the lawn
edger power cord plug.
1. Loosen the depth
adjustment locking
knob until the guide
wheel arm moves
away from the
housing. This will allow
the cutting depth to be
adjusted.
1. Make a loop with the extension lead (socket end of lead),
push it through the square hole beneath the handle.
The lawn edger provides 3 cutting depths; 15, 25 and 38mm.
The cord retainer prevents the extension lead (not included)
from being disconnected during use. Only use Heavy Duty
extension lead suitable for outdoor use with electric garden
tools, no longer than 25 meters.
2. Raise the guide
wheel cutting arm to
increase the depth
or lower to decrease
the depth.
2. Place the loop onto the cord retainer and ensure it is pulled
rmly to secure in place.
Adjusting the Cutting Depth
Adjusting the Front Handle
1. Loosen the locking knob,
then slide the handle into the
most comfortable position.
Retighten the locking knob
when in position.
Product specificaties
| Merk: | Ozito |
| Categorie: | Niet gecategoriseerd |
| Model: | LWE-1405 |
Heb je hulp nodig?
Als je hulp nodig hebt met Ozito LWE-1405 stel dan hieronder een vraag en andere gebruikers zullen je antwoorden
Handleiding Niet gecategoriseerd Ozito

15 Augustus 2025

14 Augustus 2025
30 Juli 2025

29 Juli 2025

3 Juli 2025

3 Juni 2025

10 December 2024

2 November 2024

8 April 2024

8 April 2024
Handleiding Niet gecategoriseerd
- Viltrox
- Ibanez
- Lavor
- Canon
- Gill
- YoloLiv
- Trendnet
- Vitamix
- Zephyr
- Defy
- Axis
- Livarno Lux
- LAFE
- Spirit Of Gamer
- Fizzics
Nieuwste handleidingen voor Niet gecategoriseerd

14 September 2025

14 September 2025

13 September 2025

13 September 2025

13 September 2025

13 September 2025

13 September 2025

13 September 2025

13 September 2025

13 September 2025