Nubert nuPro XS-6000 RC Handleiding
Bekijk gratis de handleiding van Nubert nuPro XS-6000 RC (4 pagina’s), behorend tot de categorie Speaker. Deze gids werd als nuttig beoordeeld door 99 mensen en kreeg gemiddeld 4.5 sterren uit 3 reviews. Heb je een vraag over Nubert nuPro XS-6000 RC of wil je andere gebruikers van dit product iets vragen? Stel een vraag
Pagina 1/4
2
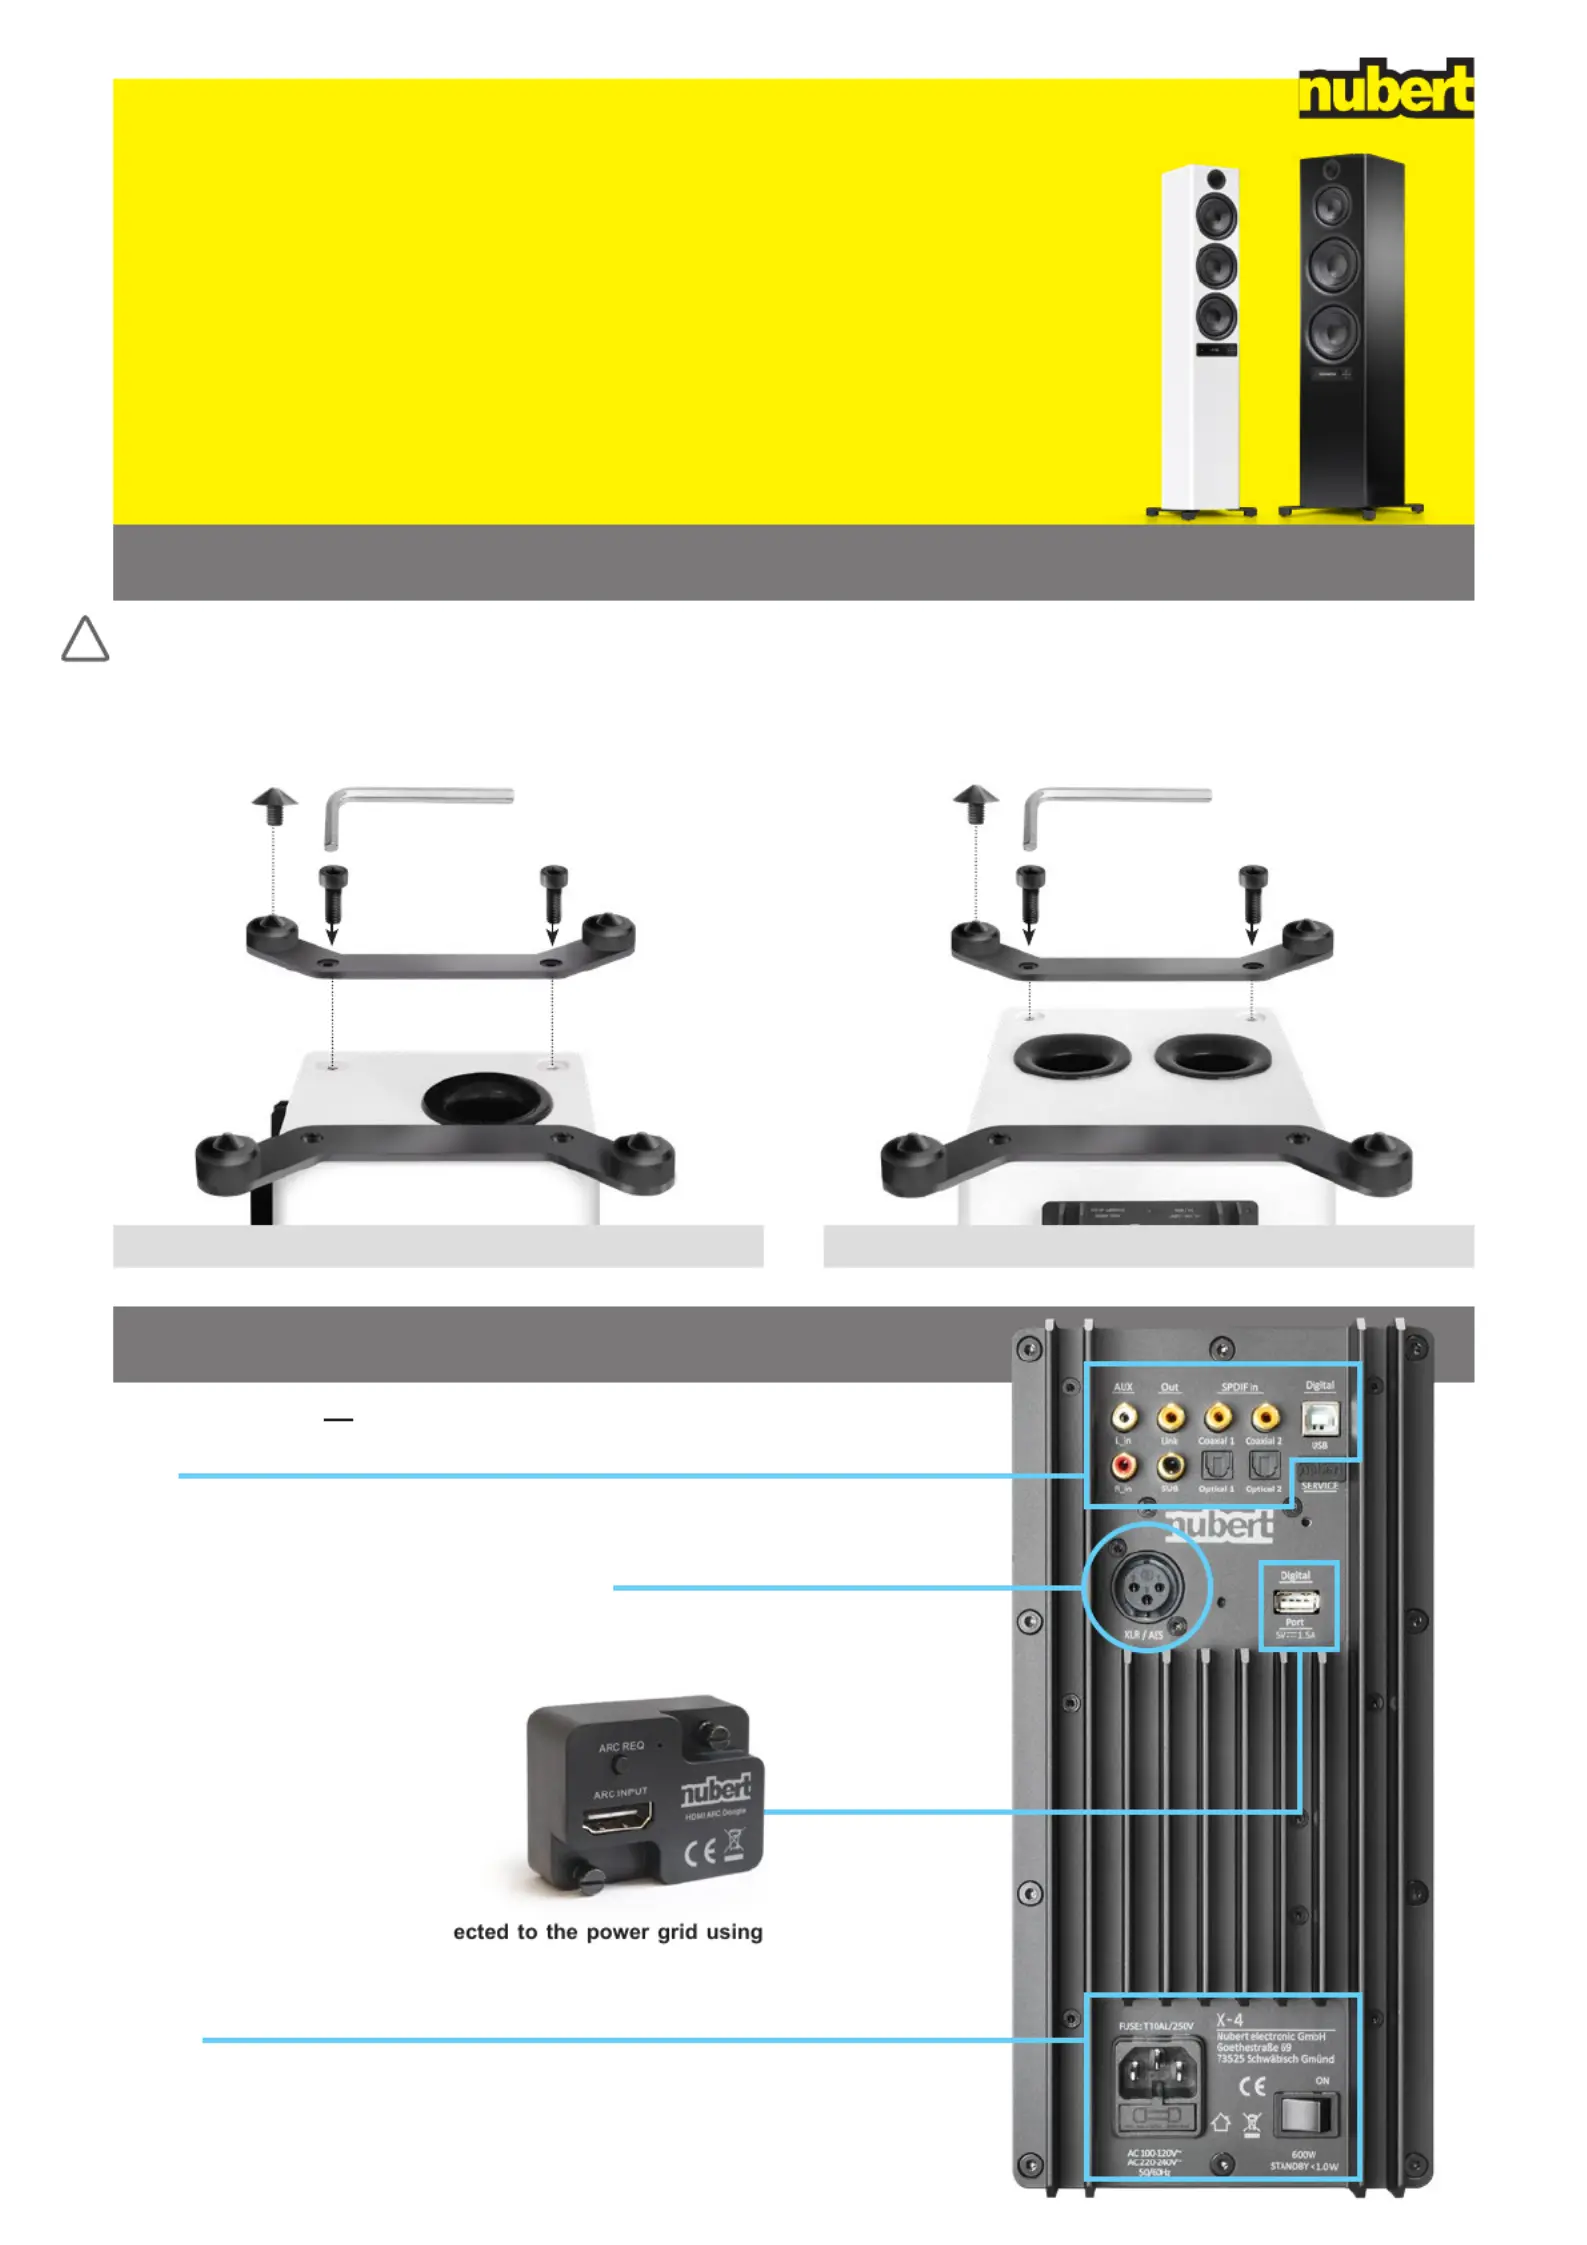
Cable connections
Please connect sources and the optional suball-
woofer to one of the two speakers of the stereo
pair.
Analogue XLR connection: Here, as an exception, each loudspeaker
is supplied with the corresponding signal separately.
At the digital Port input, you can plug in the supplied HDMI/ARC
adapter, enabling the direct connection of a TV.
Each nuPro loudspeaker is conn
the supplied power-cable.
Press the power switch on the back to turn on the speaker! If neces-
sary, press the power-button on the remote control to “wake up” the
speaker.
Caution!Be careful not to scratch the loudspeaker! Don’t let any
items fall into the bass reex ports!
Place the speaker upside down on a soft, non-scratching surface!
Place the out-rigger feet over the threaded bushings as shown in the
picture and mount the feet securely with the supplied bolts and hex
key. You can now turn the loudspeaker around, place it on its feet
and adjust the mini-spikes for a level, stable stand.
2x Out-rigger feet
4x hex
socket screws
mini-spike
1x hex key
2x Out-rigger feet
4x hex
socket screws
mini-spike
1x hex key
nuPro X-6000 RCnuPro X-8000 RC
nuPro X-6000/8000 RC · Quick Start Guide E12 · 11/2020
1
!
1
Setup and mounting of the out-rigger feet
nuPro X-6000 RC and X-8000 RC floorstanding speakers in stereo set-ups
QUICK START
GUIDE
®
E12
You can nd the most recent version of the operating manual here: www.nubert.de/downloads/61/
Product specificaties
| Merk: | Nubert |
| Categorie: | Speaker |
| Model: | nuPro XS-6000 RC |
Heb je hulp nodig?
Als je hulp nodig hebt met Nubert nuPro XS-6000 RC stel dan hieronder een vraag en andere gebruikers zullen je antwoorden
Handleiding Speaker Nubert

11 Februari 2025
11 Februari 2025
31 Januari 2025
31 Januari 2025
20 Februari 2024
20 Februari 2024
20 Februari 2024
Handleiding Speaker
Nieuwste handleidingen voor Speaker
22 Juni 2026
22 Juni 2026
21 Juni 2026
17 Juni 2026
17 Juni 2026
17 Juni 2026
17 Juni 2026
16 Juni 2026
16 Juni 2026
16 Juni 2026