NAV-TV NTV-KIT630 Handleiding

NAV-TV Dashcam NTV-KIT630

Bekijk gratis de handleiding van NAV-TV NTV-KIT630 (12 pagina’s), behorend tot de categorie Dashcam. Deze gids werd als nuttig beoordeeld door 38 mensen en kreeg gemiddeld 4.7 sterren uit 19.5 reviews. Heb je een vraag over NAV-TV NTV-KIT630 of wil je andere gebruikers van dit product iets vragen? Stel een vraag

Pagina 1/12
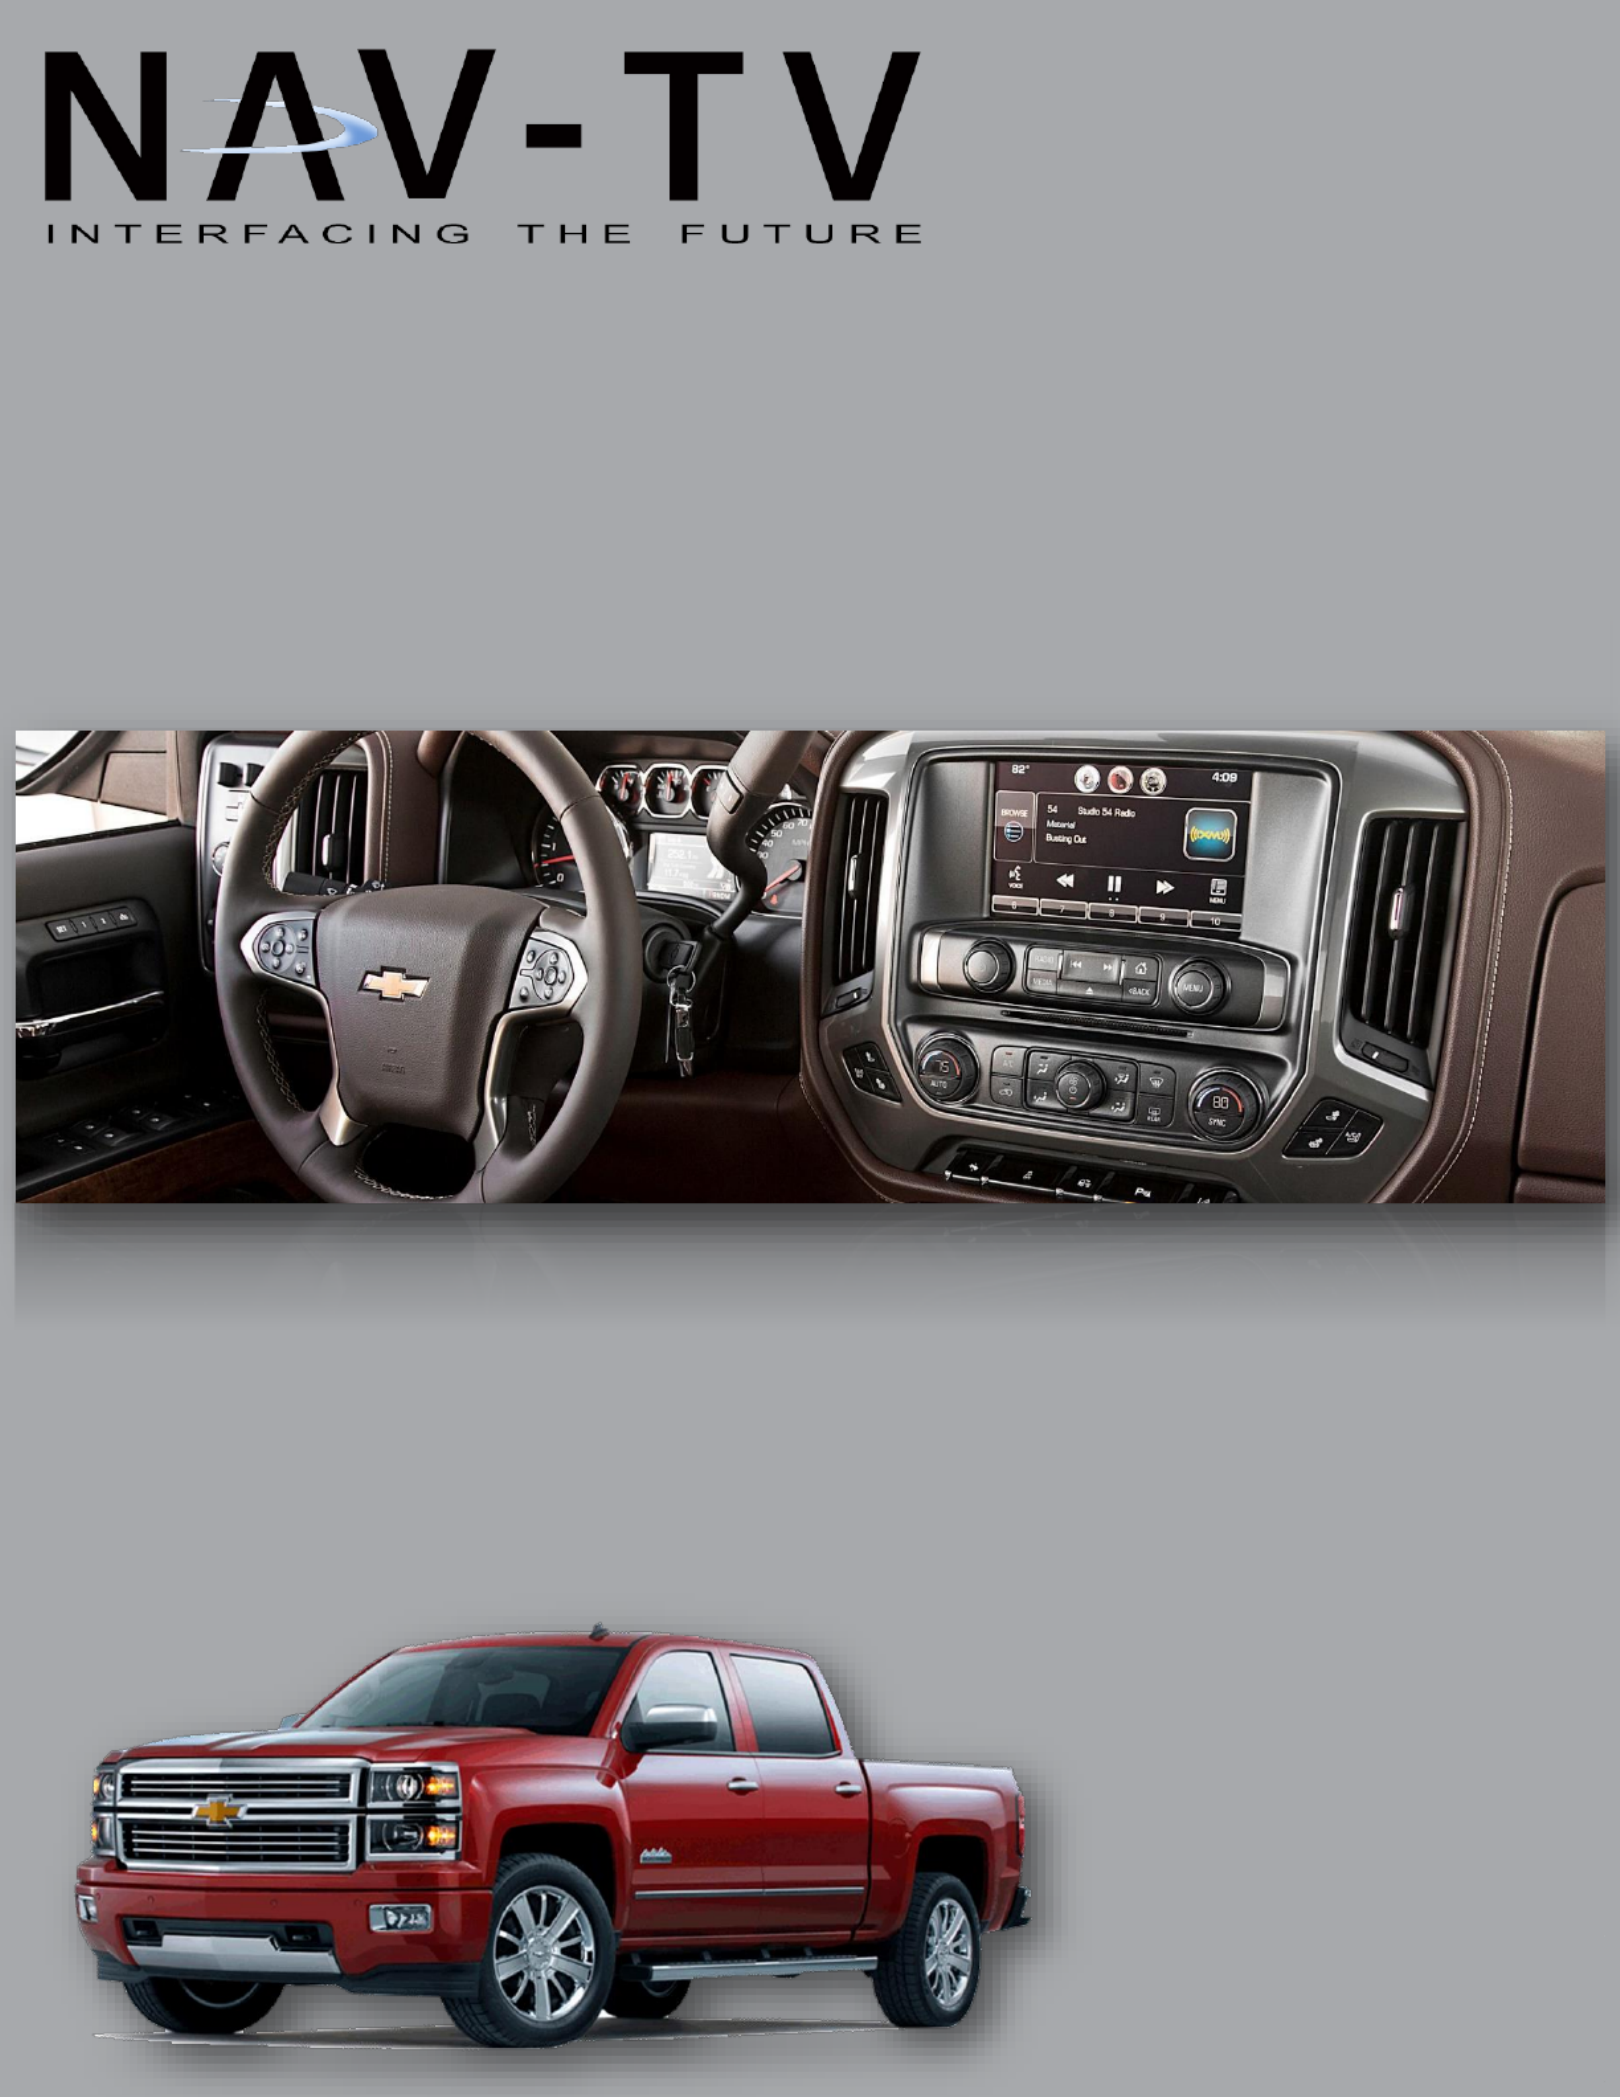
GM UNI-CAM/UNI-CAM PRG
RVC for select GM vehicles equipped with MyLink IOH Radio controller interface &/or programmer
IOH = IO4 (4” screen) & IO5/IO6 (8” screen)
NTV-KIT629: Controller ONLY (for vehicles with OEM RVC)
NTV-KIT630: Controller & Programmer (for vehicles without OEM RVC)
BHM
09 26/ /17
NTV-DOC239
3950 NW 120th Ave, Coral Springs, FL 33065 TEL 561-955-9770 FAX 561-955-9760
BHM
09/26/17
NTV-DOC239
Agreement End user agrees to use this product in compliance with all State and Federal laws. NAV-TV Corp. would not be held liable for misuse of its product. :
If you do not agree, please discontinue use immediately and return product to place of purchase. This product is intended for off-road use and passenger
entertainment only.
2 | P a g e
Overview
The GM UNI-CAM adds an addional video input on select GM vehicles equipped with the MyLink (model IOH)
4 color media screens Forcing (aermarket) AUX Video or front camera to display at any me is ” and 8” .
acvated with wire triggers. Note: NTV-KIT629 is a controller only, it will NOT program the MyLink radio
system for rear camera. If adding a reverse camera to a vehicle without OEM RVC and forced cam/AUX video
input is desired as well, you must purchase NTV-KIT630 (UNI-CAM with built-in programmer).
Kit Content
GM UNI-CAM Pinout
Pin #
Descripon
Color
1
12v Constant Power (+)
Yellow
2
Input 1 (Force Rear Cam) *
Red
3
Input 2 (Force Front Cam)
Blue
4
Input 3 ( Programming Wire) 4” **
Pink
5
--NOT USED --
Brown
6
RCA Signal (+) (Out to radio)
Yellow
7
RCA Shield (common)
Gray
8
CAN HI (HMI side)
White/Blue
9
CAN LO (vehicle side)
White/Brown
10
Ground (-)
Black
11
Output 1 (ACC 12v +)
White/Red
12
Output 2 (REV + & ) 12v FRVC
White/Blue
13
Output 3 (12v out when ) + FFVC
White/Purple
14
-- --Not Used
White/Brown
15
RCA Signal (+) Input (front cam)
White
16
RCA Signal (+) Input (rear cam)
Red
17
CAN HI (HMI side)
Blue
18
CAN LO (vehicle side)
Brown
Wire Side
Any wires not menoned here are not used for
this installaon.
USB Cable
(updates)
NTV-CAB009
*Forcing rear camera is only available for
aermarket cameras (unless OEM rear camera
is powered with an ACC source or OUTPUT 2
manually OEM RVC normally only powered in
reverse)
**Used for (IO4) 4” screens ONLY.
Plug & Play I/O T-Harness
NTV-HAR284
CAM T-Harness
NTV-HAR283
VSW-R included with
NTV-KIT629
PIN 12 Forced Rear View Camera FRVC: ‘ ’
PIN 13 FFVC: Forced Front View Camera’
BHM
09/26/17
NTV-DOC239
Agreement End user agrees to use this product in compliance with all State and Federal laws. NAV-TV Corp. would not be held liable for misuse of its product. :
If you do not agree, please discontinue use immediately and return product to place of purchase. This product is intended for off-road use and passenger
entertainment only.
3 | P a g e
Known HMI
Locaons:
GM UNI-CAM Installaon
1. Aer gaining access to the HMI module, Disconnect the gray, 12-pin plug from the OEM HMI circled
above.
2. Disconnect the black, 16-pin plug from the OEM HMI circled above.
3. 12 Connect the provided UNI-CAM -pin & 16-pin (male end) connectors into the HMI plug locaons
from steps 1 & 2.
4. Connect the factory 12-pin & 16-pin plugs (previously connected to the HMI) into the provided Plug &
Play T-Harness (female end).
5. NTV-KIT629 Installaon (with exisng OEM reverse camera):
a. When connecng a front camera (or AUX video source) to a vehicle with an exisng OEM
reverse camera, the internal relay on the UNI-CAM board is not used (RCA I/Os from module).
Complete all connecons on page 5 (FIG 2) using the included VSW-R (included with KIT629) to
prevent ‘bleed er’ image (when in front camera mode). This includes the following:-ov
b. Black wire of VSW to chassis ground
c. OUTPUT 3 (from module) to White/Red of VSW
d. RCA connecons as shown in diagram (FIG 2)
e. Connue with installaon on page 4, step 7.
6. NTV-KIT630 Installaon (without exisng OEM reverse camera):
a. Adding a single rear camera: power your camera with an ACC source or OUTPUT 1 (especially if
using the forced feature), and connect your camera signal directly to the female RCA (into the
HMI) from the 12-pin gray plug.
b. Adding 2 aermarket cameras: Instead of connecng camera signal directly to the HMI,
connect the RVC signal to the RCA labeled at the UNI-CAM module. Connect the ‘BACKUP CAM’
front cam/AUX video to the RCA labeled . Connect the (male) RCA to ‘FRONT CAM’ ‘VIDEO OUT’
the female RCA from the (at the HMI). Leave the male RCA on the CAM T-CAM T-Harness
Harness disconnected .
c. If this vehicle is equipped with a 4” screen, connect INPUT 3 (pink) to a CONSTANT 12v source.
d. Connue with installaon on step 7 (next page).
Vehicle
HMI Locaon
Cadillac ATS/CTS
Directly below glove box
Cadillac SRX
Below/behind glove box
Corvee
Driver’s kick panel
Silverado/Sierra
Behind glove box - high
Colorado/Canyon
Behind Screen - low
Factory GM HMI (Human Machine Interface)
The UNI-CAM kit connects at the OEM
HMI Module. The locaon of this module
varies by vehicle.
NOTE: If this wire is not connected, the UNI- (image will appear zoomed in) CAM PRG will program for 8” screen .


Product specificaties

Merk: NAV-TV
Categorie: Dashcam
Model: NTV-KIT630

Heb je hulp nodig?

Als je hulp nodig hebt met NAV-TV NTV-KIT630 stel dan hieronder een vraag en andere gebruikers zullen je antwoorden