Monogram ZX27CTACSS Handleiding


Bekijk gratis de handleiding van Monogram ZX27CTACSS (4 pagina’s), behorend tot de categorie Niet gecategoriseerd. Deze gids werd als nuttig beoordeeld door 3 mensen en kreeg gemiddeld 4.9 sterren uit 2 reviews. Heb je een vraag over Monogram ZX27CTACSS of wil je andere gebruikers van dit product iets vragen? Stel een vraag

Pagina 1/4
Monogram
®
Assembly Instructions
Before you Begin – Read these instructions completely and carefully.
Note To Installer: Be sure to leave these instructions with the Consumer.
Note to Consumer: Keep these instructions with your Owner’s Manual for future reference.
If you received a damaged Grill Cart, you should contact
your dealer.
Assembly of this grill cart requires basic mechanical skills.
Step 1:
Remove
Packaging
Open the box and remove the contents.
Remove packaging and protective film.
Locate the hardware accessory package and
check contents.
24" and 27" Outdoor Cooking Center
Grill Carts
Models ZX24CTBSS/ZX27CTACSS
For Monogram local service in your area, 1.800.444.1845.
For Monogram service in Canada, 1.888.880.3030.
For Monogram Parts and Accessories, call 1.800.626.2002.
NOTE:
Carts must be completely assembled before any gas
connections are made.
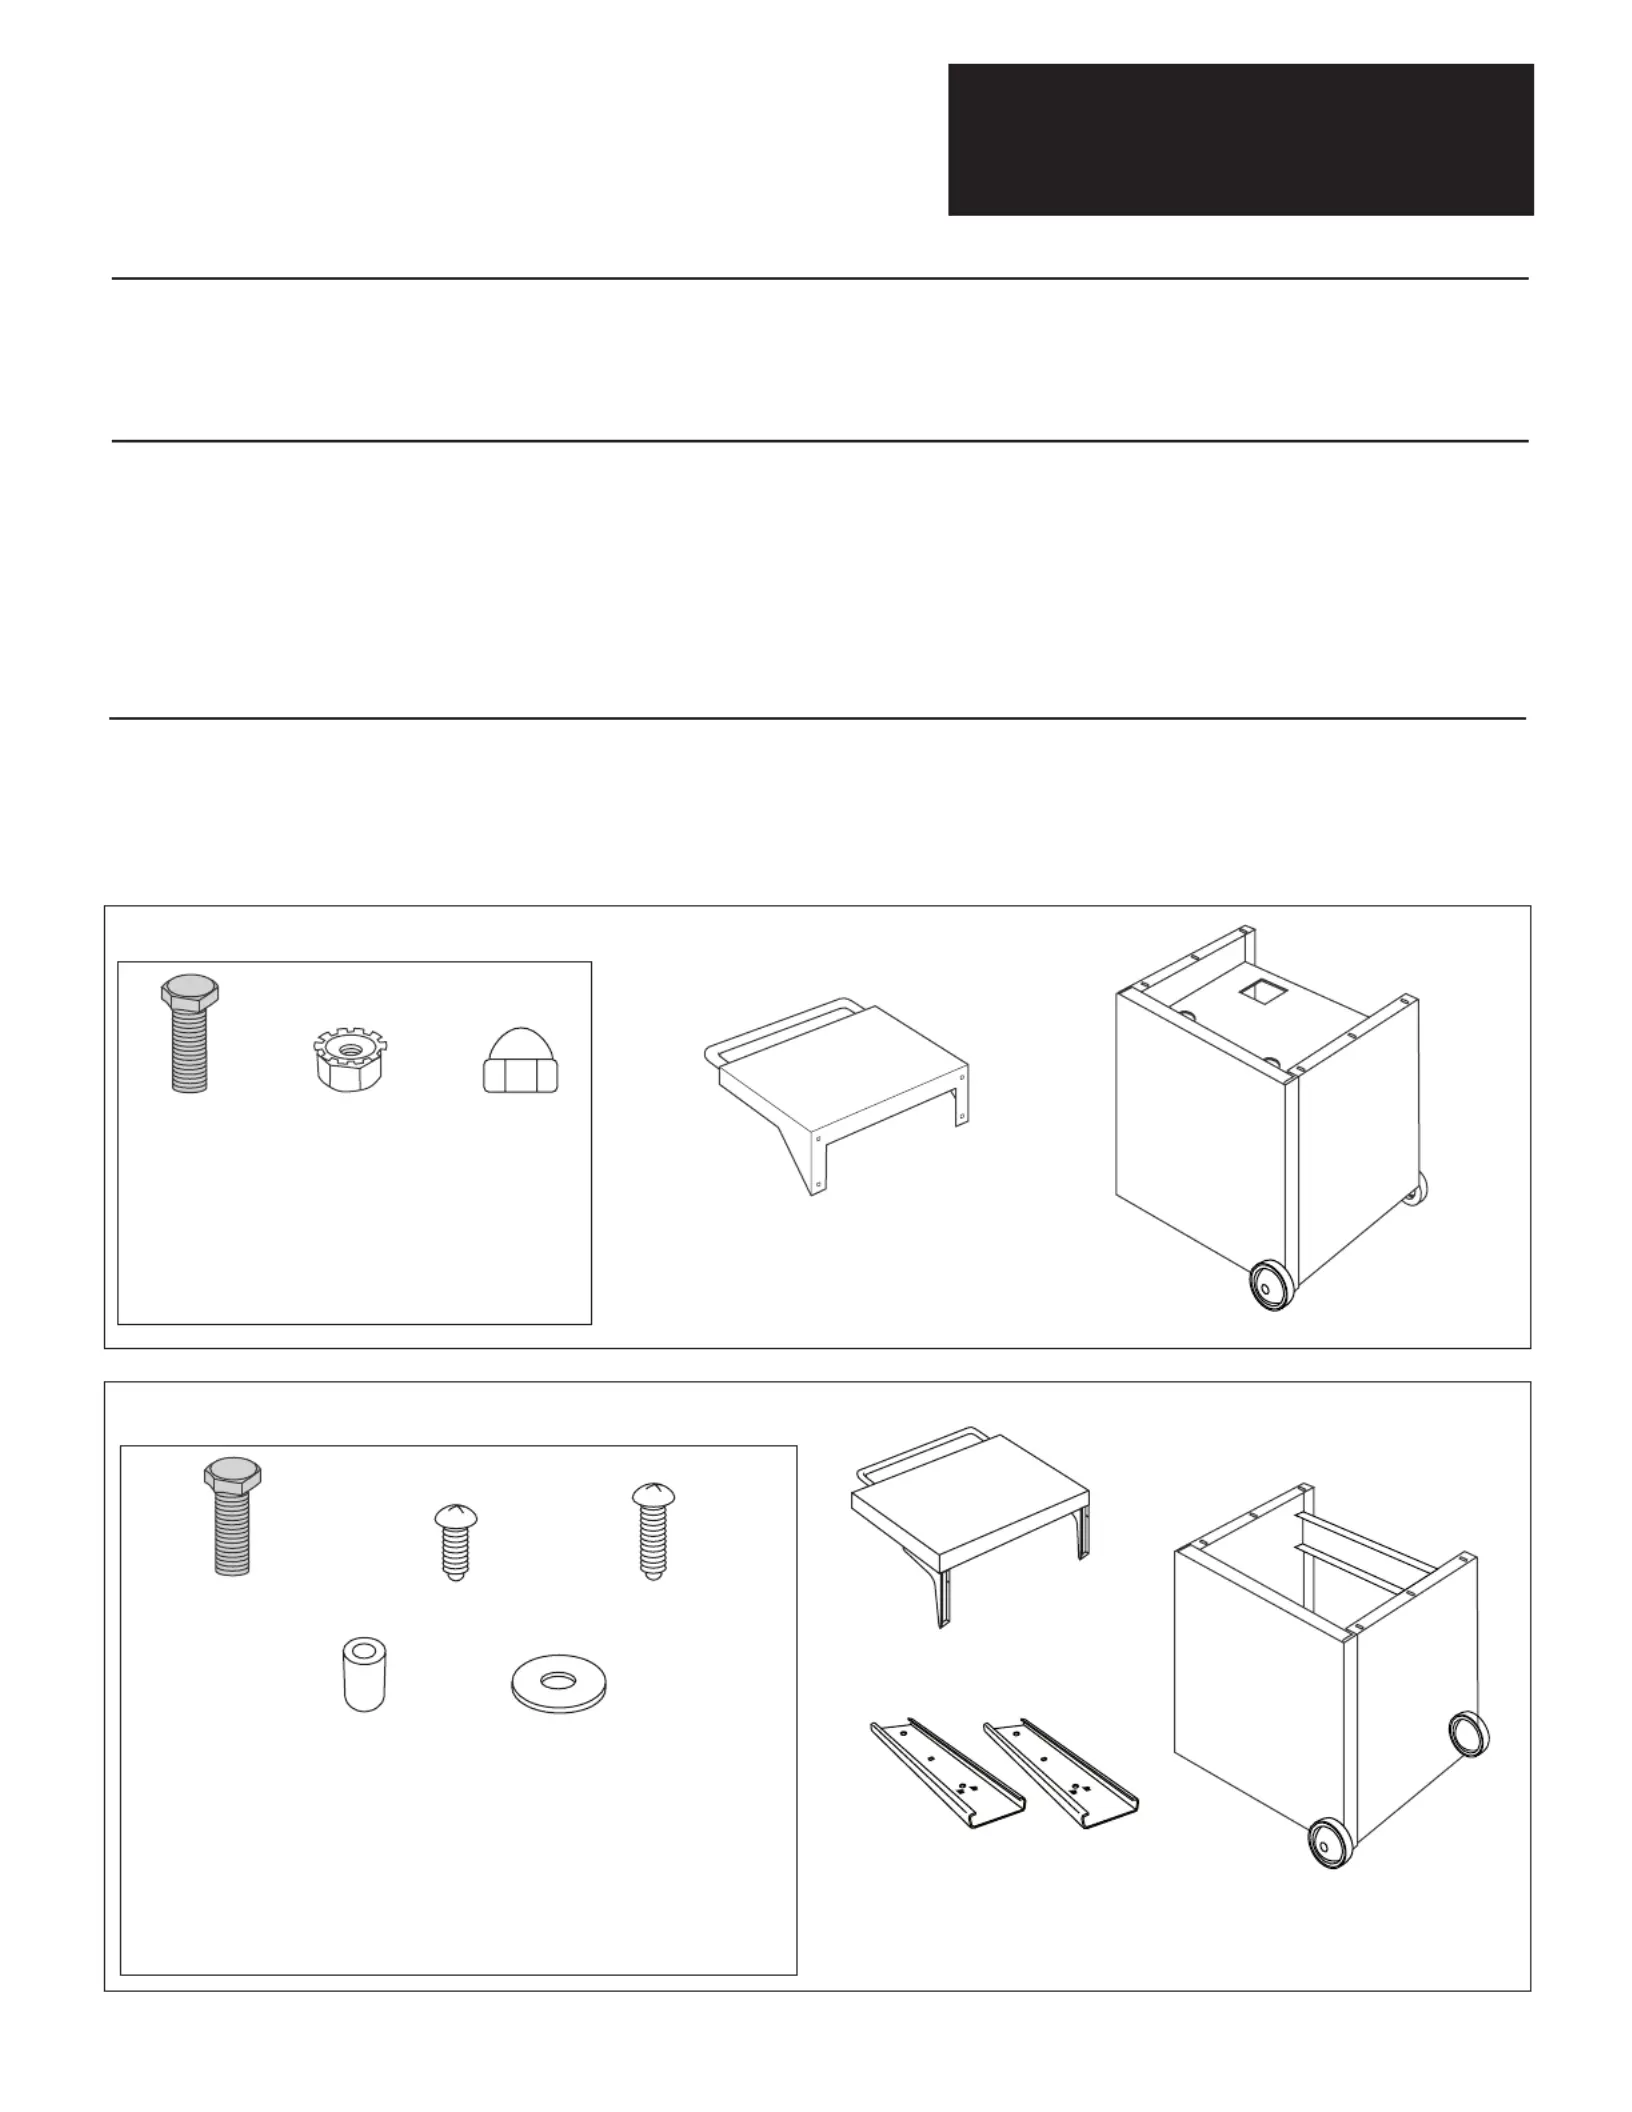
24” Grill Cart
1/4-20 x 3/4"
Hex Bolts
1/4-20 Hex
Keps Nuts
Shelf with
Handle
Cart
27” Grill Cart
1/4-20 x 1/2" Hex Bolts
Flat Washers
Shelf Brackets
10-24 x 1/2" Screws
Fold-Down Shelf
Cart
Shelf Stops
10-24 x 1-1/8" Screws
1/4-20 Acorn
Lock Nut
ITEM QUANTITY
1/4-20 x 3/4" HEX BOLTS 4
1/4-20 HEX KEPS NUTS 8
1/4-20 ACORN LOCK NUTS 8
ITEM QUANTITY
1/4-20 x 1/2" HEX BOLTS 4
10-24 x 1/2" SCREWS 4
10-24 x 1-1/8" SCREWS 2
ALUMINUM SHELF STOPS 3/8 x 3/8 2
1/4 x 3/4" WASHER FLT SS 4
2
Tools
You Will
Need
Step 2
Mount Grill
Onto Cart
• Two 7/16" wrenches or socket with
6" extension.
• Phillips head screwdriver
• Gloves to protect against sharp edges
• The grill base has 1/4–20 bolts with two
nuts pre-installed on each corner. Remove
bottom nuts on each corner and set aside.
• Check to be sure the remaining nuts on the
bottom of the grill are tight.
• Lower the grill onto the cart.
• Route the attached hose through the large
square cutout in the top of the cart as you
position the grill onto the cart.
• The bolts on the bottom of the grill should
go through the four corner holes in the top
of the cart.
• Install the four nuts on each corner to the
grill bolts protruding through the cart.
• Remove the four acorn lock nuts (1/4–20)
from the hardware bag.
• Install one acorn lock nut onto each bolt
protruding through the cart at each corner.
Le gril est extremement
lourd, Il faut deux personnes pour le
soulever et le mettre ur un chariot.
PRUDENCE
The grill is extremely heavy.
2 people are required to lift and place the
grill onto the cart.
CAUTION
Step 3
Mount Side
Shelf Onto
24" Grill
• The shelf should be installed after the grill
has been secured to the cart.
• Open the grill lid.
• Remove the 8 nuts and 4 bolts from the
hardware bag.
• Install bolts through the grill and secure
with nuts. Tighten.
• Mount shelf onto the four bolts. Secure with
nuts and tighten.
• Install the four remaining acorn lock nuts
onto the four shelf bolts.
NOTE: The additional nut installed between the
grill and shelf serves as a spacer that will help
keep the shelf cool during long periods of cooking.
24 Grill Cart
Assembly Instructions
Use Four Bolts, 8 Nuts and 4 Acorn Lock Nuts to Secure the
Shelf to the Grill
3
Step 2:
Mount Grill
Onto Cart
Step 3
Install
Mounting
Brackets
and Shelf
CAUTION: Lock front caster on the cart to
prevent movement.
See installation instructions packed with the
grill. Remove Packaging, drip tray, burner
grates and parts box.
CAUTION: The grill is extremely heavy.
Two people are required to lift and place the
grill onto the cart.
• Lower the grill onto the cart.
• Check to be sure the grill rests securely and
fits square on the cart.
• To secure the grill to the cart: Insert the
1/4–20 bolts and washers up through the
cart holes and thread into the bottom holes
of the grill head, two on each side.
• Install the side
shelf mounting
brackets (with
tabs pointing
down) to the left
side of the grill
head. Use four
10–24 x 1/2"
screws.
27 Grill Cart
Assembly Instructions
• Slide shelf supports up and into the shelf
mounting brackets.
• When the shelf stops at the top, fold the
shelf out horizontally.
• The shelf should rest securely in the
channels.
• Install the two long 10–24x1-1/8" screws and
shelf stops below the shelf supports.
• The stops and screws will prevent the shelf
from sliding out of the channels when folded
down.
A
C
B
Install screws through the top and
bottom bracket holes and into the top
two holes on the grill head as shown.
Leave bottom holes in the grill head
open for shelf stops.
Tabs Pointing
Downwards


Product specificaties

Merk: Monogram
Categorie: Niet gecategoriseerd
Model: ZX27CTACSS

Heb je hulp nodig?

Als je hulp nodig hebt met Monogram ZX27CTACSS stel dan hieronder een vraag en andere gebruikers zullen je antwoorden