Metra 95-7810B Handleiding
Bekijk gratis de handleiding van Metra 95-7810B (4 pagina’s), behorend tot de categorie Carkit. Deze gids werd als nuttig beoordeeld door 73 mensen en kreeg gemiddeld 4.5 sterren uit 4 reviews. Heb je een vraag over Metra 95-7810B of wil je andere gebruikers van dit product iets vragen? Stel een vraag
Pagina 1/4
METRA. The World’s best kits.
™
metraonline.com
© COPYRIGHT 2015 METRA ELECTRONICS CORPORATION
REV. 12/10/2015 INST95-7810B
CAUTION: Metra recommends disconnecting the negative battery
terminal before beginning any installation, unless the vehicle
manufacturer recommends against so. Please check with your
local Dealership for more information. All accessories, switches,
climate controls panels, and especially air bag indicator lights
must be connected before reconnecting the battery or cycling
the ignition. Also, do not remove the factory radio with the key
in the on position, or the vehicle running. It would be best to
remove the key from the ignition and then wait a few seconds
before removing the factory radio.
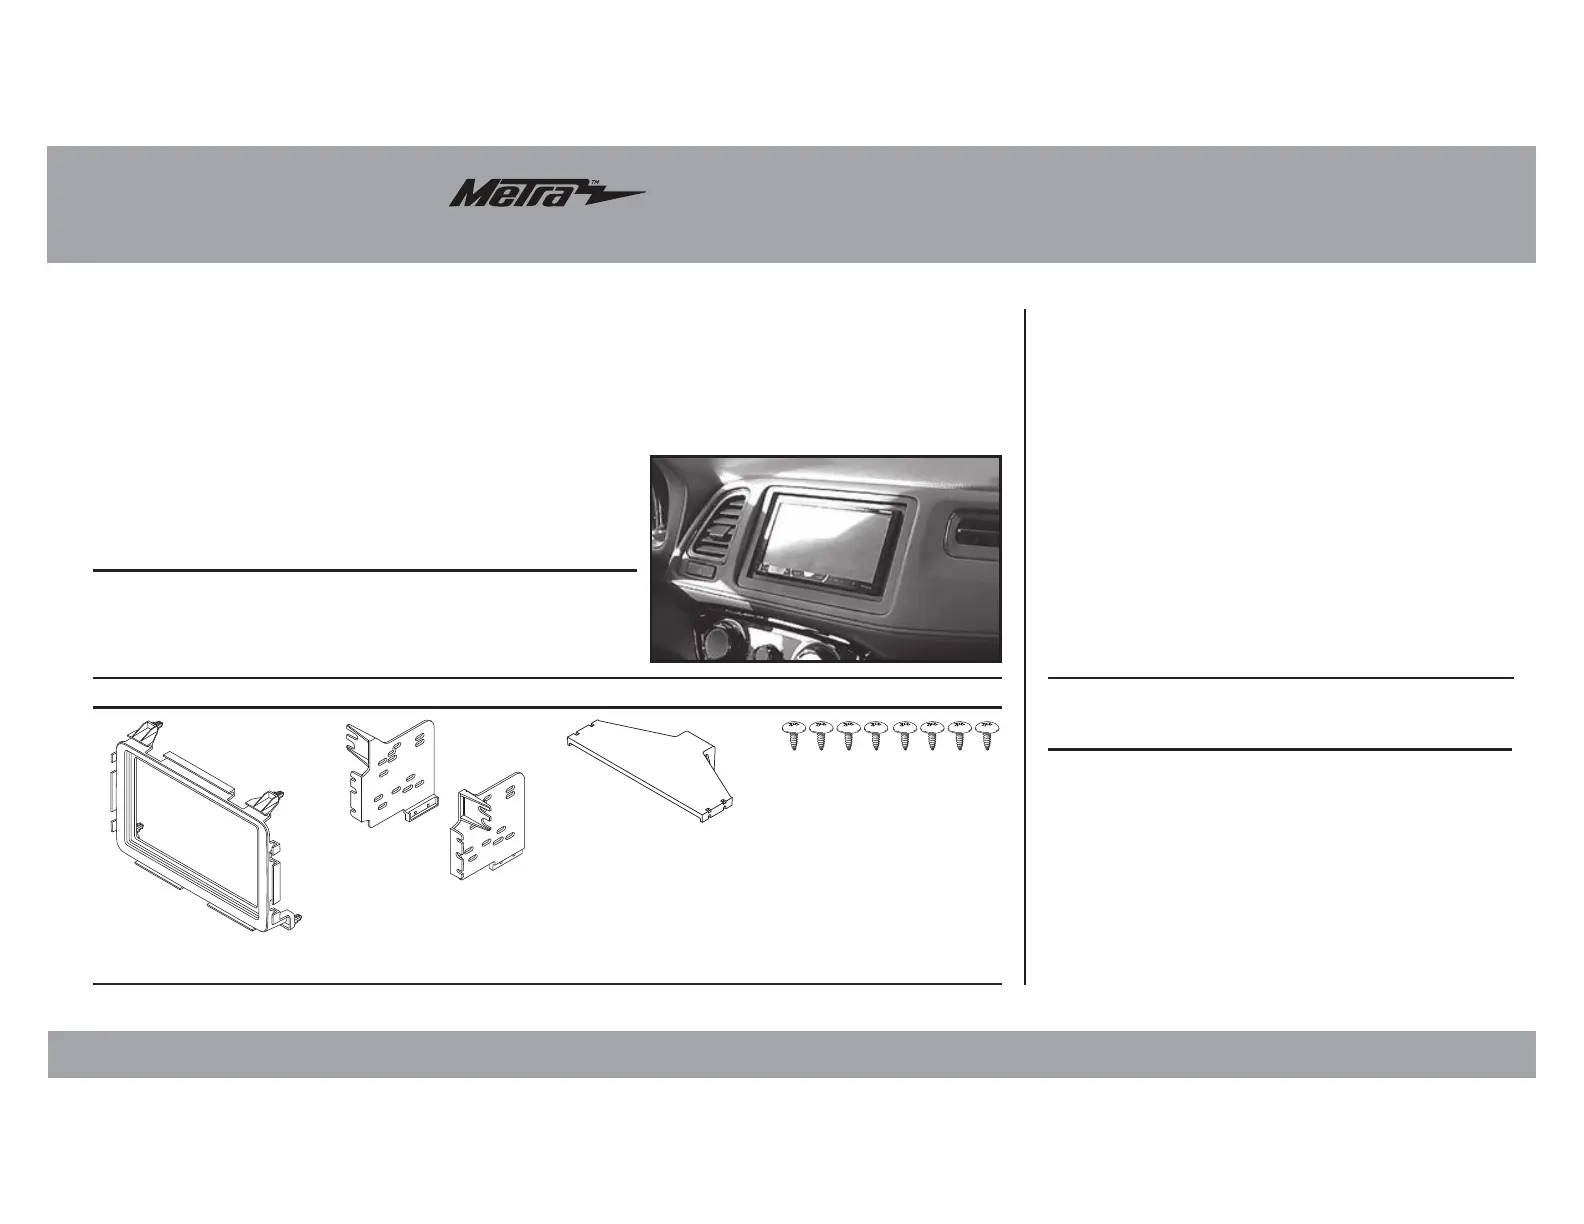
Installation instructions for part 95-7810B
• ISO DDIN radio provision
• Painted matte black
• A) Radio trim panel • B) Radio trim panel brackets • C) Rear support bracket • D (8) #6 x 3/8” Phillips screws
20;-,(;<9,:
20;*64765,5;:
>0905.(5;,55(*655,*;065: (sold separately)
Wiring Harness: • 70-1729 Antenna Adapter: • 40-HD11
• Panel removal tool • Phillips screwdriver
• 8 mm socket wrench
;663:9,8<09,+
Honda HR-V 2016-up
95-7810B
A
C
D
B
Dash Disassembly .................................................2
Kit Assembly
–ISO DDIN radio provision ......................................3
Table of Contents
Product specificaties
| Merk: | Metra |
| Categorie: | Carkit |
| Model: | 95-7810B |
Heb je hulp nodig?
Als je hulp nodig hebt met Metra 95-7810B stel dan hieronder een vraag en andere gebruikers zullen je antwoorden
Handleiding Carkit Metra

7 Oktober 2025
7 Oktober 2025
7 Oktober 2025
6 Oktober 2025
3 Juni 2025
3 Juni 2025
7 Mei 2025
3 April 2025
3 April 2025
3 April 2025
Handleiding Carkit
Nieuwste handleidingen voor Carkit
3 November 2025
21 September 2025
4 Augustus 2025
5 Juli 2025
3 Juni 2025
2 Juni 2025
19 Mei 2025
27 April 2025
31 Maart 2025
11 Februari 2025