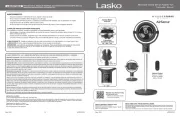
Lasko 2554 Handleiding
Lasko
Ventilator
2554
Bekijk gratis de handleiding van Lasko 2554 (6 pagina’s), behorend tot de categorie Ventilator. Deze gids werd als nuttig beoordeeld door 80 mensen en kreeg gemiddeld 4.9 sterren uit 40.5 reviews. Heb je een vraag over Lasko 2554 of wil je andere gebruikers van dit product iets vragen? Stel een vraag
Pagina 1/6

Rev. Q 9/15 1 2554ES
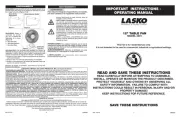
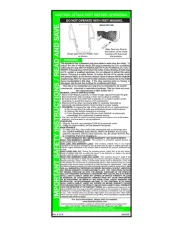
42" WIND CURVE® with FRESH AIR IONIZER
and REMOTE CONTROL
MODEL 2554
Rev. Q 9/15 12 2554ES
MODELO 2554
This Fan is for residential use only.
It is not intended to be used in commercial, industrial or agricultural settings.
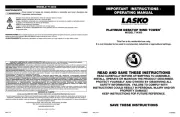
IMPORTANT INSTRUCTIONS - OPERATING MANUAL
READ AND SAVE THESE INSTRUCTIONS
READ CAREFULLY BEFORE ATTEMPTING TO ASSEMBLE,
INSTALL, OPERATE OR MAINTAIN THE PRODUCT DESCRIBED.
PROTECT YOURSELF AND OTHERS BY OBSERVING ALL SAFETY
INFORMATION. FAILURE TO COMPLY WITH INSTRUCTIONS COULD
RESULT IN PERSONAL INJURY AND/OR PROPERTY DAMAGE!
Have a Question? Need a Part?
Please Do Not Return Product to Store!
Contact Lasko Customer Service:
1-800-233-0268 Monday-Friday 8AM - 5PM EST.
Register Your Product Today
www.laskoproducts.com/product-registration
You will benefit from:
- efficient and enhanced support
- future product updates
scan with a smart phone
MANTENIMIENTO Para reducir el riesgo de choque eléctrico e incendio, por favor obedezca las
siguientes instrucciones.
- Siempre desconecte el cable eléctrico antes de trasladar, reparar o limpiar.
- NUNCA coloque el Ventilador dentro o cerca de agua.
- Limpie el Ventilador únicamente con una aspiradora equipada con un accesorio de cepillo; la aspiradora
quitará el polvillo y los desperdicios del interior del Ventilador.
- NUNCA intente desarma el Ventilador.
- Limpie el cuerpo del Ventilador únicamente con un trapo suave.
- NUNCA use ALCOHOL o SOLVENTES tales como gasolina, bencina, disolvente para pinturas u otros limpiadores
duros.
RECOMENDACIONES EN CASO DE FALLA
Si su ventilador deja de operar, refierase abajo para probables causas y soluciones
1. Asegurese que el cable electrico este debidamente conectado a un enchufe electrico en funcionamiento.
2. Asegurese que las baterias en el control remoto sean nuevas y esten instaladas apropiadamente.
REPARACIONES: Para cualquier reparación, que no sea de mantenimiento general por parte del usuario, por favor contacte a nuestro
equipo de Servicio al Cliente al (800) 233-0268 de Lunes a Viernes de 8 a.m. a 5 p.m.
ALMACENAMIENTO: Almacene el Ventilador con estas instrucciones, en la caja original en un lugar fresco y seco.
DISPOSICIÓN: Los materiales de empaque de cartón corrugado son reciclables. Para desechar este producto de manera
ecológicamente responsable, comuníquese con su proveedor de servicio de desechos local o visite www.1800recycling.com®.
SERVICIO AL CLIENTE:
Línea gratuita (800) 233-0268. Correo electrónico: producthelp@laskoproducts.com
Nuestro equipo de Servicio al Cliente está disponible para ayudarle con preguntas sobre productos, ubicaciones de los centros de reparación y
repuestos. Se puede comunicar con nuestro equipo de Servicio al Cliente de lunes a viernes, de 8 a.m. a 5 p.m. hora del Este. Por favor tenga
disponible el número de modelo, así como también el tipo y estilo
(ubicados en la parte inferior de su producto). Customer Service Dept., 820 Lincoln Ave., West Chester, PA 19380
(Por favor no envíe el producto a esta dirección) www.laskoproducts.com
LOS REPUESTOS PARA PRODUCTOS DISCONTINUADOS, OBSOLETOS Y ALGUNOS OTROS PRODUCTOS PODRÍAN NO ESTAR DISPONIBLES. DEBIDO A RAZONES DE
SEGURIDAD, MUCHOS COMPONENTES ELECTRÓNICOS Y LA MAYORÍA DE LOS COMPONENTES DE LOS CALENTADORES NO ESTÁN DISPONIBLES AL CONSUMIDOR
PARA SU INSTALACIÓN O REEMPLAZO.
El manual imprimió en la China
SOLO PARA RESIDENTES DE CALIFORNIA:
ADVERTENCIA: Este producto puede exponerle a un producto químico [o productos químicos] conocido(s) por el Estado de
California como causante de cáncer.
ADVERTENCIA: Este producto puede exponerle a un producto químico [o productos químicos] conocido(s) por el Estado
de California como causante de toxicidad reproductiva.
GARANTÍA LIMITADA DE LASKO PRODUCTS, INC.
(VÁLIDO EN EE.UU., SUS TERRITORIOS, Y CANADÁ ÚNICAMENTE)
QUÉ CUBRE ESTA GARANTÍAS: Este producto está garantizado contra defectos de mano de obra y/o materiales.
CUÁNTO DURA ESTA GARANTÍA: Esta garantía se extiende únicamente al comprador original del producto y dura un (1) año a partir de la fecha
original de compra o hasta que el comprador original del producto venda o transfiera el producto, cualesquiera de ambas que ocurriera en primer lugar.
QUÉ HARÁ LASKO: Durante el período de garantía, Lasko, a opción propia, reparará o reemplazará cualquier parte o partes que demuestren ser
defectuosas o reemplazará el producto completo por el mismo modelo u otro comparable. Para todas las reclamaciones de garantía, se debe devolver
el producto a Lasko Products, Inc. a cargo del cliente con la prueba de compra dentro del período de garantía. Comuníquese con el departamento
de atención al cliente de Lasko para obtener una Autorización de Devolución (“RA”, por sus siglas en inglés). NO devuelva los productos sin una RA
o no se procesará la reclamación de la garantía.
QUÉ NO CUBRE ESTA GARANTÍA: Esta garantía no tiene validez si el producto fue dañado o falló debido a un accidente, manipulación u operación
inadecuadas, daño en el envío, abuso, mal uso, reparaciones no autorizadas hechas o el intento de hacerlas. Esta garantía no cubre los costos de
envío para la devolución de productos a Lasko para su reparación o reemplazo. Lasko abonará los cargos de envío de devolución a Lasko con
posterioridad a las reparaciones o el reemplazo bajo garantía.
CUALESQUIERA Y TODAS LAS GARANTÍAS, EXPLÍCITAS O IMPLÍCITAS (INCLUYENDO, SIN LIMITACIÓN, CUALESQUIERA GARANTÍA IMPLÍCITA
DE COMERCIABILIDAD), DURAN UN AÑO A PARTIR DE LA FECHA ORIGINAL DE COMPRA O HASTA QUE EL COMPRADOR ORIGINAL DEL
PRODUCTO VENDA O TRANSFIERA EL PRODUCTO, CUALESQUIERA DE AMBAS QUE OCURRIERA EN PRIMER LUGAR Y EN NINGÚN
CASO LA RESPONSABILIDAD DE LASKO BAJO CUALQUIER GARANTÍA EXPLÍCITA O IMPLÍCITA INCLUIRÁ (I) DAÑOS INCIDENTALES O POR
CONSECUENCIA POR CUALQUIER CAUSA QUE FUERE, O (II) REEMPLAZO O REPARACIÓN DE CUALESQUIERA FUSIBLES HOGAREÑOS,
CORTA-CIRCUITOS O TOMACORRIENTES. INDEPENDIENTEMENTE DE CUALQUIER DECLARACIÓN CONTRARIA, EN NINGÚN CASO LA
RESPONSABILIDAD DE LASKO BAJO CUALQUIER GARANTÍA EXPLÍCITA O IMPLÍCITA PODRÁ EXCEDER EL PRECIO DE COMPRA DEL
PRODUCTO Y DICHA RESPONSABILIDAD TERMINARÁ AL VENCIMIENTO DEL PERÍODO DE GARANTÍA.
Algunos estados y provincias no permiten limitaciones sobre la duración de una garantía implícita, o sobre la exclusión o limitación de los daños
incidentales o por consecuencia, por lo tanto dichas exclusiones o limitaciones podrían no aplicarse en su caso. Esta garantía le otorga a usted
derechos legales específicos. Usted también podría tener otros derechos que varían de estado en estado y de provincia en provincia.
Se requiere prueba de compra antes que se acepte un reclamo bajo garantía.

MODELO 2554
Rev. Q 9/15 2 2554ES Rev. Q 9/15 11 2554ES
SAVE THESE INSTRUCTIONS
IMPORTANT SAFETY INFORMATION
When using electrical appliances, basic precautions should always be followed to reduce
the risk of fire, electrical shock and injury to persons, including the following:
Read all instructions before using this Fan.
TO REDUCE THE RISK OF FIRE, ELECTRICAL SHOCK OR PERSONAL INJURY, ALWAYS
FOLLOW THESE IMPORTANT SAFETY INSTRUCTIONS AND WARNINGS:
DO NOT use this fan to ventilate areas where flammable liquids or vapors are used, stored or are present, including paints,
gasoline, varnishes, floor refinishing products or solvents. ALWAYS read and follow all warnings and instructions on the
containers for these products!
ALWAYS be sure the plug fits tightly into the outlet. When plugs fit loosely into outlets, they may slip partially out of the
outlet and create a poor connection. This may cause outlets to overheat and create a potential fire hazard. Outlets in this
condition should be replaced by a qualified electrician.
ALWAYS unplug the power cord when servicing, cleaning or moving the Fan. DO NOT use the ON/OFF switch as the sole
means of disconnecting power. NEVER leave children unattended when the Fan is on or plugged in. ALWAYS turn off and
unplug the Fan when not in use.
BE CERTAIN that the power source for the Fan is 120V AC. DO NOT plug the Fan into 240V or other power source.
The Blue Plug™ on your Lasko fan is a safety feature. It contains a non-replaceable safety device (fuse) that should not be
removed or tampered with. To reduce the risk of fire, electric shock and personal injury, attempt to remove, replace, DO NOT
repair or tamper with the originally supplied plug. If the Fan has stopped functioning, it may be due to the safety device
incorporated in this plug.
THIS FAN HAS A POLARIZED PLUG (one blade is wider than the other). This plug is designed to fit into the outlet only one
way. Match the wide blade to wide slot in outlet and FULLY INSERT. DO NOT attempt to bypass or defeat this safety fea-
ture. If the plug does not fit in the outlet, consult a qualified electrician. The outlet may need to be replaced.
• AVOID the use of extension cords, power strips, power taps, outlet style air fresheners or other cord connected device, as these
devices may overheat and cause a fire hazard.
• route power cord under rugs, carpets, runners or furniture. This may damage the cord or cause it to overheat creating a fire DO NOT
hazard.
•ALWAYS place the Fan on a stable, flat, level surface while in operation to prevent the Fan from overturning.
•NEVER insert or allow fingers or objects to enter grill openings while Fan is in operation or injury and/or damage to the Fan may occur.
• block, cover or obstruct air flow to or from the fan while in operation.DO NOT
• use this Fan outdoors or near water or wet locations such as a bath tub, pool or hot tub. Use of this Fan in a wet location DO NOT
may create a shock hazard.
• run cord under carpeting. Do not cover cord with throw rugs, runners, or similar coverings. Do not route cord under furniture DO NOT
or appliances. Arrange cord away from traffic area and where it will not be tripped over.
• use a single extension cord to operate more than one Fan or other electrical device.NEVER
• use this Fan if it has been damaged or is not functioning properly. DO NOT
•Remote controls for other appliances or electronic equipment can sometimes interfere with the operation of this Fan. If this occurs,
move the Fan to another location.
•Keep Fan remote control unit away from chairs and your bed where it may be sat or laid upon and inadvertently turn on the Fan.
•THIS FAN DOES NOT MEET THE REQUIREMENTS OF NEC ARTICLE 547-7 (2008).This Fan is not suitable for use in agricultural
facilities including areas where livestock, poultry or other animals are confined. Please refer to National Electric Code (NEC) Article
547-7 (2008), or applicable state or local codes or standards relating to electrical requirements for agricultural buildings.
•THIS FAN DOES NOT MEET THE REQUIREMENTS OF NEC ARTICLE 500 (2008).This Fan is not suitable for use in hazardous
locations. Please refer to National Electric Code (NEC) Article 500 or applicable state or local codes or standards relating to electrical
requirements for hazardous locations.
NOTICE: This equipment has been tested and found to comply with the limits for a Class B digital device, pursuant to Part 15 of the
FCC Rules. These limits are designed to provide reasonable protection against harmful interference in a residential installation. This
equipment generates uses and can radiate radio frequency energy and, if not installed and used in accordance with the instructions,
may cause harmful interference to radio communications. However, there is no guarantee that interference will not occur in a particu-
lar installation. If this equipment does cause harmful interference to radio or television reception, which can be determined by turning
the equipment off and on, the user is encouraged to try to correct the interference by one or more of the following measures: Reorient
or relocate the receiving antenna. Increase the separation between the equipment and receiver. Connect the equipment into an outlet
on a circuit different from that to which the receiver is connected. Consult the dealer or an experienced radio/TV technician for help.
The user is cautioned that changes and modifications made to the equipment without the approval of manufacturer could void the
user’s authority to operate this equipment.
CAUTION
FUNCIÓN DE PERSIANA (Figura 5)
Además de la función oscilante, este Ventilador está
equipado con persianas en la parrilla anterior, lo cual permite
ajustar verticalmente el flujo de aire. Haga girar el control
de persiana hacia arriba o hacia abajo para (Insertar 5A)
ajustar el flujo de aire según su preferencia.
CONTROL REMOTO (Figura 4)
Todas las funciones realizadas con el Control Remoto
funcionan idénticamente a los controles manuales.
1. Instale dos baterías "AAA" de 1,5 Vcc (cada una, no
incluídas)
2. No mezcle baterías viejas y nuevas. No mezcle baterías
alcalinas, estándar (carbono-cinc) o recargables
(níquel-cadmio).
3. No arroje las baterías al fuego, las baterías pueden estallar
o puede derramarse el líquido contenido.
Insertar 5A
Figura 5
TIMER
POWER
OSC
SPEED
ION IZER
Figura 4
Botón
Temporizador
Botón
Alimentación
Botón
Velocidad Baterías
AAA
Oscilación
Botón
Ionizante Botón
MANTENGA LAS BATERÍAS FUERA DEL ALCANCE DE LOS NIÑOS

MODEL 2554
MODELO 2554
Rev. Q 9/15 10 2554ES Rev. Q 9/15 3 2554ES
4. Align the Support Base Assembly Motor Base with the , noting
that the cord channel on the bottom of the support base
assembly should be towards the back of the Fan. Attach
the Support Base Assembly Motor Base to the with Thumb
Screws. Make certain to align the Key on the Support Base
Assembly with the on the Locating Notch Motor Base. (Figure
1) Gently pull any excess slack of the and Power Supply Cord
place it in the Wire Locating Trough. (Figure 2)
TOOLS REQUIRED FOR ASSEMBLY (not included)-
#2 Phillips Head Screwdriver
ASSEMBLY
1. For ease of assembly, lay the Fan down so that the front grill
and control panel are facing up.
2. Assemble the Support Base Halves by interlocking the Bosses
on Support Base A Boss Holes Support Base B into the on .
Thread the Power Supply Cord through the large hole in the
center of the .Support Base Assembly (Figure 1)
3. Secure (2) #8 X 3/8" Screws into the two outer holes in the
bottom of the Base. (Figure 2)
Support
Base A
Support
Base B
Bosses
Figure 1
Key
Power Supply
Cord
Wire
Locating
Trough
Support Base
Assembly
Figure 2
FUNCIONAMIENTO
Este Ventilador podrá hacerse funcionar mediante los controles
manuales ubicados en la parte superior de la unidad (como
se indica en la Figura 3) o con el Control Remoto (como se
indica en la )Figura 4
1. Retire el ventilador de su caja y reúna como instruido.
2. Coloque el ventilador sobre una superficie firme y
nivelada.
ADVERTENCIA: Los tacos de plástico o hule, tales como
las patas de esta unidad, pueden pegarse a la superficie
de los muebles. La unidad podría dejar un residuo capaz
de oscurecer, manchar o dejar marcas permanentes en
el acabado de ciertas superficies de muebles, incluyendo
superficies y pisos de madera.
3.Conecte el cable eléctrico a un tomacorriente de 120 V~ .
Asegúrese que el enchufe encaje firmemente en el
tomacorriente.
Cuando los enchufes quedan flojos en los
tomacorrientes, pueden deslizarse parcial
o completamente fuera del tomacorriente
con un leve movimiento del cable adosado.
Los tomacorrientes en este estado podrían
sobrecalentarse y representar un grave peligro
de incendio; si está cubierto por una cortina o
tela, el riesgo de incendio es aún mayor.
4. Encienda el Ventilador oprimiendo el Botón de
Encendido ( ). Se iluminará una luz verde cuando se
encienda el Ventilador. Esta luz permanecerá encendida
hasta que se apague la unidad.
5. VELOCIDADES: Oprima el Botón de Velocidad de
Ventilador ( ) para ajustar la velocidad deseada. Cada
vez que oprima el Botón de Velocidad de ventilador, la
velocidad cambiará de alta (3), a mediana (2) a baja (1).
6. OSCILACIÓN: Oprima el ( ) para Botón de Oscilación
iniciar y detener la función oscilante.
7. TEMPORIZADOR: La función temporizadora permite
ajustar la unidad para que funcione durante un lapso
que va desde 1/2 hora hasta 7 1/2 horas, en incrementos
de 1/2 hora. Oprima el Botón Temporizador ( ) para
ajustar el lapso de tiempo de su preferencia. Cada vez
que oprima el botón temporizador, el tiempo aumentará
en 1/2 hora. Al llegar a 7 1/2 horas, si oprime el botón
temporizador una vez más, el Ventilador se reajustará al
modo de funcionamiento continuo. Las luces en la parte
frontal de la unidad se encenderán para indicar el tiempo
durante el cual el Ventilador estará funcionando.
8. IONIZANTE: La Función Ionizante de este Ventilador
funcionará con cualquier modo de velocidad. Oprima el
Botón de Ionizante una vez para activar esta función y
una segunda vez para desactivarla. El Ventilador deberá
estar ENCENDIDO para que el Ionizante pueda funcionar.
Cuando el Ionizante se encuentra activado, esto ayudará
a purificar el aire de la habitación,.
9. Para APAGAR el Ventilador, oprima el Botón de
Encendido/Apagado ( ).
10.Después de apagar el Ventilador, desconecte la unidad
del tomacorriente eléctrico.
Figura 3
Botón de Encendido/Apagado
Botón de Ionizante
Botón Temporizador Botón de Velocidad
Botón de Oscilación
Product specificaties
| Merk: | Lasko |
| Categorie: | Ventilator |
| Model: | 2554 |
Heb je hulp nodig?
Als je hulp nodig hebt met Lasko 2554 stel dan hieronder een vraag en andere gebruikers zullen je antwoorden
Handleiding Ventilator Lasko
14 Juni 2025
13 Juni 2025
17 Maart 2025

17 Maart 2025

17 Maart 2025
17 Maart 2025
17 Maart 2025

17 Maart 2025

17 Maart 2025

17 Maart 2025
Handleiding Ventilator
- Eldom
- Silvercrest
- Sichler
- SereneLife
- Trumatic
- Middle Atlantic
- HQ
- Husqvarna
- Guardo
- Baseline
- MPM
- NewAir
- Defy
- Profile
- Be Cool
Nieuwste handleidingen voor Ventilator
30 Juli 2025

29 Juli 2025
29 Juli 2025
29 Juli 2025
28 Juli 2025
23 Juli 2025
23 Juli 2025
22 Juli 2025
22 Juli 2025
22 Juli 2025