Kramer VS-21DTP Handleiding
Kramer Csavaros gép VS-21DTP
Bekijk gratis de handleiding van Kramer VS-21DTP (2 pagina’s), behorend tot de categorie Csavaros gép. Deze gids werd als nuttig beoordeeld door 44 mensen en kreeg gemiddeld 4.5 sterren uit 2 reviews. Heb je een vraag over Kramer VS-21DTP of wil je andere gebruikers van dit product iets vragen? Stel een vraag
Pagina 1/2
VS-21DTP Quick Start
P/N:
2900-300924QS
Rev:
2
Scan for full manual
VS-21DTP Quick Start Guide
This guide helps you install and use your VS-21DTP for the rst time.
Go to www.kramerav.com/downloads/VS-21DTP to download the latest user manual and check if firmware
upgrades are available.
Step 1: Check in the b what’sox
VS-21DTP 2xHDMI to HDBT Standby
Switcher/POE
1 Bracket set
4 Rubber feet
1 Power adapter and cord
1 Quick start guide
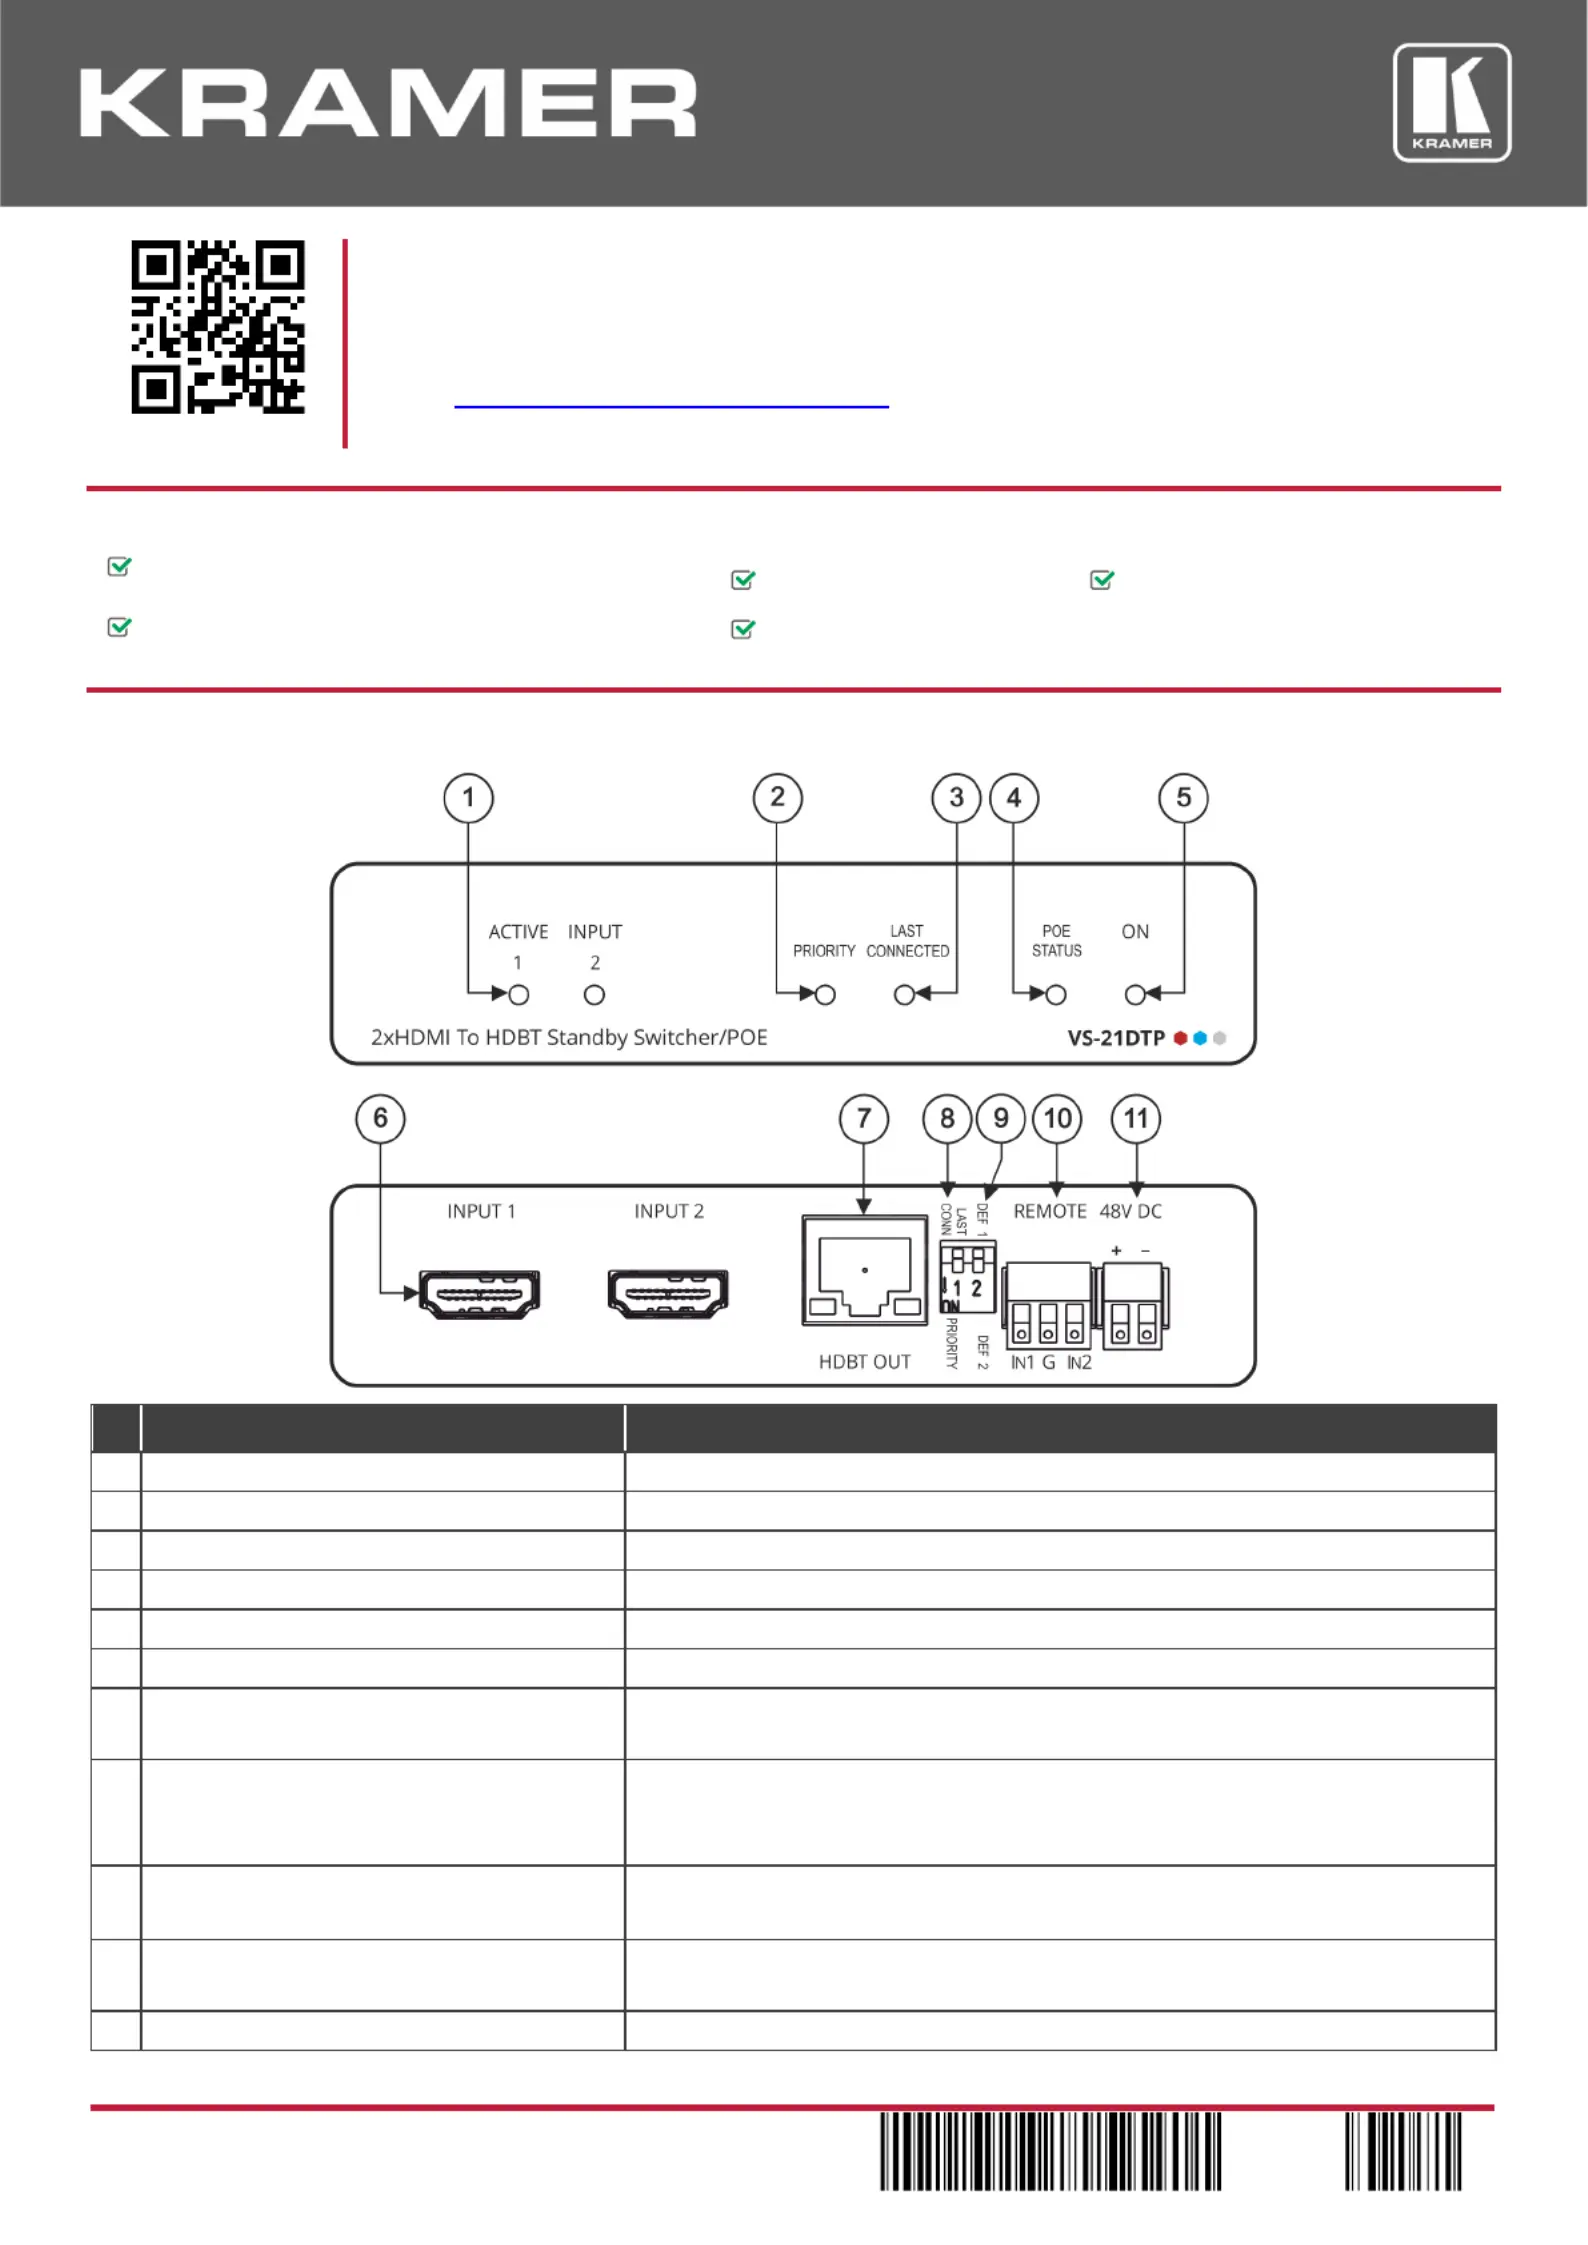
Step 2: Get to know your -21DTP VS
#
Feature
Function
1
ACTIVE INPUT LEDs (1 to 2)
Lights green when the input active. Both LEDs ash when no input is active. is
2
PRIORITY LED
Lights green when DIP-switch 1 is set to PRIORITY (down).
3
LAST CONNECTED LED
Lights green when DIP-switch 1 is set to LAST CONNECTED (up).
4
POE STATUS LED
Lights green when the unit provides PoE.
5
ON LED
Lights green when the unit is powered on via power adapter or PoE.
6
INPUT HDMI Connectors (1 to 2) ™
Connect to an HDMI source.
7
HDBT OUT RJ-45 Connector
Connect to an HDBaseT receiver (for example, ) and provide or accept TP-580R
power (bidirectional PoE).
8
LAST CONN/PRIORITY DIP-switch 1
Set DIP-switch 1 up (o) to select the Last Connected input.
Set DIP-switch 1 down (on) to select the Priority input determined by DIP-switch
2.
9
DEF 1/DEF 2 DIP-switch 2
Set DIP-switch 2 up (o) to dene INPUT 1 as the default (priority) input.
Set DIP-switch 2 down (on) to dene INPUT 2 as the default (priority) input.
10
REMOTE 3-pin Terminal Block Connector
Connects to optional contact closure switches 1 or 2 for manual switching (by
momentary contact between the desired pin and the G pin).
11
48V DC Power Terminal Block Connector
Connect to the Kramer power adapter.
The terms HDMI, HDMI High-Denition Multimedia Interface, and the HDMI Logo are trademarks or registered trademarks of HDMI Licensing Administrator, Inc.
Product specificaties
| Merk: | Kramer |
| Categorie: | Csavaros gép |
| Model: | VS-21DTP |
Heb je hulp nodig?
Als je hulp nodig hebt met Kramer VS-21DTP stel dan hieronder een vraag en andere gebruikers zullen je antwoorden
Handleiding Csavaros gép Kramer

25 Augustus 2025
25 Augustus 2025
2 Juli 2025
26 November 2024
26 November 2024
26 November 2024
26 November 2024
26 November 2024
25 November 2024
25 November 2024
Handleiding Csavaros gép
Nieuwste handleidingen voor Csavaros gép
21 Juli 2026
20 Juli 2026
16 Juli 2026
15 Juli 2026
9 Juli 2026
8 Juli 2026
8 Juli 2026
20 Mei 2026
20 Mei 2026
19 Mei 2026