Hoover PCHGH640/1SW Handleiding
Bekijk gratis de handleiding van Hoover PCHGH640/1SW (6 pagina’s), behorend tot de categorie Fornuis. Deze gids werd als nuttig beoordeeld door 45 mensen en kreeg gemiddeld 4.3 sterren uit 23 reviews. Heb je een vraag over Hoover PCHGH640/1SW of wil je andere gebruikers van dit product iets vragen? Stel een vraag
Pagina 1/6

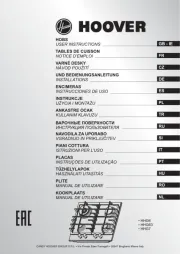
HOBS
USER INSTRUCTIONS
Grafica RB - 09-2005 - Cod. 41017810 - Imprimè en Italie
HOOVER - Via Privata Eden Fumagalli - 20047 Brugherio (Milano) - Italy
GB IE

2
INSTRUCTIONS FOR THE INSTALLER
INSTALLATION
The Purchaser is responsible for the installation of the hob. The Manufacturer does not
accept any responsibility for any damage or loss resulting from incorrect installation,
and as such this will not covered by the Manufacturer’s Guarantee.
The hob may be installed in any worktop which is heat resistant to a temperature of
100° C, and has a thickness of 25 - 45 mm. The dimensions of the insert to be cut out
of the worktop are in shown in Fig. 1.
If the Hob is fitted next to a cabinet on either side, the distance between the Hob and the
cabinet must be at least 15 cm (see Fig. 2); while the distance between the hob and the
rear wall must be at least 5,5 cm.
The distance between the hob and any
other unit or appliance above it (e.g. An ex-
tractor hood) must be no less than 70 cm
(fig.2).
When there is an accessible space between
the built-in hob and the cavity below, a divi-
ding wall made of insulating material should
be inserted (wood or a similar material)
(fig.
3).
Important - The diagram below shows
how the sealant should be applied.
The Hob unit is fitted by attaching the Fixing
Clamps supplied, using the holes at the base of the unit.
Fig. 1
Fig. 2
Fig. 3
accessible space
GB IE
Plan 60 Plan 75
4 a gas 5 a gas
- / si - / si
si si
PL 03/PL 04 PL 73/PL 74
1 1
1 1
1 1
8,75 kW 11,25 kW
636 g/h 818 g/h
220-240/50 220-240/50
BUILT IN HOBS
Burners/hotplates
Type / reference
Flame failure device
Little burner ø 50 mmAUS
Double ring burner ø 135 mmQC
Ultra rapid burner ø 110 mmUR
Semirapid burner ø 75 mmSR
Rapid burner ø 100 mmR
Griddle 174x160 mm
Griddle 229x379
Electric plate ø80 PE
Electric plate ø145 PE
Electric plate 160x265 mm PE
Installed gas Type/Power:
G20 20mbar* (METHANE)
G30 28-30mbar (GPL)
Installation class
Voltage/Frequency V/Hz
Electrical imput power
Electronic ignition
Product dimension WXD (mm)
1
* Manufacturer setting IE cat. II GB cat. II2H3 + 2H3 +
Tab. 1
This appliance has been designed for non-professional, i.e. domestic, use.
GB IE

4
ELECTRICAL CONNECTION (FOR U.K. ONLY)
Warning - this appliance must be earthed
This appliance is designed for domestic use only. Connection to the mains supply must
be made by a competant electrician, ensuring that all current regulations concerning
such installations are observed.
The appliance must only be connected to a suitably rated spur point, a 3 pin 13 amp
plug/socket is not suitable. A double pole switch must be provided and the circuit must
have appropriate fuse protection. Further details of the power requirement of the in-
dividual product will be found in the users’ instruction and on the appliance rating plate.
In
the case of built-in product you are advised, should you wish to use a longer cable than
the one supplied, that a suitably rated heat resistant type must be used.
The wiring must be connected to the mains supply as follows:
CONNECT TO SPUR TERMINAL
Green & Yellow Wire Earth Connection
Blue Wire Neutral Connection
Brown Wire Live Connection
Note: We do not advocate the use of earth leakage devices with electric cooking applian-
ces installed to spur points because of the «nuisance tripping» which may occur. You are
again reminded that the , the manufacturer decli-appliance must be correctly earthed
nes any responsibility for any event occurring as a result of incorrect electrical installation.
Declaration of compliance: This equipment, in the parts intended to come into con-
tact with food, complies with the regulations laid down in EEC directives 89/109.
This appliance complies with directive 89/336/EEC, 73/23/EEC, 90/396/EEC and
the following changes.
GAS CONNECTION (FOR U.K. ONLY)
The labels on the Hob indicate the types of gas that can be used.
It is possible to use other types of gas after carrying out simple modifications.
Warning: If gas can be smelt in the vicinity of this appliance turn off the gas supply to the
appliance and call the engineer directly. Do not search for a leak with a naked flame.
GB IE
3
FOR U.K. ONLY
INSTRUCTIONS FOR THE INSTALLER
The following information is intended for qualified and competant persons only who will
ensure that your appliance is installed correctly. All current legislation concerning the in-
stallation of Gas appliances must be observed by the installer*
* For the U.K. only - By law, the gas installation/commissioning must be carried out by a
«Corgi», registered installer.
This appliance must be installed in accordance with applicable regulations and should only be
used in well-ventilated locations. Before using this appliance carefully study the instruction book.
Suitable location
A gas-powered cooking appliance produces heat and humidity in the area in which it is
installed. For this reason you should ensure good ventilation either by keeping all natu-
ral air passages open or by installing an extractor hood with an exhaust flue. Intensive
and prolonged use of the appliance may require extra ventilation, such the opening of a
window or an increase in speed of the electric fan, if you have one.
If a hood cannot be installed, an electric fan should be fitted to an outside wall or win-
dow as long there are air vents in the area.
The electric fan should be able to carry out a complete change of air in the kitchen 3-5
times every hour. The installer should follow the relavant national standards.
If a hob of 60 cm is fitted above an oven which is not equipped with fan cooling system
it is recommended that openings are created within the built in furniture to ensure cor-
rect air circulation.
The size of these openings must be at least 300 cm2and placed as shown in fig. 4.
When a 75 cm hob is fitted over a built in oven, the latter must be fan cooled.
FIG. 4
60 Cm2
240 Cm2
120 Cm2
180 Cm2
GBIE
Product specificaties
| Merk: | Hoover |
| Categorie: | Fornuis |
| Model: | PCHGH640/1SW |
Heb je hulp nodig?
Als je hulp nodig hebt met Hoover PCHGH640/1SW stel dan hieronder een vraag en andere gebruikers zullen je antwoorden
Handleiding Fornuis Hoover
31 Maart 2025
25 Maart 2025
25 Maart 2025

5 Februari 2025

6 December 2024

6 December 2024

25 Oktober 2024

25 September 2024

25 September 2024

25 September 2024
Handleiding Fornuis
- Thermador
- Ariston Thermo
- Heller
- Thermex
- Zelmer
- Benavent
- Toshiba
- Superiore
- La Cornue
- Rinnai
- High One
- Cookology
- Linarie
- Café
- Afk
Nieuwste handleidingen voor Fornuis

1 Augustus 2025
1 Augustus 2025
30 Juli 2025

30 Juli 2025

29 Juli 2025

29 Juli 2025
29 Juli 2025
29 Juli 2025
29 Juli 2025

29 Juli 2025