Franke HHF180-6L Handleiding
Franke
Niet gecategoriseerd
HHF180-6L
Bekijk gratis de handleiding van Franke HHF180-6L (4 pagina’s), behorend tot de categorie Niet gecategoriseerd. Deze gids werd als nuttig beoordeeld door 11 mensen en kreeg gemiddeld 3.7 sterren uit 6 reviews. Heb je een vraag over Franke HHF180-6L of wil je andere gebruikers van dit product iets vragen? Stel een vraag
Pagina 1/4

Franke Kindred Canada Limited
|
1000 Franke Kindred Road
|
Midland
|
Ontario
|
Canada
|
L4R 4K9
CANADA: T 1-855-446-5663
|
F 1-866-227-3050
|
commercial-info.ca@franke.com
USA: T 1-855-526-0503 | F 1-866-440-2250 | commercial-info.us@franke.com
HHF180-6LZMI | 0324
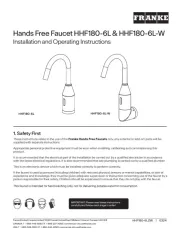
Hands Free Faucet HHF180-6L & HHF180-6L-W
Installation and Operating Instructions
1. Safety First
These instructions relate to the use of the Franke Hands Free Faucets only, any external or ‘add-on’ parts will be
supplied with separate instructions.
Appropriate personal protective equipment must be worn when installing, calibrating and commissioning this
product.
It is recommended that the electrical part of the installation be carried out by a qualied electrician in accordance
with the latest electrical regulations. It is also recommended that any plumbing is carried out by a qualied plumber.
This is an electronic device which must be installed correctly to perform correctly.
If the faucet is used by persons (including children) with reduced physical, sensory or mental capabilities, or lack of
experience and knowledge, they must be given adequate supervision or instruction concerning use of the faucet by a
person responsible for their safety. Children should be supervised to ensure that they do not play with the faucet.
This faucet is intended for hand washing only, not for delivering potable water for consumption.
IMPORTANT: Please read these instructions
carefully and follow each stage in order!
HHF180-6L
HHF180-6L-W

2HHF180-6LZMI | 0324
2. Installation HHF180-6L (deck mounted)
Faucet body
Countertop
Angle valve
(provided by user)
Transformer
Control
box
Max. thickness of countertop
including sink: 1 ¹/ ” (30 mm)₄
Faucet hole size
1 ¹/ ” (+/- ¹/ ”)2 ₁₆
The holes need
to be aligned
Set screw notch
Screws
Alignment
notches
Control box
Transformer
Water
inlet
Water
Outlet
Angle valve
(provided by user)
A.
Picture is for reference only. Please refer to
actual product.
B.
Place installation element into the hole.
D.
Install faucet body as shown, aligned
with screw holes.
G.
Connect faucet hose to the water outlet of the control box. Connect the angle valve
to the water inlet of the control box. Connect faucet line interface to the control box
interface. Connect control box line interface to the power line interface.
C.
Position installation element as below.
Line up notches front to back and bolts
left to right. Firmly tighten screws with
screwdriver to secure installation element
into place.
E.
Tighten fastener on faucet body.
F. If using batteries
Open upper cover of control box and remove
the battery box. Open battery box cover and
load 4 x AAA alkaline batteries. Lock battery
box cover and put back into control box. Install
upper cover and x the control box on the wall.

3HHF180-6LZMI | 0324
3. Installation HHF180-6L-W (wall mounted)
Wall
Faucet body
Angle valve
(provided by user)
Transformer
Control
box
Maximum wall thickness
including sink: 1 ¹/ ” (30 mm)₄
Faucet hole size
1 ¹/ ” (+/- ¹/ ”)2 16
The holes need
to be aligned
Alignment notches
Set crew notch
Screws
Control box
Transformer
Water
inlet
Water
Outlet
Angle valve
(provided by user)
A.
Picture is for reference only. Please refer to
actual product.
B.
Place installation element into the hole.
D.
Install faucet body as shown, aligned with
screw holes.
G.
Connect faucet hose to the water outlet of the control box. Connect the angle valve
to the water inlet of the control box. Connect faucet line interface to the control box
interface. Connect control box line interface to the power line interface.
C.
Position installation element as below.
Line up notches top to bottom and
bolts left to right. Firmly tighten screws
with screwdriver to secure installation
element into place.
E.
Tighten fastener on faucet body.
F. If using batteries
Open upper cover of control box and remove
the battery box. Open battery box cover and
load 4 x AAA alkaline batteries. Lock battery
box cover and put back into control box.
Install upper cover and x the control box on
the wall.
Product specificaties
| Merk: | Franke |
| Categorie: | Niet gecategoriseerd |
| Model: | HHF180-6L |
Heb je hulp nodig?
Als je hulp nodig hebt met Franke HHF180-6L stel dan hieronder een vraag en andere gebruikers zullen je antwoorden
Handleiding Niet gecategoriseerd Franke
8 September 2025
5 Juli 2025

5 Juli 2025
23 Mei 2025
12 Mei 2025
16 April 2025
16 April 2025

16 April 2025
16 April 2025
16 April 2025
Handleiding Niet gecategoriseerd
- SkyRC
- Mode Machines
- Proline
- Block & Block
- POWEROWL
- Nordea
- Auriol
- MuxLab
- Bazooka
- Urrea
- Geneva
- Sinus Live
- Bliss Hammocks
- LawnMaster
- UNGO
Nieuwste handleidingen voor Niet gecategoriseerd
18 September 2025
18 September 2025

18 September 2025
18 September 2025
18 September 2025

18 September 2025

18 September 2025
17 September 2025
17 September 2025

17 September 2025