Epson ELPMBP02 Handleiding
Bekijk gratis de handleiding van Epson ELPMBP02 (6 pagina’s), behorend tot de categorie Beamer. Deze gids werd als nuttig beoordeeld door 19 mensen en kreeg gemiddeld 4.8 sterren uit 10 reviews. Heb je een vraag over Epson ELPMBP02 of wil je andere gebruikers van dit product iets vragen? Stel een vraag
Pagina 1/6

Model: ELPMBP02 This product is UL Listed. It must be
installed by a qualified professional
installer.
R
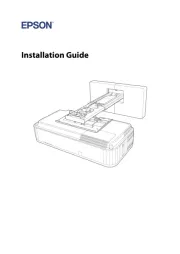
Installation and Assembly:
False Ceiling Plate Kit
3215 W. North Ave. • Melrose Park, IL 60160 • (800) 865-2112 or (708) 865-8870 • Fax: (708) 865-2941 • www.peerlessmounts.com
Maximum UL Load Capacity: ( )50 lb 22.6 kg
Manufactured by Peerless Industries, Inc.

ISSUED: 02-13-08 SHEET #:128-9030-2 07-16-08
2 of 6
Visit the Peerless Web Site at www.peerlessmounts.com For Technical Support Contact Peerless Mounts at 1-800-729-0307 or 708-865-8870.
Table of Contents
Parts List .............................................................................................................................................................................. 3
Mounting Above Ceiling Tile, Mounting in Place of Ceiling Tile and Attaching Ceiling Tray to Filler Tray ............................... 4
Anchoring Methods ............................................................................................................................................................... 5
Warranty Information ............................................................................................................................................................. 6
NOTE: Read entire instruction sheet before you start installation and assembly.
• Do not begin to install your product until you have read and understood the instructions and warnings contained in this
Installation Sheet. If you have any questions regarding any of the instructions or warnings, call Peerless customer care
at 1-800-729-0307.
• This product should only be installed by someone of good mechanical aptitude, has experience with basic building
construction, and fully understands these instructions.
• Make sure that the supporting surface will safely support the combined load of the equipment and all attached hard-
ware and components.
• Never exceed the Maximum UL Load Capacity.
• If mounting to wood joists or wood beam ceilings, make sure that mounting screws are anchored into the center of the
joists or beams. Use of an "edge to edge" stud finder is highly recommended.
• Always use an assistant or mechanical lifting equipment to safely lift and position equipment.
• Tighten screws firmly, but do not overtighten. Overtightening can damage the items, greatly reducing their holding
power.
• This product is intended for indoor use only. Use of this product outdoors could lead to product failure and personal
injury.
• When installing or adjusting the ceiling mount, do not use adhesives, lubricants or oils to prevent the screws from
loosening. If you use adhesives, lubricants, or oils to prevent the screws from loosening, the casing may crack and the
projector may fall, causing serious injury and damage to the projector.
WARNING
Tools Needed for Assembly
•stud finder ("edge to edge" stud finder is recommended)
•phillips screwdriver
•hammer
•wire cutters
•drill
•1/4" bit for concrete surface
•5/32" bit for wood studs

ISSUED: 02-13-08 SHEET #:128-9030-2 07-16-08
3 of 6
Visit the Peerless Web Site at www.peerlessmounts.com For Technical Support Contact Peerless Mounts at 1-800-729-0307 or 708-865-8870.
A1
NOTE: Some parts may appear slightly different than illustrated.
Before you begin, make sure all parts shown are included with your product.
D
B C
A
LKF
MAA BB
CC
IMPORTANT PRE-ASSEMBLY INFORMATION: Ceiling Trays (A), and (A1) are designed to fit within or above a
24" (610 mm) x 24" (610 mm) section of a conventional suspended ceiling system. It may also be mounted within or
above 24" x 48" conventional suspended ceiling. Ceiling runners (see DETAIL 1, page 5) should have a "T" cross
section and a minimum height of 1.5" (38 mm).
For certain installations it may be best to install ceiling anchors (step 2) before installing the ceiling tray (step 1).
Description Qt
y
. Part #
A
ceiling tray 1 128-2198
A1 filler tray 1 128-2207
B1/4"-20 x 3/8" screws 4 520-2015
C1/4"-20 nuts 4 530-9302
Dallen wrench 1 560-9706
Fturnbuckle 4 560-9620
G12 gauge x 20' (6.1m) tie wire (not shown) 1 600-2008
Keye bolt 5 580-0006
Lconcrete anchor 5 580-0005
Mflush mount tube 1 1446-014
A
A
M5 x 10 mm socket screw 4 520-1216
BB nut 4 530-9409
CC 3 mm allen wrench 1 560-0194
Parts List
Product specificaties
| Merk: | Epson |
| Categorie: | Beamer |
| Model: | ELPMBP02 |
| Kleur van het product: | Wit |
| Montagewijze: | Muur |
| Maximale gewichtscapaciteit: | 22.7 kg |
| Compatibiliteit: | PowerLite 1815p\nPowerLite 6100i\nPowerLite 77c\nPowerLite 7900NL |
Heb je hulp nodig?
Als je hulp nodig hebt met Epson ELPMBP02 stel dan hieronder een vraag en andere gebruikers zullen je antwoorden
Handleiding Beamer Epson
4 Juli 2025

4 Juli 2025

3 Juni 2025

23 Mei 2025
12 Maart 2025
9 Januari 2025

14 December 2024

14 December 2024

14 December 2024

14 December 2024
Handleiding Beamer
- Xiaomi
- EKO
- Eiki
- Knoll
- Mimio
- InFocus
- PLUS
- Sharp
- La Vague
- Blaupunkt
- Adj
- Dahua Technology
- Boxlight
- Christie
- Panamorph
Nieuwste handleidingen voor Beamer
29 Juli 2025
29 Juli 2025

29 Juli 2025
28 Juli 2025
28 Juli 2025

28 Juli 2025
28 Juli 2025
28 Juli 2025

28 Juli 2025
28 Juli 2025