Elro AS80SR11A Handleiding
Elro Beveiliging AS80SR11A
Bekijk gratis de handleiding van Elro AS80SR11A (4 pagina’s), behorend tot de categorie Beveiliging. Deze gids werd als nuttig beoordeeld door 13 mensen en kreeg gemiddeld 4.7 sterren uit 3 reviews. Heb je een vraag over Elro AS80SR11A of wil je andere gebruikers van dit product iets vragen? Stel een vraag
Pagina 1/4
1
AS80SR11A
Voice Siren
Installation Instructions
General Introduction
The Voice Siren is a two-way wireless alarm device which functions not only
as a siren, but also a strobe light with voice indicator functions.
Includes the following functions:
*
Tamperproofprotection
*
Green and red flashing strobelight
*
Visual and audiblealarmindications
*
6 indicating beep sounds foridentification
*
EEPROM for non-volatile memory facility
*
LED for identification, visual command confirmation and batterystatus
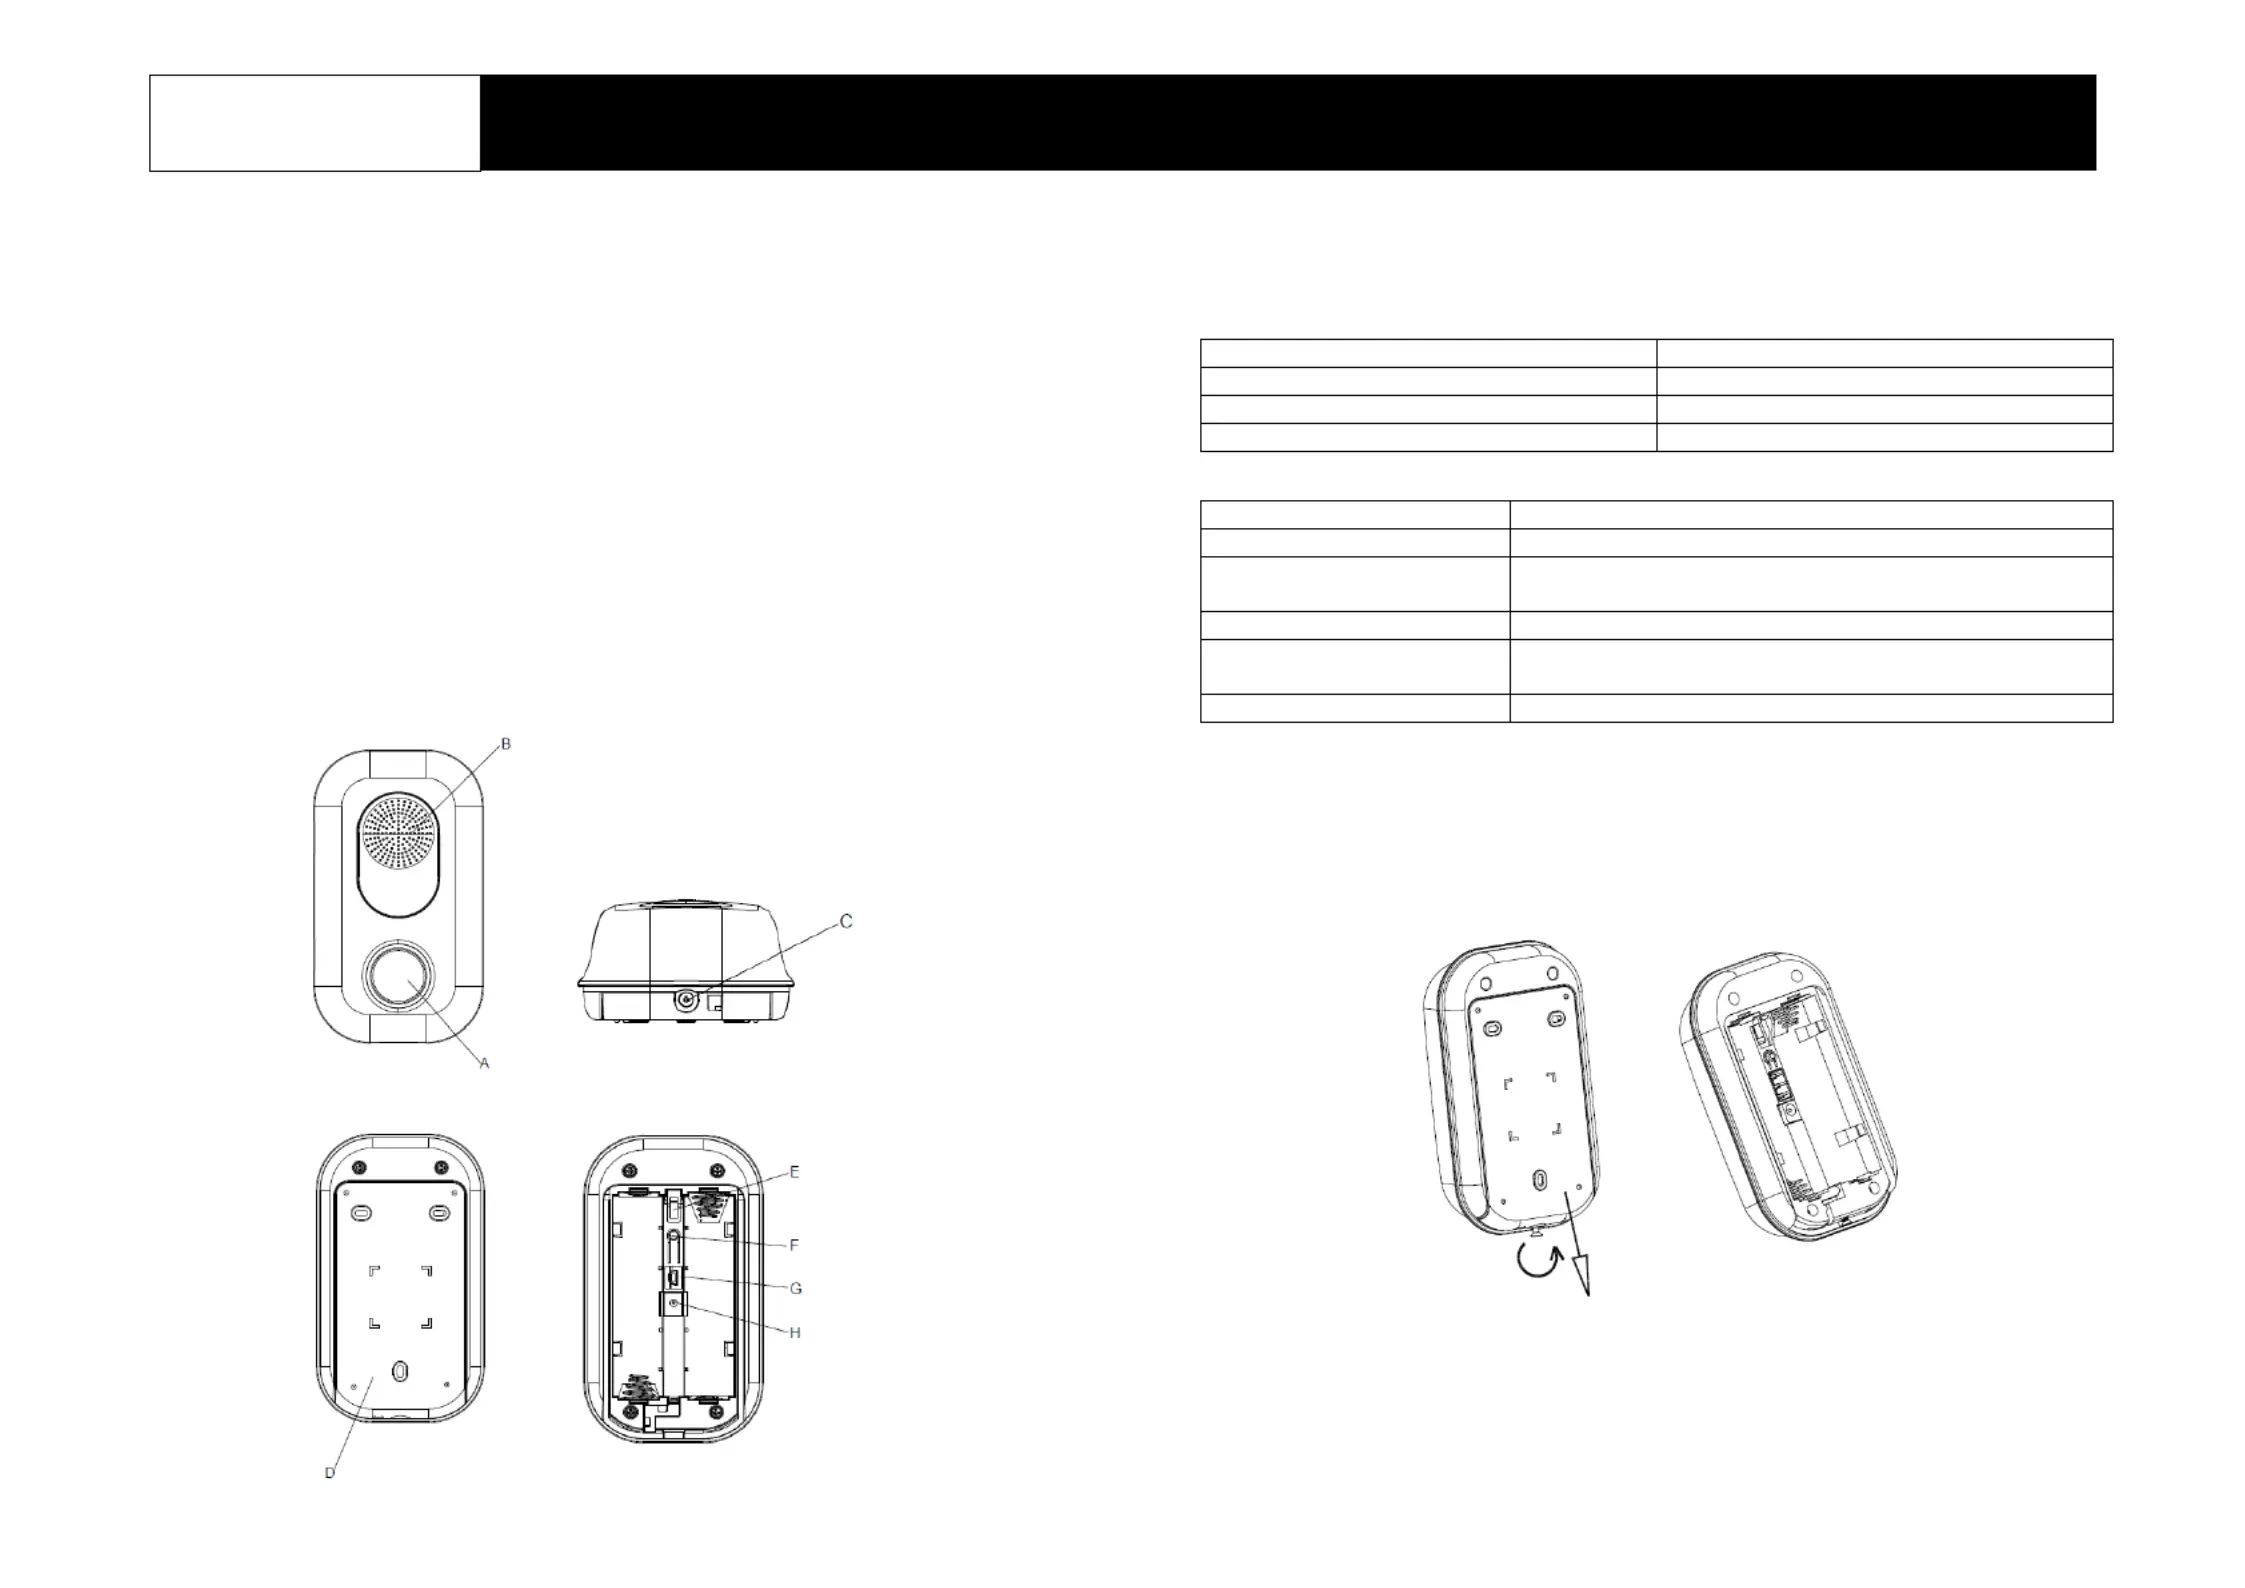
Product Layout
Keys
A. Speaker
E. Tamper Switch
B. Voice Speaker
F. Learning Key
C. Backplate screws
G. Micro USB (Factory use only)
D. Backplate
H. DC Jack
Functions
A. Siren Speaker
Siren Warning 110 dB
B. Voice Speaker
Voice Indicator 90 dB
E. Tamper Jumper Link
A full alarm condition will be enabled when the device is
removed from the wall.
F. Learning Key
Learn and clear ID codes.
G. Micro USB
Update voice messages through the USB cable. (Factory
useonly)
H. DC Jack
Socket for connecting DC adapter
Binding
1.
Loosen and remove the locking screw from the bottom edge of the unit
counterclockwise.
2.
Slide the backplate out of theunit.
Figure 1 Front View
Figure 3 Back View
Figure 2 Under View
Figure 4 Inside View
3.
Prepare four 1.5V alkaline batteries. Do not insert them into the unityet.
4.
Log into the Homesys account from a webbrowser.
Product specificaties
| Merk: | Elro |
| Categorie: | Beveiliging |
| Model: | AS80SR11A |
Heb je hulp nodig?
Als je hulp nodig hebt met Elro AS80SR11A stel dan hieronder een vraag en andere gebruikers zullen je antwoorden
Handleiding Beveiliging Elro

2 Februari 2023
2 Februari 2023
2 Februari 2023
2 Februari 2023
2 Februari 2023
2 Februari 2023
2 Februari 2023
2 Februari 2023
2 Februari 2023
2 Februari 2023
Handleiding Beveiliging
Nieuwste handleidingen voor Beveiliging
6 Maart 2024
4 Februari 2024
29 December 2023
29 December 2023
23 November 2023
16 Oktober 2023
16 Oktober 2023
16 Oktober 2023
16 Oktober 2023
16 Oktober 2023