Eliminator Lighting E116 Handleiding
Bekijk gratis de handleiding van Eliminator Lighting E116 (2 pagina’s), behorend tot de categorie Niet gecategoriseerd. Deze gids werd als nuttig beoordeeld door 26 mensen en kreeg gemiddeld 4.1 sterren uit 13.5 reviews. Heb je een vraag over Eliminator Lighting E116 of wil je andere gebruikers van dit product iets vragen? Stel een vraag
Pagina 1/2

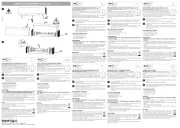
E 116 PARTS LIST
2 x T-Bars
4 x Side Mount T-Collars
1 x Center “I” Support Bar
2 x Center Posts for Tri-Pod Stands
2 x 5” Truss I-Beam Sections w/Spigot
2 x 9” Tri-Pod Stands
6 x Safety Pins
1 Hexagon Allen Wrench
(Inserted in 5” Truss End)
E 116
©Eliminator® Los Angeles, CA. - www.EliminatorLighting.com
PORTABLE TRUSSING SYSTEM
INSTRUCTIONS FOR ASSEMBLING YOUR E 116™:
Everything is included to assemble your E 116™.
1. Open up the two Tri-Pod Stands. There are two Center posts which are packed in the
E 116™ that need to be inserted into each Tri-pod stand. Tighten tri-pod knobs, leaving
inserted post exposed enough to mount Truss to top of bar.
2. Connect the two 5 ft. sections of Truss together using the spigots (flanges), mounting
screws and wing nuts attached to interconnect the two. There is a center support Bar that
has two T-collars attached to each end. This connects between the two 5 ft. sections. The
spigots fit inside of this. Remove the two screws and wing nuts and fit center support bar
onto the truss section with the spigots attached. Connect the other 5 ft. truss section and
insert screws and wing nuts. Tighten allen screws in the center support bar with the allen
wrench supplied.
3. Next, mount two Side mount T-Collars to each end of the 10 ft. truss assembly. Slide the
fully assembled truss piece onto each tri-pod center post. We suggest doing this on the
floor before standing up completed truss system: tighten all allen screws, knobs, and insert
safety pins. Once complete, stand system up on tri-pod legs extending them out so that the
lower tri-pod leg support bars are parallel to the ground.
4. Connect two T-bars at the top of each T-collar. Make sure there is enough room on the
center post above the T-collar to mount the T-bars.
5. We suggest setting the E 116™ at the desired height before mounting any fixtures to it.
Be sure to insert the three safety pins into each tri-pod.
Specifications: E 116™
Weight: 42 lbs.
System Capacity: 200 lbs.
Aluminum Diameter: 1 1/2”
Warranty: 1 Year Limited Warranty
™

©Eliminator® Los Angeles, CA. - www.EliminatorLighting.com
1 Year Limited Warranty: Eliminator Lighting warranty is valid from the date of purchase. Our
1 year limited warranty covers manufacturing defects only. Serial number, place of purchase with
dated valid receipt must be submitted at time of service. Eliminator Lighting warranty does not cover
items or parts prone to wear and tear: lamps, fuses, brushes and belts. Eliminator Lighting warranty
is only valid with-in the United States.
Product specificaties
| Merk: | Eliminator Lighting |
| Categorie: | Niet gecategoriseerd |
| Model: | E116 |
Heb je hulp nodig?
Als je hulp nodig hebt met Eliminator Lighting E116 stel dan hieronder een vraag en andere gebruikers zullen je antwoorden
Handleiding Niet gecategoriseerd Eliminator Lighting
3 Juni 2025

28 December 2024

18 November 2024

24 Juni 2024

27 Mei 2024

27 Mei 2024

27 Mei 2024

27 Mei 2024
Handleiding Niet gecategoriseerd
- Burris
- Musical Fidelity
- Millenium
- Mercusys
- PeakTech
- Vitec
- Crunch
- Olympus
- Act
- Moomin
- Cudy
- Frigidaire
- Doffler
- SumUp
- Vantage Point
Nieuwste handleidingen voor Niet gecategoriseerd

31 Juli 2025
31 Juli 2025
31 Juli 2025
31 Juli 2025
31 Juli 2025
31 Juli 2025
31 Juli 2025
31 Juli 2025

31 Juli 2025
31 Juli 2025

