Dormakaba 9600 Handleiding


Lees hieronder de 📖 handleiding in het Nederlandse voor Dormakaba 9600 (22 pagina's) in de categorie Niet gecategoriseerd. Deze handleiding was nuttig voor 30 personen en werd door 2 gebruikers gemiddeld met 4.5 sterren beoordeeld

Pagina 1/22
I9600-1 4/2010
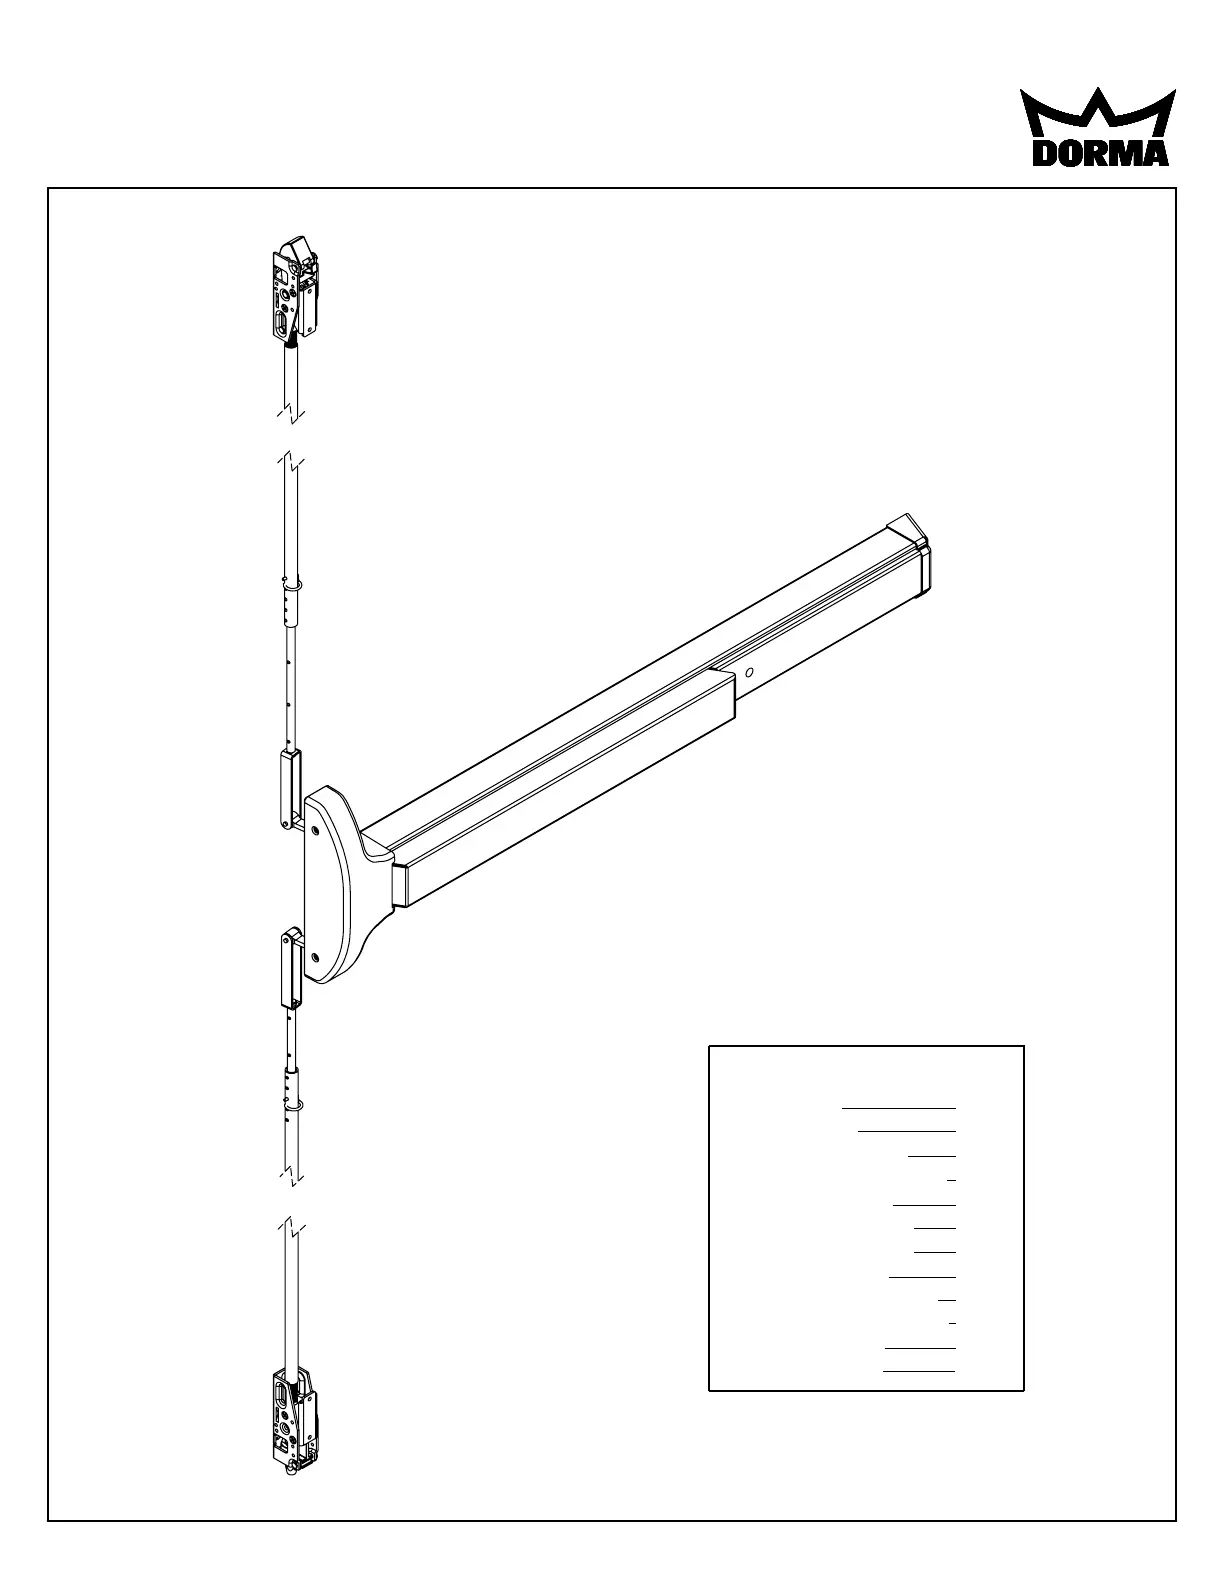
CONCEALED VERTICAL ROD EXIT DEVICE
9600/F9600 SERIES
INSTALLATION INSTRUCTIONS
1135-231 95057470 www.dorma-usa.com 1-800-523-8483
Index:
Screw chart
Tools required
Outside trim options
"03" Additional door prep
Device installation
Frame & strike preps
Final rod adjustment
Options available
Wood door preparation
5100 retro-t preparation
Metal edge guard
Spotting template
1
2
3
4
5-10
11-12
13
14-16
17
18
19
20
Note: One set of instructions should be left
with building owner after device has been
installed.
1
SCREW CHART
(2) #12 x 1 1/4" F.H.P.T.S. (Wood door)
(2) 12-24 x 1 1/2" F.H.P.M.S. (Metal or thru bolts)
(2) #12 x 1 1/4" R.H.P.T.S. (Wood door)
(2) 12-24 x 1" R.H.P.M.S. (Metal or thru Bolts)
(12) 8-32 x 1/4" F.H.P.M.S.
Optional "WD" mounting brackets (4)
(wood, steel and re)
(4) 10-32 x 1/4" F.H.P.M.S. (Aluminum)
(12) #10 x 1" F.H.P.T.S. (Wood door)
(12) 10-32 x 3/8" F.H.P.M.S. (Metal door)
Adjusting screw
(2) 3/32 x 10-32 x 1/2" Allen Head (wrench supplied)
(2) 10-32 x 3/8" F.H.P.M.S.
(6) 8-32 x 1/4" F.H.P.M.S.
Chassis mounting
End cap bracket
Bracket to latch
Bracket to door
Locking screw
#418 Strike pack
Chassis cover
& end cap
Chassis mounting
End cap bracket
Bracket to door
Bracket to door
#439 Bottom strike
(cement or grout
in place)
(4) 10-32 x 1/4" F.H.P.M.S. (Aluminum) Bracket to toor
Standard "NS"
latch assembly
(2) Rod retaining clips Rod installation
Optional: "ALD" Mounting Bracket (2)
(Medium Stile Aluminum Doors)
2
RHR LHR
9600
Series
Device
9600
Series
Device
9700
Series
Device
9600
Series
Device
9600
Series
Device
Read the entire instruction sheet prior to installation.
Before Installing Hardware:
1. Verify door width, handing and product with carton label for correct exit device and length. (See Step 9)
2. For hand reversal of chassis see page 6, for outside lever trim see page (3).
3. For less bottom rod device, delete bottom latch installation steps.
4. Device installation and preliminary adjustments should be made prior to hanging door.
Note: Less bottom rod device is not recommended where security is a primary concern.
Note: If device is to be installed over glass lite panels, shim kit may be required, order GK9200.
12-24 Tap, 10-32 Tap
Drill bits: 1/8", 3/8", #25, #16, #21
Hole saw 1 1/4" diameter for trim (if required) or jig saw.
5/32" Allen wrench for lever trim.
3/32" Allen wrench (supplied)
HANDING OF DOOR
HANDING OF DOOR
HANDING OF DOOR
HANDING OF DOORHANDING OF DOOR
TYPICAL APPLICATIONS
TYPICAL APPLICATIONSTYPICAL APPLICATIONS
SPECIAL TOOLS FOR INSTALLATION
SPECIAL TOOLS FOR INSTALLATIONSPECIAL TOOLS FOR INSTALLATION


Product specificaties

Merk: Dormakaba
Categorie: Niet gecategoriseerd
Model: 9600

Heb je hulp nodig?

Als je hulp nodig hebt met Dormakaba 9600 stel dan hieronder een vraag en andere gebruikers zullen je antwoorden


Handleiding Niet gecategoriseerd Dormakaba

Handleiding Niet gecategoriseerd

Nieuwste handleidingen voor Niet gecategoriseerd