Doktorvolt Wallbox basic Handleiding
Doktorvolt
Niet gecategoriseerd
Wallbox basic
Bekijk gratis de handleiding van Doktorvolt Wallbox basic (7 pagina’s), behorend tot de categorie Niet gecategoriseerd. Deze gids werd als nuttig beoordeeld door 5 mensen en kreeg gemiddeld 4.3 sterren uit 3 reviews. Heb je een vraag over Doktorvolt Wallbox basic of wil je andere gebruikers van dit product iets vragen? Stel een vraag
Pagina 1/7
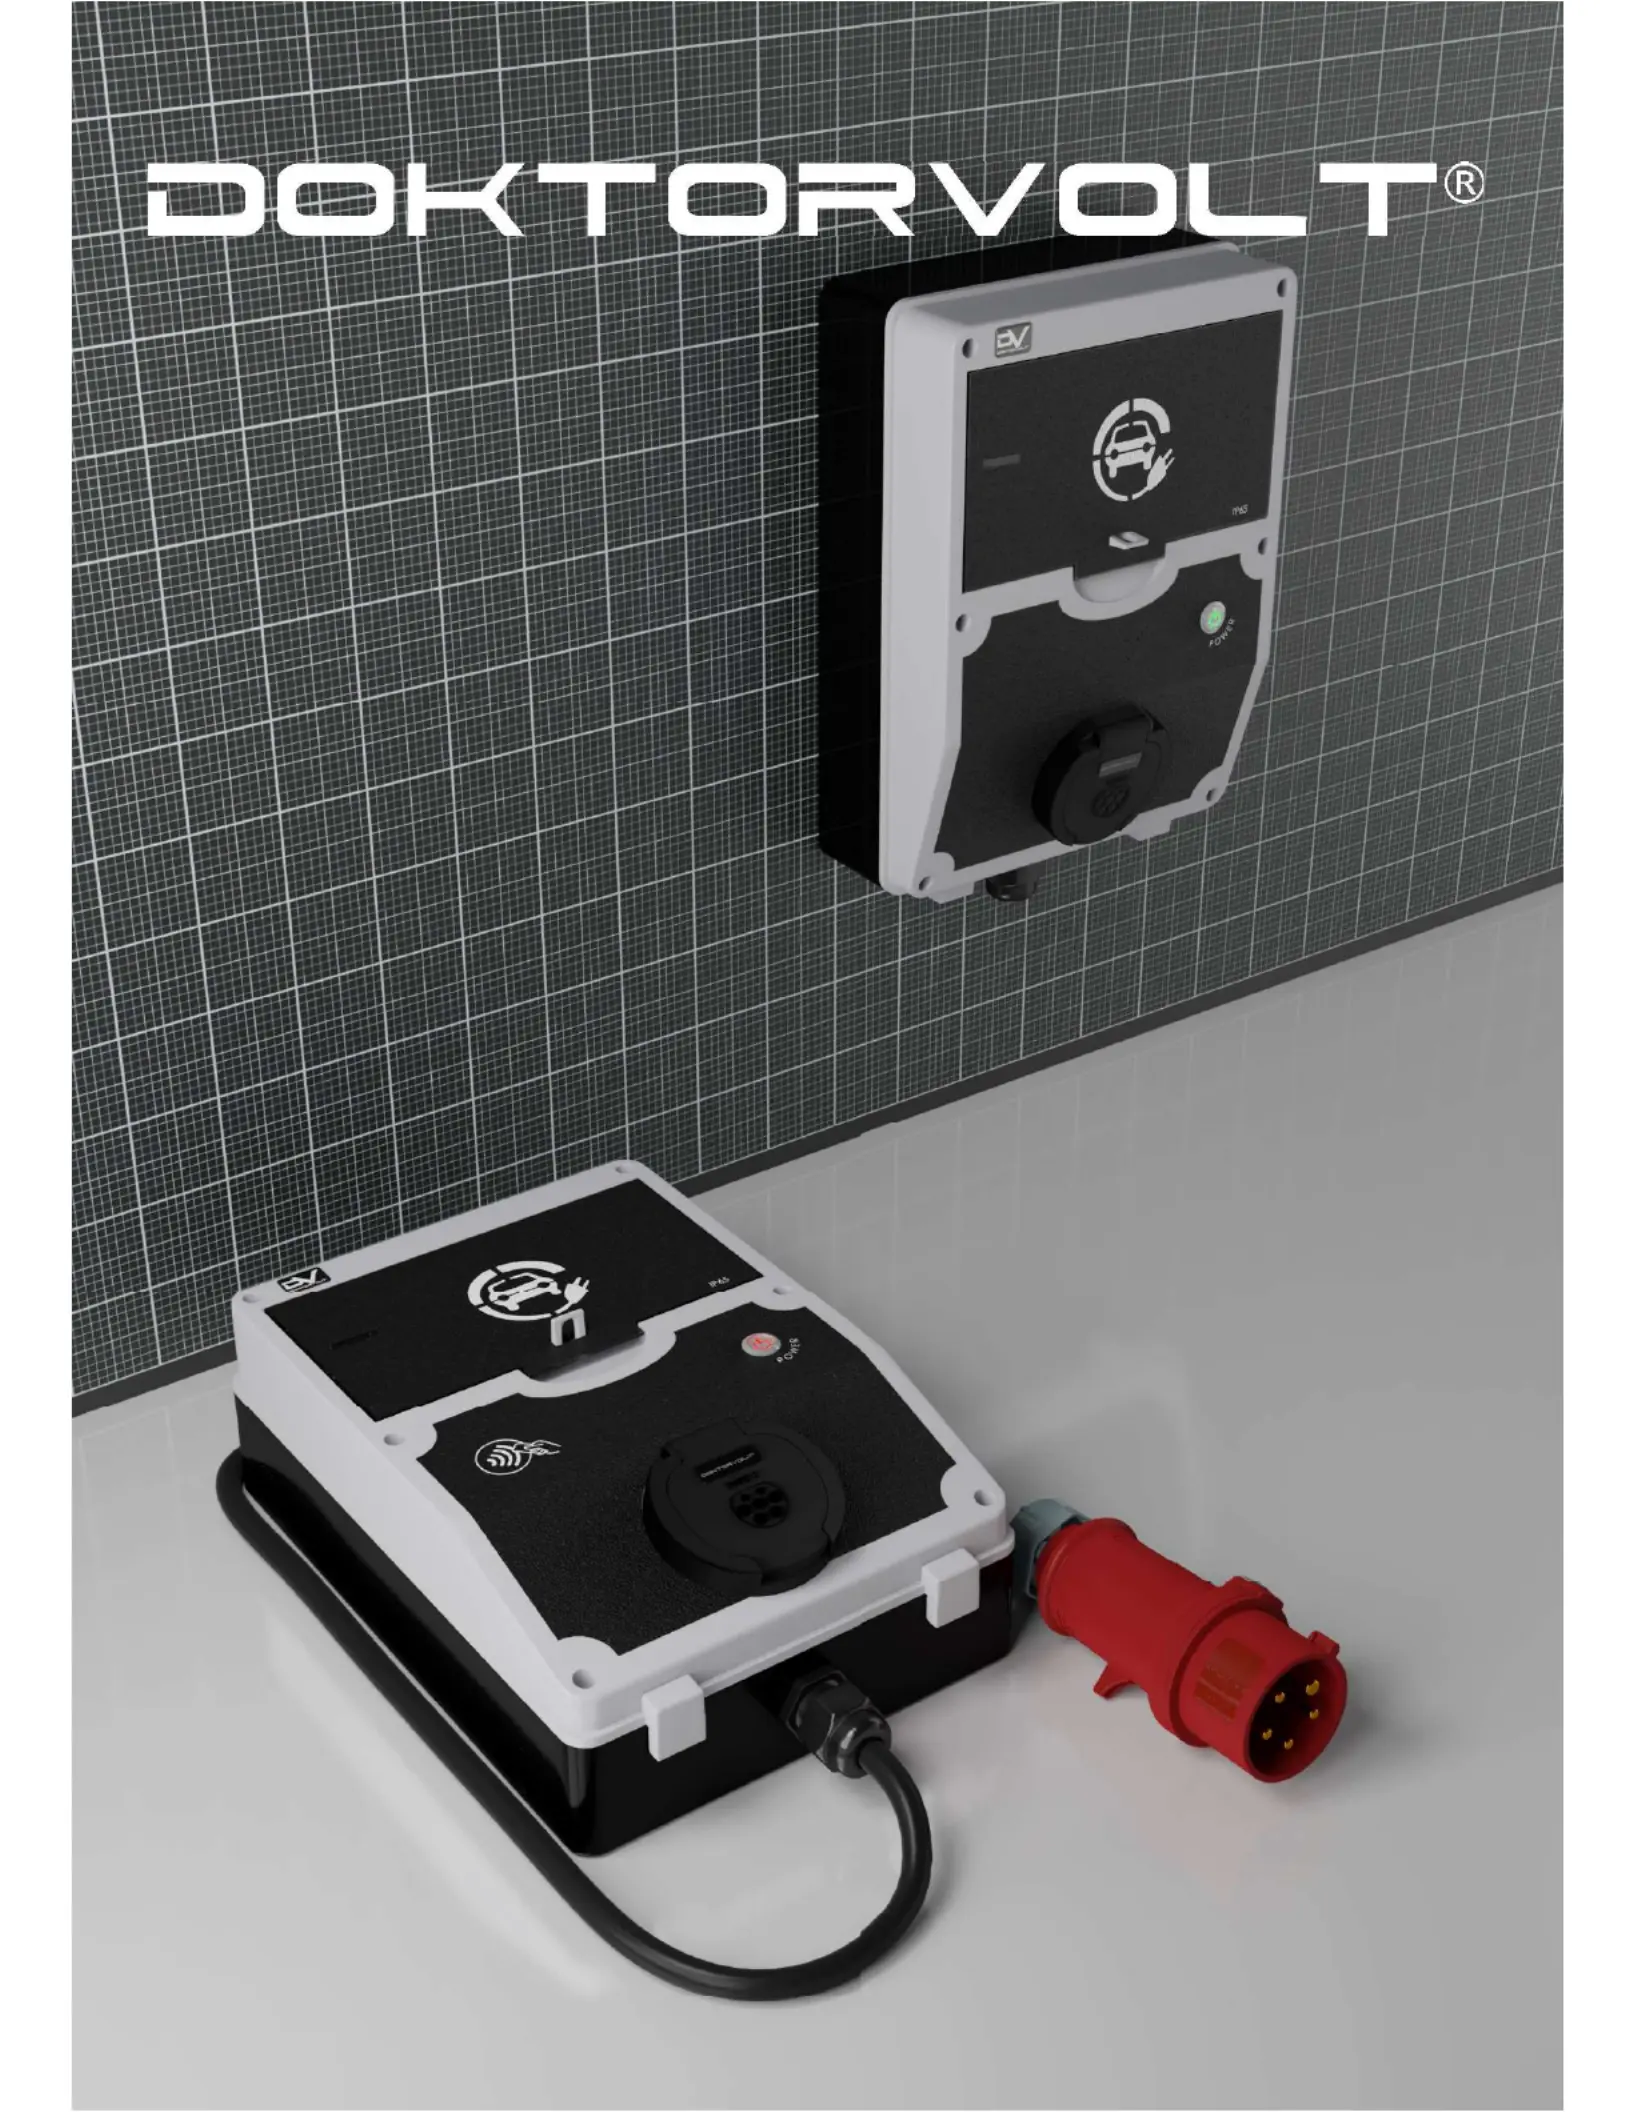
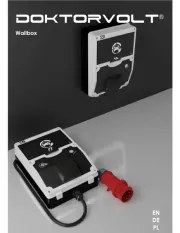
Wallbox
BASIC
EN
DE
PL
2
WALLBOX charger for EV
DV-9109-EV
The charger should be disconnected from the power source before installation, configuration or
cleaning!
Installation should only be performed by a qualified installer in accordance with local electrical
regulations!
0. Preparation
Before starting, always ensure that the device is shut down.
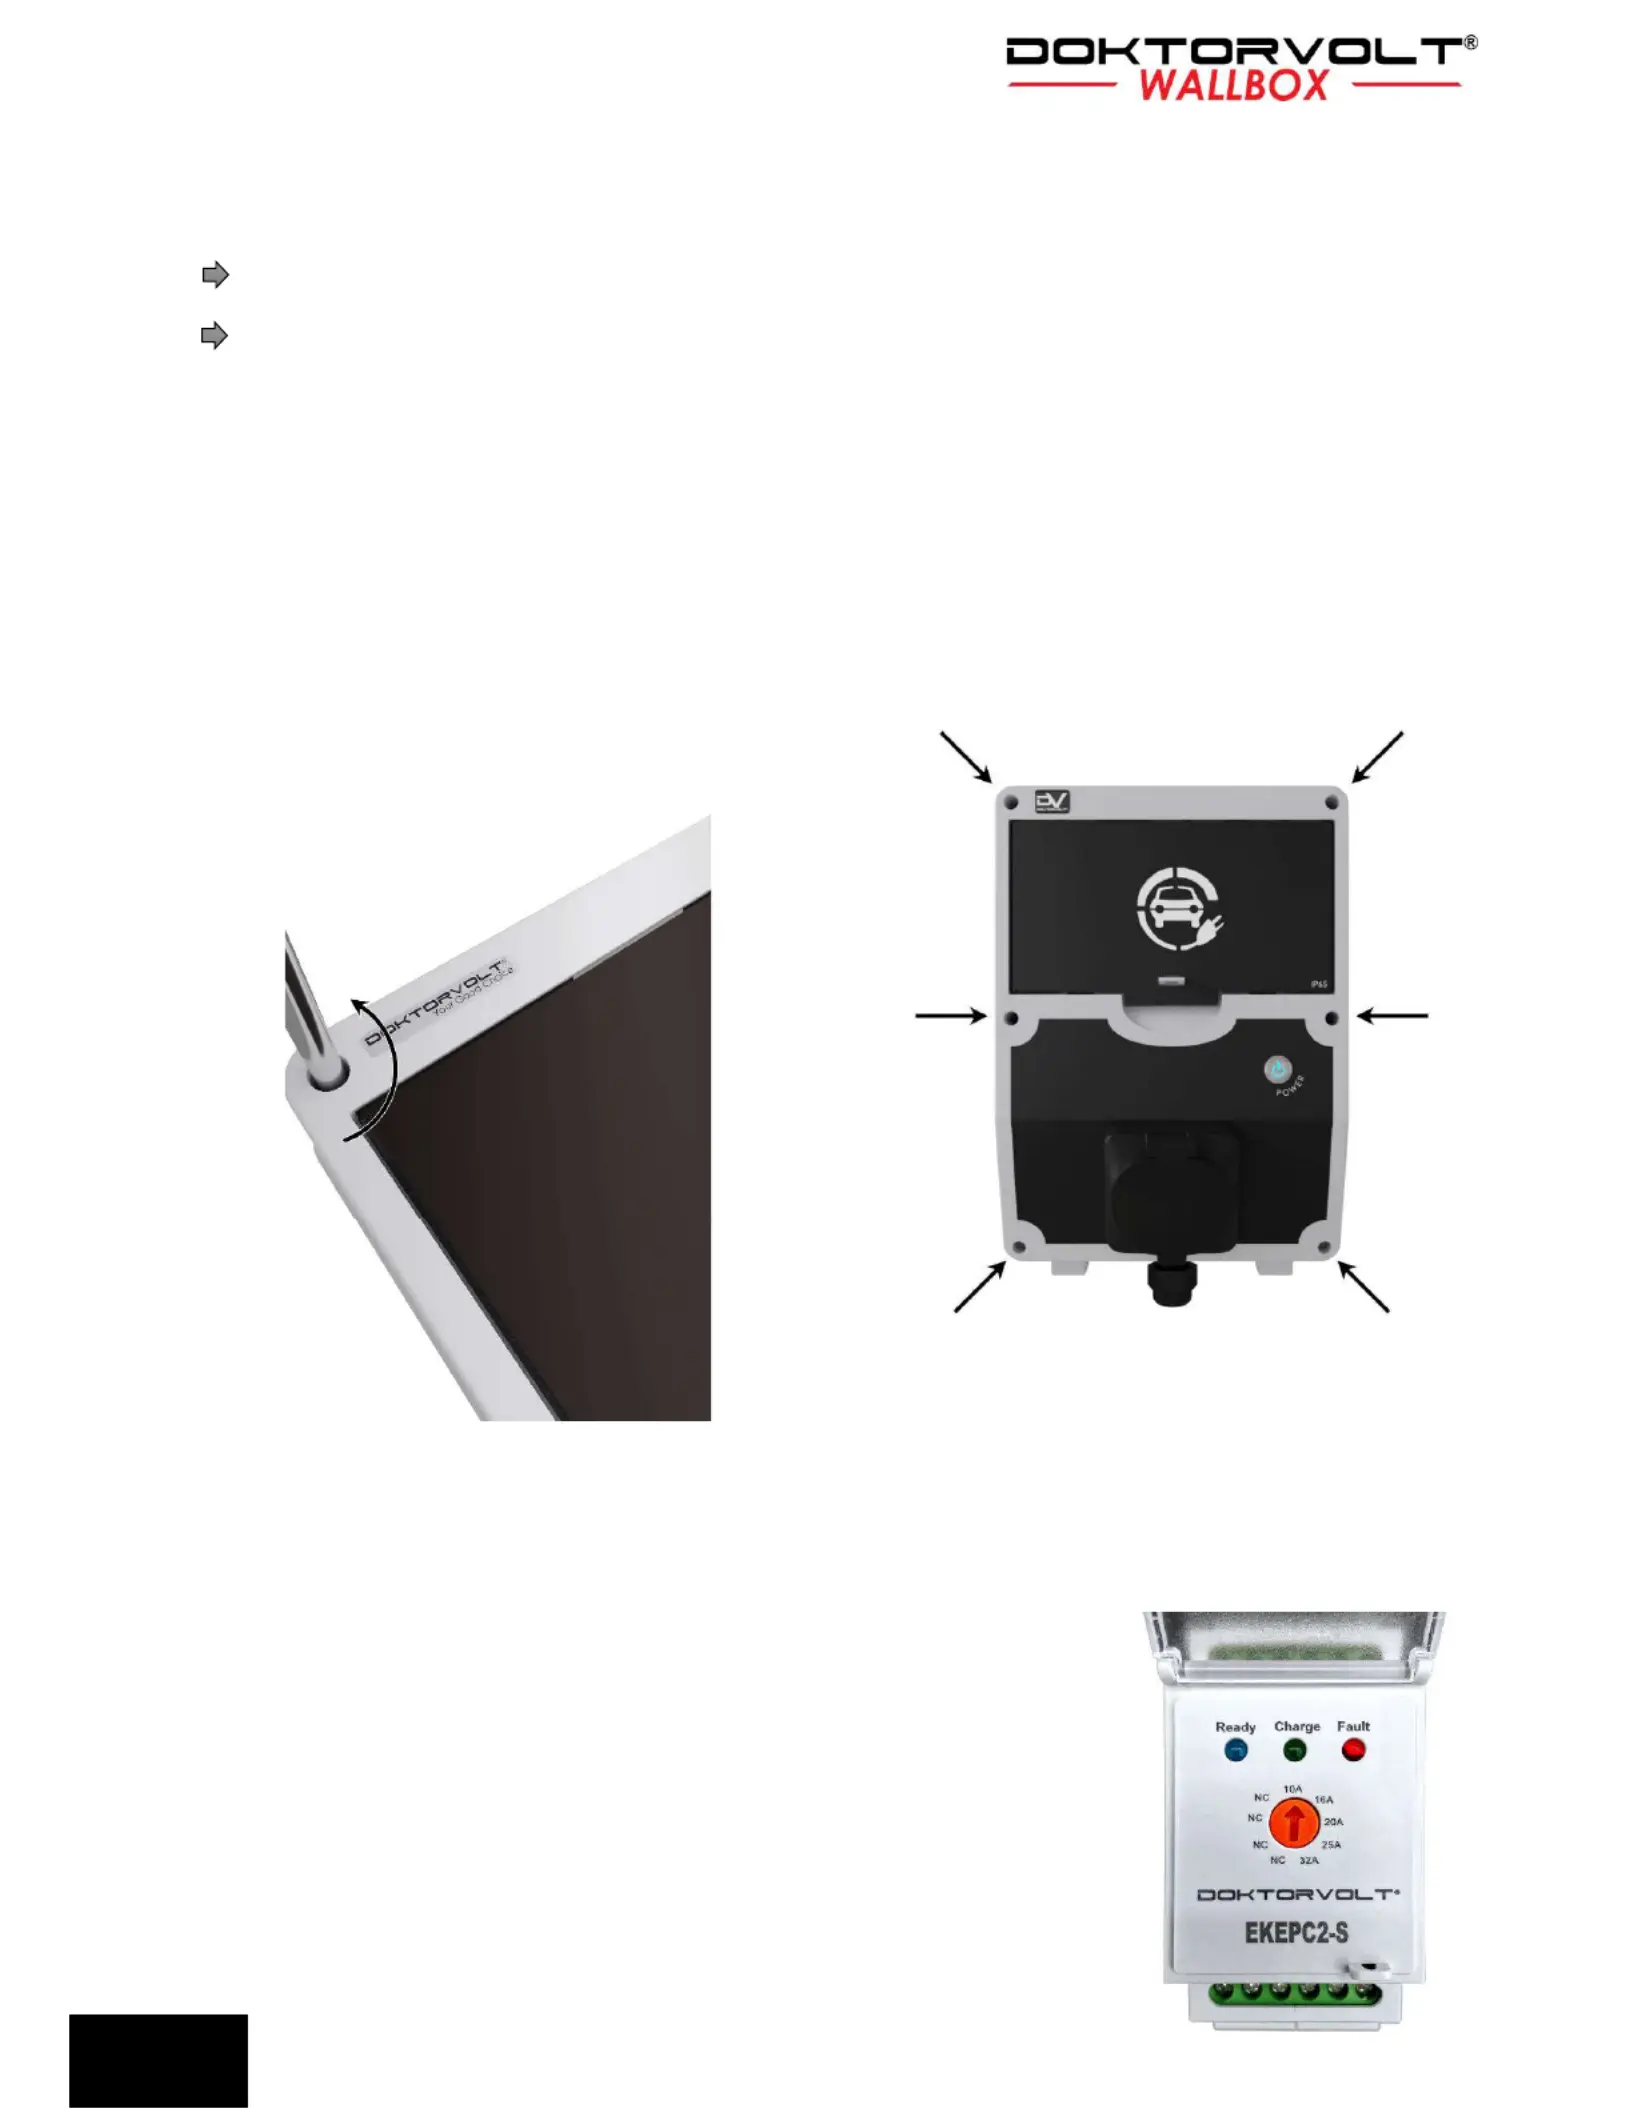
1. Open the housing
Remove the 6 screws holding the top of the housing to the base.
Gently open the case.
2. Wall mounting
Refer to the attachment included to the manual
3.
Power supply
3.a
The Wallbox charging station does not have its own electrical protection
devices. The supply cable to the charger must be protected by an
overcurrent circuit breaker and a residual current circuit breaker (at least
type A with a tripping current of 30 mA) and miniature circuit breaker. No
other circuits may be connected to the same protection devices
The device incorporates additional means of protection against DC
residual current (>6 mA DC). In addition, follow the vehicle manufacturer's
recommendations.
The residual current device and the overcurrent protections should be
selected according to the controller's charging current setting
EN
3
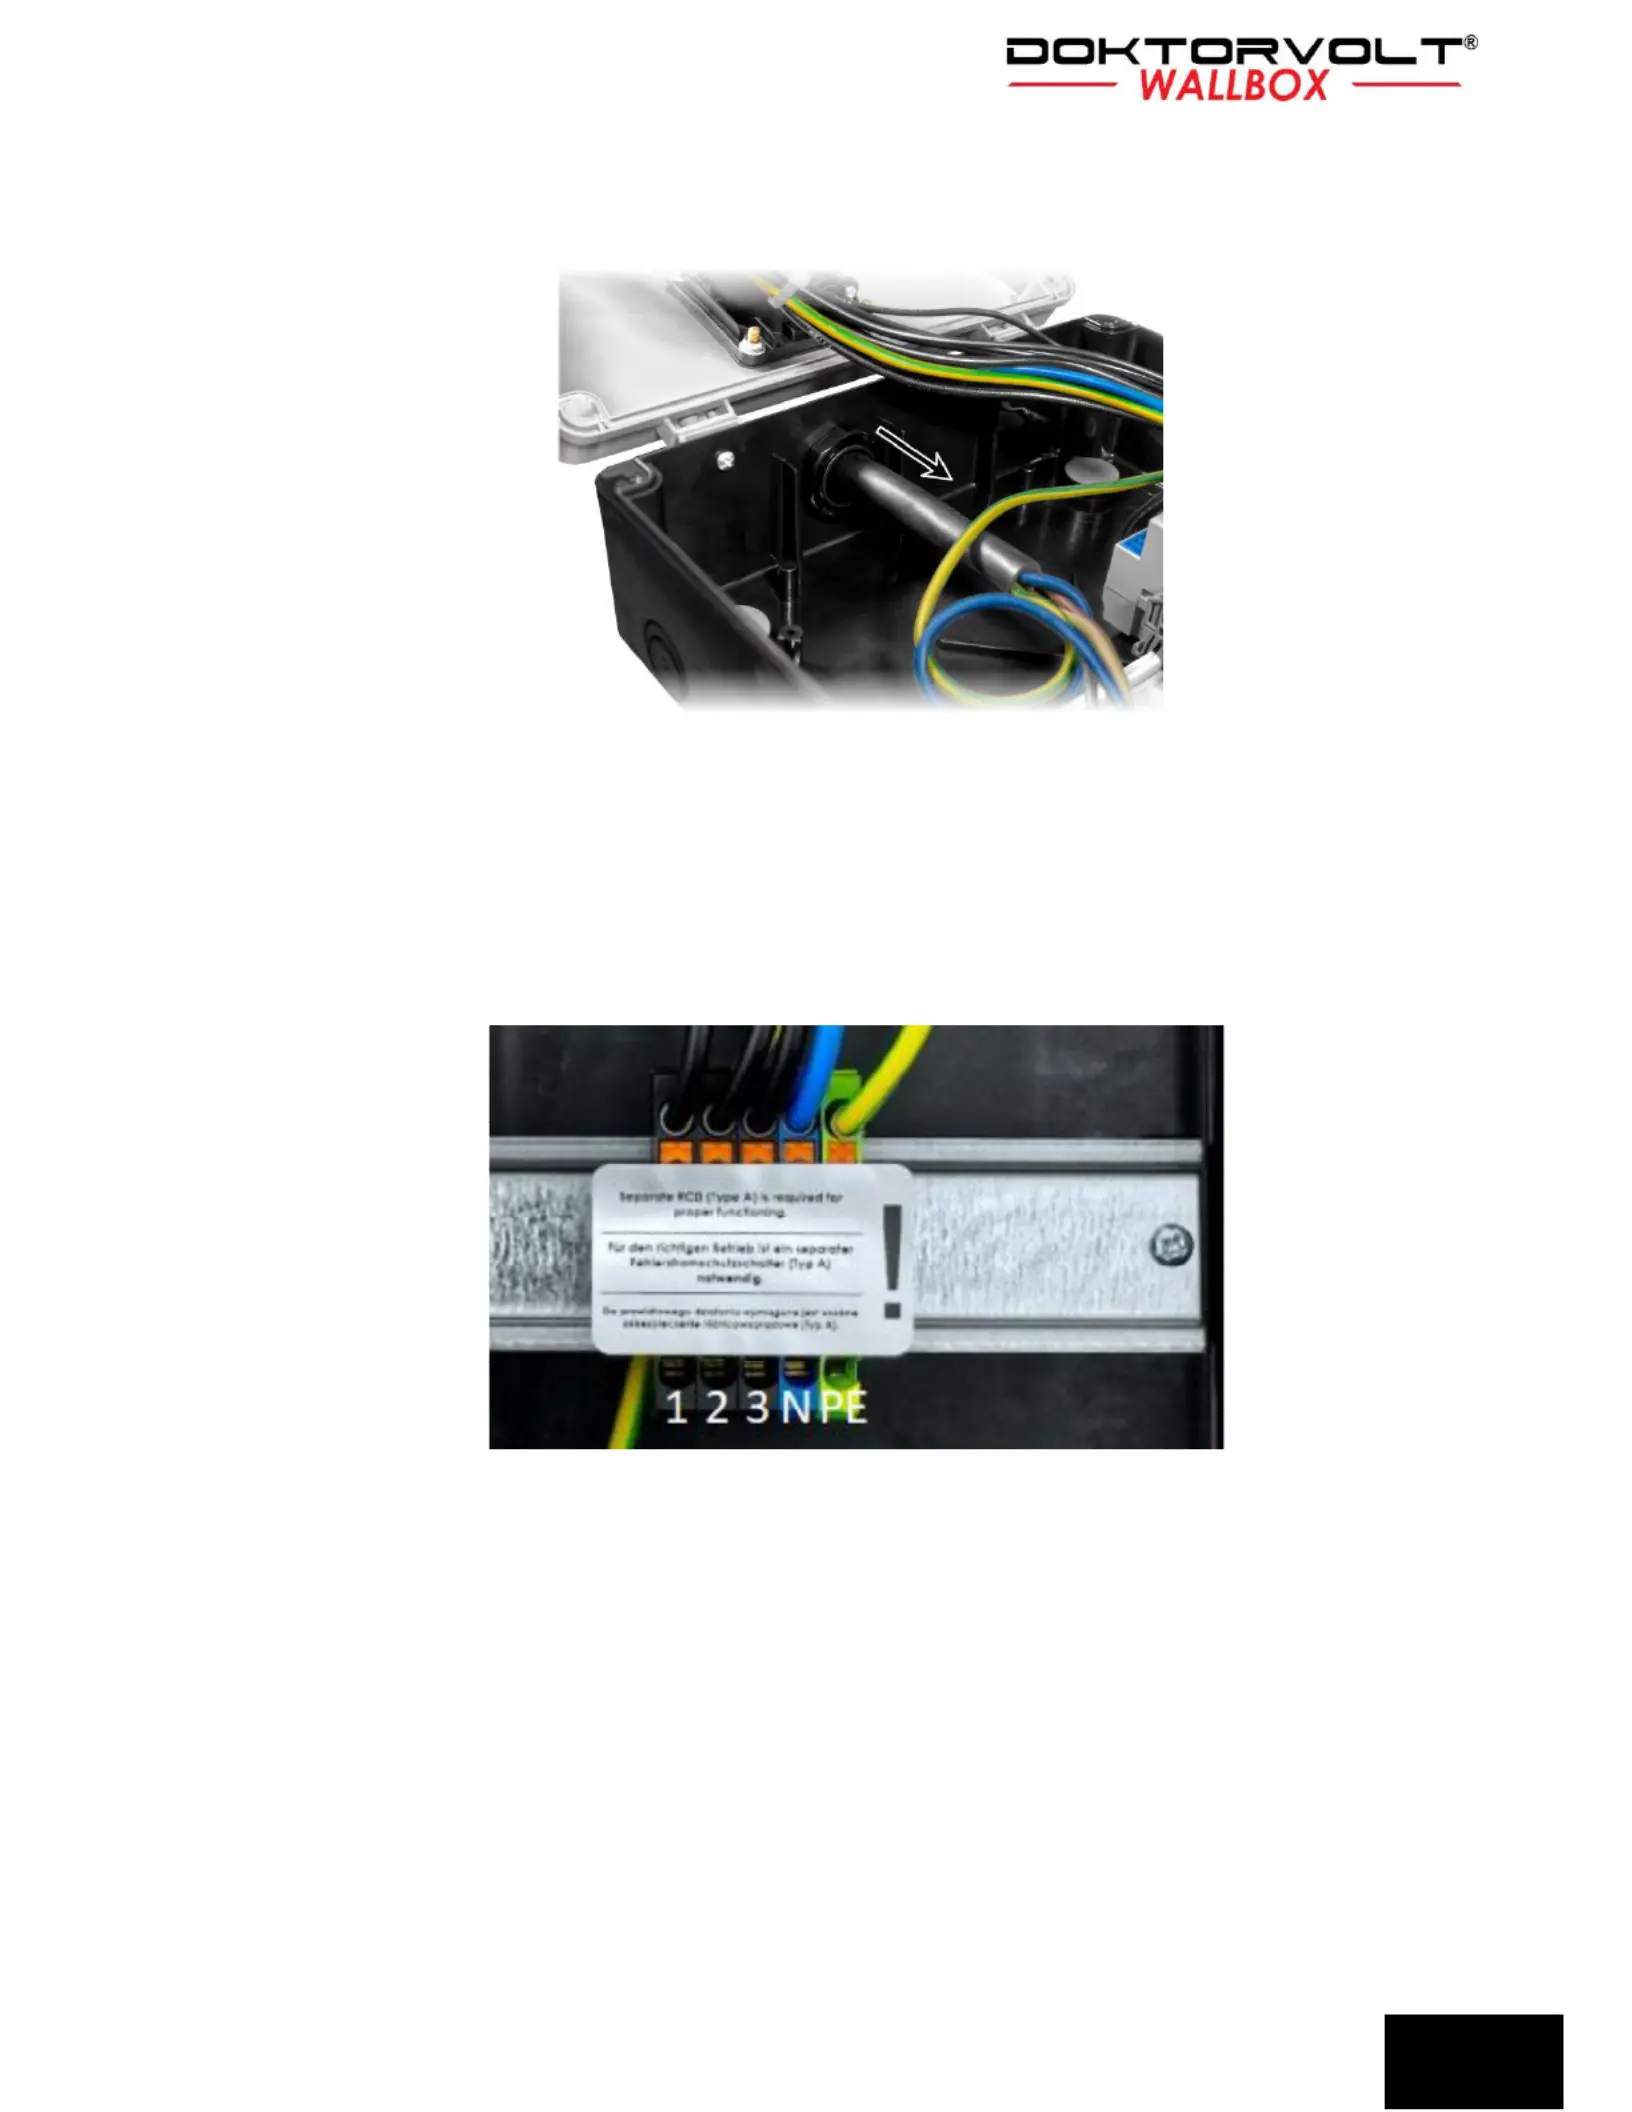
Put the power cord (cross section: min. 5x4mm2) through the installed cable gland on the bottom of the enclosure.
This cross section is required because the charging current can be set at the controller: 10A, 16A, 20A, 25A 32A,
which corresponds to a power range of 7 to a maximum of 22 kW.
Insulate the end of the cable and crimp the individual conductors with sleeve lugs with a diameter that matches
the conductor diameter. Connect all wires to the individual terminals located on the TH35 mounting rail:
- Phase wires (brown, black, gray) to the connectors marked with numbers 1, 2 and 3.
- The neutral conductor (blue) to the terminal marked with the letter N (of the same color).
- The protective conductor (yellow-green) to the terminal marked with the letters PE (in the same color).
EN
Product specificaties
| Merk: | Doktorvolt |
| Categorie: | Niet gecategoriseerd |
| Model: | Wallbox basic |
Heb je hulp nodig?
Als je hulp nodig hebt met Doktorvolt Wallbox basic stel dan hieronder een vraag en andere gebruikers zullen je antwoorden
Handleiding Niet gecategoriseerd Doktorvolt
5 Augustus 2025
5 Augustus 2025
Handleiding Niet gecategoriseerd
- HPI Racing
- Nokia
- Ebro
- Tutis
- Kitchen Brains
- Argoclima
- Rohl
- Neutrik
- Digital Watchdog
- DOCtron
- Gossen
- Sungale
- Meridian
- Acti
- Pardini
Nieuwste handleidingen voor Niet gecategoriseerd
5 Augustus 2025

5 Augustus 2025
5 Augustus 2025
5 Augustus 2025

5 Augustus 2025

5 Augustus 2025
5 Augustus 2025

Thames & Kosmos Wow in the World: Dino Dig & Diorama Handleiding
5 Augustus 2025
5 Augustus 2025