CRUX SOCGM-18L Handleiding
CRUX Niet gecategoriseerd SOCGM-18L
Bekijk gratis de handleiding van CRUX SOCGM-18L (6 pagina’s), behorend tot de categorie Niet gecategoriseerd. Deze gids werd als nuttig beoordeeld door 111 mensen en kreeg gemiddeld 4.6 sterren uit 5 reviews. Heb je een vraag over CRUX SOCGM-18L of wil je andere gebruikers van dit product iets vragen? Stel een vraag
Pagina 1/6
Crux Interfacing Solutions • 21541 Nordhoff St., Unit C, Chatsworth, CA 91311
phone: (818) 609-9299 • fax: (818) 996-8188 • www.cruxinterfacing.com
rev.071720
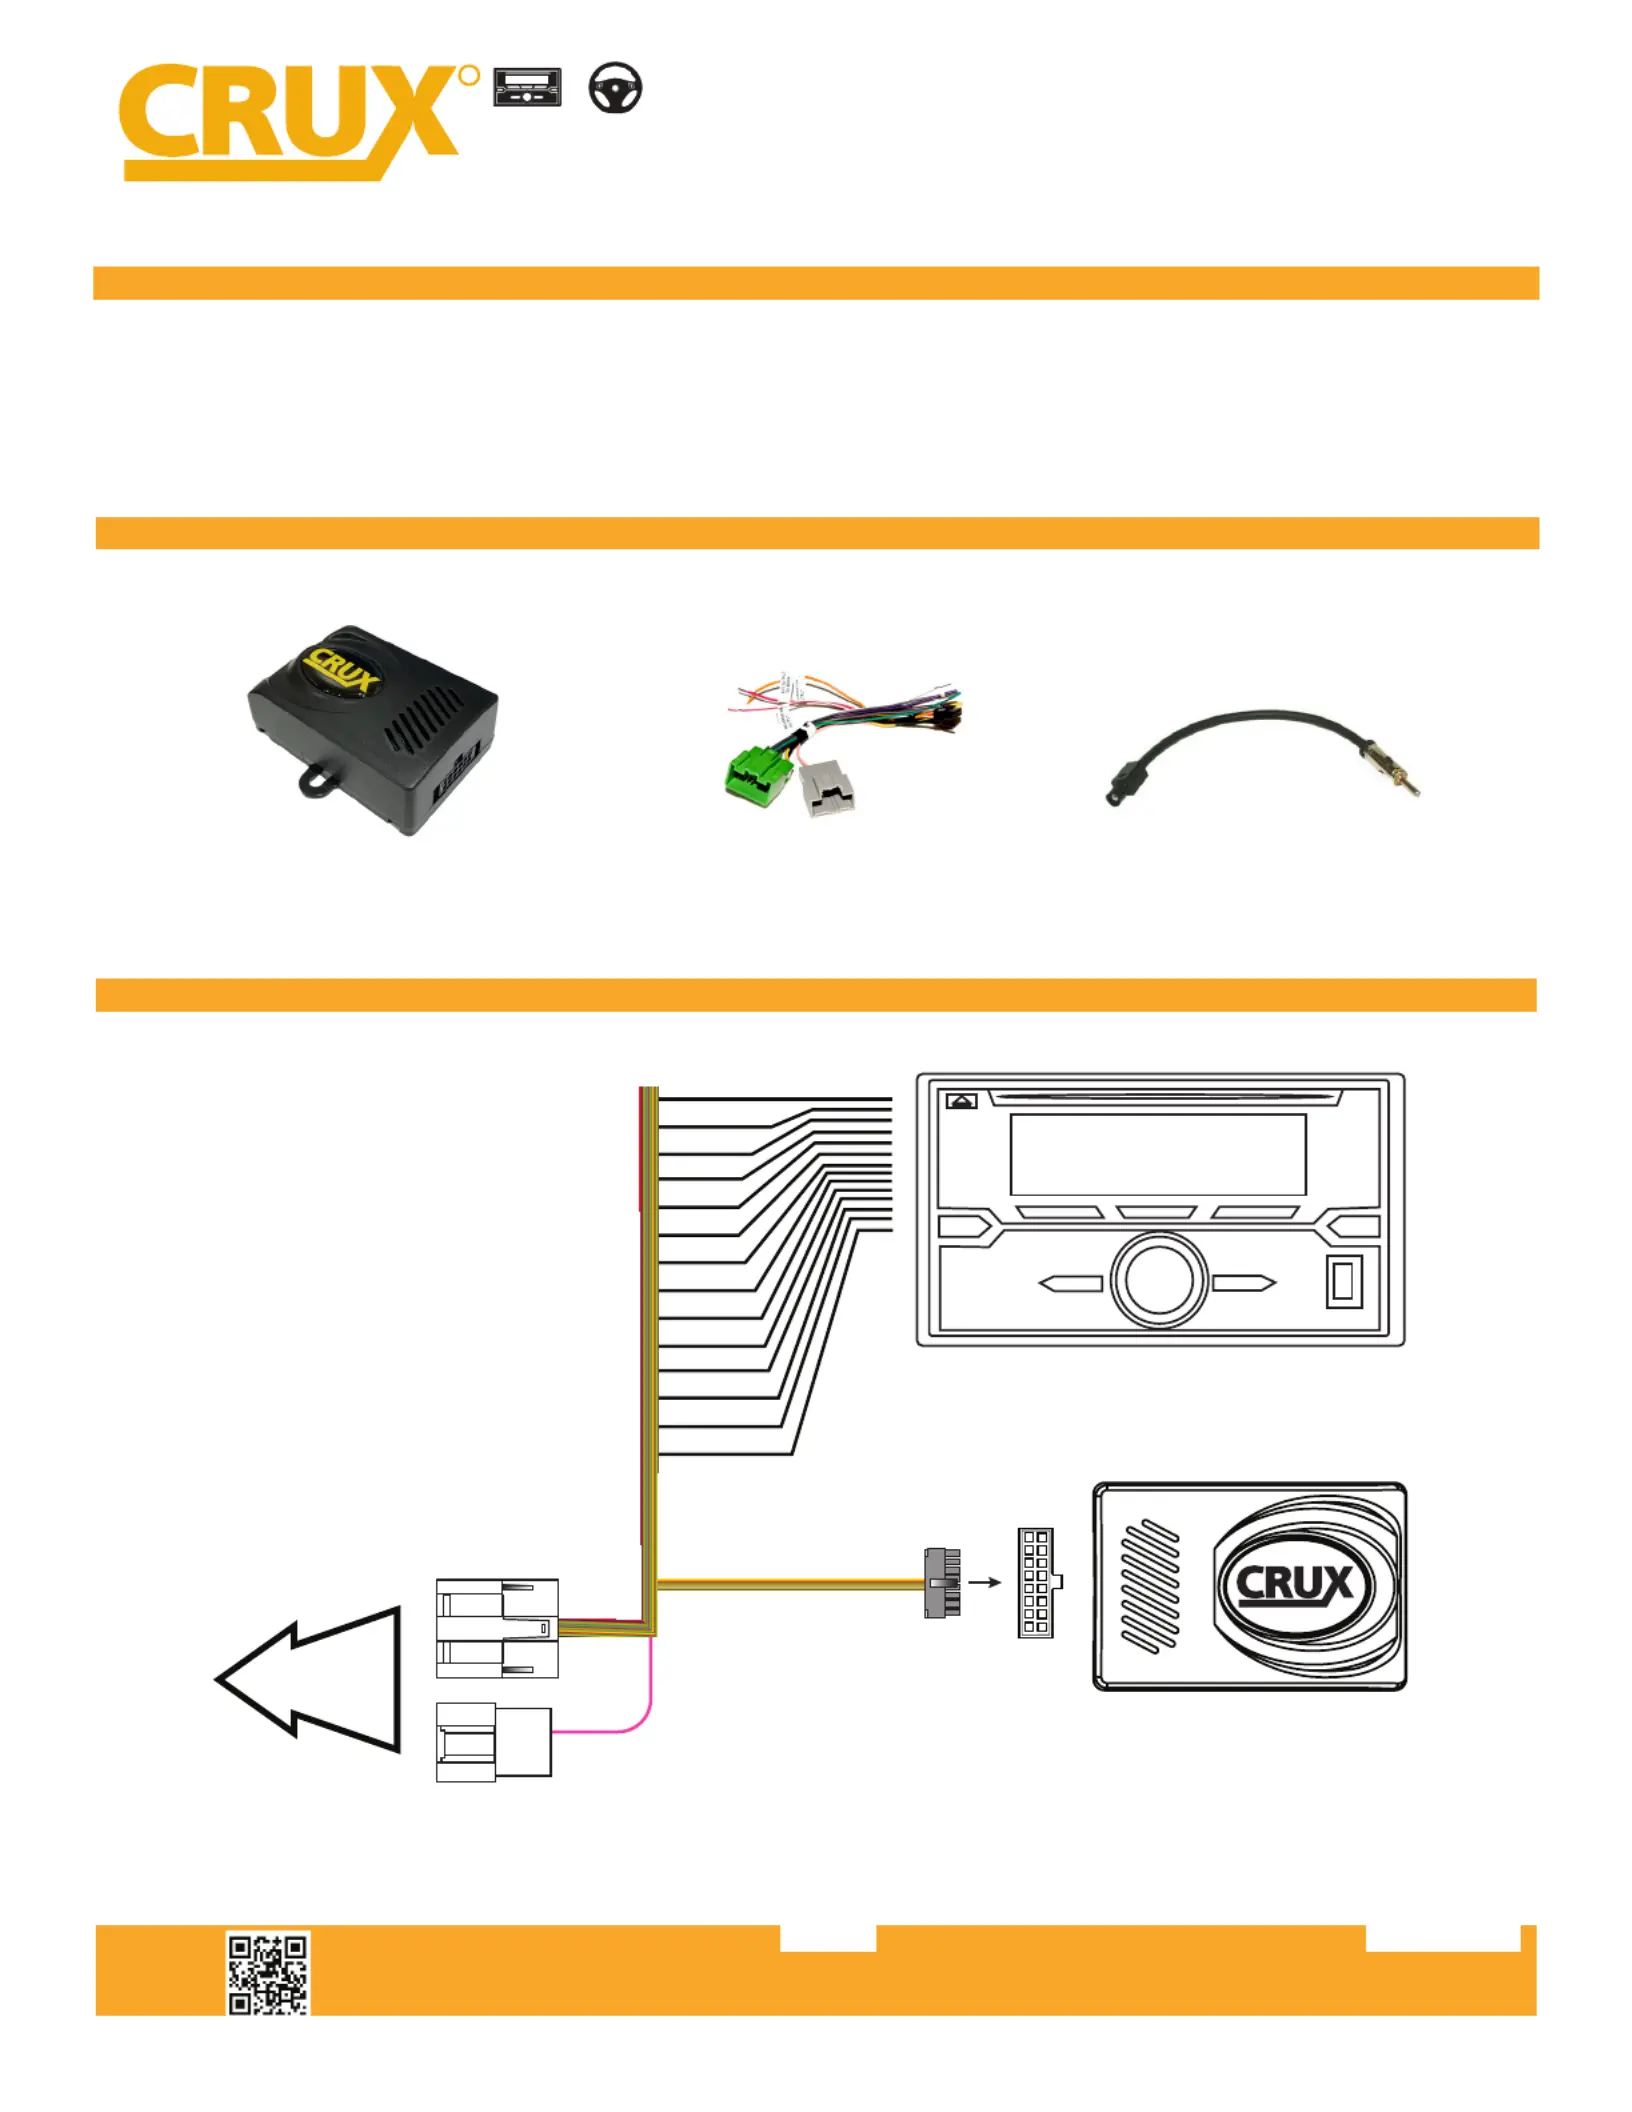
SOCGM-18L
Radio Replacement Interface for
GM LAN v2 (LIN) Bus Vehicles
1 of 2
RADIO REPLACEMENT
SWC RETENTION
+
R
INTERFACING SOLUTIONS
- Retains factory features in select GM LAN V2 (LIN) Bus vehicles while functioning with an aftermarket radio.
- Supports non-amplied Systems only.
- Retains chime functions.
- Retains RAP (Retained Accessory Power).
PRODUCT FEATURES:
PARTS INCLUDED:
SOCGM-18L ModuleSOCGM-18L HarnessAntenna Adapter
INSTALLATION DIAGRAM:
AFTERMARKET
RADIO
Reverse Red/White
TO FACTORY
HARNESS
16-Pin Black
Connector
16-Pin Green
Connector
20-Pin Gray
Connector
INTERFACING SOLUTIONS
Product specificaties
| Merk: | CRUX |
| Categorie: | Niet gecategoriseerd |
| Model: | SOCGM-18L |
Heb je hulp nodig?
Als je hulp nodig hebt met CRUX SOCGM-18L stel dan hieronder een vraag en andere gebruikers zullen je antwoorden
Handleiding Niet gecategoriseerd CRUX

13 Januari 2026
13 Januari 2026
13 Januari 2026
10 Maart 2025
10 Maart 2025
10 Maart 2025
10 Maart 2025
9 Maart 2025
9 Maart 2025
9 Maart 2025
Handleiding Niet gecategoriseerd
Nieuwste handleidingen voor Niet gecategoriseerd
23 Juli 2026
23 Juli 2026
23 Juli 2026
22 Juli 2026
22 Juli 2026
22 Juli 2026
22 Juli 2026
22 Juli 2026
22 Juli 2026
21 Juli 2026