Casio DQD-105 Handleiding
Bekijk gratis de handleiding van Casio DQD-105 (4 pagina’s), behorend tot de categorie Klok. Deze gids werd als nuttig beoordeeld door 79 mensen en kreeg gemiddeld 5.0 sterren uit 7 reviews. Heb je een vraag over Casio DQD-105 of wil je andere gebruikers van dit product iets vragen? Stel een vraag
Pagina 1/4
Operation Guide DQD-105
1
MA0702-EA
346
2
7
1
5
2
1
8
•
A sticker is affixed to the glass of this clock when you purchase it. Be sure to remove the sticker before using the clock.
•Depending on its model number, the appearance of your clock may differ somewhat from that shown in the
illustration.
Alarm OffSnooze Alarm On
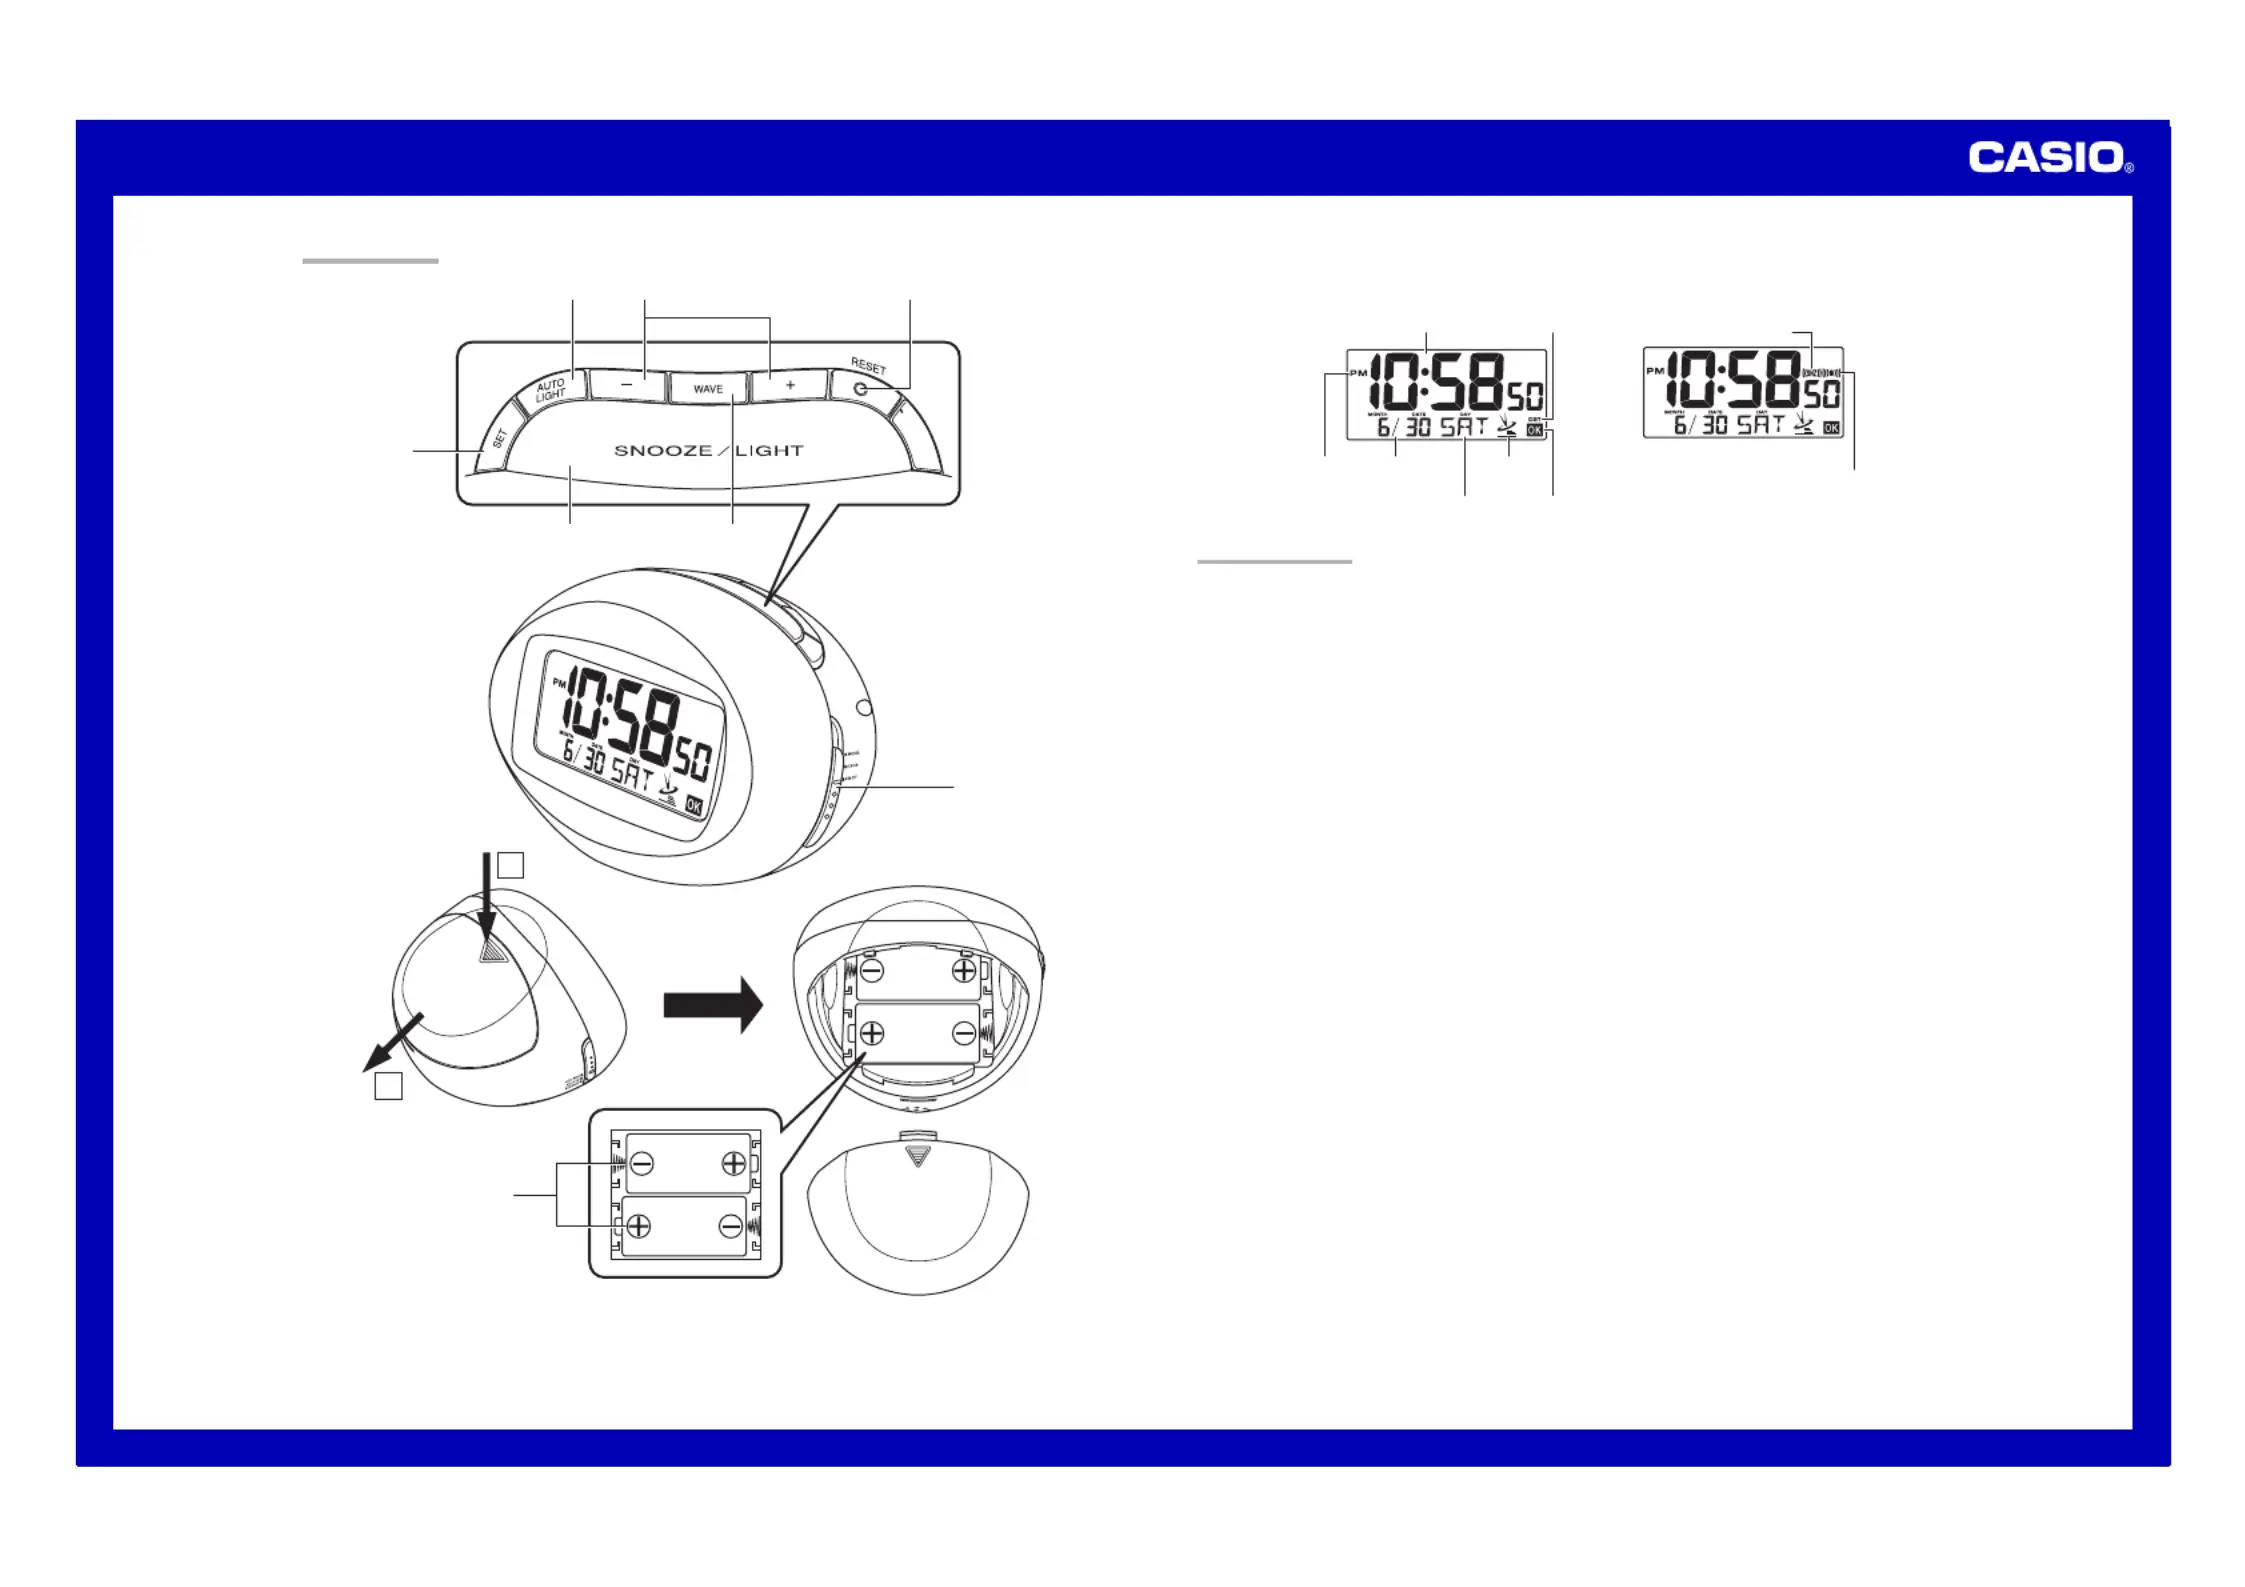
GENERAL GUIDE
1SNOOZE/LIGHT button
•Press this button to illuminate the display for about four seconds.
•Pressing this button while the alarm is sounding stops the alarm.
2WAVE button
Press this button to receive the time calibration signal and adjust timekeeping.
3AUTO LIGHT button
Use this button to configure Auto Light settings.
4Alarm Time Set buttons
Use these buttons to change the alarm time or current time setting.
5SET button
Use this button when setting the current time.
6RESET button
Press this button to reset the clock after replacing its batteries.
7Alarm Mode selector
SNOOZE: Snooze alarm on
ALM ON: Alarm on
ALM OFF: Alarm off
8Batteries
DST indicator
PM indicator
Wave OK indicator
Antenna Icon
Current time (Hour, minutes, seconds)
Day of the week
Date
(month – date)
Alarm on indicator
Snooze on indicator
ILLUSTRATION
Product specificaties
| Merk: | Casio |
| Categorie: | Klok |
| Model: | DQD-105 |
Heb je hulp nodig?
Als je hulp nodig hebt met Casio DQD-105 stel dan hieronder een vraag en andere gebruikers zullen je antwoorden
Handleiding Klok Casio

15 Augustus 2022
16 Augustus 2022
17 Augustus 2022
16 Augustus 2022
17 Augustus 2022
17 Augustus 2022
16 Augustus 2022
16 Augustus 2022
17 Augustus 2022
16 Augustus 2022
Handleiding Klok
Nieuwste handleidingen voor Klok
28 Mei 2026
19 Mei 2026
6 Mei 2026
2 Mei 2026
2 Mei 2026
2 Mei 2026
2 Mei 2026
2 Mei 2026
21 April 2026
3 April 2026