Canon REALiS 4K500ST Pro AV Handleiding
Bekijk gratis de handleiding van Canon REALiS 4K500ST Pro AV (189 pagina’s), behorend tot de categorie Beamer. Deze gids werd als nuttig beoordeeld door 45 mensen en kreeg gemiddeld 5.0 sterren uit 23 reviews. Heb je een vraag over Canon REALiS 4K500ST Pro AV of wil je andere gebruikers van dit product iets vragen? Stel een vraag
Pagina 1/189

Safety Instructions
Before Use
Basic Guide
Installation Procedure
Connection Procedure
Projection Procedure
Convenient Features
Advanced Guide
Using Menus
Menu Settings
Advanced Projection
Other Information
Maintenance
Product Specifications
Troubleshooting
ENG
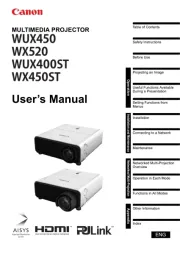
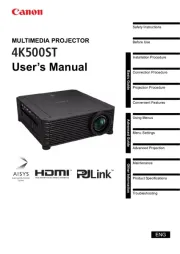
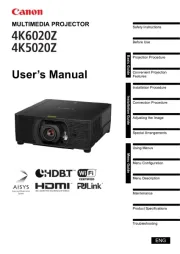
MULTIMEDIA PROJECTOR
User’s Manual

2
How to Use This Manual
Thank you for purchasing a Canon projector.
The 4K500ST Multimedia Projector (hereinafter referred to as “the projector”)
is a high-performance projector that is capable of projecting a high-
resolution computer screen and high-quality digital image on a large screen.
This Manual
This is the user’s manual for the 4K500ST Multimedia Projector. The “Basic Guide”
section describes installation and basic use of the projector. Descriptions of menus
and how to connect the projector to a network are given in the “Advanced Guide”
section. Read this manual thoroughly to make the most of your projector.
Installation of the projector should be performed by a qualified technician, if
possible. Contact the Canon Customer Support Center for further information.
When the Language Selection Screen Appears
A screen appears when the projector is turned on for the first time. You can select a
language to be used by the projector for displaying menus and messages in the
window. Select the desired language with the pointer buttons and press the OK
button.
You can change the language from the menu at a later time. (P116)
If the language selection screen is out of focus, adjust the focus. (P67
)
Remote control Projector
An item highlighted in orange will be selected.
Symbols Used in This Manual
Sections labeled with these symbols give the following kinds of information.
A precaution about operation or restriction is given here.
Indicates supplemental information to note in use.
Symbols of Button Operations
The projector can be operated using the buttons on the remote control or on the
side of the projector. The remote control allows you to operate all functions of the
projector.
In this document, the button’s operations are shown as below.
Operation of buttons
on side of projector
Remote control button
operation
Indicate the buttons to
be pressed

3
Table of Contents
How to Use This Manual............... 2
Projector Highlights...................... 4
Safety Instructions........................ 5
Precautions for Use ............................. 12
Installation and Handling
Precautions .......................................... 13
Precautions on the Lamp .................... 14
Precautions for the Batteries of the
Remote Control .................................... 15
For Safe Use................................ 17
Before Installation....................... 18
Precautions When Carrying/Shipping
the Projector......................................... 18
Precautions for Installation................. 18
Open Source Software ............... 23
Before Use ................................... 24
Included Accessories .......................... 24
Part Names ........................................... 25
Preparing the Remote Control............ 32
Basic Guide ............................35
Installation Procedure ................ 36
Setting Up the Projector ...................... 36
Ceiling Mounting.................................. 38
Parts Lineup ......................................... 39
Mounting Position................................ 40
Assembly and Installation................... 42
Adjust the Projection Angle................ 48
Relationship between Projecting
Distance and Image Size ..................... 50
Lens Shift Function ............................. 51
Connection Procedure ............... 53
Connecting a Computer ...................... 53
Connecting AV Equipment.................. 54
Multi Input 4K Projection..................... 55
Plugging the Projector In .................... 59
Projection Procedure.................. 60
Step 1 Turn the Projector On .............. 60
Step 2 Select an Input Signal.............. 63
Step 3 Adjust the Image ...................... 65
Step 4 Select an Aspect Ratio (Screen
Aspect) Matching the Screen.............. 72
Step 5 Adjusting Keystone
Distortion .............................................. 73
Step 6 Select the Image Quality (Image
Mode) .................................................... 76
Step 7 Turn the Projector Off.............. 79
Convenient Features...................80
Advanced Guide ....................83
Using Menus ................................84
Menu Configuration ............................. 84
Basic Menu Operations ....................... 85
Menu Settings..............................87
Input settings ....................................... 87
Image adjustment ................................ 90
Install settings...................................... 97
System settings ................................. 108
Network settings ................................ 122
Completing Computer Settings for a
Network Connection.......................... 130
Checking Projector Information ....... 148
Advanced Projection.................149
Projecting from Multiple Projectors at
Once (Edge Blending) ....................... 149
Advanced Registration to Adjust
Projected Images ............................... 153
Adjusting Peripheral Focus .............. 157
Other Information ................159
Maintenance...............................160
Cleaning the Projector....................... 160
Cleaning the Air Filter........................ 160
Replacing the Air Filter...................... 161
Replacing the Lamp........................... 163
Replacement Lamp ............................ 164
Lamp Replacement Procedure ......... 165
Product Specifications .............168
Displayed Test Patterns .................... 168
Supported Signal Types.................... 169
Specifications..................................... 174
Troubleshooting ........................180
LED Indicator Details......................... 180
Symptoms and Solutions.................. 181
Index ...........................................186
Option.........................................188
Product specificaties
| Merk: | Canon |
| Categorie: | Beamer |
| Model: | REALiS 4K500ST Pro AV |
Heb je hulp nodig?
Als je hulp nodig hebt met Canon REALiS 4K500ST Pro AV stel dan hieronder een vraag en andere gebruikers zullen je antwoorden
Handleiding Beamer Canon
28 Juli 2025
16 November 2024
16 November 2024

10 Juni 2024

4 Juni 2023

28 Mei 2023

27 Mei 2023

8 Mei 2023

5 Mei 2023

2 Mei 2023
Handleiding Beamer
- Steren
- Promethean
- Speaka
- AOpen
- EKO
- Barco
- Derksen
- Toshiba
- Easymaxx
- XGIMI
- OK
- Prixton
- Varytec
- Leica
- Boxlight
Nieuwste handleidingen voor Beamer

6 Augustus 2025

6 Augustus 2025
4 Augustus 2025
29 Juli 2025

29 Juli 2025

29 Juli 2025

28 Juli 2025

28 Juli 2025
28 Juli 2025

28 Juli 2025