Atdec TH-VWP-100 Handleiding
Bekijk gratis de handleiding van Atdec TH-VWP-100 (5 pagina’s), behorend tot de categorie Wandsteun. Deze gids werd als nuttig beoordeeld door 42 mensen en kreeg gemiddeld 4.7 sterren uit 21.5 reviews. Heb je een vraag over Atdec TH-VWP-100 of wil je andere gebruikers van dit product iets vragen? Stel een vraag
Pagina 1/5
TH-VWV
TH-VWVP
TH-VWP-050
TH-VWP-080
TH-VWP-100
TH-VWP-160
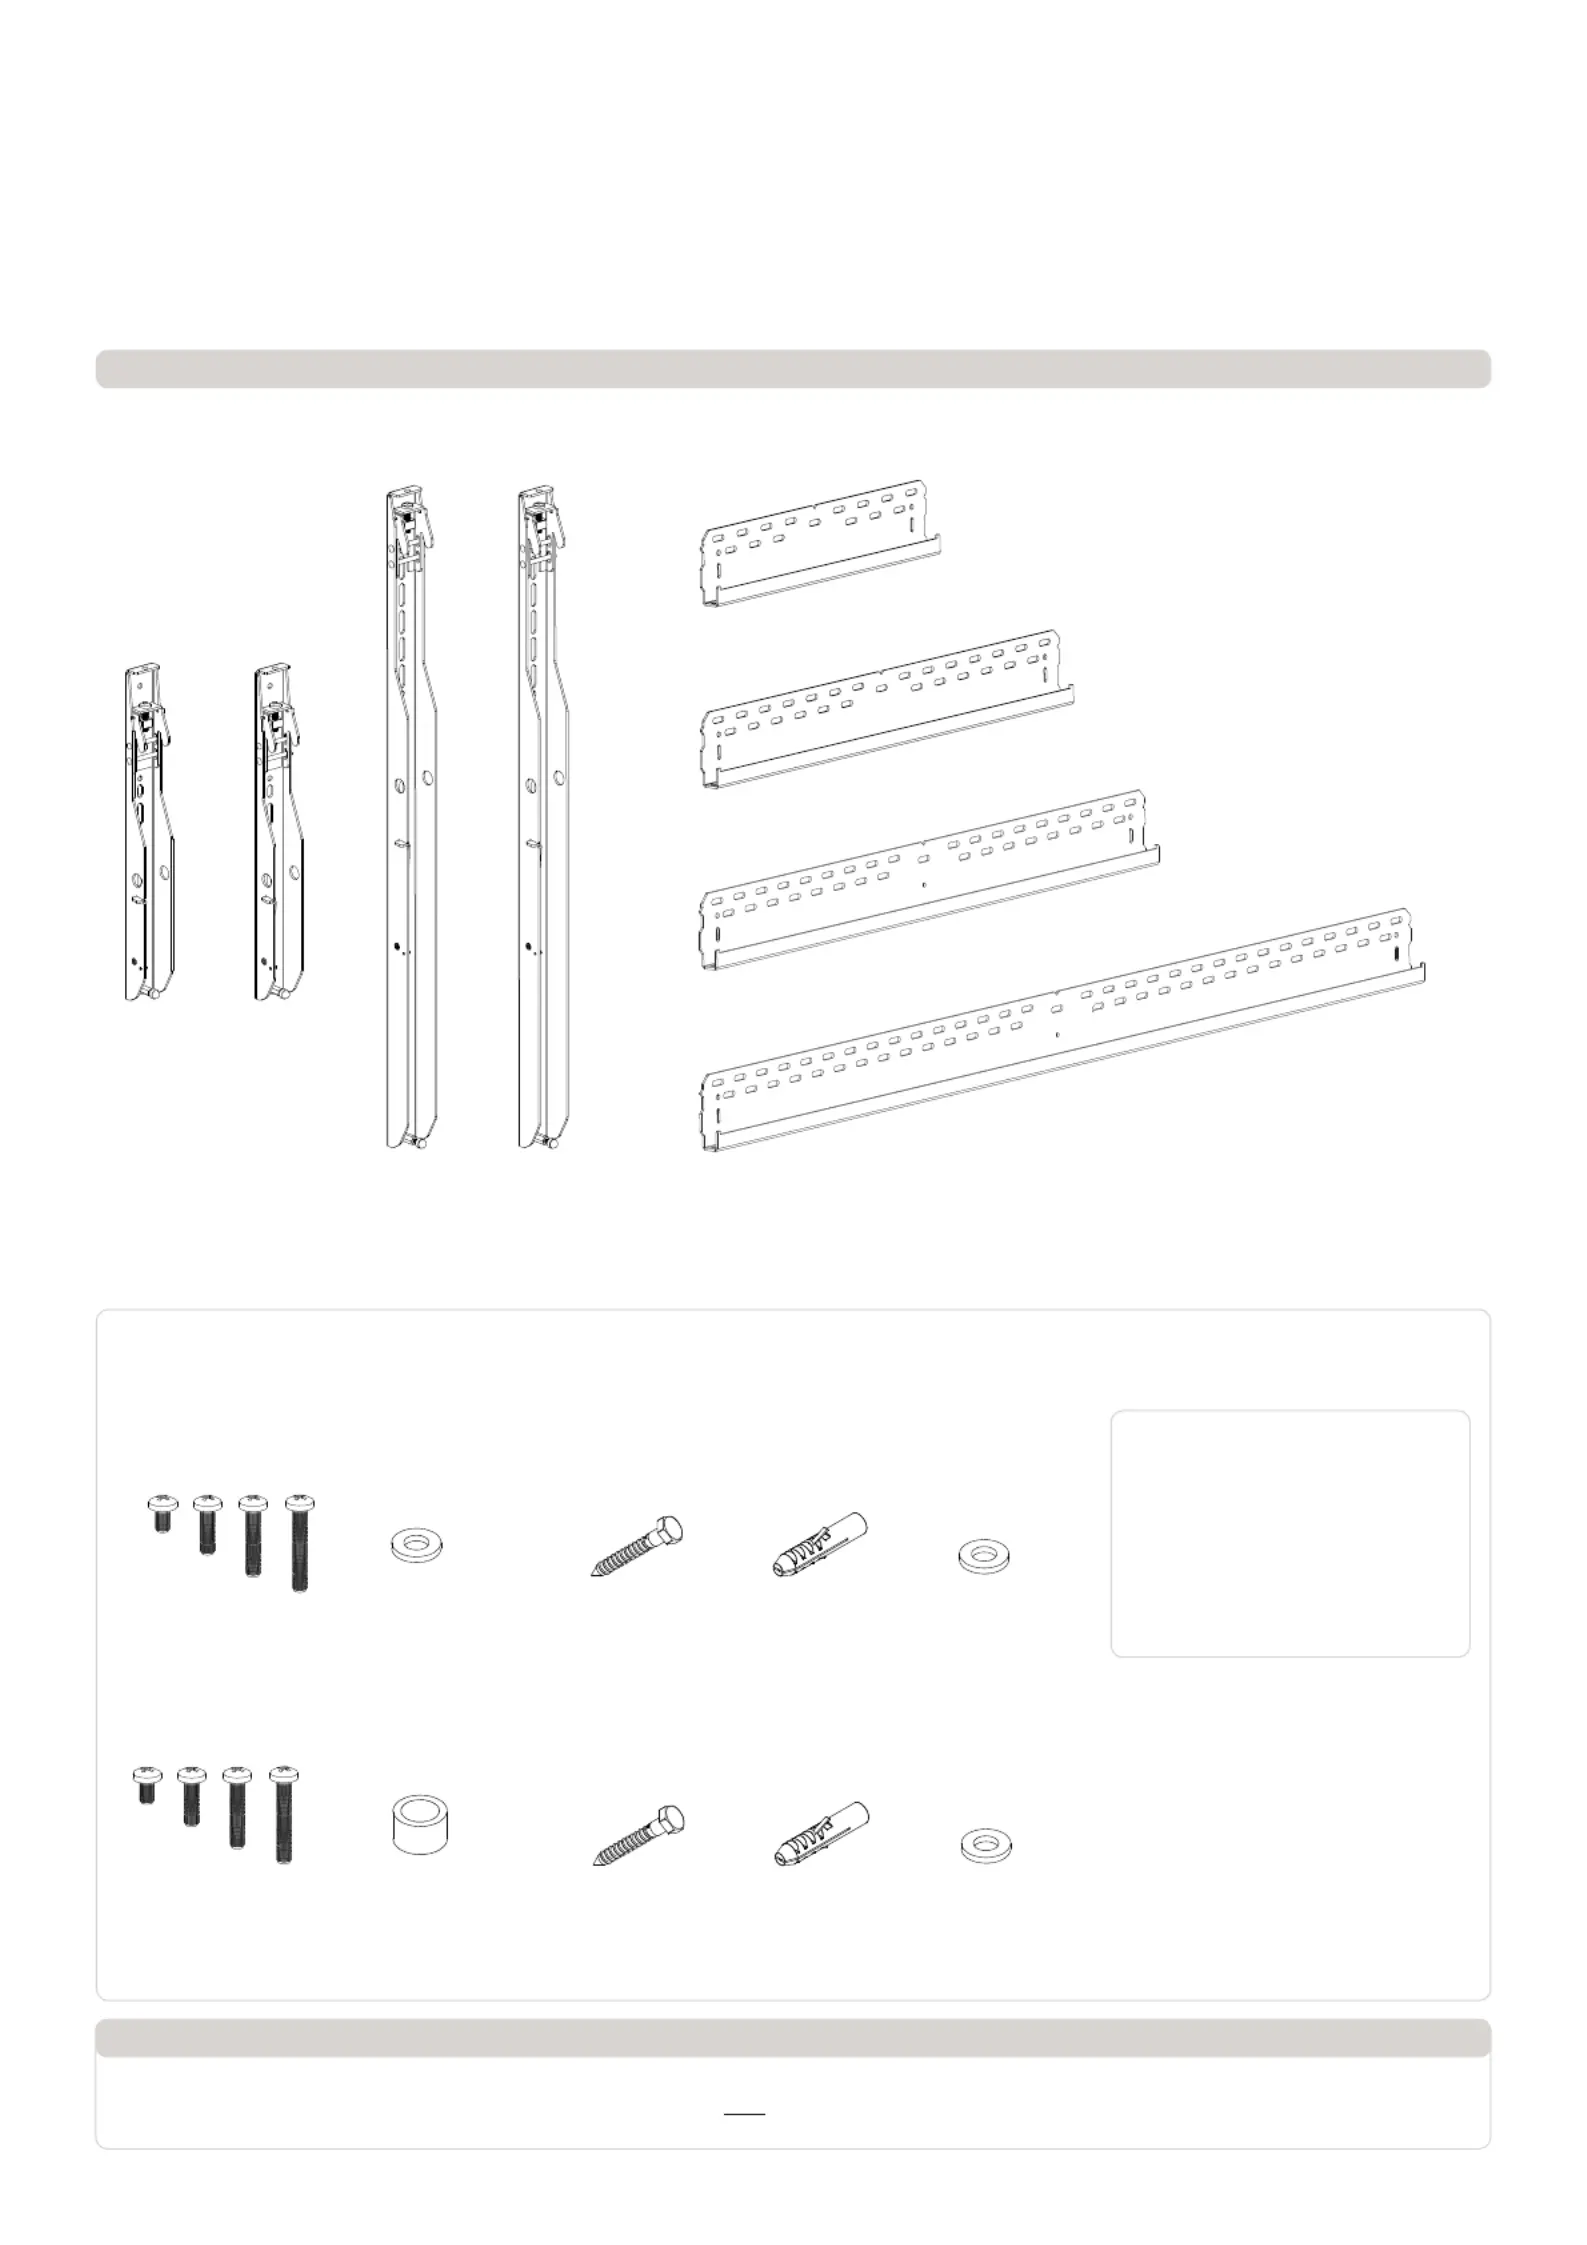
Component Checklist
Universal Video Wall
! IMPORTANT - Install Video Wall as per installation instruction.
! This product supports a maximum load of 165kg (363lbs.) per panel or screen.
! The manufacturer accepts no responsibility for incorrect installation.
IMPORTANT INFORMATION:
Mounting Bracket (x2)
TH-VWVP
Mounting Bracket (x2)
TH-VWV
Wall Plate (1.6m)
TH-VWP-160
Wall Plate (0.8m)
TH-VWP-080
Wall Plate (0.5m)
TH-VWP-050
Wall Plate (1m)
TH-VWP-100
HARDWARE
Mounting Brackets
(TH-VWV, TH-VWVP)
Wall Plate 0.5m, 0.8m, 1m
(TH-VWP-050, TH-VWP-080, TH-VWP-100)
Wall Plate 1.6m
(TH-VWP-160)
Coach Screw
(x2)
Coach Screw
(x3)
M6 x 16/30/45/60
(x4)
M8 x 16/30/50/65
(x4)
Nylon
Anchor (x2)
Nylon
Anchor (x3)
8mm Washer (x2)
8mm Washer (x3)
Tools Required:
• Power Drill
• 8mm (0.31”) Drill Bit
• 10mm (0.39”) Masonry Drill Bit
• 13mm (0.51”) Socket Wrench
Shifter
• Phillips Head Screwdriver
• Spirit Level
• Tape Measure
M6 Washer (x4)
Spacer (x8)
Installation Instructions
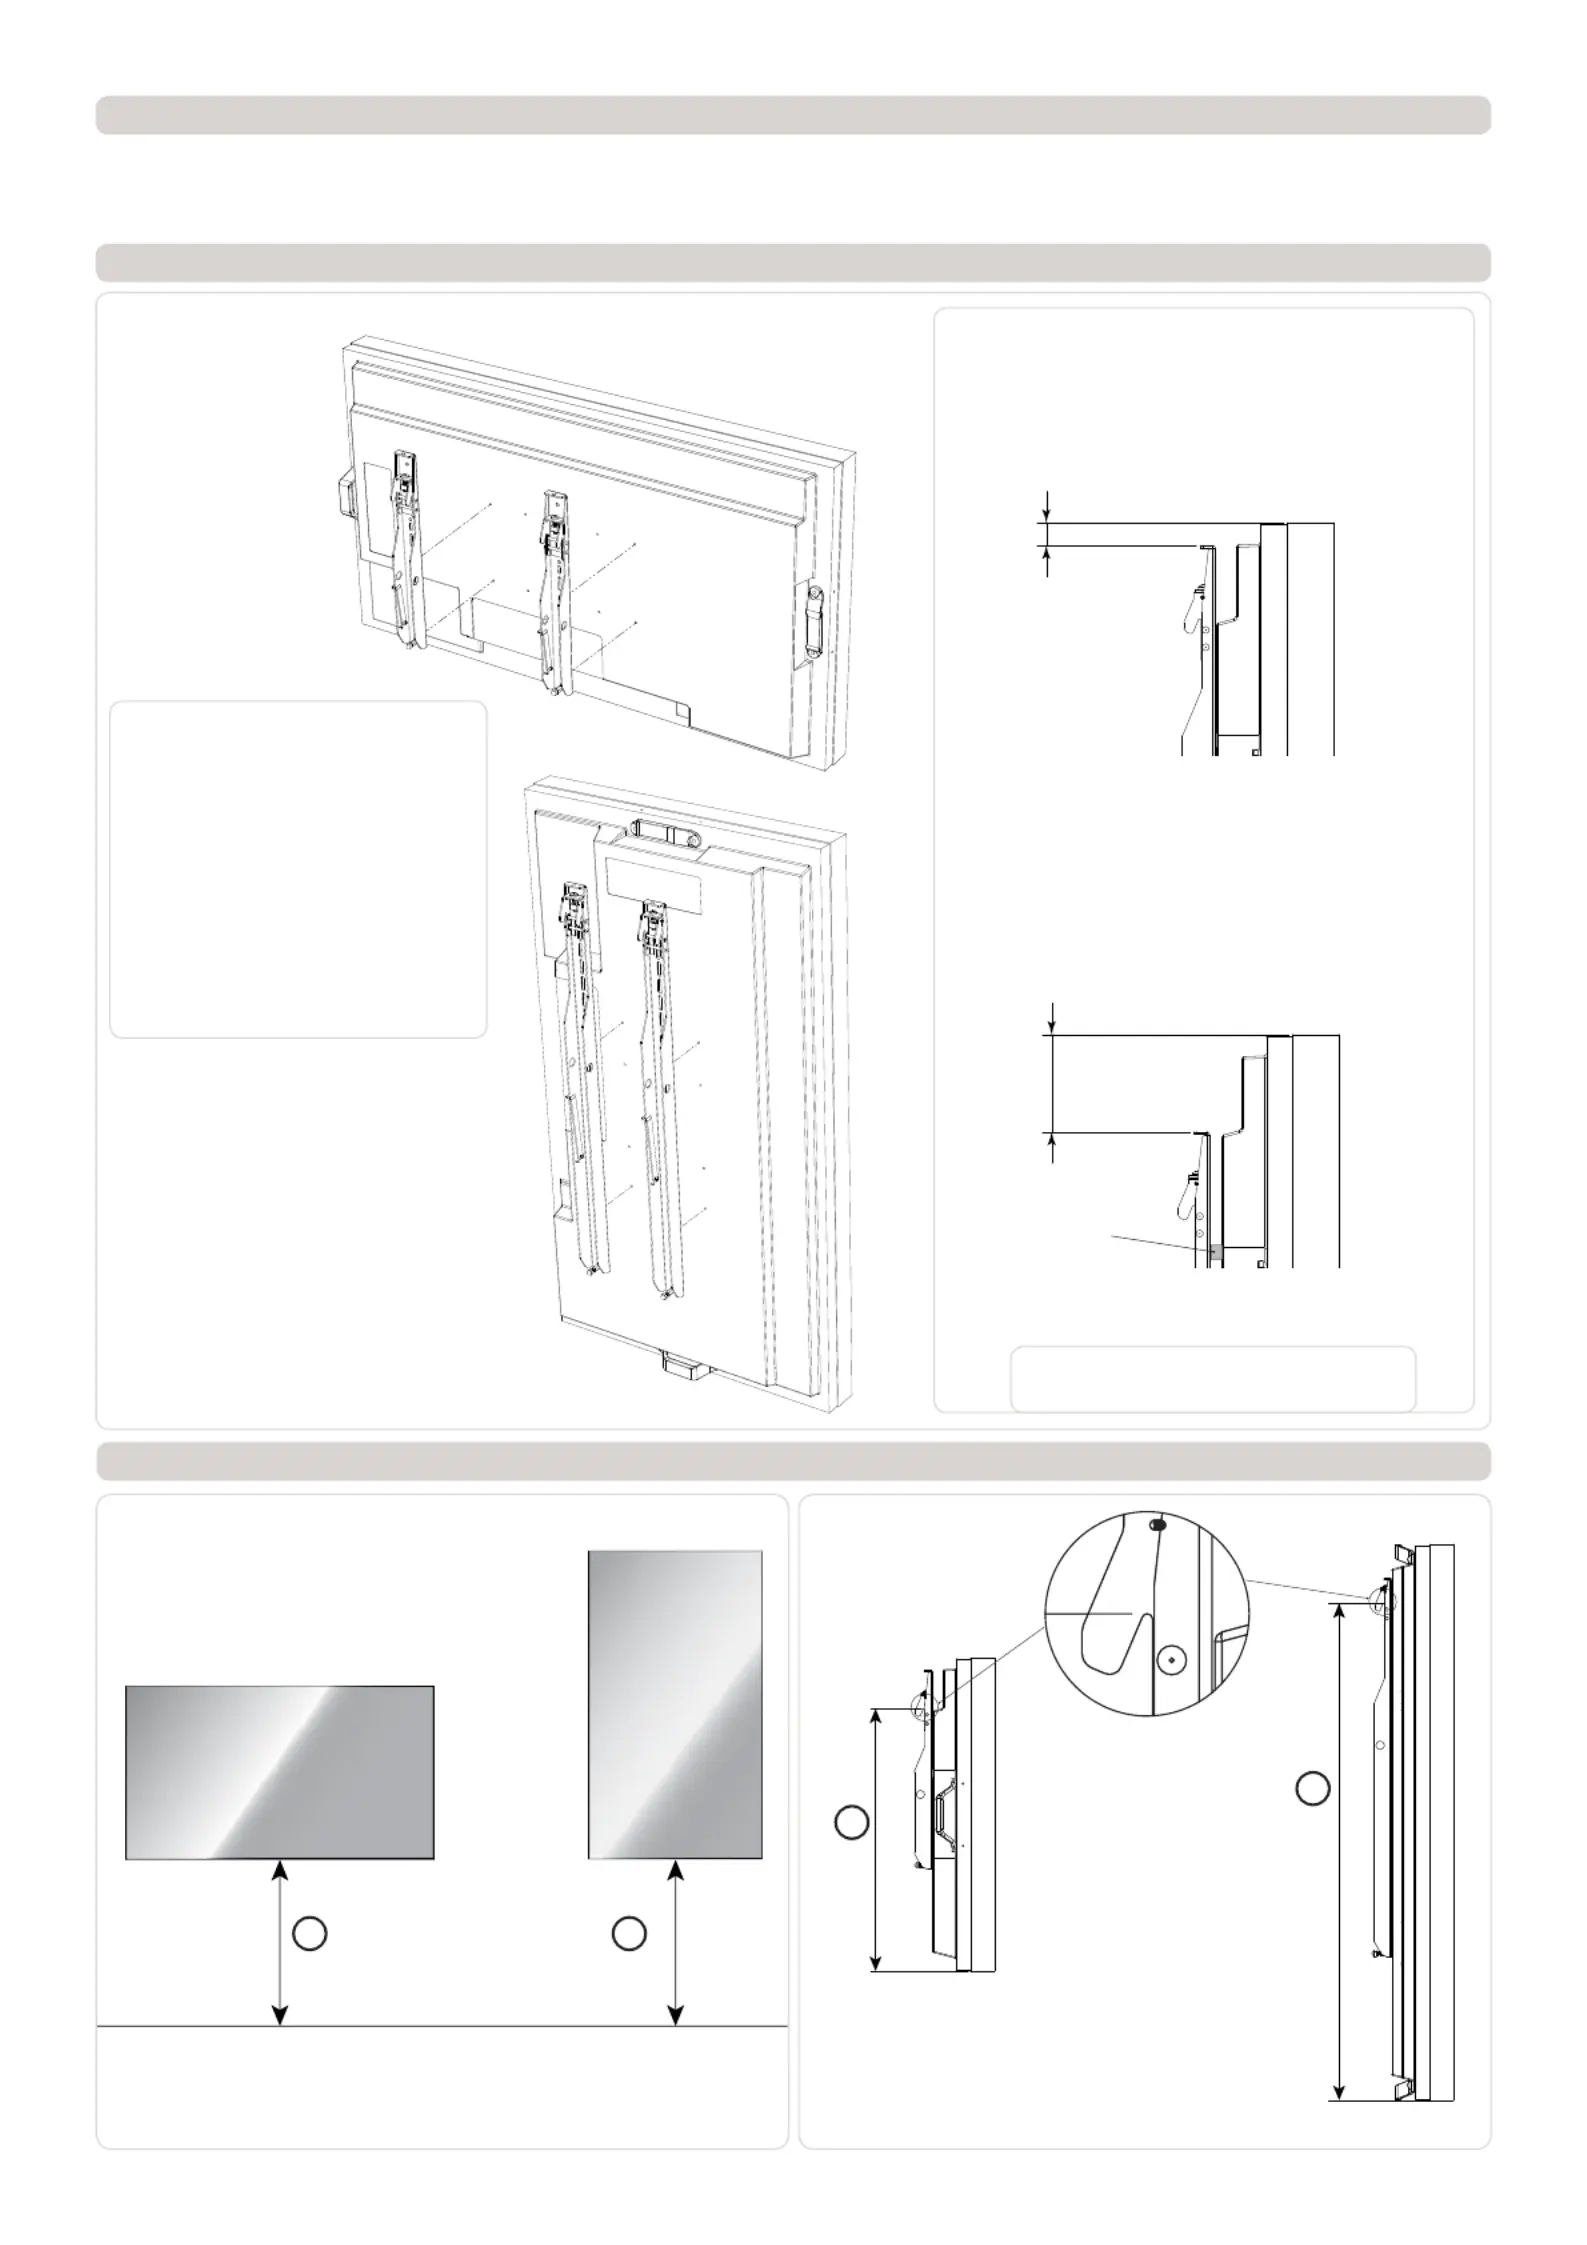
Step 2. Mounting Brackets
If the distance between the top of
the display & mounting bracket is
80mm and under, mount directly
onto the screen.
IMPORTANT
For the Brackets to function
correctly they must be mounted
as close to the top of the screen
as possible.
When mounting multiple screens
the brackets must be mounted in
exactly the same position each
time to ensure alignment.
0~80mm
80~165mm
Spacer
NOTE: The top of the bracket be must not
higher than the top of the screen.
If the distance between the top of the
display & mounting bracket is between
80 and 165mm, mount using spacers
included.
Determine the desired height
of your screen from the floor.
Measure the height between
the top of the hook to the
bottom of the screen.
Step 1. Check Components
Check you have received all parts against the component checklist and hardware on the previous page.
Step 3. Mounting first Wall Plate
Option A
Option B
3.1. 3.2.
X X
Y
Y
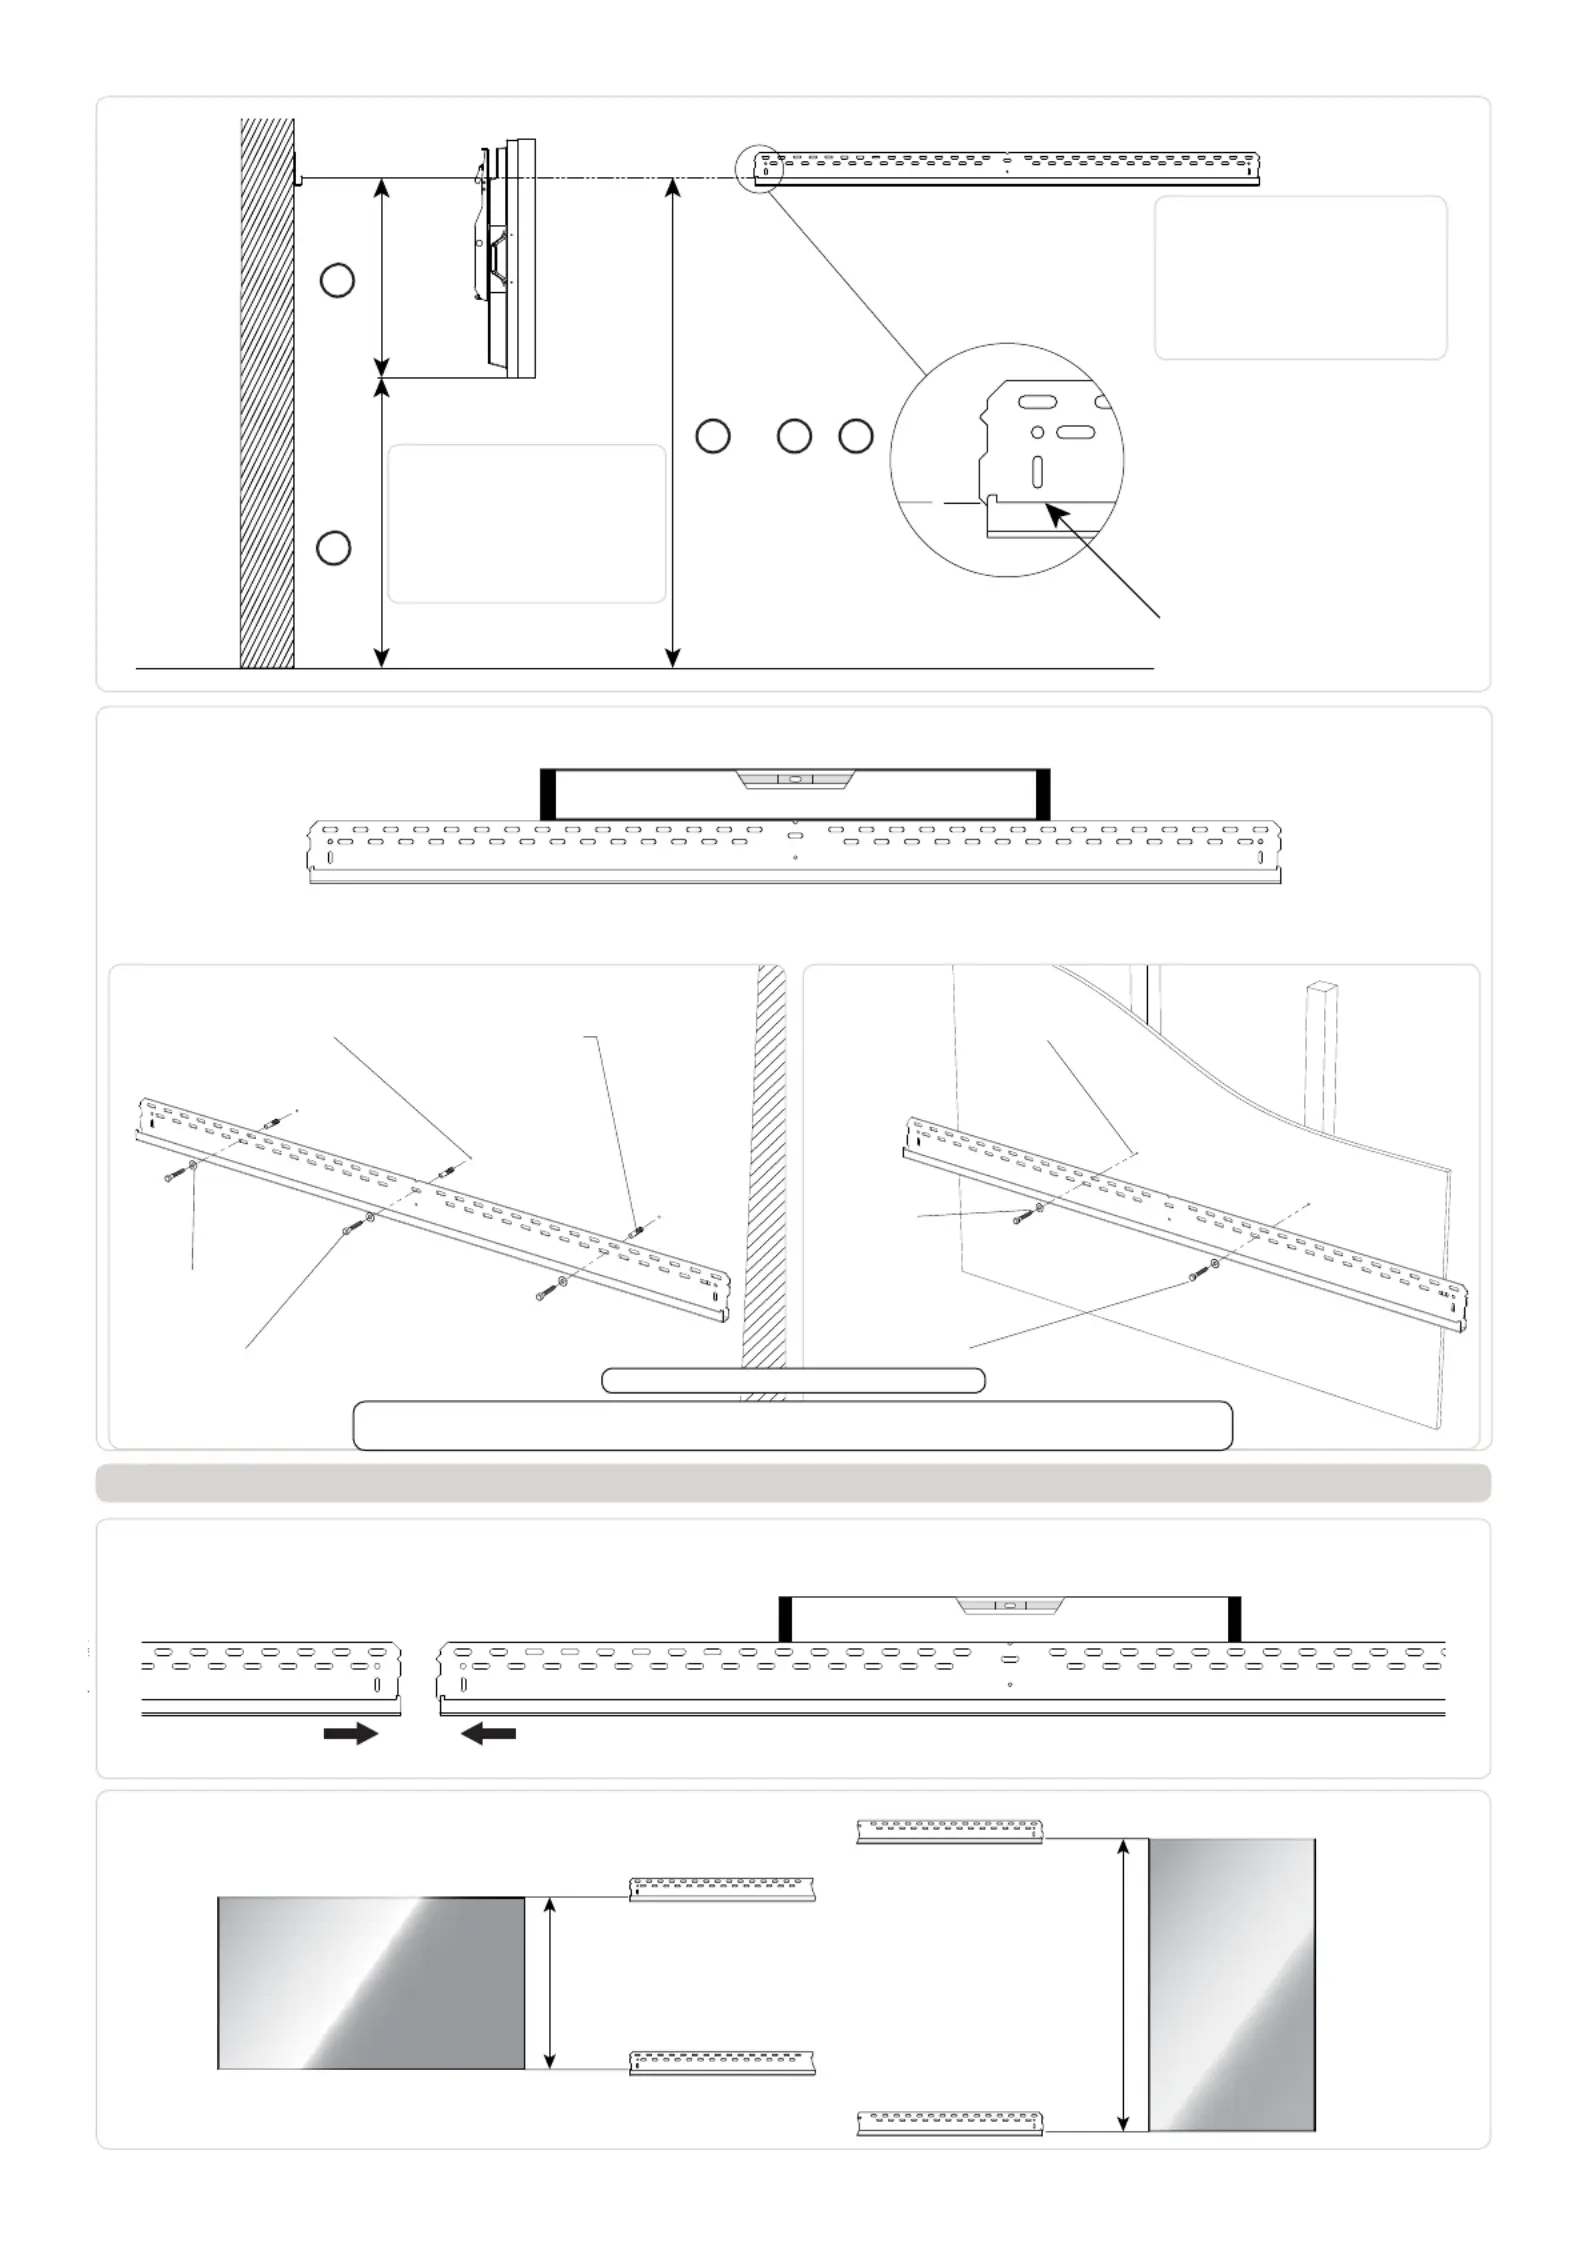
Position your wall plate,
aligning the Contact Edge to
your mark.
Combine both heights to find
the height of the Contact
Edge of the Wall Plate &
mark this on the wall.
Contact Edge with the Hook
Masonry Timber Stud
Coach Screw Coach Screw
Washer
Washer
Ø10mm x 60mm deep
Drilled Hole
Ø8mm x 60mm deep
Drilled Hole
Nylon Anchor
2 coach screws are provided for the TH-VWP-050, TH-VWP-080, TH-VWP-100 and 3 coach screws are provided for the TH-VWP-160.
Ensure all screws are used with exception of where timber studs are spaced too far apart.
3.3.
Step A
Step B
3.4.
IMPORTANT! Any structural elements must be capable of supporting the combined weight of
all the equipment and devices being mounted. If in doubt, consult a structural engineer.
TIP: Use Mount as a drilling template.
Please use a during installation to Spirit Level
ensure that the Wall Plate is LEVEL
X
Y
XZ Y
= +
Step 4. Mount remaining Wall Plates
4.1.
Match Profiles
Repeat Step 3.4 with the following to
install the remaining Wall Plates
Please use a during installation to Spirit Level
ensure that the Wall Plates are LEVEL
4.2.
Height between Wall Plates = Overall Height of Screen
To find the next row height:
Product specificaties
| Merk: | Atdec |
| Categorie: | Wandsteun |
| Model: | TH-VWP-100 |
| Kleur van het product: | Zwart |
| Gewicht: | 3700 g |
| Breedte: | 150 mm |
| Diepte: | 1090 mm |
| Gewicht verpakking: | 7920 g |
| Breedte verpakking: | 170 mm |
| Diepte verpakking: | 1100 mm |
| Hoogte verpakking: | 170 mm |
| Maximale gewichtscapaciteit: | 165 kg |
| Materiaal: | Staal |
Heb je hulp nodig?
Als je hulp nodig hebt met Atdec TH-VWP-100 stel dan hieronder een vraag en andere gebruikers zullen je antwoorden
Handleiding Wandsteun Atdec

17 November 2024

17 November 2024
Handleiding Wandsteun
- Foppapedretti
- Garmin
- NeoMounts
- Ag Neovo
- Deltaco
- Laserliner
- Ezymount
- SIIG
- Vivanco
- StarTech.com
- Nabo
- IKEA
- Nedis
- Champion
- Nubert
Nieuwste handleidingen voor Wandsteun
30 Juli 2025

29 Juli 2025
29 Juli 2025

26 Juli 2025
21 Juli 2025
18 Juli 2025

18 Juli 2025
18 Juli 2025
18 Juli 2025

18 Juli 2025