Whirlpool W9I 4S2 OP2 H Handleiding
Bekijk gratis de handleiding van Whirlpool W9I 4S2 OP2 H (180 pagina’s), behorend tot de categorie Oven. Deze gids werd als nuttig beoordeeld door 21 mensen en kreeg gemiddeld 4.2 sterren uit 5 reviews. Heb je een vraag over Whirlpool W9I 4S2 OP2 H of wil je andere gebruikers van dit product iets vragen? Stel een vraag
Pagina 1/180
EN
Quick guide
THANK YOU FOR BUYING A WHIRLPOOL PRODUCT
In order to receive a more complete assistance, please
register your product on www . whirlpool . eu/ register
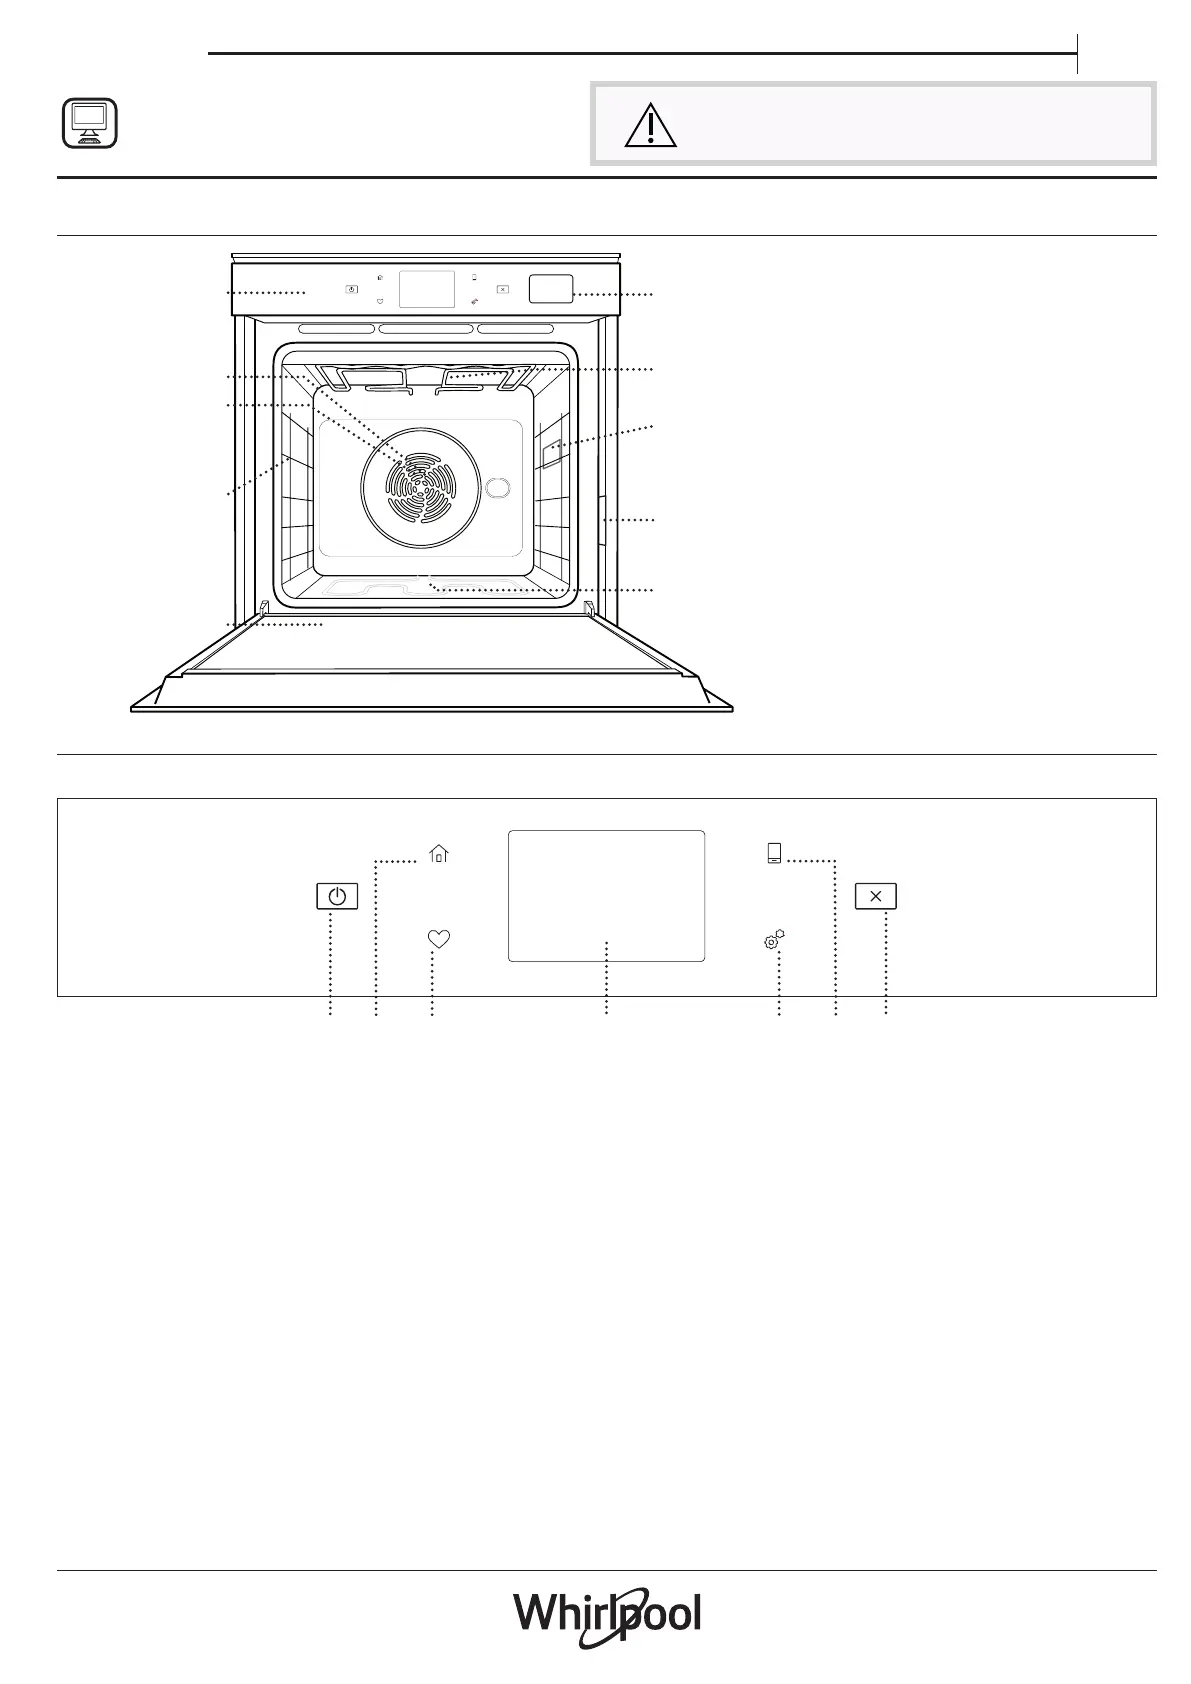
PRODUCT DESCRIPTION
5
4
3
2
1
5
4
3
2
1
1
2
3
4
8
9
10
5
7
6
1.Control panel
2.Fan
3.Circular heating element
(not visible)
4.Shelf guides
(the level is indicated on the
front of the oven)
5.Door
6.Water drawer
7.Upper heating element/grill
8.Lamp
9.Identification plate
(do not remove)
10.Lower heating element
(not visible)
CONTROL PANEL DESCRIPTION
1
23
4
65
7
1.ON / OFF
For switching the oven on and off.
2.HOME
For gaining quick access to the
main menu.
3.FAVORITE
For retrieving up the list of your
favorite functions.
4.DISPLAY
5.TOOLS
To choose from several options
and also change the oven settings
and preferences.
6.REMOTE CONTROL
To enable use of the 6
th
Sense Live
Whirlpool app.
7.CANCEL
To stop any oven function except
the Clock, Kitchen Timer and
Control Lock.
Before using the appliance carefully read the Safety
Instruction.
1
Product specificaties
| Merk: | Whirlpool |
| Categorie: | Oven |
| Model: | W9I 4S2 OP2 H |
Heb je hulp nodig?
Als je hulp nodig hebt met Whirlpool W9I 4S2 OP2 H stel dan hieronder een vraag en andere gebruikers zullen je antwoorden
Handleiding Oven Whirlpool

10 Januari 2026
9 Januari 2026
9 Januari 2026
9 Januari 2026
9 Januari 2026
8 Januari 2026
8 Januari 2026
8 Januari 2026
8 Januari 2026
7 Januari 2026
Handleiding Oven
Nieuwste handleidingen voor Oven
22 Januari 2026
21 Januari 2026
21 Januari 2026
20 Januari 2026
20 Januari 2026
19 Januari 2026
19 Januari 2026
14 Januari 2026
14 Januari 2026
14 Januari 2026